Tips to Relieve Low Back Pain
Low back pain is one of the most common complaints I get from new clients who have a desk job.
And honestly, I’m not surprised. They sit hunched over a computer all day, which causes bad posture and muscle imbalances that can easily lead to injury and pain.
That bad posture contributes to low back pain because it causes tight hip flexors, hamstrings and even calves. It can also cause tight lats and poor thoracic extension.
Those tight muscles and poor extension cause imbalances. They cause you to overuse the low back. And the tight hip flexors and hamstrings especially inhibit the glutes and prevent them from activating, placing more pressure on your low back.
Because muscles aren’t working that should be working, your low back takes over when it shouldn’t, which causes further pain and injury.
Below are some great trigger point, stretching and glute activation techniques to help you relieve that low back pain and get more out of your workouts!
TRIGGER POINT RELEASE
For videos showing all of these trigger point release moves, sign up for the Redefining Strength video library!
1. Calves – I love using either a rumble roller or a ball on a block (or books if you don’t have a block). I find it easier to really dig into knots using one of those tools. To roll out your calves, place one calf over the trigger point tool. Cross the other leg on top to apply more pressure. Rock the leg side to side to dig in more. You can also make circles with the foot and flex and relax the foot to apply more pressure and help release the trigger point. Move the ball or roller up and down the back of your lower leg, spending time on any tight spots you find.
2. Hamstrings – The best way to hit your hamstrings is using a ball or roller, but while seated on a chair, bench or table. You really can’t apply enough pressure while seated on the ground. Place the ball or roller right below your butt at the top of your hamstring and sit down on it. Roll it from side to side, holding on any tender spots. You can work your way down the length of your hamstring to right above the back of your knee. Do not roll out behind your knee.
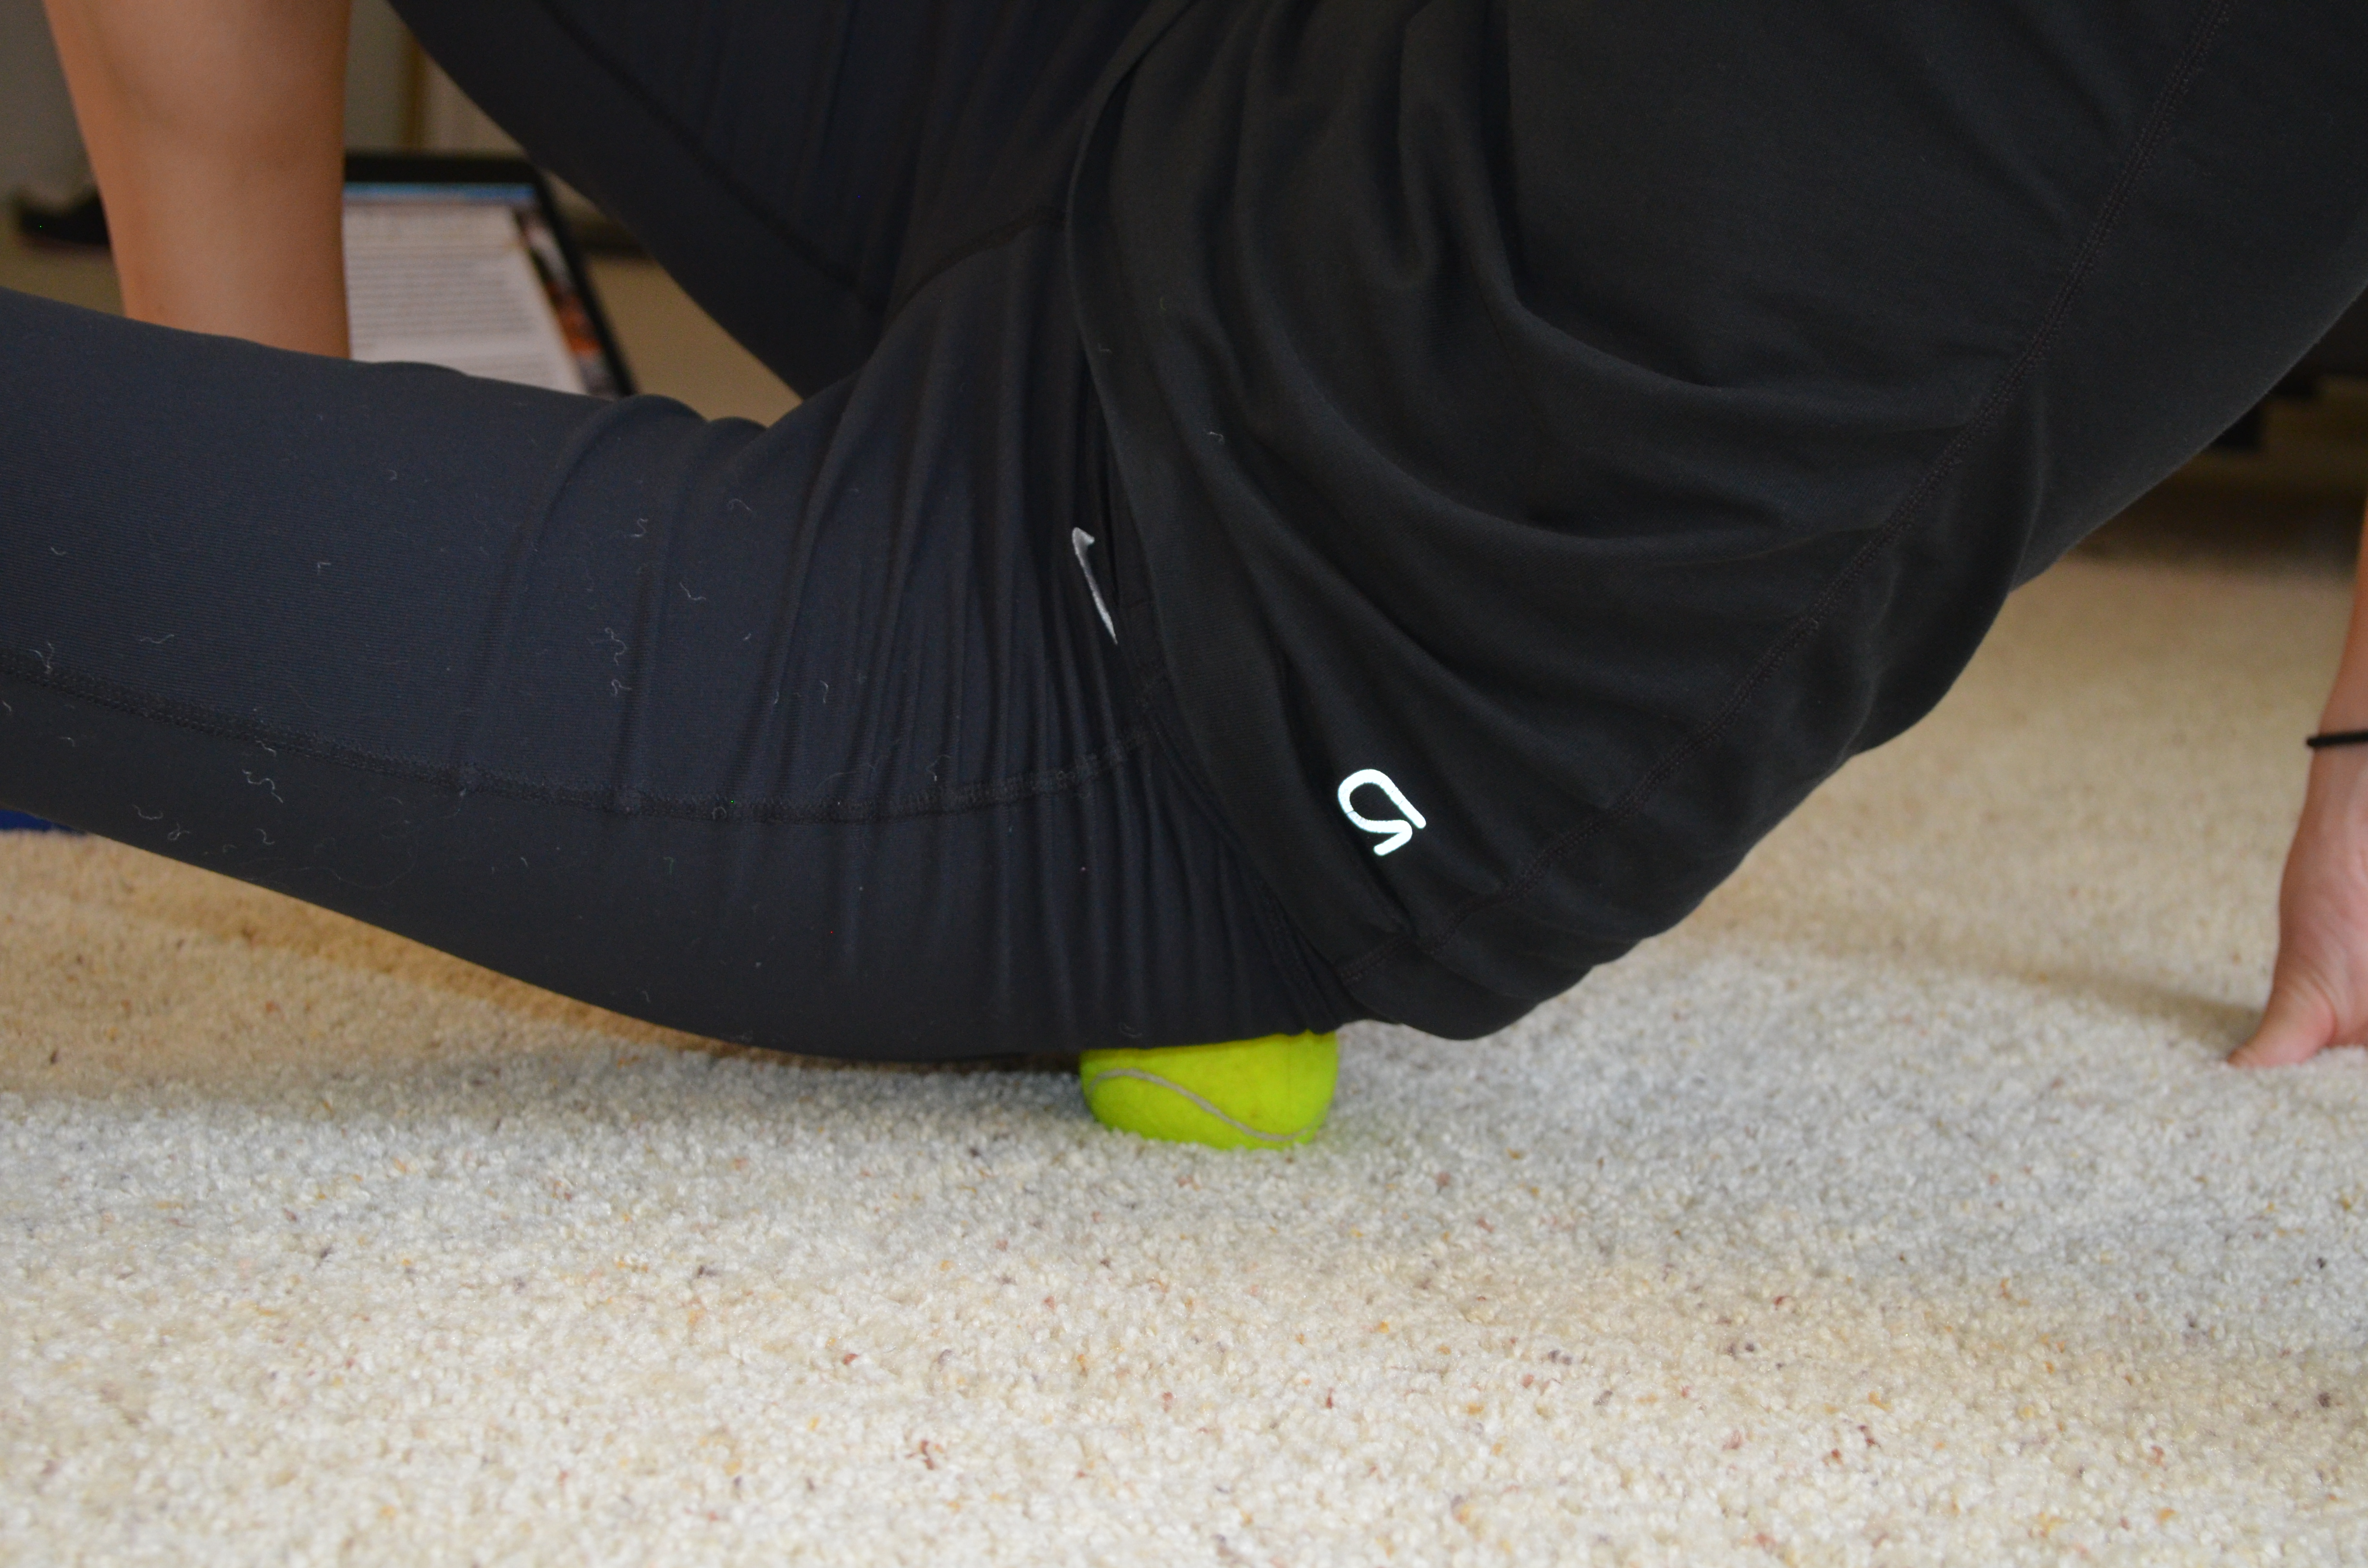
3. Hips/Glutes – The best way to target your hips and glutes is with a ball. The smaller and harder the ball, the more you will really be able to dig in. Start by lying face down on the ground with the ball at the top of one quad. Roll the ball toward your groin and then back toward your hip bone. Move it slightly up and down the top of your quad. Hold on any tight spots. After working out the front of your hip, move the ball around the side and to the back of the hip bone. Roll out the top of your glute, staying right below your low back. Hold on any tight spots. As you work your way down your butt, as you hold on any tight spots, lift and lower your leg. Also draw your knee in toward your chest and then straighten the leg back out. Those two moves will help you apply more pressure to any trigger points. Spend more time on the areas in your hips and glutes that are tight. If a spot doesn’t hurt, don’t spend time there!
4. Ab Release – This is best done with a larger ball although it can be done with a small ball on some books or a block. Lie face down on the ground with the ball under your belly. It should be to one side of your belly button and right beside/above your hip. So basically in one side of your abs. Relax over the ball, letting your body sink into the ground. This will help release your hips as well. You can also move the ball up higher to right below your rib cage to help release your abs. Our abs can be tight and shortened because we sit hunched over all day so we can’t forget to roll them out as well!
5. Peanut – The peanut (two balls tapped together) can be used to work all the way up your back along your spine. It is personally one of my favorite tools. Lie on your back with the peanut right above your butt and a ball on either side of your spine. Relax your upper back onto the ground and lift both knees into your chest. Repeat that movement a few times then move the peanut up higher on your back and repeat. Once the peanut is at about the middle of your back and you don’t feel like tucking your knees is applying more pressure, start performing an upper body crunch instead. Perform a few slow crunches and continue working the peanut up your back until you reach the top of your shoulder blades. Spend more time on any tight areas.

5. Lats – You can use a roller or a larger ball to roll out your lats. I prefer the roller because I feel like it is easier to work all the way up and down your side. Lie on your side with the roller under your armpit. Rock forward and backward then move the roller lower down your side. Continue to rock slightly forward and backward to dig in further to any trigger points. Work down the side of your back until you hit the bottom of your rib cage. Spend more time on the areas that are tight.

7. Thoracic Spine – You can use a peanut or a ball to work out your upper back. One of my favorite ways to roll out my upper back, and work on thoracic extension, is with the roller. Bend your knees and place your feet flat on the ground with the roller in the middle of your back. Keep your butt on the ground and extend your back over the roller, letting your head relax back over toward the ground. Move the roller up higher on your back and repeat. Every time you extend back over the roller, make sure to breathe and keep your butt on the ground. Work all the way up to almost the top of your shoulder blades. You can also simple roll up and down without the extension, but I love to add the extension in there as well.
STRETCHES
1. Bear Squat – Start kneeling on the ground. Place your hands down on the ground in front of you. The closer you place your hands to your knees, the harder the stretch will be. Press your butt up into the air, driving your heels to the ground. Feel a nice stretch down your calves and hamstrings. Hold for 1-2 seconds and then drop back down to your knees. If your feet feel locked up, you can do the bear squat with foot stretch.
2. World’s Best Stretch with Hamstring – Start in a high plank position with your hands under your shoulders and feet together. Your body should start in a nice straight line. Step your right foot outside your right hand. Drop the right elbow down into the instep of your right foot. Then rotate open facing your right leg, stretching your right arm up toward the ceiling. Bring the right hand back down to the ground. Sit back on your left heel and straighten your right leg. Feel a stretch down your hamstring. Then bend the right leg and move back into the plank position with the foot outside the hand. Again drop the elbow and repeat the move on your right side. Complete all reps and then switch and do the stretch on the other side.
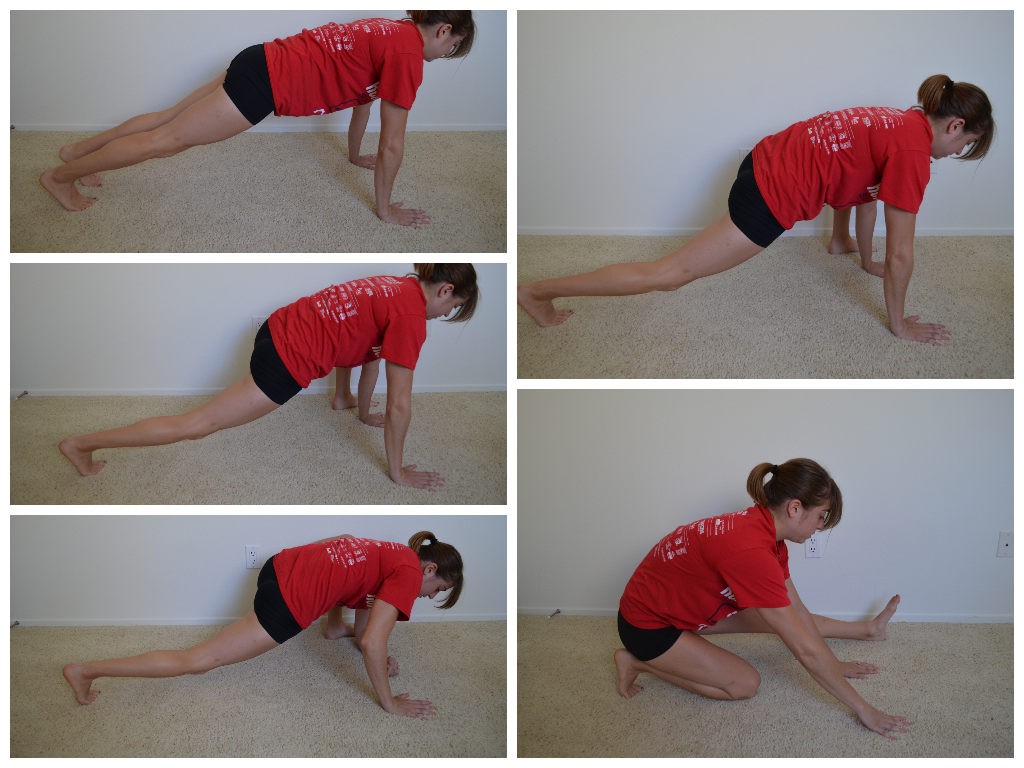
3. Lunge with Reach to Hamstring Stretch – This move kind of reminds me of crescent pose and a triangle pose in yoga…Not exactly but that is what it reminds me of. Start in a high plank position. Step one foot up between your hands. Lift your hands up off the ground and reach them back and overhead as you stay in a low lunge. Feel a nice stretch down the hip and quad of the back leg. Then bring the hands back down to the ground and hike your hips up to straighten your front leg. Feel a stretch down the hamstring of the front leg. Sink back into the lunge and reach up and back overhead again to stretch the hip and quad before repeating the hamstring stretch. Complete all reps on one side before moving back into the plank and switching to the other side.
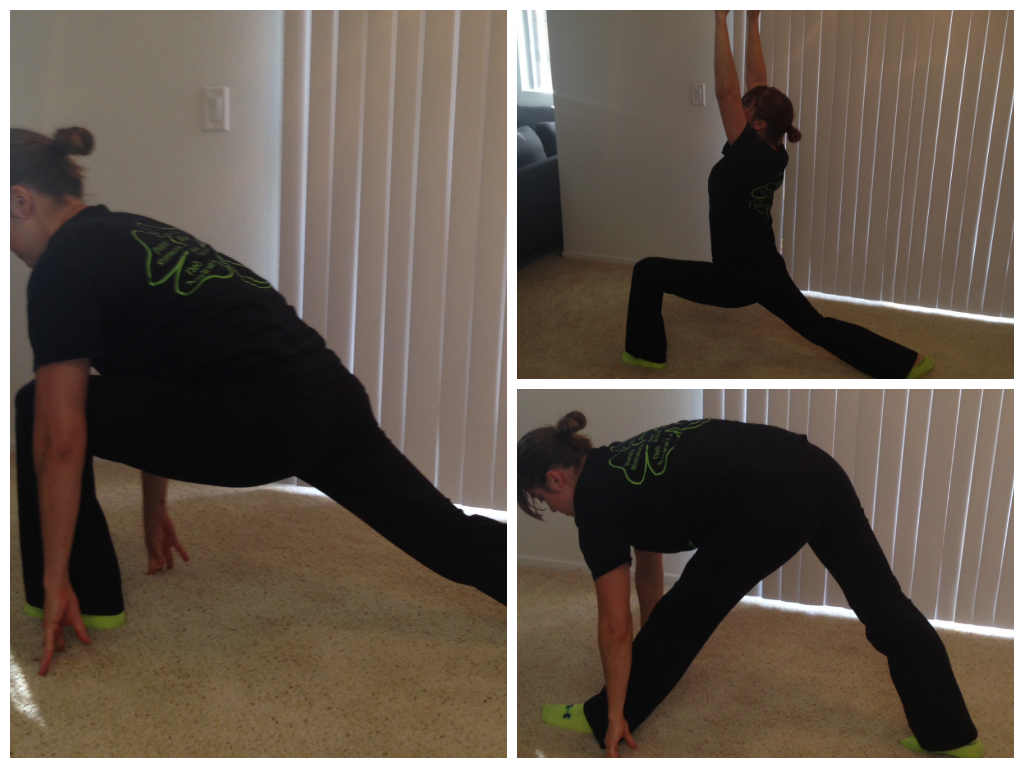
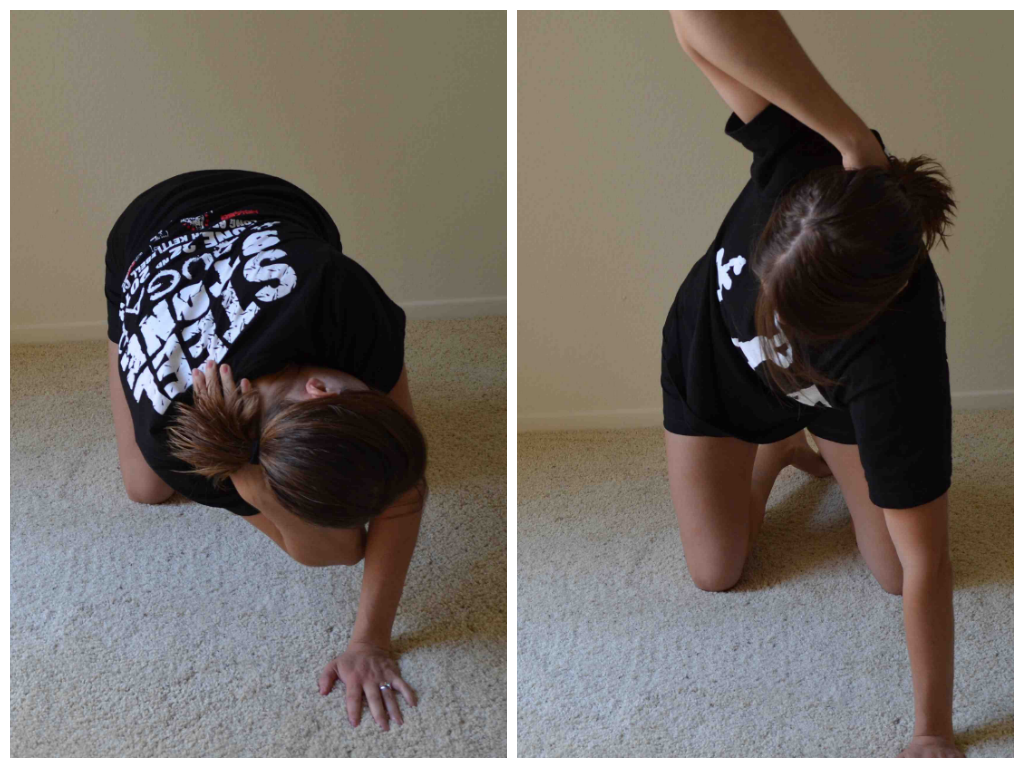
4. Frog Stretch with Rotation – One of the best groin and hip stretches out there in my opinion. Kneel on the ground and spread your knees as wide as possible. Lower yourself down to your forearms. Keep your feet in line with your lower leg and knees. Do not let your feet come together behind your butt. Sit your butt back between your knees as much as possible. As you come back forward, lower your body down to the ground and rotate your lower leg up and forward. Sit back again and then pivot the other hip. Keep alternating sides until all reps are complete.
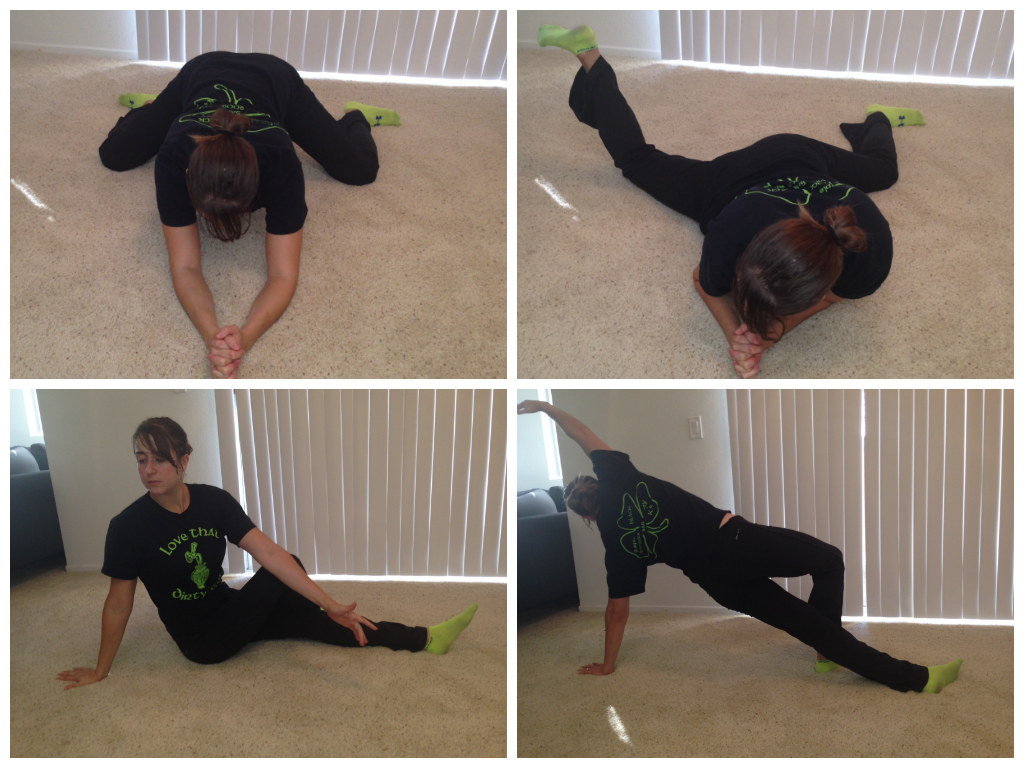
Top is frog stretch with rotation and the bottom is the seated rotation to plank reach
5. Seated Rotation with Plank Reach – Sit on the ground with both legs out straight. Bend your right knee and cross your right foot over your left leg and place it on the ground by your knee. Place your right hand on the ground behind you. Take your left arm and place your left elbow on the right side of your right knee. Press through your left arm and rotate your body to the right, keeping your chest up nice and tall. Do not slouch. Then rotate back around and place your left hand on the ground behind you. Press up into a side plank, driving through your right foot and the side of your left foot. Reach your right hand back and overhead. Then sit back down on the ground and rotate back to the right and repeat the whole stretch. Complete all reps on the right side before switching.
6. Child’s Pose with Lat Stretch – Kneel on the ground with your toes pointed. Sit back on your heels reaching your arms out on the ground overhead. Walk your hands out as far as possible. You can also walk your hands to the right and left to get more of a stretch down each side of your back. You should feel this stretch down your arms and the sides of your back. You should also feel the stretch in your low back if you are relaxing back onto your heels.

7. Standing Wall Lat Stretch – Most easily done in a corner, but can be done on a flat wall. Reach your arm up the wall and press your side as close to the wall as possible. You can also bend your elbow and relax your hand down your back. Breathe and relax into the wall as much as possible.
8. Kneeling Thoracic Extension – On your hands and knees, reach one hand down your neck and spine. Fingertips should be pointing down your back toward your butt. Then rotate your core so that your elbow goes under your arm on the ground. Then rotate open driving the elbow up toward the ceiling. Try to focus on just opening up your back and not really shifting your weight in your lower body. Then rotate back closed and repeat. For more Thoracic stretches, check out an earlier post on Neck and Upper Back Pain.
9. Cobra – Lie on your belly with your legs out straight. Prop yourself up on your forearms with your elbows under your shoulders. You can stop there or you can press up further. You can push yourself up higher and lift up onto your hands if the stretch from your forearms isn’t enough.
NOTE: To help correct upper body imbalances, you may also need to address tight pecs, which will improve your posture and can in turn even help reduce your low back pain!
BONUS move….Kneeling Bridge. This is a great move to stretch out those pecs, work on thoracic extension and stretch your hips and quads! It is basically exactly the opposite of how your body is positioned while sitting all day. The only downside is many people struggle with the flexibility to truly do this move. You can always use a chair or bench and place your hands on top of that instead of your heels if you can’t reach your heels.
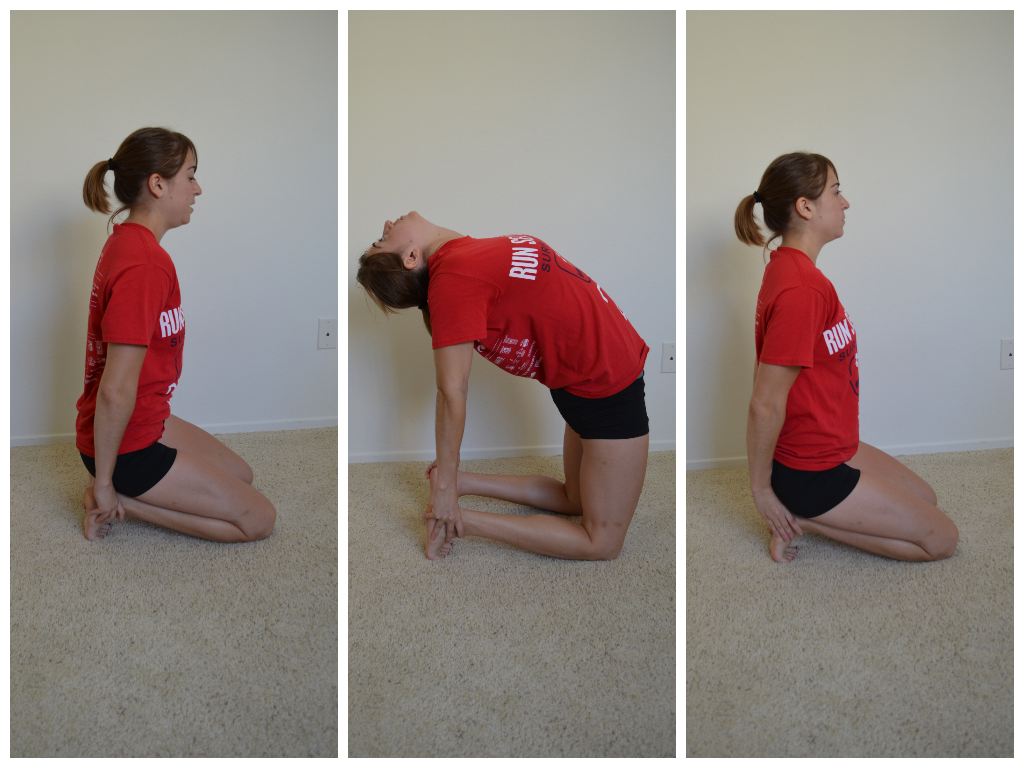
One of my favorite stretches to stretch everything made tight by sitting. A great one for days when you do front squats.
ACTIVATION
To reduce low back pain, you want to focus on activating your abs and your glutes.
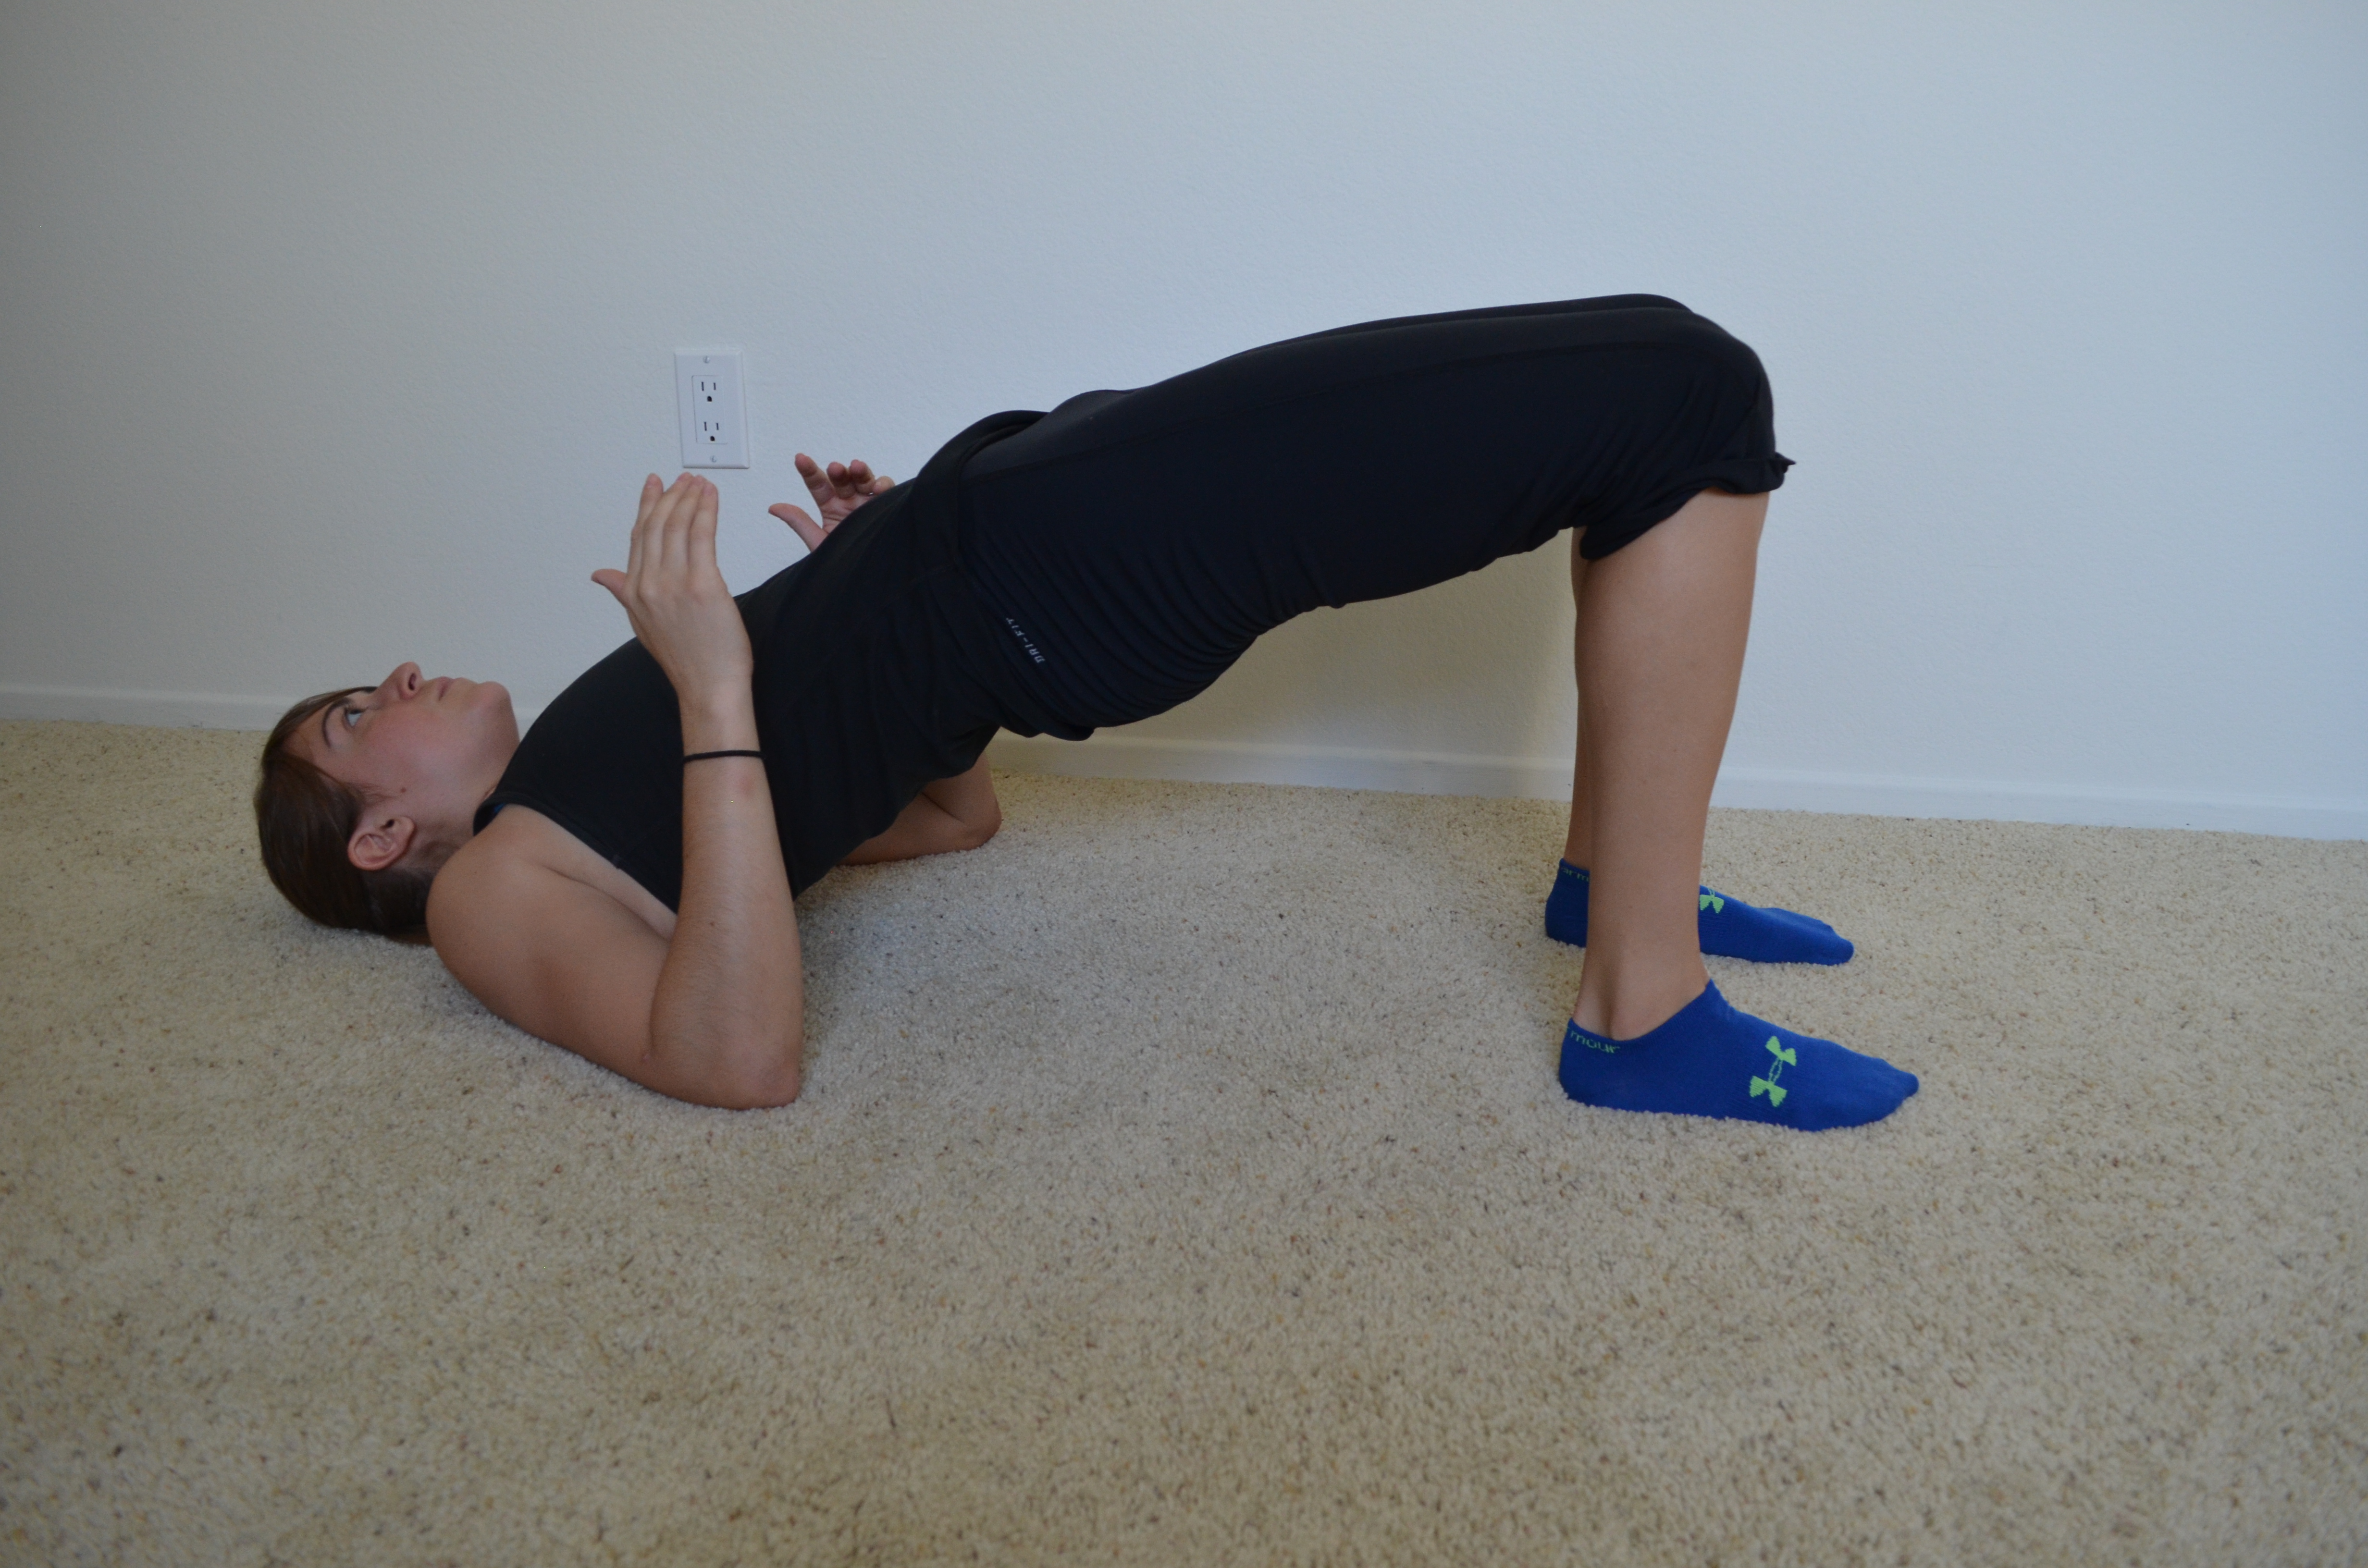
1. Glute bridge – Lie on your back with your feet about hip-width apart. You should basically be able to touch your heels with your finger tips. Then bend your elbows to 90 degrees. Drive your elbows, shoulders and heels into the ground as you drive your hips up. Make sure your knees do not fall apart. Actively squeeze your butt as you drive your hips up. If you only feel your hamstrings working, make sure that you aren’t driving off your heels backwards. You shouldn’t feel like you are driving back into your shoulders. You want to actual feel like you are driving your knees forward over your toes even though you are driving through your heels. Drive your hips straight up. You can either do a glute bridge hold and hold at the top or you can perform reps by lowering down and lifting your hips again.
2. Reverse Hypers – Lie face down on the ground to perform a Reverse Hyper or perform an IKEA table Reverse Hyper if you have a table that will support you. To do the hyper from the ground, lie face down with your legs out straight and squeezed together. Relax your upper body and squeeze your glutes to lift your legs up off the ground. Keep your legs straight and together as you lift. Hold for a second or two at the top and then lower back down. Make sure to squeeze your glutes tight so you don’t feel it in your low back.
3. Fire Hydrants – Place your hands underneath your shoulders and your knees underneath your hips. Flex your feet. Then raise one leg out to the side, keeping the knee at 90 degrees. Try to not let the foot get higher than the knee or the knee get higher than the foot. Really squeeze the butt cheek as you lift. Repeat all reps on one side before moving on to the other side.
4. Bird Dog – A great move to activate both your core and your glutes. Place your hands underneath your shoulders and your knees underneath your hips. Flex your feet. Kick one leg out straight as if kicking it into the wall behind you while you reach the other arm out straight toward the wall in front of your head. Don’t worry about lifting your leg or arm up high. Really try to drive your arm and leg toward opposite walls. Squeeze your glutes and keep your belly button pulled in toward your spine. As you lower your arm and leg, bend them and bring them together under your body. Try to touch your knee to your elbow before extending back out. Repeat all reps on one side before switching to the other side. All reps should be done in a slow and controlled manner. You should even hold for a second or two at the top of the move.

5. Pelvic Tilt – The best core engagement move. Lie flat on your back with your knees bent and your feet flat on the ground. There will be a space between your low back and the ground. Draw your belly button in toward your spine and press that space away. Hold your core tight for 5 to 10 seconds and then release. Feel the space again between your low back and the ground when you relax. There are progressions to the Pelvic Tilt, including marching and leg lowers. Check back soon for a post about ab engagement and pelvic tilt progressions on Redefining Strength’s blog.
6. Plank Series – Later this week, I will be posting a variety of plank variations. But here is a quick description of how to perform the basic forearm front and side plank.
To perform a front forearm plank, you should rest on your forearms with your elbows right below your shoulders. Beginners can start on their forearms and knees while more advanced exercisers will perform the plank from their forearms and toes. The longer you hold, the harder the move will be. Make sure to draw your belly button in toward your spine, tuck your hips under and keep your body in a nice straight line. Feet should be together and adductors, glutes and quads engaged. Do not let your upper back round as you hold. Breathe as you hold and don’t let your hips drop toward the ground or raise up toward the ceiling.
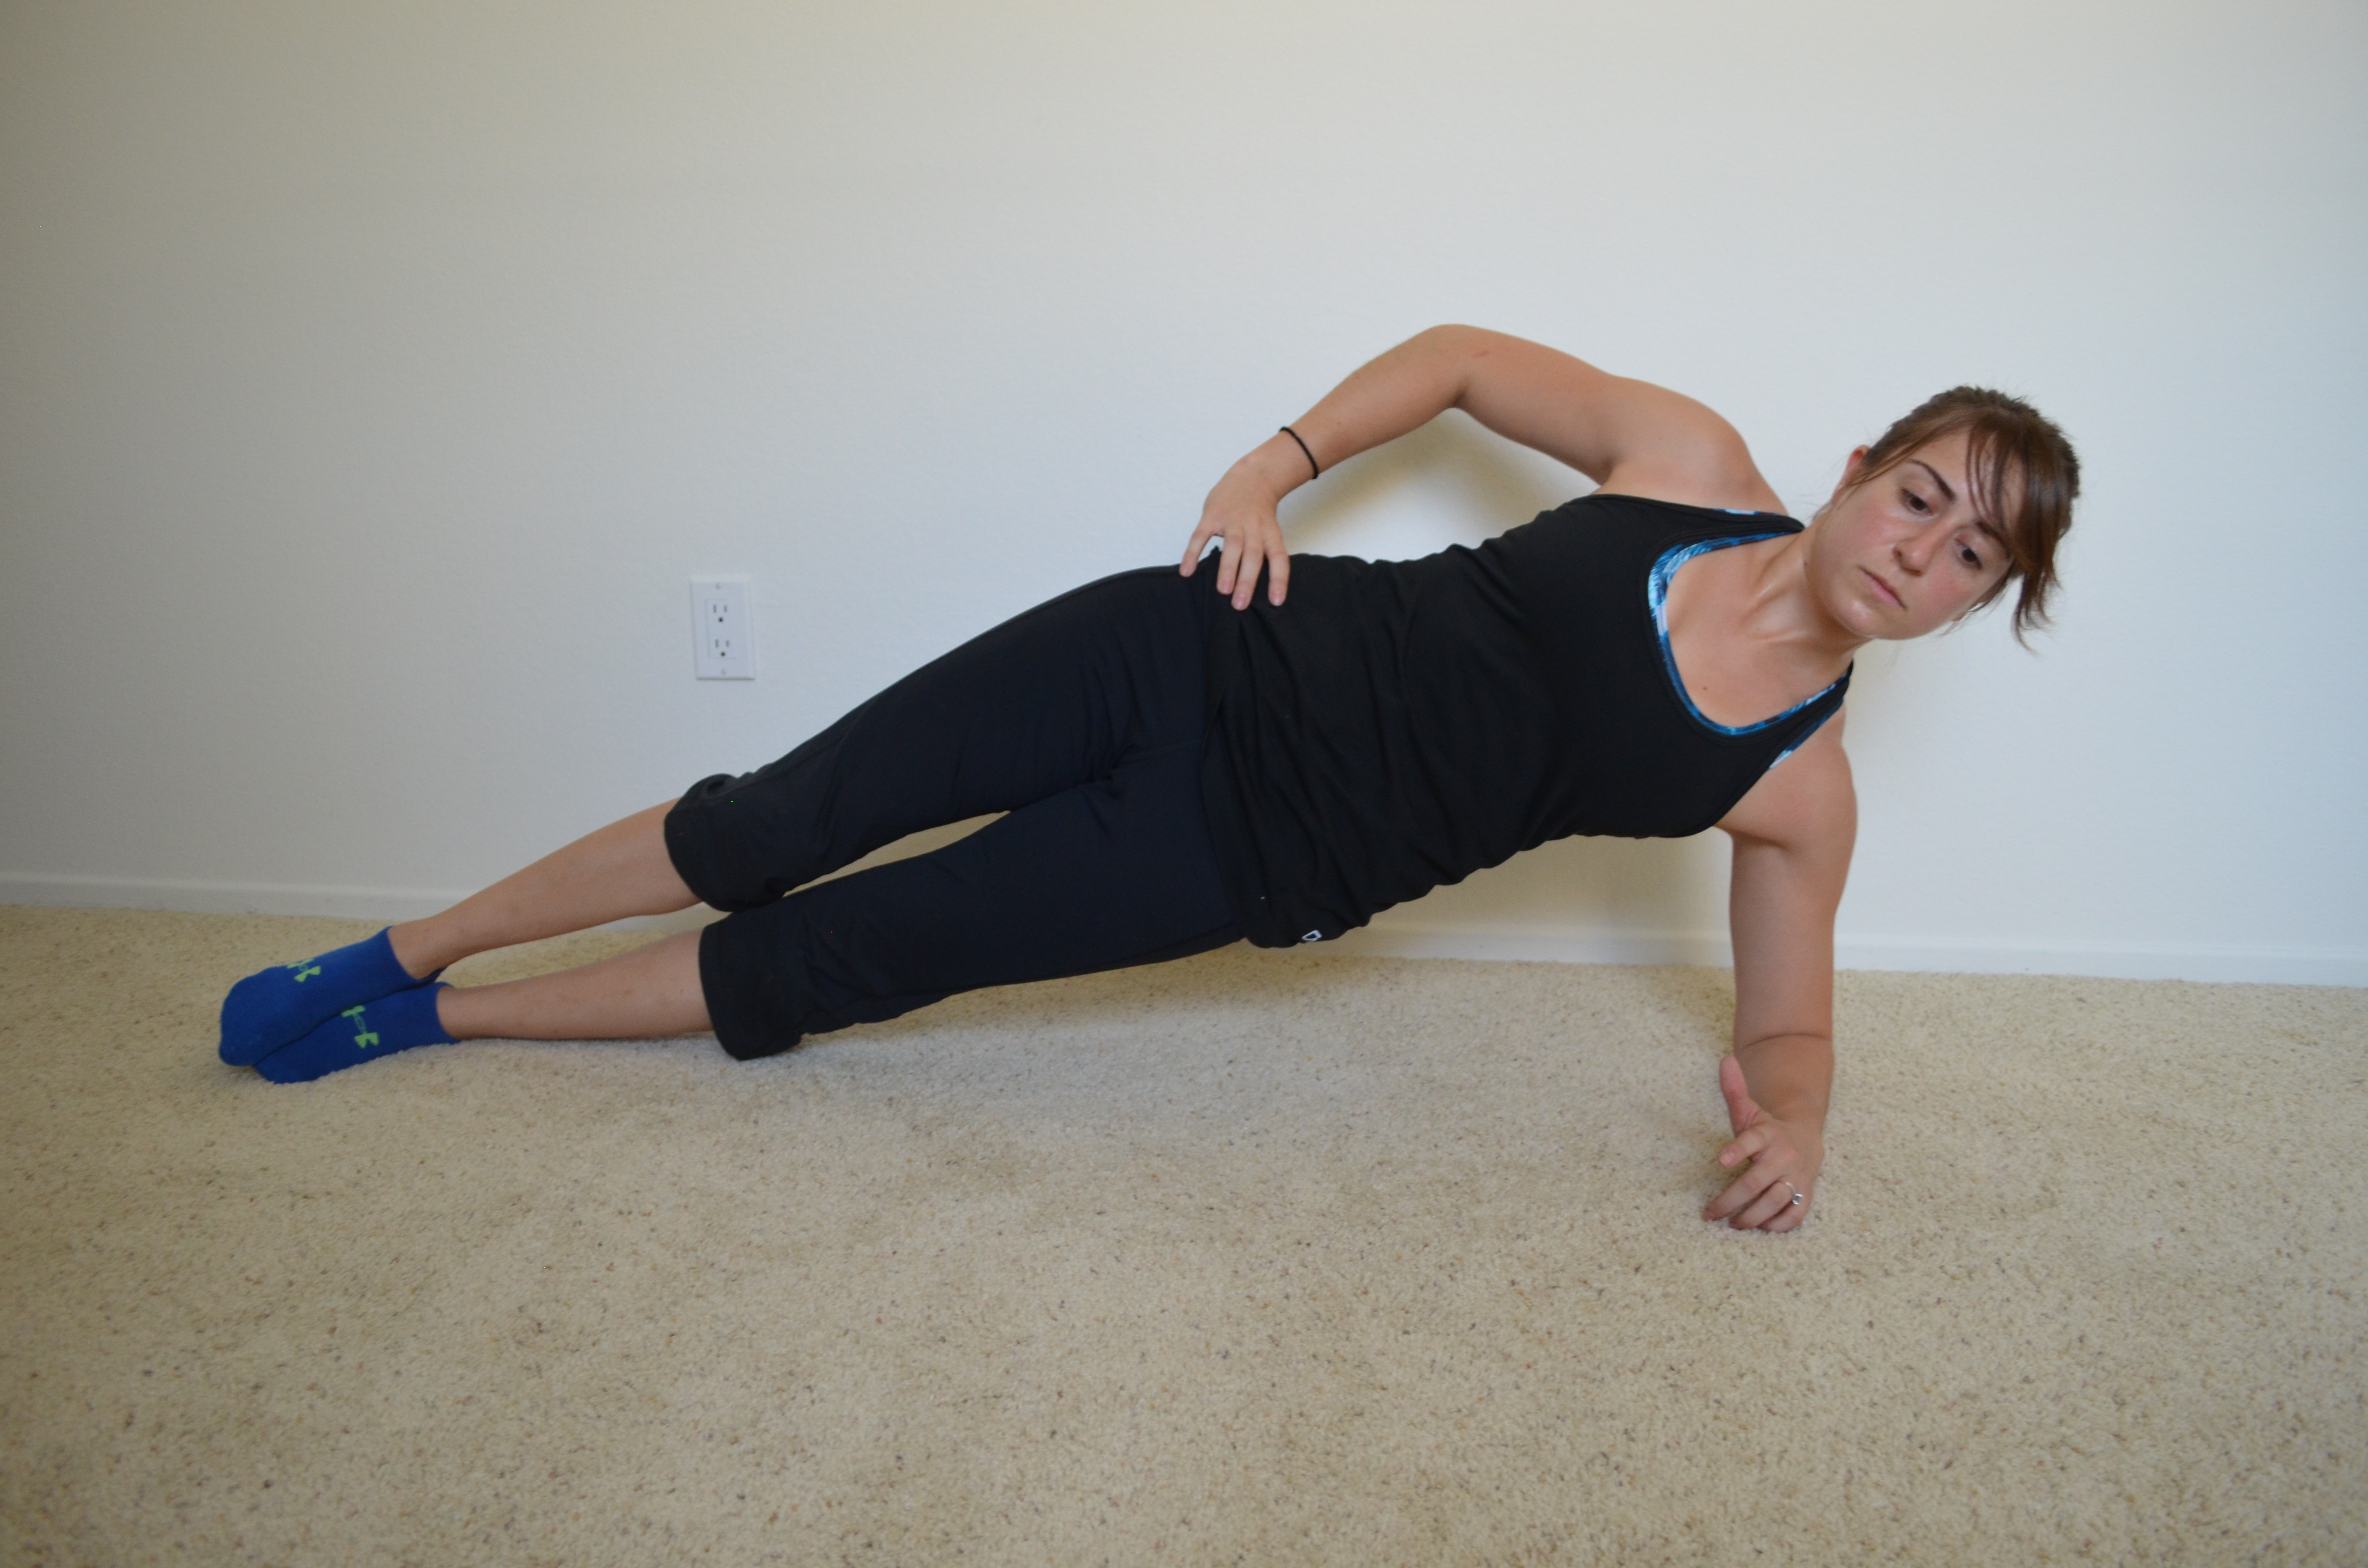
The forearm side plank variation is done on one forearm. Your elbow should be right below your shoulder. Beginners may do this from their knees. A modified plank can also be done with just the bottom knee down and the top leg straight.To advance the move, straighten both legs and rest on the side of your feet and your forearm. (Feet may be stacked or one may be in front of the other.) If that isn’t challenging enough, raise the top leg. Your top arm can rest on your hip or reach up toward the ceiling. Make sure to keep your body in a nice straight line. Squeeze your glutes and make sure your chest doesn’t rotate toward the ground. Drive your bottom hip up nice and high. Do not let your hip sag toward the ground.
7. Band Stability Press (anti-rotational) – Anchor a band in a door, around a pole or even use a cable-pulley machine. Step away from the anchor point as far as you can without allowing your body to rotate toward the anchor. You should be facing perpendicular to the band. Start with the handle at your chest. Push the band straight out from the center of your chest until your arms are straight. Do not let your arms rotate open and go back toward the anchor. Then slowly bring your arms back in. This move looks easy, but when you try it, you realize how much your entire body fights rotating back toward the band hook!
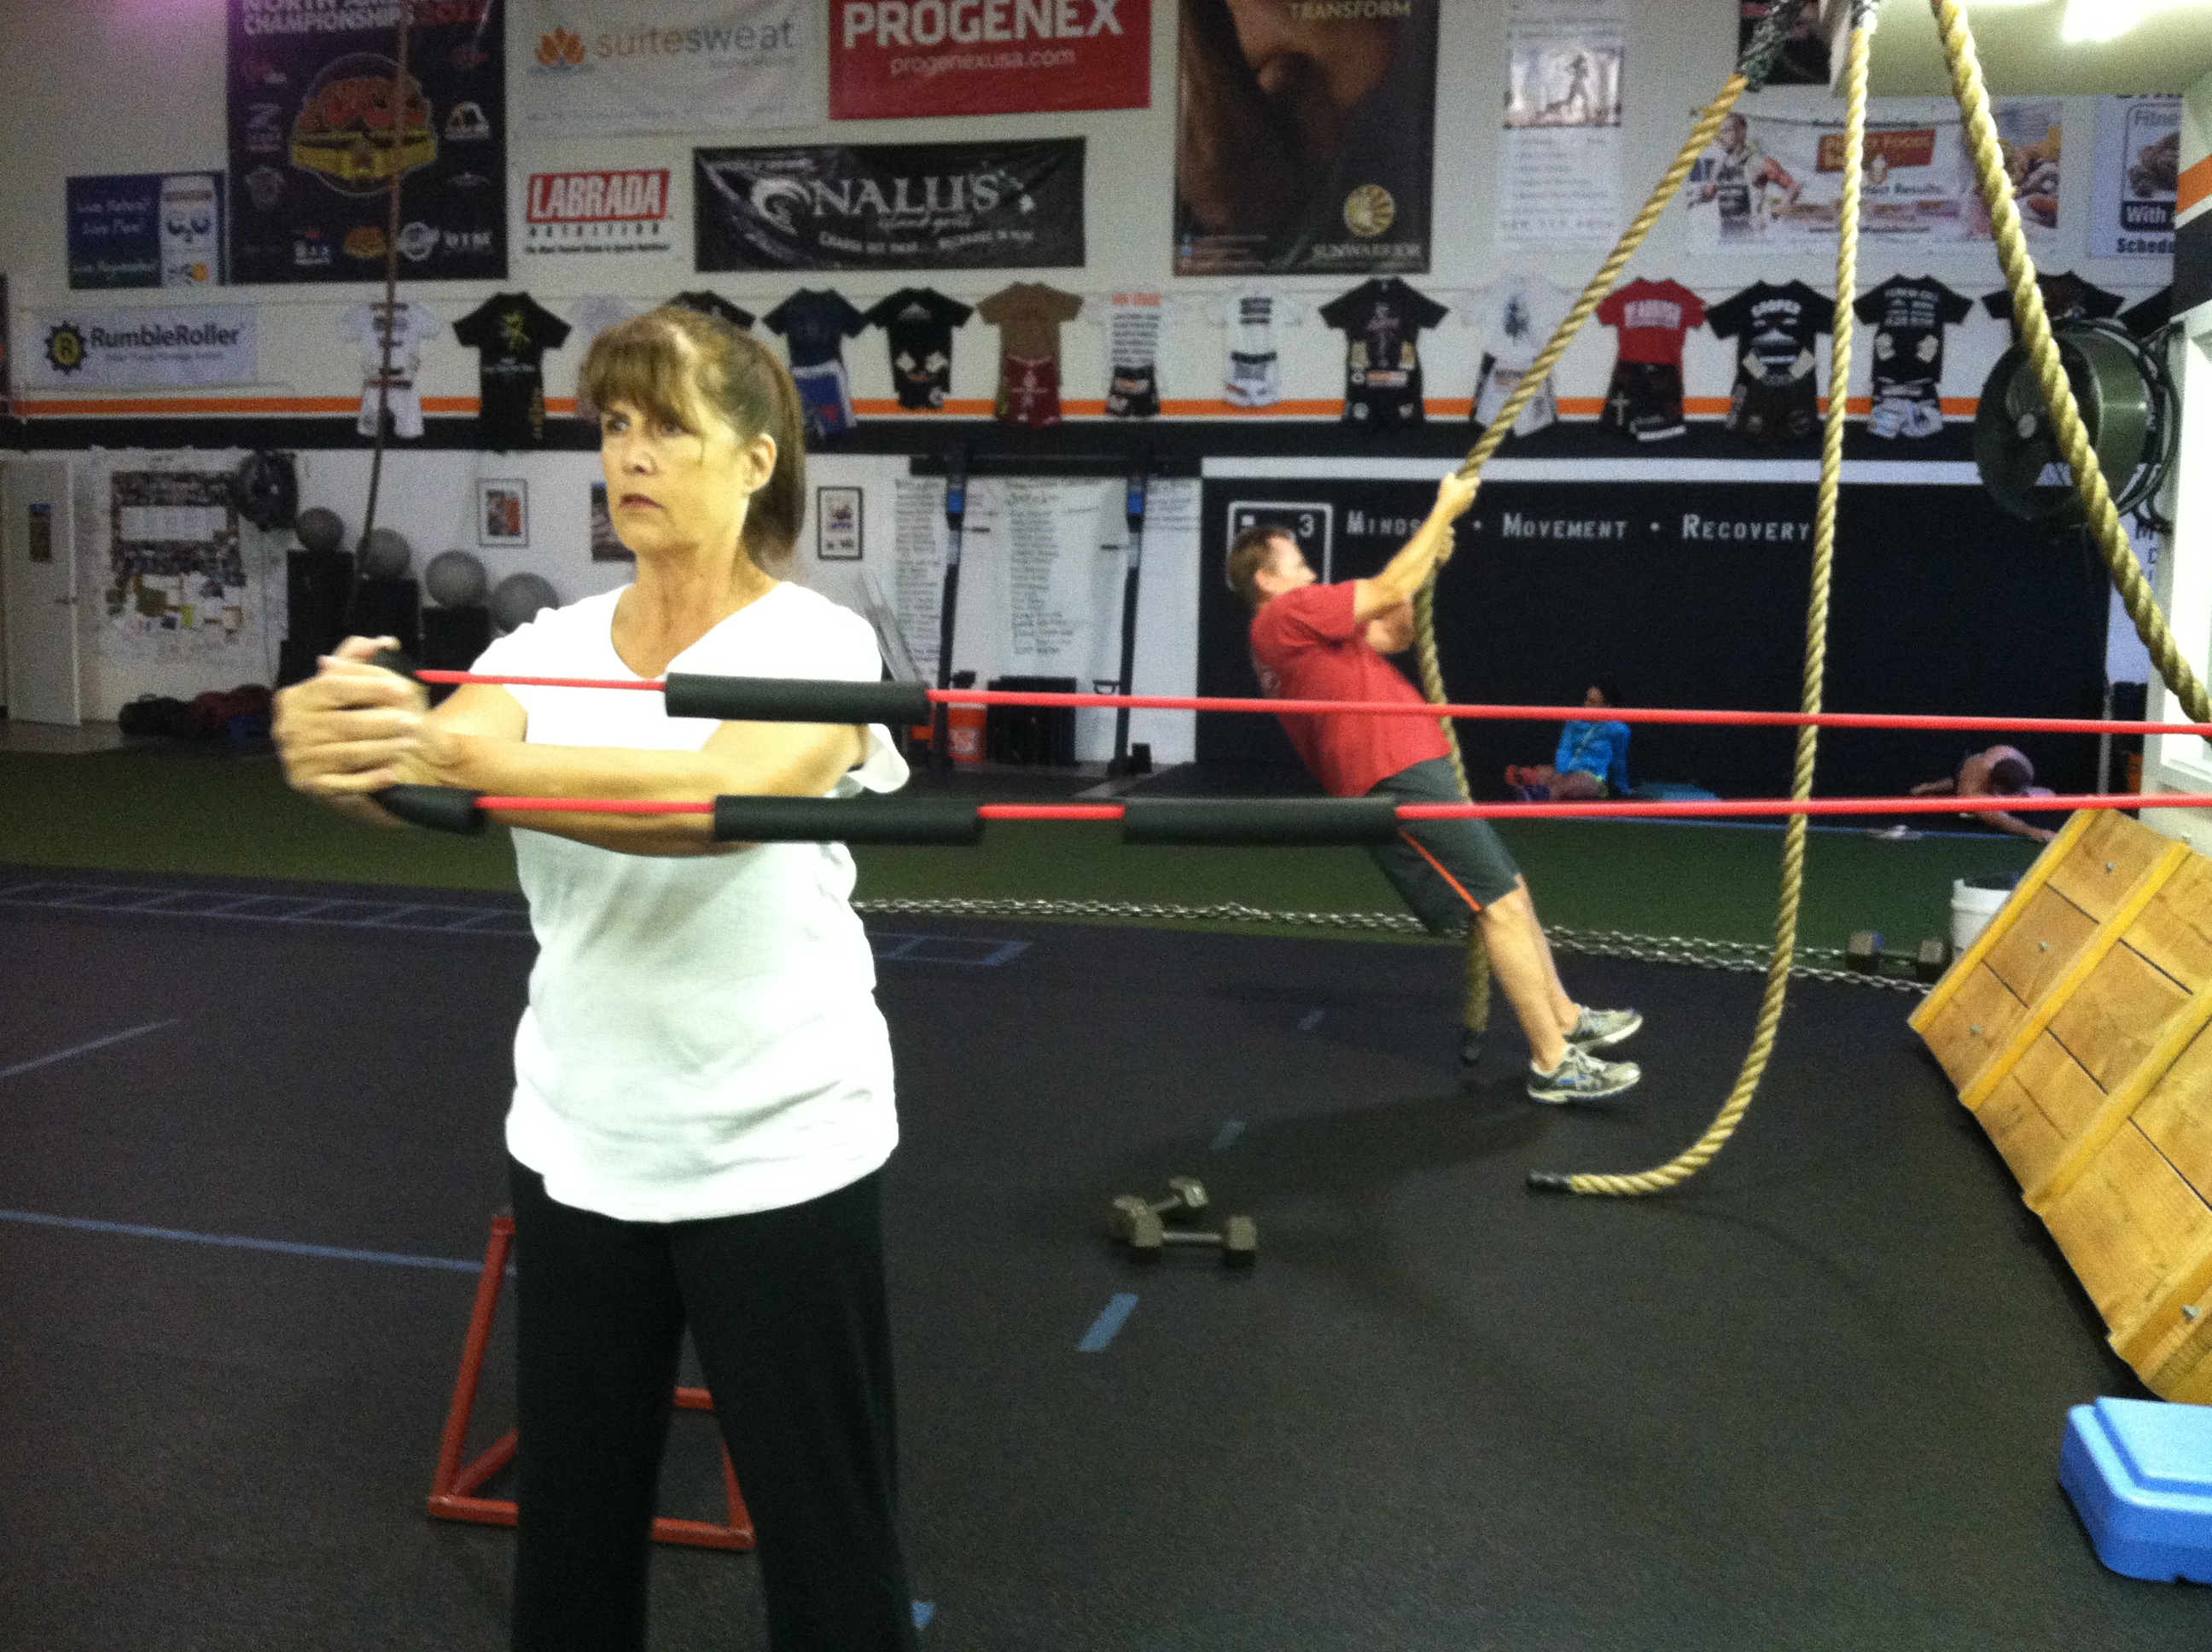
Joan demoing the stability press.
For more glute activation exercises, check out Part 3 of the Bootilicious series. And check back later this week for more great plank variations to help you engage your core.
Use the moves above to find the specific spots that are tight and inactive on you and then loosen and activate them! Just because you have low back pain doesn’t mean you will need to use all of the moves above.
You may find you only have trigger points around the front of your hips and that your hamstrings are fine. Don’t spend time on areas that are ok. Target areas of tightness or inactivity!
If your back pain is due to trauma, please consult a doctor.
Stop accepting chronic back pain and start doing something about it!
Posted on November 11, 2013, in Injury, Man Bicep Form Bible, Recovery and tagged hip mobility, low back pain relief, posture fixes, relieve low back pain, tips to get rid of low back pain. Bookmark the permalink. 3 Comments.


Pingback: Tips to Relieve <b>Low Back Pain</b> | Man Bicep | Chronic Back Pain
Pingback: Worth Reading — 11/20/13 | A Touch of Cass
Pingback: When Pain Doesn’t Mean You Should Skip Your Workout | Man Bicep