Blog Archives
10 Plank Variations to Strengthen Your Core
I’ve had sort of a love-hate relationship with planks over the years.
At points I’ve felt they didn’t give you that much bang for your buck, but I’ve started to realize they really are essential to developing stability and therefore preventing injury.
Here are my favorite plank variations. Some are isometrics while others are dynamic moves. Some even make great warm up moves.
1. Front Plank – The basic front plank variation is done from your forearms. You should rest on your forearms with your elbows right below your shoulders. Beginners can start on their forearms and knees while more advanced exercisers will perform the plank from their forearms and toes.
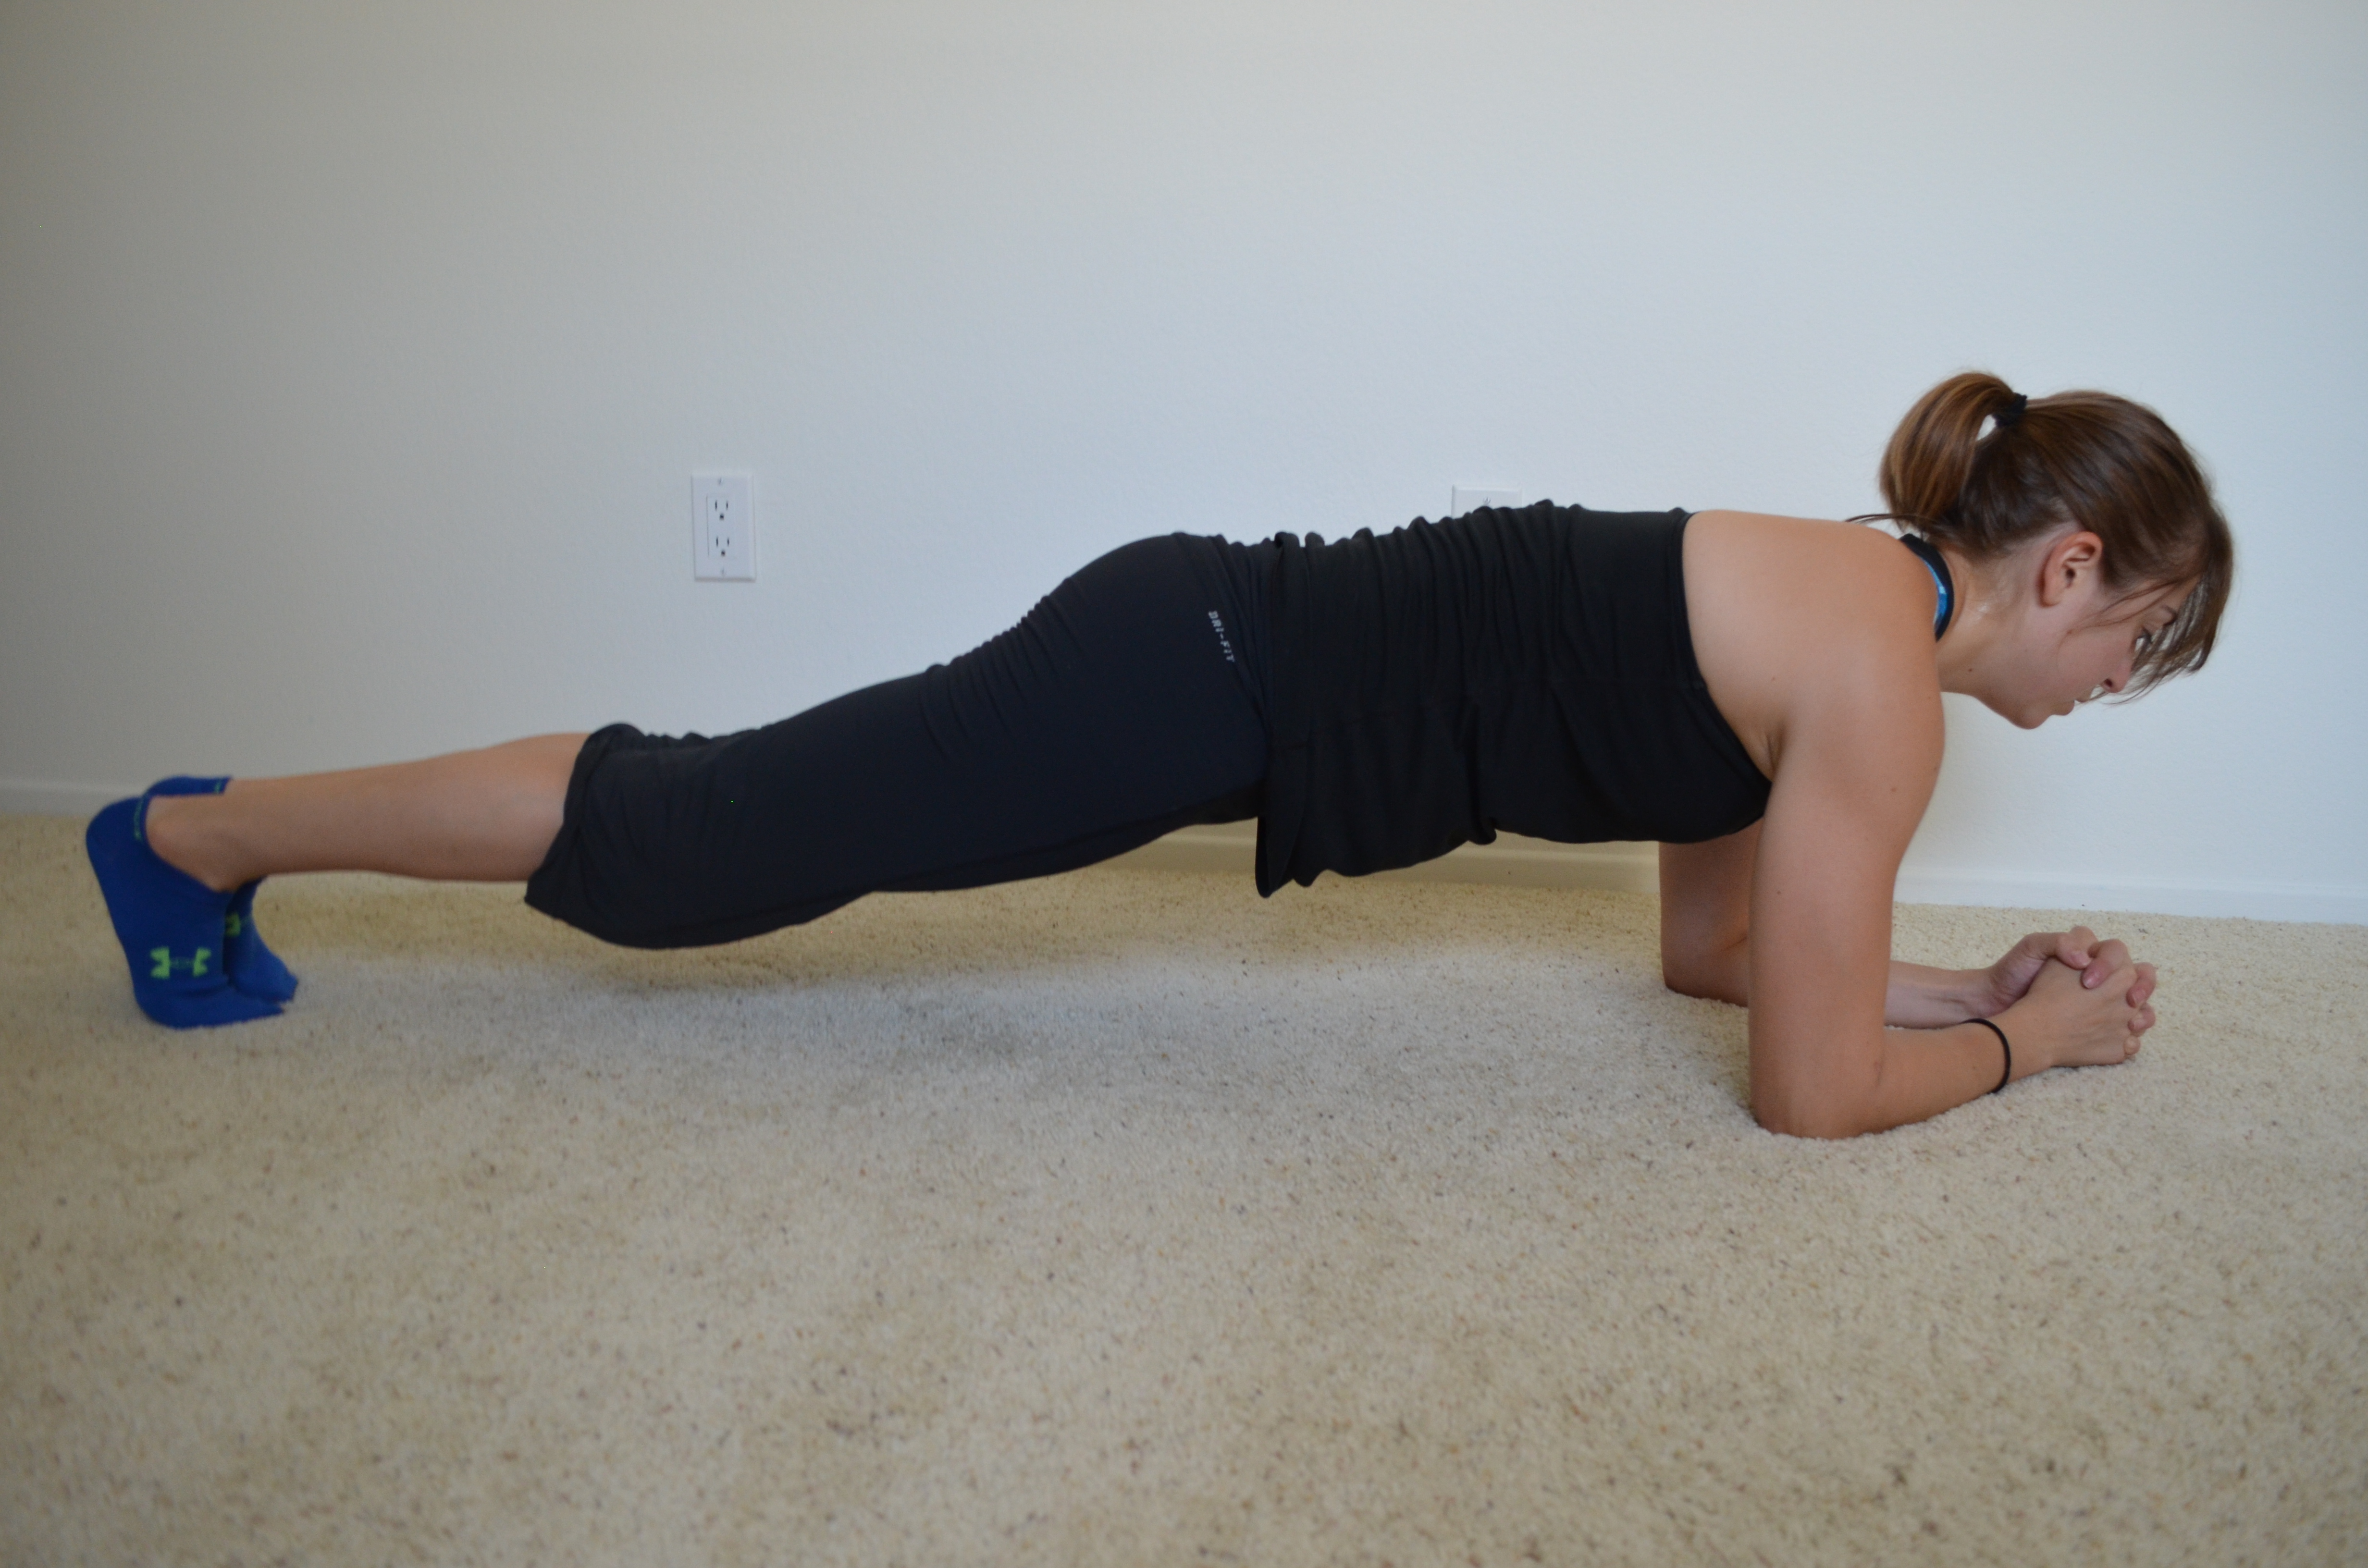
The longer you hold, the harder the move will be. To advance the move further, try lifting one leg and holding it off the ground. Make sure to draw the belly button in toward your spine, tuck your hips under and keep your body in a nice straight line. Feet should be together and adductors, glutes and quads engaged. Do not let your upper back round as you hold. Breathe as you hold and don’t let your hips drop toward the ground or raise up toward the ceiling.
You can also do the front plank from your hands.
2. Side Plank – The basic side plank variation is done on one forearm. Your elbow should be right below your shoulder.
Beginners may do this from their knees. A modified plank can also be done with just the bottom knee down and the top leg straight.
To advance the move, straighten both legs and rest on the side of your feet and your forearm. (Feet may be stacked or one may be in front of the other.)
If that isn’t challenging enough, raise the top leg. You can also do the side plank from your hand.
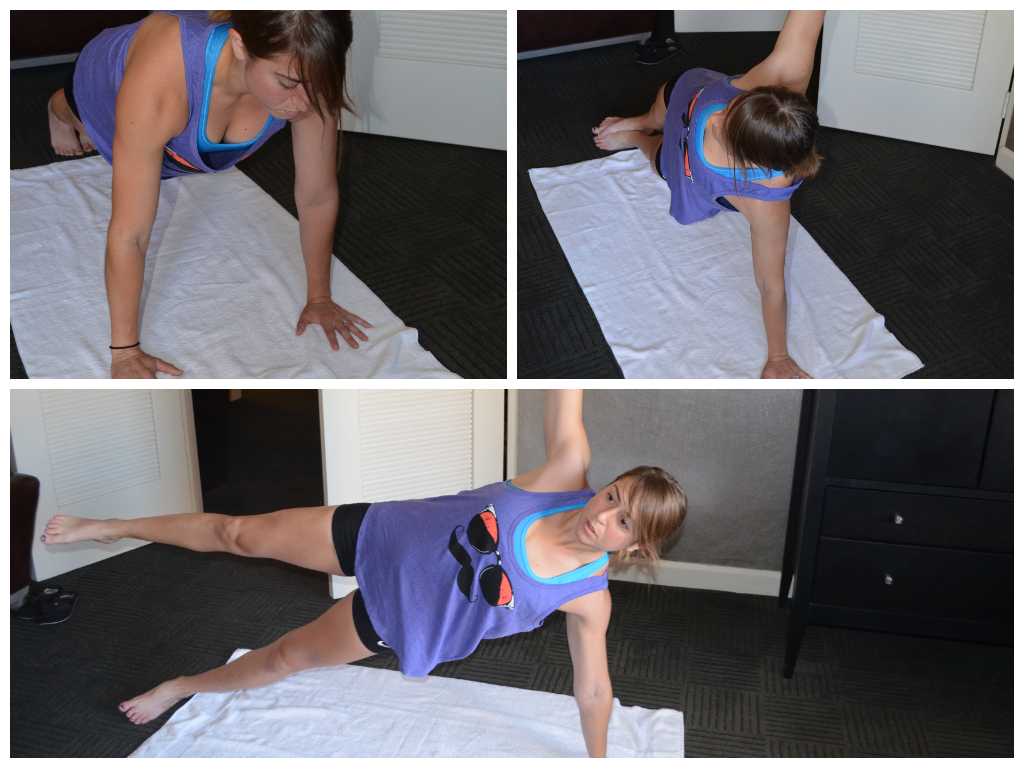
High front plank and two side plank variations
Your top arm can rest on your hip or reach up toward the ceiling. Make sure to keep your body in a nice straight line. Squeeze your glutes and make sure your chest doesn’t rotate toward the ground. Drive your bottom hip up nice and high. Do not let your hip sag toward the ground.
3. Planks with Hip Dips – There are two variations of plank hip dips that I love to use. One is a front plank with hip dips and the other is a side plank with hip dip.
To do the front plank with hip dip, set up on your forearms and knees or toes. Keep your core engaged and your belly button pulled in toward your spine. Then drop the side of your right hip down toward the ground. Come back to center and then drop the side of the left hip down toward the ground. Alternate hip dips while keeping the core tight. Do not let the hips sag or raise up toward the ceiling.
To do the side plank with hip dip, set up on one forearm and either your knees or the sides of your feet. Start in a basic side plank. Then keeping your body straight and your chest open (aka not rotated toward the ground), drop your hip toward the ground and then press it back up as high as you can. Repeat making sure your body doesn’t collapse forward. Your top hand can be raised toward the ceiling or on your hip. Complete all reps then switch to the other side.
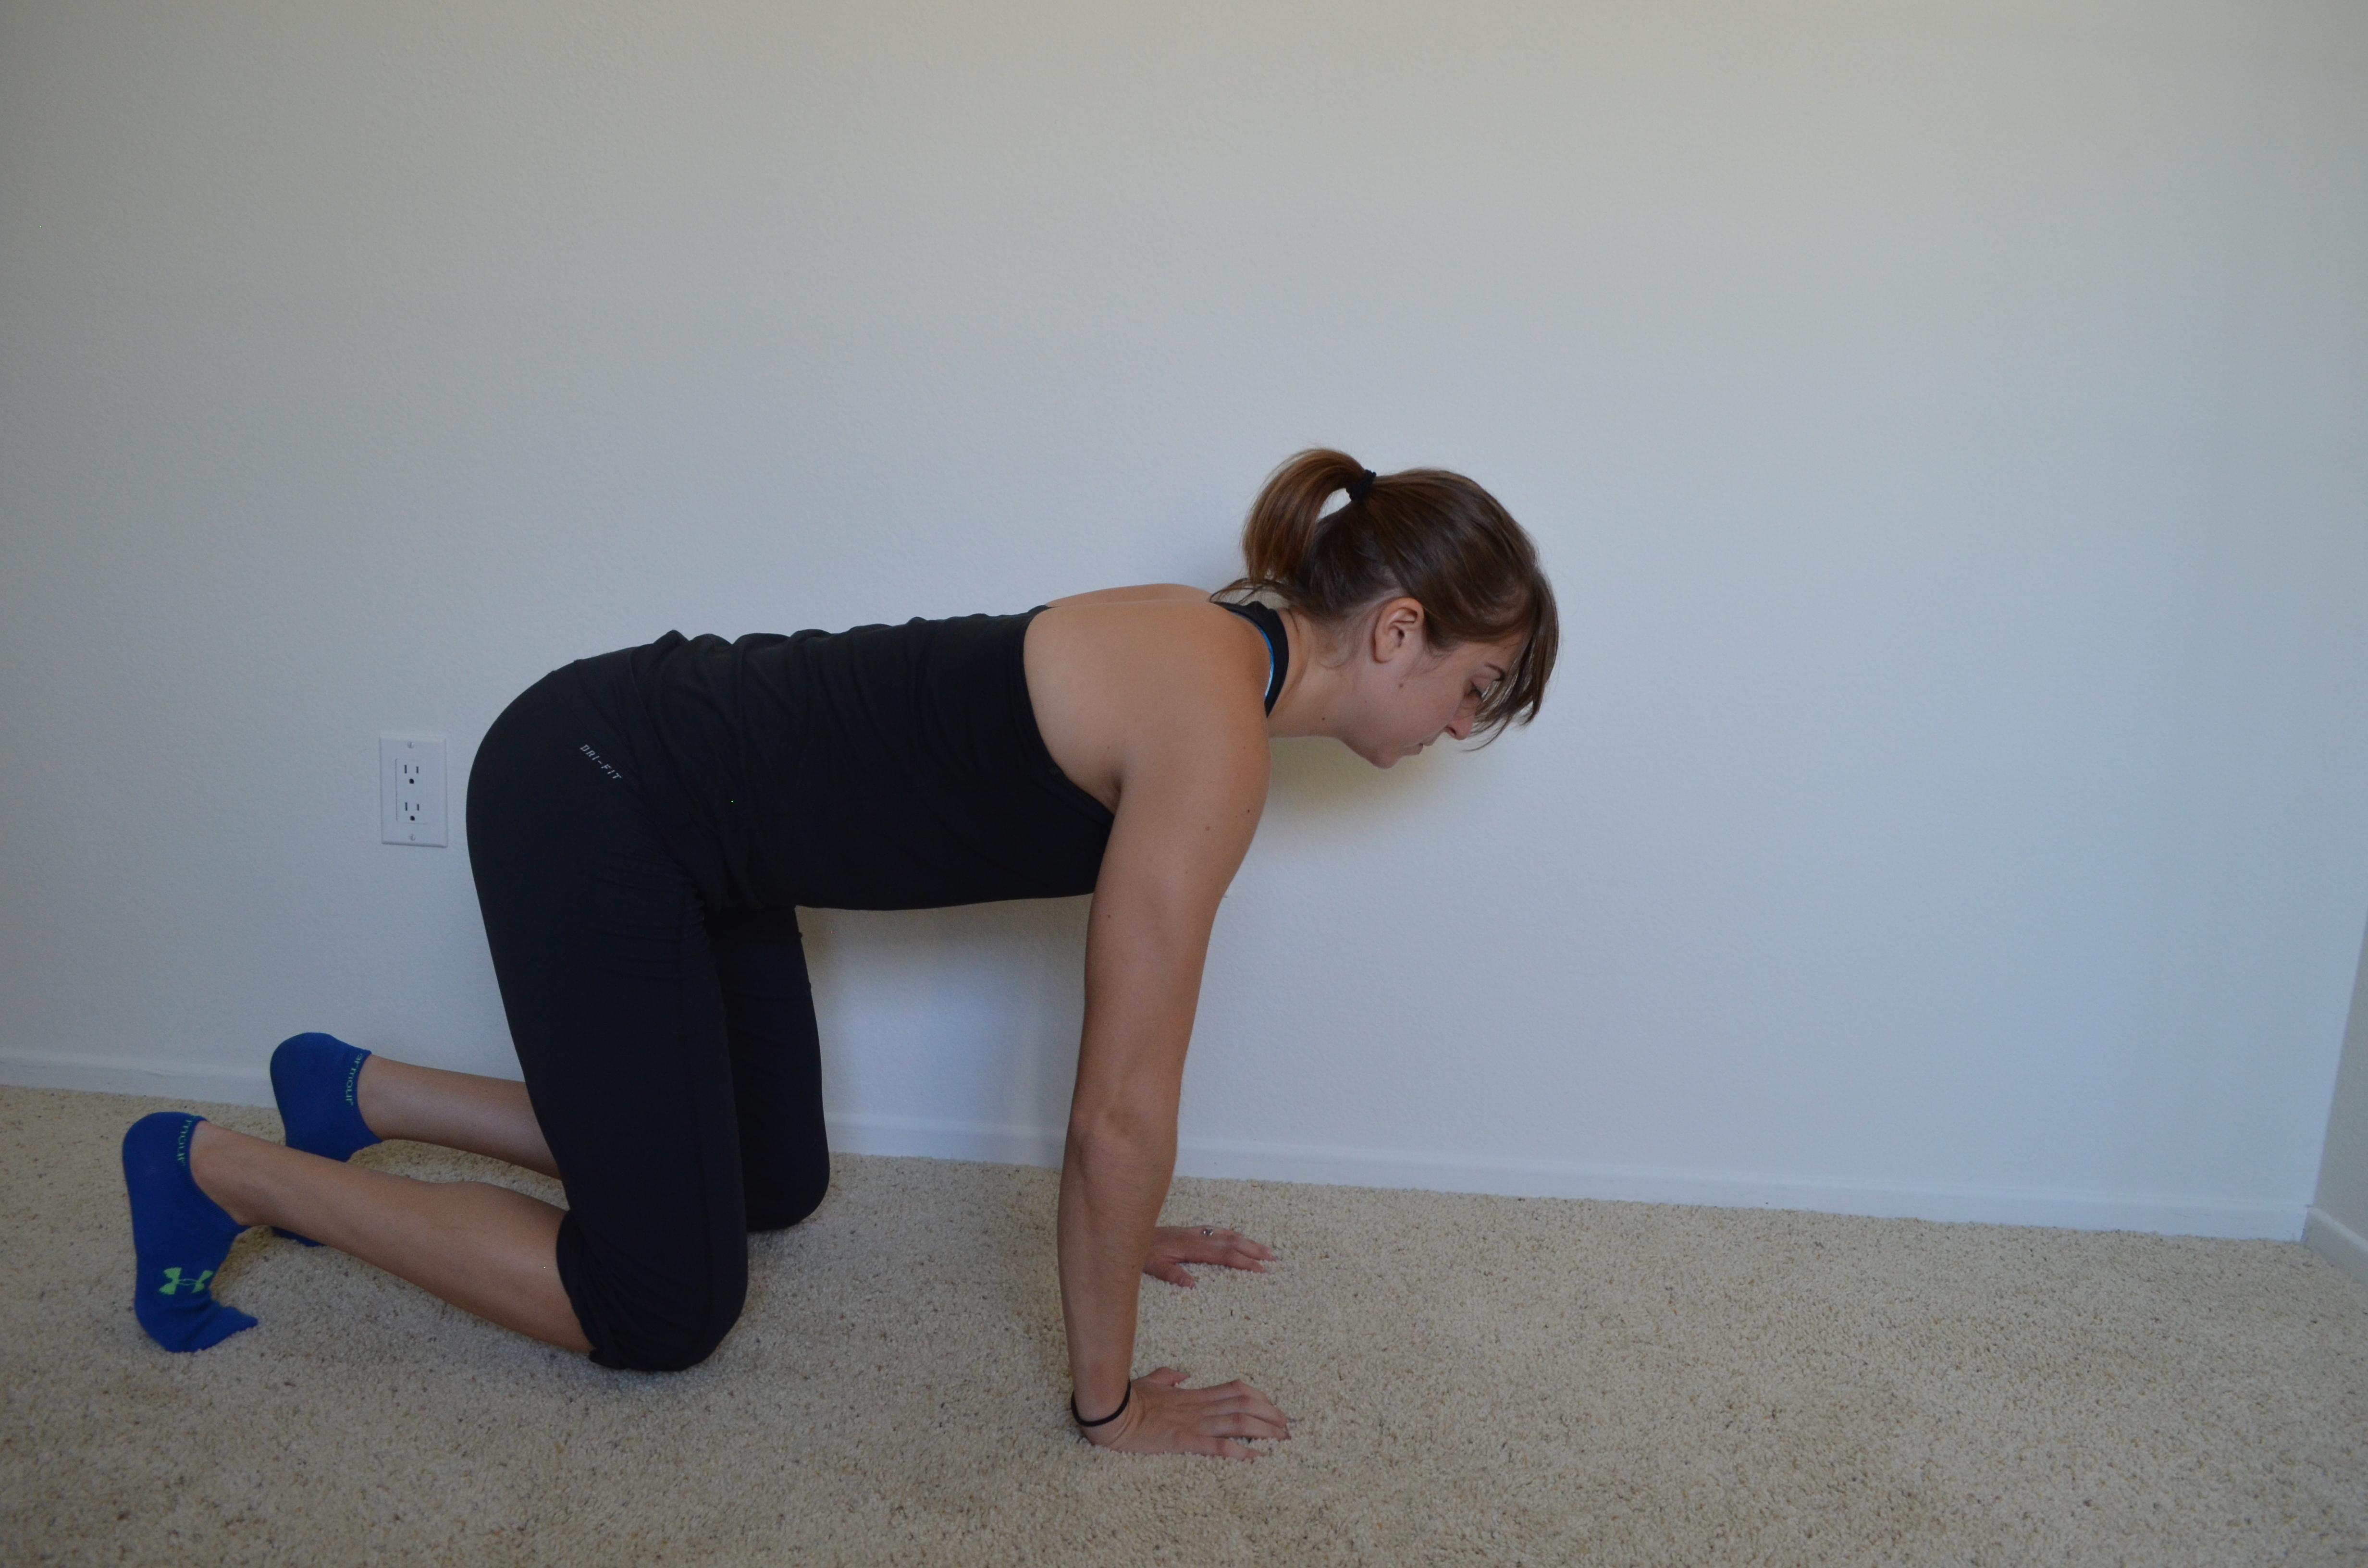
4. Plank with Reach Out and Back – A great glute activation move and tough on the core. This move is done from the hands and either your knees (beginner) or toes (advanced). To do this move from your knee, set up in the top of a push up with your hands under your shoulders and your body in a nice straight line down to your knees. Then sit back on your heels into a “child’s pose” position, reaching one hand back between your legs. Move forward back to the top of the push up as you reach the hand from between your legs out toward the wall beyond your head. You may even extend your hips more toward the ground. Just make sure to keep your abs engaged so that you don’t feel the extension out in your low back. Complete all reps on that side before switching to the other arm.

To do the plank with reach out and back from your toes, start at the top of a push up with your hands under your shoulders and your body in a nice straight line to your toes. Your feet should be between hip-width and shoulder-width apart. Lift one hand and hike your hips up as you reach back and across to the opposite ankle. Then reach back forward, reaching beyond your head as you lower your hips back down into the plank position. Extend your hips forward toward the ground, squeezing your glutes while keeping your abs engaged so that you don’t feel it in your low back. Complete all reps on that side before switching to the other arm.
5. Plank with Reach Thru – Set up in the high plank position on your hands and knees (beginner) or toes (advanced). Then reach one hand under your armpit and toward the far wall. You don’t just want to reach under your armpit to pat yourself on the back. Make sure your hips stay down as you reach through. Then pivot open, rotating into a side plank. You will reach the hand that reached under your armpit up toward the ceiling while rotating onto the sides of your feet or knees. Then reach the hand back down and under the armpit. Move back into a high plank position. Complete all reps on that side before switching and reaching the other way.

6. Bull Dog – To perform a bull dog hold, start on your hands and knees with your knees under your hips and your hands under your shoulders. Flex your feet and push up onto your toes and hands while your knees stay bent under your hips. Hold your knees an inch or two off the ground, keeping the core tight and the belly button pulled in toward your spine. Do not let your upper back arch as you hold. This move you almost feel more in your quads and shoulders than your core.
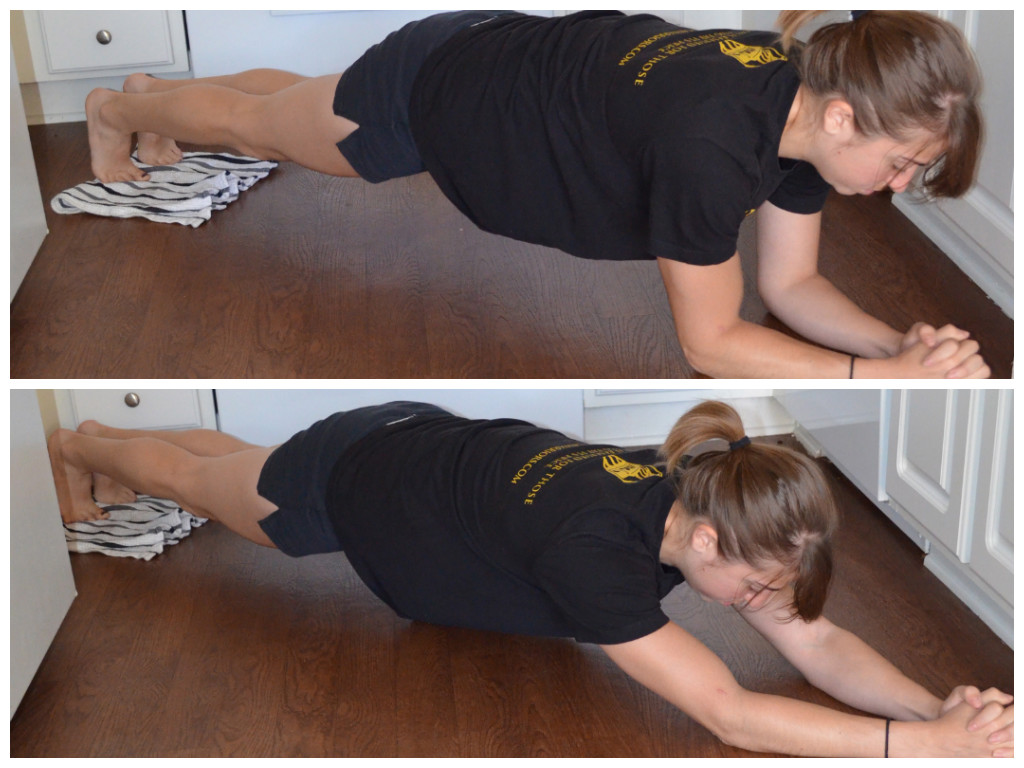
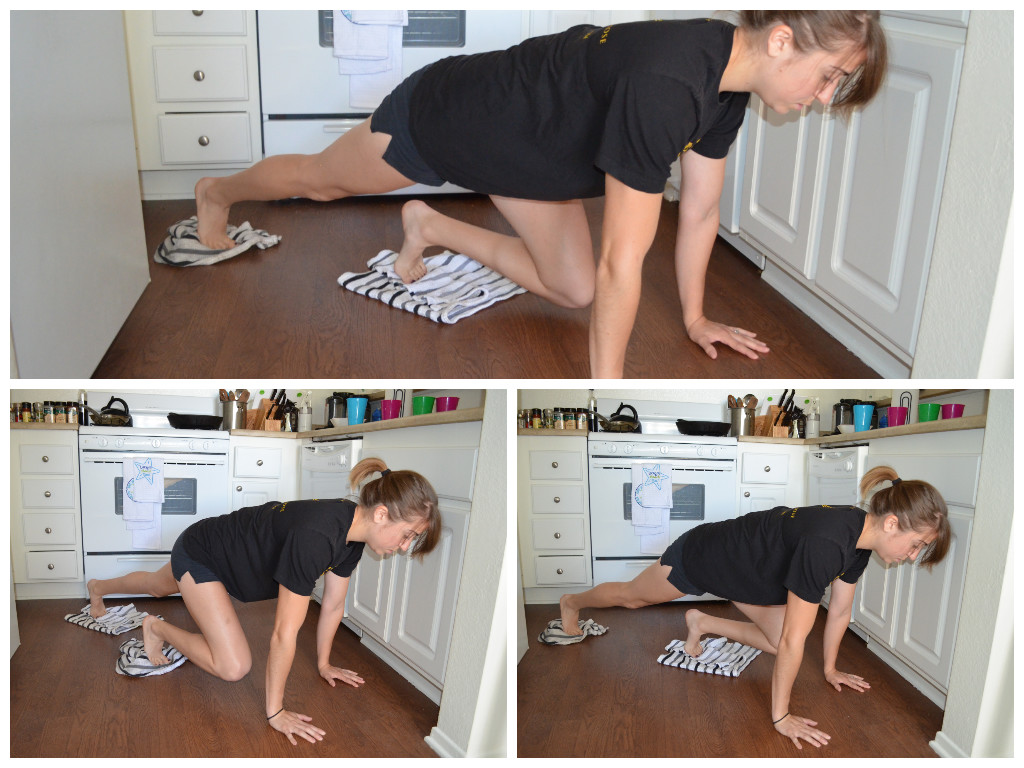
7. Body Saw – This is a very advanced plank variation…even at its most regressed. You can do this on a towel or sliders or regress it to a simple plank from your toes on the ground. Set up on your forearms and toes in a basic front plank. If you aren’t using sliders or a towel, you are going to walk your feet backward, lengthening your body through your triceps. Keep your body in a nice straight line. Do not let your low back arch. Walk your feet back as far as you can while maintaining good form and then walk back forward into the front plank.
If you use sliders or a towel, you will slide your feet back instead of walking them back. Make sure your lengthen through your arms. It is tempting to “pike” instead of truly lengthening, but to challenge your core, you need to lengthen your body out. You should not feel it in your low back. Keep the belly button pulled in and your glutes engaged. Don’t let your hips hike up or sag toward the ground. Slide out and back in and repeat.
8. Bird Dog – The basic bird dog is done from your hand and knee. Place your hands underneath your shoulders and your knees underneath your hips. Flex your feet. Kick one leg out straight as if kicking it into the wall behind you while you reach the other arm out straight toward the wall in front of your head. Don’t worry about lifting your leg or arm up high. Really try to drive your arm and leg toward opposite walls. Squeeze your glutes and keep your belly button pulled in toward your spine. As you lower your arm and leg, bend them and bring them together under your body. Try to touch your knee to your elbow before extending back out. Repeat all reps on one side before switching to the other side. All reps should be done in a slow and controlled manner. You should even hold for a second or two at the top of the move.

To advance this move, set up in a high plank position from your toes and hands. Now lift the opposite arm and leg up toward the ceiling, keeping both straight. Still try to reach both toward the far walls instead of just getting them up as high as possible. Keep your core tight and glutes engaged. Do not let the hip of the raised leg rotate open toward the ceiling. Squeeze the butt to hold the leg up then lower the arm and the leg and repeat the arm and leg raise on the same side.
Both bird dog variations can also be done as holds at the top instead of for reps.
9. High Plank Hold with Knee Drives – Set up in the high plank position on your hands and toes. You are then going to raise one leg off the ground and drive that knee toward your chest. You can drive the knee straight in. Or you can drive it to the outside of the same elbow (so right knee to the outside of the right elbow). You can also do a cross-body drive, bringing the right knee under and across the body to the left elbow.
Whichever drive you do, hold the knee in and the foot off the ground. Hold for 30 seconds to a minute before returning the foot back down to the ground and moving back into the high plank position.
If you want to make the move more cardio, you can turn it into a “mountain climber” by running the knees in and alternating knee drives instead of holding the drive.
You can even make the climbers harder by adding a towel or slider.
10. Reverse Plank – I’ve talked about this move before…It is the one that always reminds me of Flash Dance (also called the Posterior Plank). Start seated on the ground with your legs out straight and your hands on the ground behind your butt. Your finger tips should be pointing toward your butt. Drive through your hands and heels and raise your hips up off the ground toward the ceiling. Press your chest up and out as you raise your hips. Keep your legs straight as you bridge up and relax your head back. You can either perform a Reverse Plank hold by holding at the top or you can perform reps, dropping your hips back down and raising them back up.
To make the move easier, you can bend your knees slightly. To make the move more advanced, you can perform a single leg Reverse Plank.
Here are some other amazing plank variations (some of which overlap the ones I’ve discussed above).


