The Benefits of Walking
People often act like WALKING isn’t really that great. They act like it sort of doesn’t count.
But walking is an important part of any healthy lifestyle.
Actually I think walking is often overlooked as an essential part of being healthy because of our belief that we have to do MORE to be healthy or lose weight.
But as I’ve repeated almost every day recently, “More isn’t always better. Sometimes LESS is actually MORE.”
In a society where we are constantly told to do MORE when it comes to a healthy lifestyle – diet more, workout more – could the push to do MORE actually be causing us to get worse results?
I think the answer is a big, “YES!”
I mean think about it. You are told to eat fewer calories. To cut out more foods. To DIET MORE.
But sometimes doing more, cutting out more, when it comes to diet can actually hinder your results.
Just this week I talked about the importance of fueling your activity level – about eating more and dieting when your body needs it. Restricting too much can hinder your results just as much as doing nothing can. Again…More isn’t always better.
Same goes for working out.
Overtraining isn’t some myth. It is actually easier to overtrain than you would even think. And more people than you would expect are actually training too much!
Exercise is meant to improve health, aid in fat and weight loss and reduce injury, aches and pain, and fatigue…Yet when you do too much, you do exactly the opposite!
So often you read about how you have to exercise more. Or you see your weight loss progress stall and instantly think you need to put in more hours at the gym. Or up your intensity.
TOO MUCH CAN HAVE NEGATIVE EFFECTS!
Often we find it easier to do more than to reassess and try something simpler. I find a lot of clients need to feel a certain way after their workout to feel like they “worked.” They need to be out of breath. Or feel like they are going to puke. Or have sweated a certain amount to feel like the did ENOUGH.
But that attitude is exactly what gets people into trouble. That attitude is what makes people ignore some of the best diet and exercise programs and activities out there for them!
That attitude is what causes people to end up struggling a lot more to become healthier, fitter, stronger, and leaner than they need to.
And one of those activities that is often overlooked as an essential part of a healthy lifestyle is WALKING!
Many people skip walking in favor of activities like running that burn more calories and help them FEEL like they’ve gotten a workout.
They skip walking because they don’t realize how much bang for their buck they really get with walking. All they consider is calories in vs. calories out or working out as hard or as much as they can.
But walking is a great exercise and an important part of a healthy lifestyle and even a weight loss program.
Instead of keeping it simple, people do two-hour workouts. They include 15 different exercises and do 100s of reps. They take themselves to the max every single workout.
But if you break your muscles down every day, you aren’t going to reap the benefits of your workouts! Workouts break your body down so you can become stronger. But doing MORE breaking down, if you don’t take enough time to rebuild, is really just wasted effort.
And rest is when you REBUILD.
Your body can’t go at 100% every single day. You can’t lift heavy or run hard every day. Your body needs workouts of varied intensities. Your body NEEDS easy days.
Walking can be a great lower intensity activity you can use as active recovery. It can be a great way to MENTALLY and PHYSICALLY recover!
And we’ve all heard that if we move more, we will be healthier.
This doesn’t mean going and doing longer workouts. And it doesn’t mean doing hours of intense cardio.
Guess what is a great way to move more though!?!
Walking! It allows us to move more without wearing our bodies down and overtraining!
Walking is one of those activities that we see as “less bang for our buck.” But it is truly one of those exercises where LESS IS MORE.
Yea…maybe you don’t get the same calorie burn as an hour of intense exercise. But walking means less stress. It means better sleep. It can enhance your move. It can help you fight against disease. It allows your body to recover and rebuild. It can mean a lot of great health benefits not only because of the activity, but also because you can be relaxed and social with it while even soaking up some sun!
And all of these things lead to better health. All of these things mean that you will get MORE out of the time you do spend doing higher intensity workouts.
Walking is often overlooked as EXERCISE but trust me, it is the one exercise that EVERYONE needs to be doing no matter their age or fitness level.
Right now too many people suffer from the attitude that MORE IS BETTER – more restriction, more intense, longer workouts.
But if you want great results, LESS IS MORE.
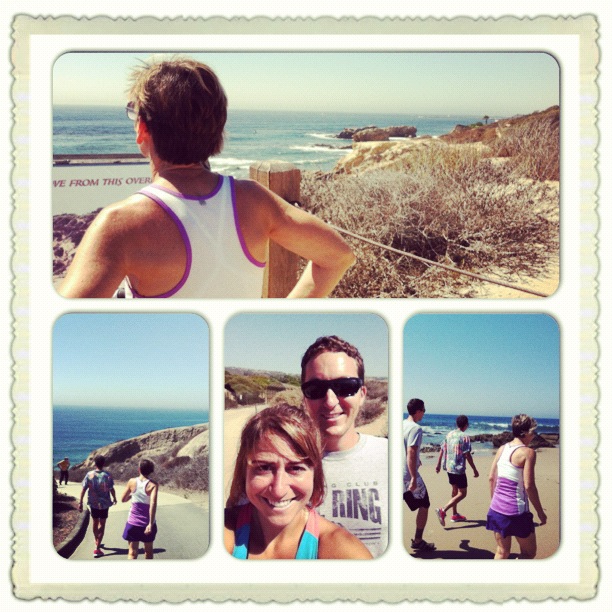
Do you go for walks? Maybe you should go out this weekend and soak up some sun!
Summer Sprint Workout
I’ve mentioned this numerous times before, but the only running I enjoy doing is sprinting.
And when the sun is out, I love getting outside to workout.
So in honor of this beautiful Thursday, here is a great sprint workout to do outside!
This workout is also one of the few that I do that includes crunch-like moves. They are almost like an active break between the sprints.
The key with this workout is to go all out when you are working and make sure your take time to recover. Start with two or even three times the rest and work your way down to equal rest to work. Doing this workout with a partner is a great idea because you can rest while they complete all the exercises and then you can work while they rest!
Below is a video demonstrating all of the crawling and crunch exercises for the sprint workout.
Summer Sprint Workout:
Complete 3-5 rounds of each circuit. Beginners may need 2-3 times the rest while more advanced exercisers should keep an equal work to rest ratio.
Sprint Circuit #1:
3-5 rounds of the following 3 exercises. Do not rest between the 3 exercises! Rest once all three are completed!
4 cone suicide, 1 round (farthest cone should be about 50ft away from start)
Forwards Crawl, Backwards Crawl (down to farthest cone and back)
Cherry Bombs, 10 reps
Rest and repeat. These rest intervals should be as close to equal work to rest as you can make them although beginners may need more rest to start.
Rest for 1-3 minutes after completing 3-5 rounds of the circuit above. Then move onto the second circuit.
Sprint Circuit #2:
3-5 rounds of the following 3 exercises. Do not rest between the 3 exercises! Rest once all three are completed!
4 cone suicide, 1 round (farthest cone should be about 50ft away from start)
Lateral Crawls (down to farthest cone and back)
Plank Hip Dips, 10 each side
Rest and repeat. These rest intervals should be as close to equal work to rest as you can make them although beginners may need more rest to start.
Rest for 1-3 minutes after completing 3-5 rounds of the circuit above. Then move onto the third and final circuit.
Sprint Circuit #3:
3-5 rounds of the following 3 exercises. Do not rest between the 3 exercises! Rest once all three are completed!
4 cone suicide, 1 round (farthest cone should be about 50ft away from start)
Circle Crawls, 3-5 circles each way (Beginners do 3, advanced do 5. Make sure to alternate directions each time or you will get very dizzy. Pretend your belly button is attached by a string to the ground and circle your hands and feet around that spot.)
Sit Thrus, 5-10 reps each side (5 for beginners, up to 10 per side for advanced)
DONE!
Enjoy!
Calorie and Carb Cycling – What does your body NEED?
I got into an interesting discussion last night with clients about diet and what they SHOULD be eating every day. Women especially seem to get very obsessed with restricting their calories when they are trying to lose weight.
My simple answer when they asked me what they should be eating and how many calories they needed was:
Your body’s needs change daily.
Different meals for different days.
They of course rolled their eyes at me and shook their heads because they knew I loved giving that very vague answer.
Some days you are super active and require more fuel while other days you aren’t as active and don’t need as much. Some days you are super hungry while other days you aren’t.
Yet so many people restrict their calories (and their carbs) to the exact same level each and every day.
And that maybe why they aren’t getting the results they want.
You need to fuel your body’s needs. And those needs aren’t the same day-to-day.
If you do an intense workout, YOU ARE GOING TO NEED TO EAT MORE. If you deprive yourself of food when your body needs it, you are going to hinder your progress – be it weight loss or strength gains.
Just like if you eat too much on days when you aren’t active you are going to hinder your progress.
Eat when you are HUNGRY.
People are often shocked when I say this, but…IF YOU AREN’T HUNGRY DON’T EAT! And if you are…THEN EAT!
There is really no most important meal or the day. If you aren’t hungry for breakfast, then don’t eat it!
And if you are hungry at 10 p.m., EAT!
You aren’t going to get fat just because you ate after a certain time of night. If your body needs the fuel, it will use it no matter when you eat. It isn’t like your metabolism decides to just shut off because it is 8 p.m.
Your body is pretty good at telling you what it needs.
You just need to learn how to listen because most people don’t really pay attention. They mistake boredom for hunger or even thirst for a need for food. They can also get caught up in thinking they need to eat every few hours or their metabolism will just shut off so they force down food even when their body isn’t really asking for it.
So how do you learn to listen to your body? How do you know when to cycle your calories and carbs?
HOW TO LISTEN TO YOUR BODY:
Think before you eat. It’s really that simple. For example….If you just ate like an hour ago (and it was a filling healthy lunch) and you are sitting at your computer doing some boring work and are struck by a desire to just eat, ask yourself, “Am I hungry or am I bored?” I’m guessing more often than you know, your answer will be BORED. Maybe try drinking some water before you dive in. Dehydration is also another common trigger of “hunger pangs.” And so is stress. Think before you eat.
While I know many people may be shocked by what I will say next….Fasting can be a great way to get in tune with your body. I’m not suggesting you start starving yourself, but occasional intermittent fasts can be a great way to realize how often you eat for reasons unrelated to hunger. I found I became way more in tune with my body when I did intermittent fasting.
I no longer NEED to eat at certain times. And some days I don’t eat till late in the afternoon while other days I need to eat something the second I get up.
The point is though that I can RESPOND to my body’s NEEDS. I don’t just have to eat because I’m conditioned to mentally want something at a certain time of day.
Another great way to get in tune with your body is to keep track of your diet, activity level, emotions and lifestyle.
I know this sounds super annoying, but it can be super helpful if you are really struggling to make a healthy lifestyle stick. There are going to be common trends. Emotions may trigger eating binges. Or you may find out that on certain days when you were more active and ate more carbs you had better results than on days when you worked out intensely yet forced yourself to continue to restrict your carb intake.
Tracking reveals patterns so that we aren’t just guessing at what is going on. Guessing generally leads to frustration and failure.
WHEN/HOW TO CARB AND CALORIE CYCLE:
To put it simply as I stated above – eat when you are hungry and listen to what your body craves.
If you don’t workout, your body won’t need the carbs and calories that it does on days when you do workout. And more intense workouts, especially cardio workouts that really deplete your glycogen stores, are going to require more carbs and more calories.
Respond to your activity level and what your body is craving. (And just because your body is craving carbs doesn’t mean you have to give in and go eat a bunch of crap. There are lots of ways to do a carb re-feed without eating unhealthily.)
Plan days of low carb (around 50 grams) for days when you don’t workout or workout lightly. If you have a super hard intense workout, don’t be afraid to up your carbs to even 200-300 grams. Keep the carbs healthy, but fuel the workout.
While you don’t want your carbs to be up at 200g every day (because if you need that many every day you are probably OVERTRAINING), having a few days where you do get up over 150g is ok and even go.
Also, play around with carb timing. Have some carb refeed days and then have some days where maybe you just have carbs AFTER your workout when your body will quickly grab them up to rebuild.
Generally I break down my diet into three days.
Low day – Around 50 grams of carbs, high fat, high protein.
Medium day – Around 100-120 grams of carbs, medium/low-fat, high protein
High day – Around 200-300 grams of carbs, low-fat, medium protein
This basic plan works for me and I always feel energized.
But there are lots of ways to carb cycle – you can do whole day refeeds or just specific meal refeeds after your workouts.
I must say that there are times where I fast, workout and then basically just have carbs after my workouts and that is my refeed for the day.
The point is to listen to your body and not be stuck believing that the only way to get results is to restrict your diet completely.
While low carb can be a great way to kick-start your diet and may even have help you have great success, you may just find that carb and calorie cycling is what you need to get over that last little hurdle. Sometimes a little more can be better when it comes to weight or fat loss.
And while I have no problems running a half marathon fasted and after a week of low carb, you may just find that your body requires MORE carbs to fuel your activity level and help you reach the strength and performance gains you desire.
Listen to your body and don’t be afraid to eat more calories or carbs especially when your body is asking for them! You may just find your goals are easy to reach when you aren’t so militant about restriction.
Half Marathon Training – It’s all in your head
I want to start this post by giving a BIG shout out to Jodie for completing her first half marathon this weekend.

She overcame huge hurdles on Sunday to finish 13.1 torturous miles. And her victory, her determination and perseverance in the face of some pretty sucky circumstances inspired me to write this post.
Take a second right now and think about your training, be it training for a race, a sport, life (actually most importantly life) or a powerlifting competition.
How often do you train in pretty comfortable circumstances? In a warm gym. Or on a route you know and may have even run before. With music you like to listen to that motivates you. Following your normal routine surrounded by people and places you are fairly familiar with.
Most of us probably always train in pretty comfortable surroundings following our own basic routine.
I mean why wouldn’t we? I know I generally do.
But guess what…A lot of unexpected crap can pop up when it comes to competition. We all acknowledge this, yet rarely do I really ever hear or read about people TRAINING for the unexpected crap. High level athletes, yes, but weekend warriors, no (and the crazy part is, those of us training for LIFE, for HEALTH, encounter more unexpected stuff than anyone else, yet we train for it the least!).
And when it comes down to competition time, guess what matters more than all the hours you spent strengthening your body?
How strong your mind is.
While training, even under ideal circumstances can still make you mentally tougher, it doesn’t necessarily make you ready to handle crappy situations when they pop up unexpected during competition.
Because unfortunately, they sometimes do. And when those situations arise, it doesn’t matter how strong our body truly is. All it matters is whether or not our mind can carry us through when the going becomes so much worse than we could have foreseen.
This past Sunday, Jodie had the perfect storm. Mid-race, on a course much tougher than expected, Jodie’s ipod died. Just completely shut off.
And when you’ve trained day and in and day out with your music that is a huge blow. Who would ever expect your fully charged, brand new phone to suddenly shut off!?!
Mentally the shock of something like that happening can be a death blow. Especially when you still have 6 more miles to go and the last few are on a hill that people the day before kept complaining and whining about.
But Jodie pushed on.
Then what do you do if your body chooses that day to rebel? You’ve trained hard for months. You are physically strong enough, but your stomach just doesn’t seem to care.
What do you do then when you have no music to distract you (like you’ve had ever run for the past few months while training), your stomach is telling you to stop and your body is fatigued from unexpected hill after hill?
It all comes down to how strong your mind is.
And all I can tell you is, I ran with one strong lady on Sunday. Up a hill that felt like it lasted for an hour, Jodie pushed through finishing her half marathon with no music and a body in rebellion.
She was a bit disappointed when we finished because she wanted a bit more out of the race. And then she turned said to me, “I think I should have trained on more hills.”
While yes, a bit more hill training could have made that last hill feel a little less awful, I don’t think hill training was what was missing from our program.
The hill did deliver a blow, but the real battle started when her music shut off. All she then had were her thoughts and a mind that now had nothing to distract it from the pain building in her body.
It made me realize that what had been missing from our training was a true mental test.
I never once thought of having us run without music. I never once thought of creating a ridiculously, outrageously hard unexpected route.
I never thought of having her train in a way that would mentally make her suffer more than her body was.
I did everything to prepare her for the route we thought we knew we’d be running and the circumstances we thought we’d be running under.
Heck, the only mental training we really did was the few times I forced her to run sore just in case her body didn’t feel perfect the day of the race. That way at least she’d know that she’d done it before feeling worse.
Anyway, the point is, it really doesn’t matter how much you train if your mind isn’t going to be prepared to handle adversity. And while I was so proud of Jodie for the mental strength she displayed, a bit more mental training could have made yesterday a walk (ok maybe a run) in the park for her even with all the crap that popped up.
And just because you aren’t training for a race doesn’t mean you can skip the mental training.
Adversity doesn’t just pop up in competition. It happens in everyday life.
We are truly only as strong as our minds believe we are. It’s as simple as that.
So while I’m not suggesting you force yourself to go outside and deadlift in the snow to prepare for unforeseen circumstances at a powerlifting competition, I am suggesting that you occasionally force yourself to train in circumstances that challenge your mental strength.
What I am suggesting is that, while you may get into a routine and generally train in that routine, you every so often force yourself to deviate from that routine just so you know that you don’t NEED the routine to succeed.
Like maybe if you always run with music, you try a few runs without it just in case your iphone decides to stop functioning mid-race…
Training can’t just strengthen your body, it must also push your mind.
Because as I said before…
YOU ARE ONLY AS STRONG AS YOUR MIND BELIEVES YOU ARE!
Congrats again Jodie. I want to say how proud of you I am for finishing that half-marathon strong!
The Burpee And The 100 Day Challenge
The other day I was talking to Erin, one of my beautiful Boston lifting ladies, and she mentioned THE 100 DAY BURPEE CHALLENGE.
Generally I don’t participate in challenges like that because they require you to do the same move day after day after day and I feel like they can interrupt your other training. And they really don’t get you any specific results except that you are moving every single day.
However, I couldn’t pass up the opportunity to do a fun challenge with friends especially since I will be seeing them shortly and we can do a few days of the challenge together.
While challenges like these won’t help you reach weight loss or strength goals, they can occasionally be fun. And shoot, if they get you moving well then by all means, do them! (Just don’t make them the basis of your training program…PLEASE!)
Anyway, when starting this challenge, I began to think about the other burpee variations out there that I use. While I could probably name about 100 variations (including the box jump burpee and the pull up burpee), I’ve chosen five to highlight below that I like to use.
5 Burpee Variations
1. The Modified Burpee – This is a beginning variation of the burpee. To do a modified burpee, stand up nice and tall to start. Then bend over and place your hands on the ground right in front of your feet, which are a few inches apart. Jump your legs back so that you are in a high plank (top of the push up) position. Jump your feet back into your hands, stand up and jump up in the air. The beginner burpee does not include a push up at the bottom. To regress this move further, you can step back into the high plank and then step back forward. You can also remove the jump up at the top and instead just stand up nice and tall and reach your hands overhead.
2. The Full Burpee – This is a full burpee with a push up. To do a full burpee, stand up nice and tall. Then bend over and place your hands on the ground about hip-width apart a slight bit in front and to the side of your feet. Jump your legs back and then perform a push up, dropping your chest to the ground. Push back up to the high plank and then jump your feet back in and come back to standing. Jump as high as you can at the top. If you are going to add in the push up, PERFORM A PERFECT PUSH UP! No worms or butts up in the air during the push up.
3. The Burpee Sit Thru – I like doing this variation without the push up since it allows you to move faster and do more sit thrus. Stand up nice and tall. Bend over and put your hands on the ground and just jump your feet back a little so that you are in a nice crawling position (hands about under shoulders and knees about under your hips). Then perform one sit thru to each side. To perform the sit thru, lift one hand and kick the opposite leg through so that you are basically sitting on the ground. Swing back to the crawl position and repeat on the other side. Then stand up and jump up at the top and repeat.
4. The Slider Burpee – This is your basic burpee just done on sliders. To do the slider burpee, place a slider under each foot. Bend down and put your hands on the ground. Slide your feet back to the high plank position. Perform a push up and then slide them back in and stand up. Do not jump at the top. Just stand up and raise your hands overhead. Repeat. To make the move easier, remove the push up. To make the move harder and a bit slower, perform a push up followed by bringing the knee in to the outside of the same elbow and then another push up followed by the opposite knee. Then slide the feet in and come back to standing.
5. The Beast Mode Burpee – I generally do lower reps with these than I do with the other burpee variations because you are using weights. To do the Beast Mode Burpee, hold a dumbbell in each hand up at your shoulders. Stand with your feet between hip-width and shoulder-width apart. Squat down and then press the weights overhead. After the squat to press, bend over and place the weights in your hands on the ground and jump your feet back into the high plank position. You can then either do a push up and then two plank rows or you can do a push up, row, push up row. Then jump your feet back in and come back to standing. Do not jump up at the end. Just stand up and go back into the squat to press. Please make sure you aren’t lifting the weights back up with your low back as you stand up.
At the top is a video with each of the variations. Thank you Ryan for the music.
Do you use burpees in any of your workouts? If so, what’s your favorite variation?
Have you ever taken on The 100 Day Burpee Challenge?
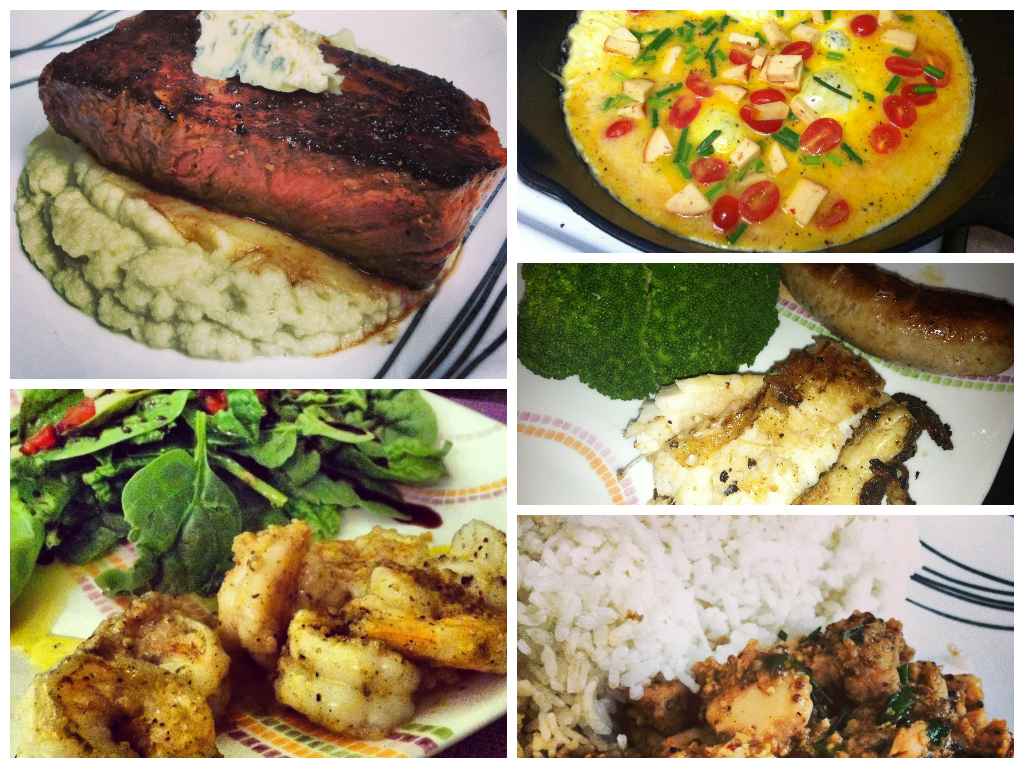
Dinner and Dessert – Cauliflower Fried Rice and Frozen Strawberry Merengue
Desserts are my weakness. But now I don’t eat them very often.
I have a piece of dark chocolate occasionally or some berries, maybe even with a little nut butter. But I never really try to make any “healthy” desserts. I save my cupcakes for cheat days thank you very much. If I want a cupcake, I want the REAL THING.
But the other day, one of Ryan’s students, who’s a chef, told him to try to make a frozen strawberry merengue since it would be healthy.
Of course it being summer and me loving frozen yogurt and ice cream, WE HAD TO TRY IT!
Frozen Strawberry Merengue

I will most definitely never be a food photographer.
Ingredients:
3 Egg whites
1/3 cup sliced Strawberries
Honey or sugar if you want (we did not include this)
Slice the strawberries up. While they will get sliced up and mashed further by the blender, you want them small enough to start.
Add egg whites and sliced strawberries to a standing mixer or bowl and blend. Keep mixing until stiff peaks form.
Scoop into a bowl and freeze. The frozen merengue comes out with a fluffy almost snow cone-ish icy texture.
It is super good! Obviously this won’t be super sweat unless your strawberries are so you can add sweetener if you want.
A great low cal, healthy dessert and perfect for our high carb days since we do lower fat on those days!
And since I’m cauliflower obsessed, and love our homemade fried rice as well, I wanted to share this delicious dinner to go along with your dessert!
Cauliflower Fried Rice

Ingredients:
1/2 head of cauliflower
1lbs chicken breast
2 eggs
3 garlic chives
4 tbsp Tamari
Garlic, salt and pepper to taste
Rice uncooked cauliflower in a food processor and set aside.
Season chicken and place in a hot skillet coated with a bit of sesame oil.
When chicken is starting to cook, add tamari and chives. (You can add more or less of both depending on your taste.)
When chicken is just about cooked, add cauliflower to pan and then add one egg at a time. Scramble the eggs in the pan and mix in with the cauliflower and chicken.
Serve! And then eat the merengue after…Or along side…Whatever floats your boat!
As one of my clients always says about the cauliflower mash, “The cauliflower tastes like CARBS!” So I guess if you are craving carbs (yes…veggies are carbs but I take it to mean starchy or even maybe bad for you carbs) but don’t want to eat them, this and the cauliflower mash are great options!
Neck and Upper Back Pain Fixes
Let’s face it…Even if we are pretty active, we spend a great deal of time hunched over a computer. Which generally leads to bad posture and upper back and neck pain.
Because most people sit looking at a computer screen all day, muscles get out of their proper alignment. For instance because you hunch over the computer, your upper traps may become active (aka you may be tense a lot with your shoulders up by your ears). If your upper traps are overactive, most likely your lower traps will be underactive. Muscles therefore aren’t working the way they should be.

When muscles aren’t properly aligned and working the way they should be, other muscles compensate, leading to injury.
Below are some great trigger point release, stretches and strengthening moves you can do to alleviate minor aches and pains in your neck, shoulders and upper back. These moves will release and stretch any muscles that would be tight from sitting all day. They will also strengthen those muscles that are underactive.
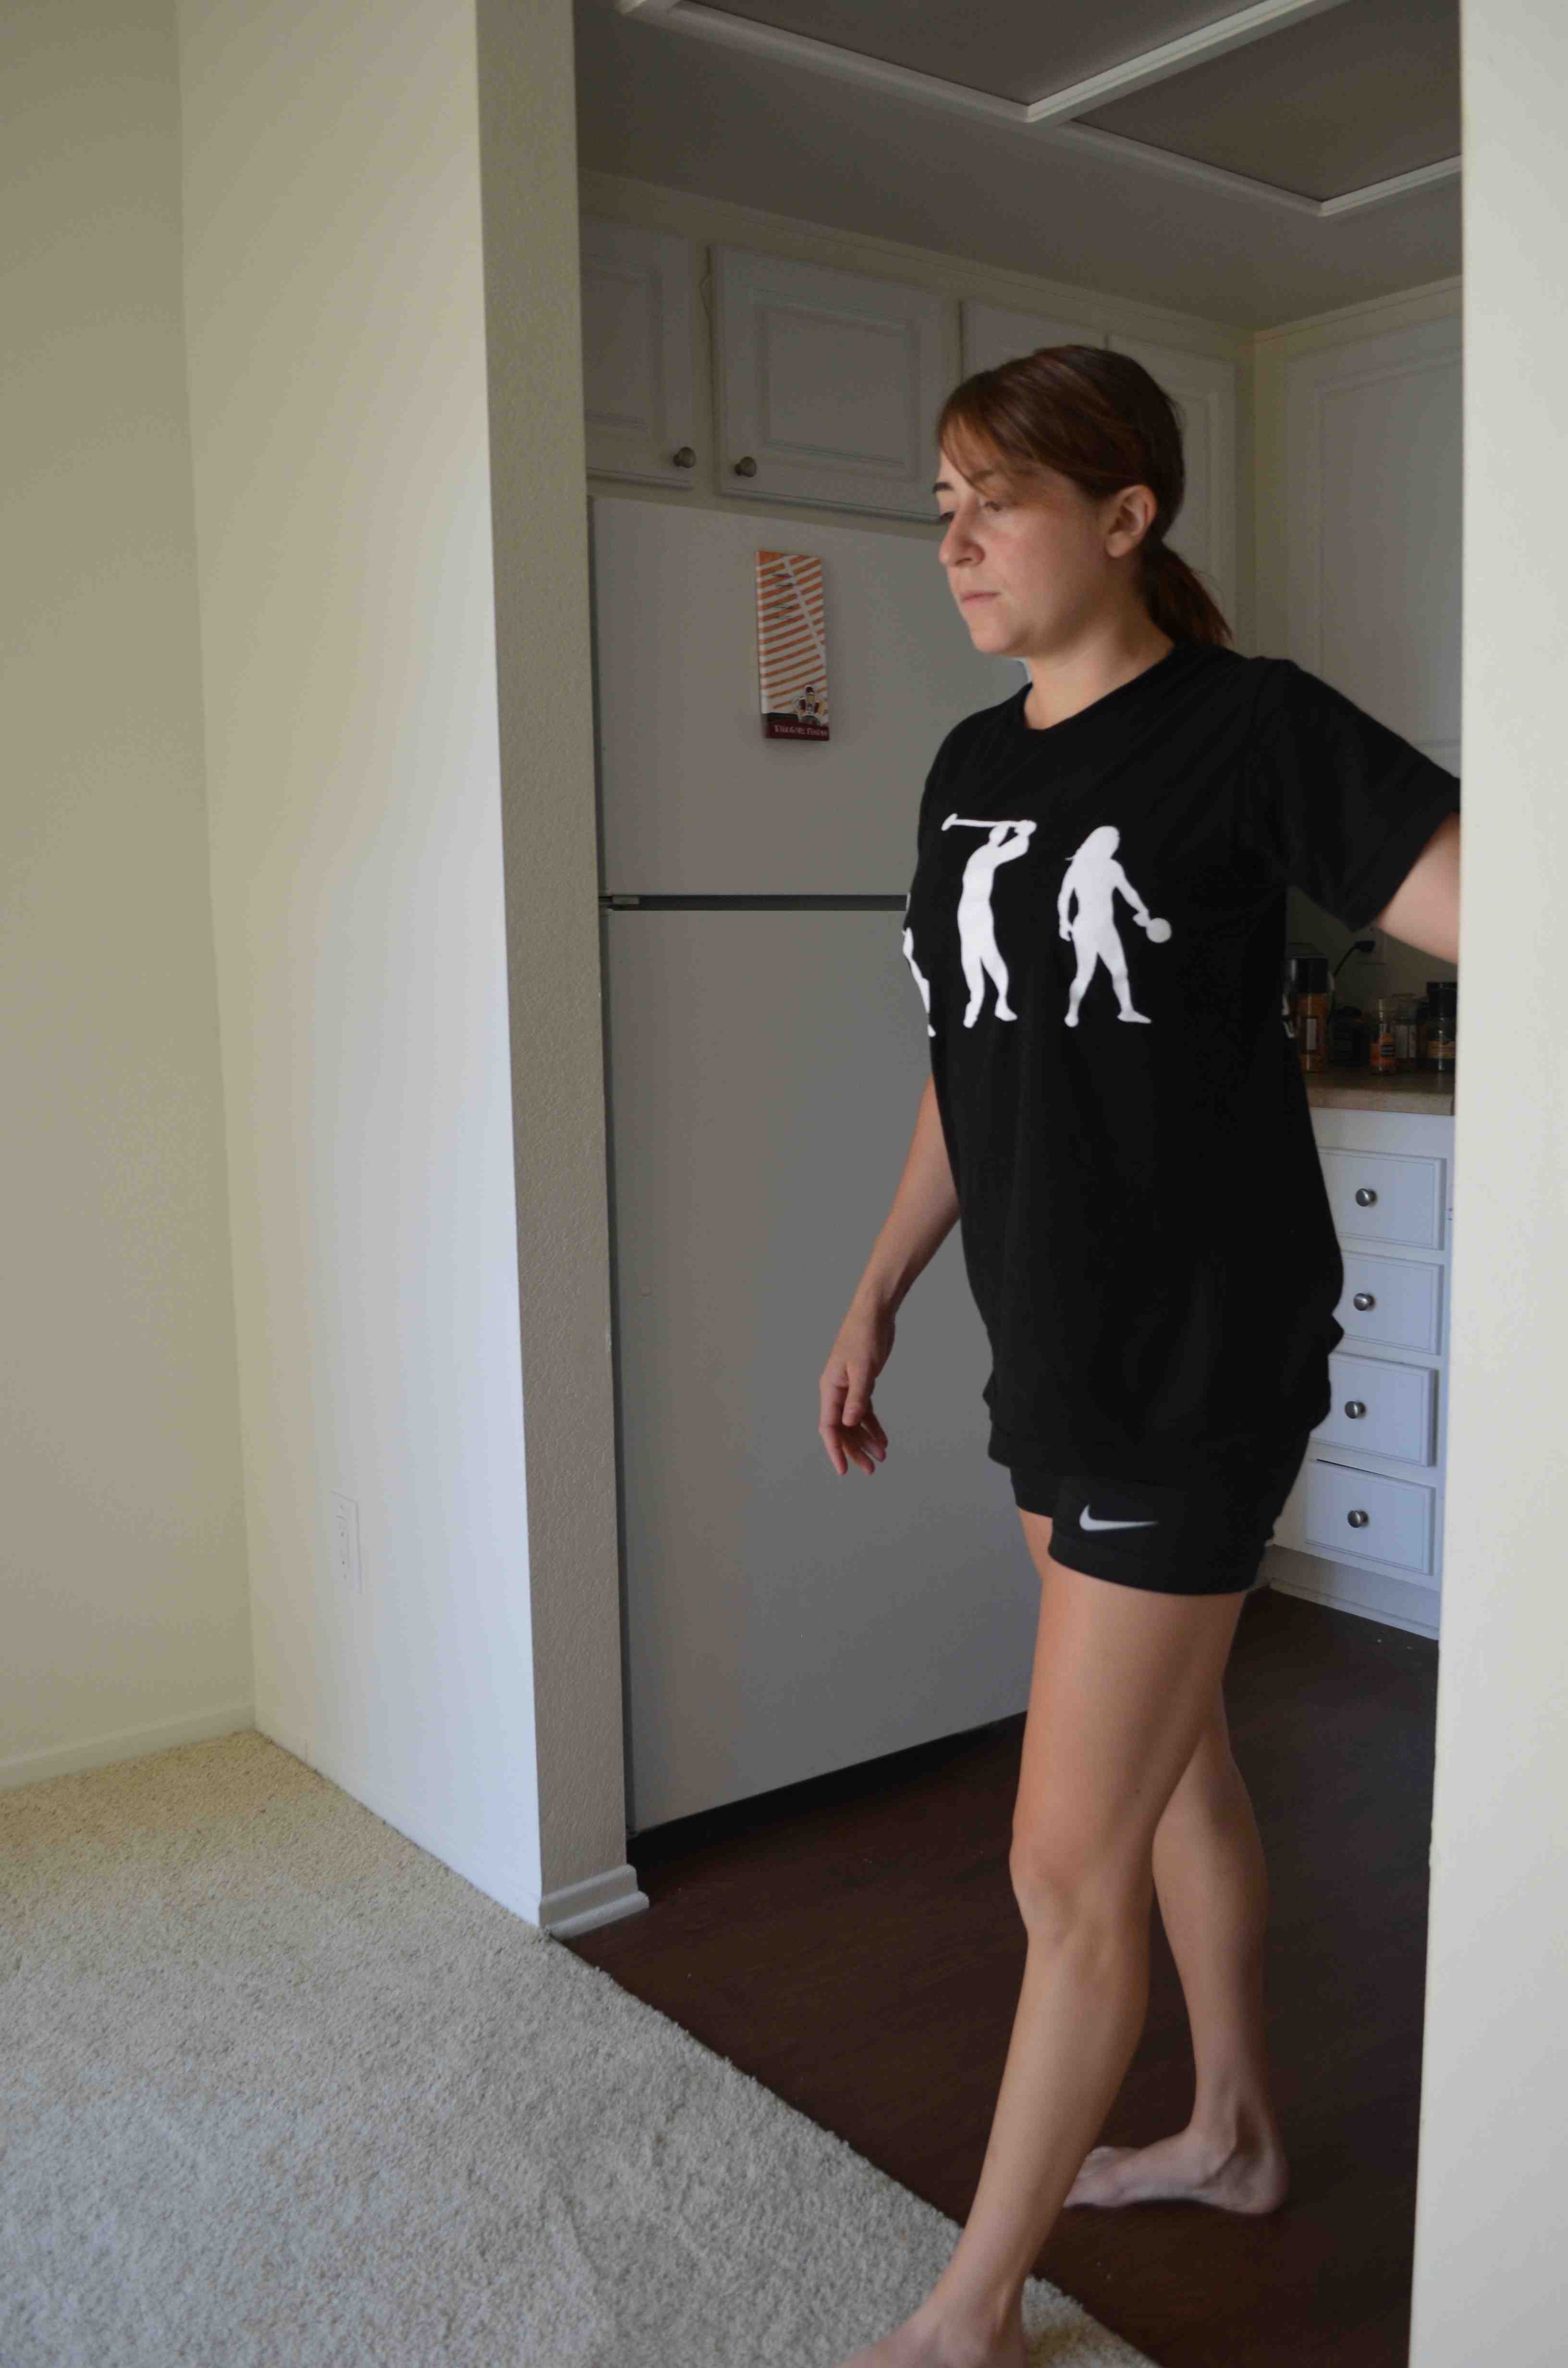
NECK – Be careful when rolling out your neck. Use a very softer ball and stand against a wall with the ball between the wall and your neck. Do not go over your vertebrae. Dig in lightly to any tight spots. Look side to side and up and down to release any trigger points.
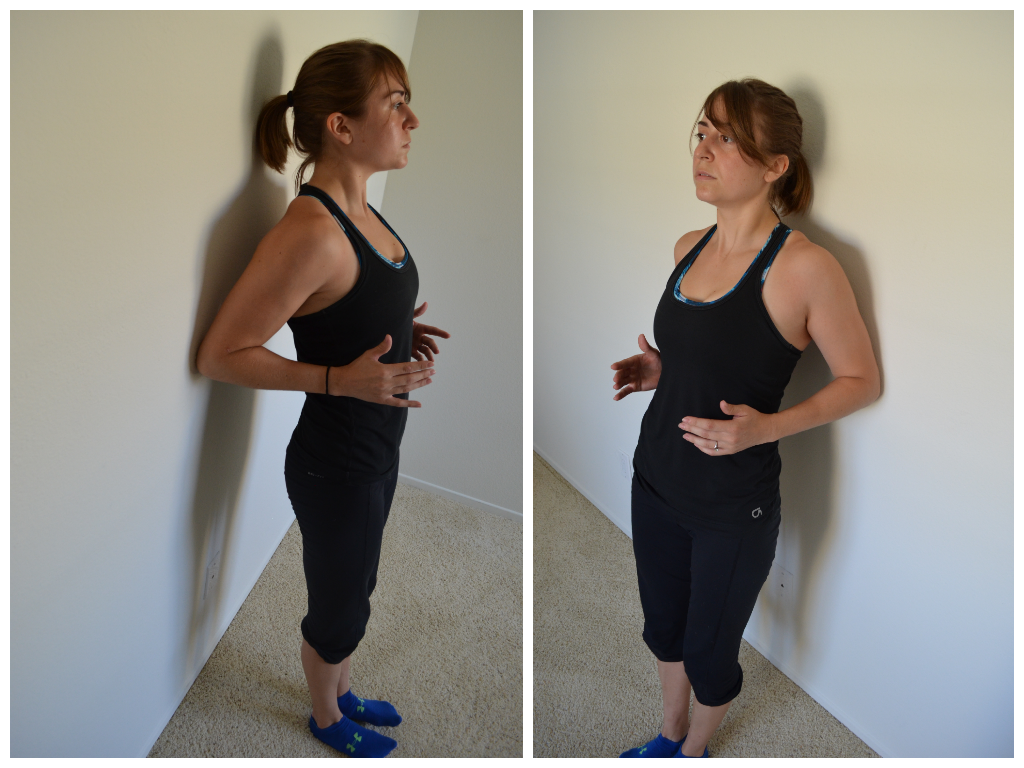
UPPER TRAPS AND SHOULDER BLADES – Stand with your back to a wall. Place a tennis ball right behind your trap (just to the side of your neck). Roll the ball out toward your shoulder and then back in. Then roll it down your shoulder blade and back up. Hold on any tight spots. You can even stretch your neck away from the side of the ball and then relax to help dig out the trigger point. As you work your way down your shoulder blades, you may even cross one arm (the arm on the side with the ball) across your chest to allow you to really work under the shoulder blade. Hold on any tight spots and relax and breathe.
CHEST – A big foam ball works best if you do this on the ground. Take the foam ball and place it in your chest near the shoulder joint, but not on the shoulder joint. Lie face down on the ground with the ball in your chest. Reach your hand overhead and then bring it back down by your side. You can even reach out to the side and then bring your hand back in. Hold on any tight spots. You can also do this standing with a smaller ball against a pole, door frame or corner of a wall into a hallway. Place the ball on the wall in your chest near your shoulder joint. You should put it in the side of your chest that isn’t blocked by the wall so you can stretch your arm out in front of you. Stretch your arm out in front of you at shoulder height. Then raise it over head and lower it back down to the ground. Move the arm around to help dig out any trigger points.
LATS – You can use a foam ball or a ball. I prefer the roller because I can hit my lats and also roll out my upper back and work on thoracic extension. Lie on your side with the roller under one armpit. Rock forward and backward and then move the roller down your side toward your belly button. Work down your lat to about the end of your ribs. Rock forward and backward as you move to really dig out the lats. If you use the blue ball, you can actually start in your chest and then roll the ball under your armpit and up between your shoulder blades. It is a great move if you want to hit your back, lats and chest all in one!

THORACIC EXTENSION – Take a roller and roll out your upper back. Let it roll from about your ribs to your shoulders. You can lean a bit to either side to change exactly where the roller hits. You can also use a ball to roll out your upper back. I like the roller though because after your roll out your back you can do a nice little stretch. With the roller in your upper back, drop your butt down to the ground and then lean back over the roller, trying to drop your head to the ground behind you. Change where the roller is in your upper back and then drop your butt to the ground and extend back over again. Really works on thoracic extension since we seem to be in thoracic flexion for 8 hours a day while sitting in front of the computer screen!
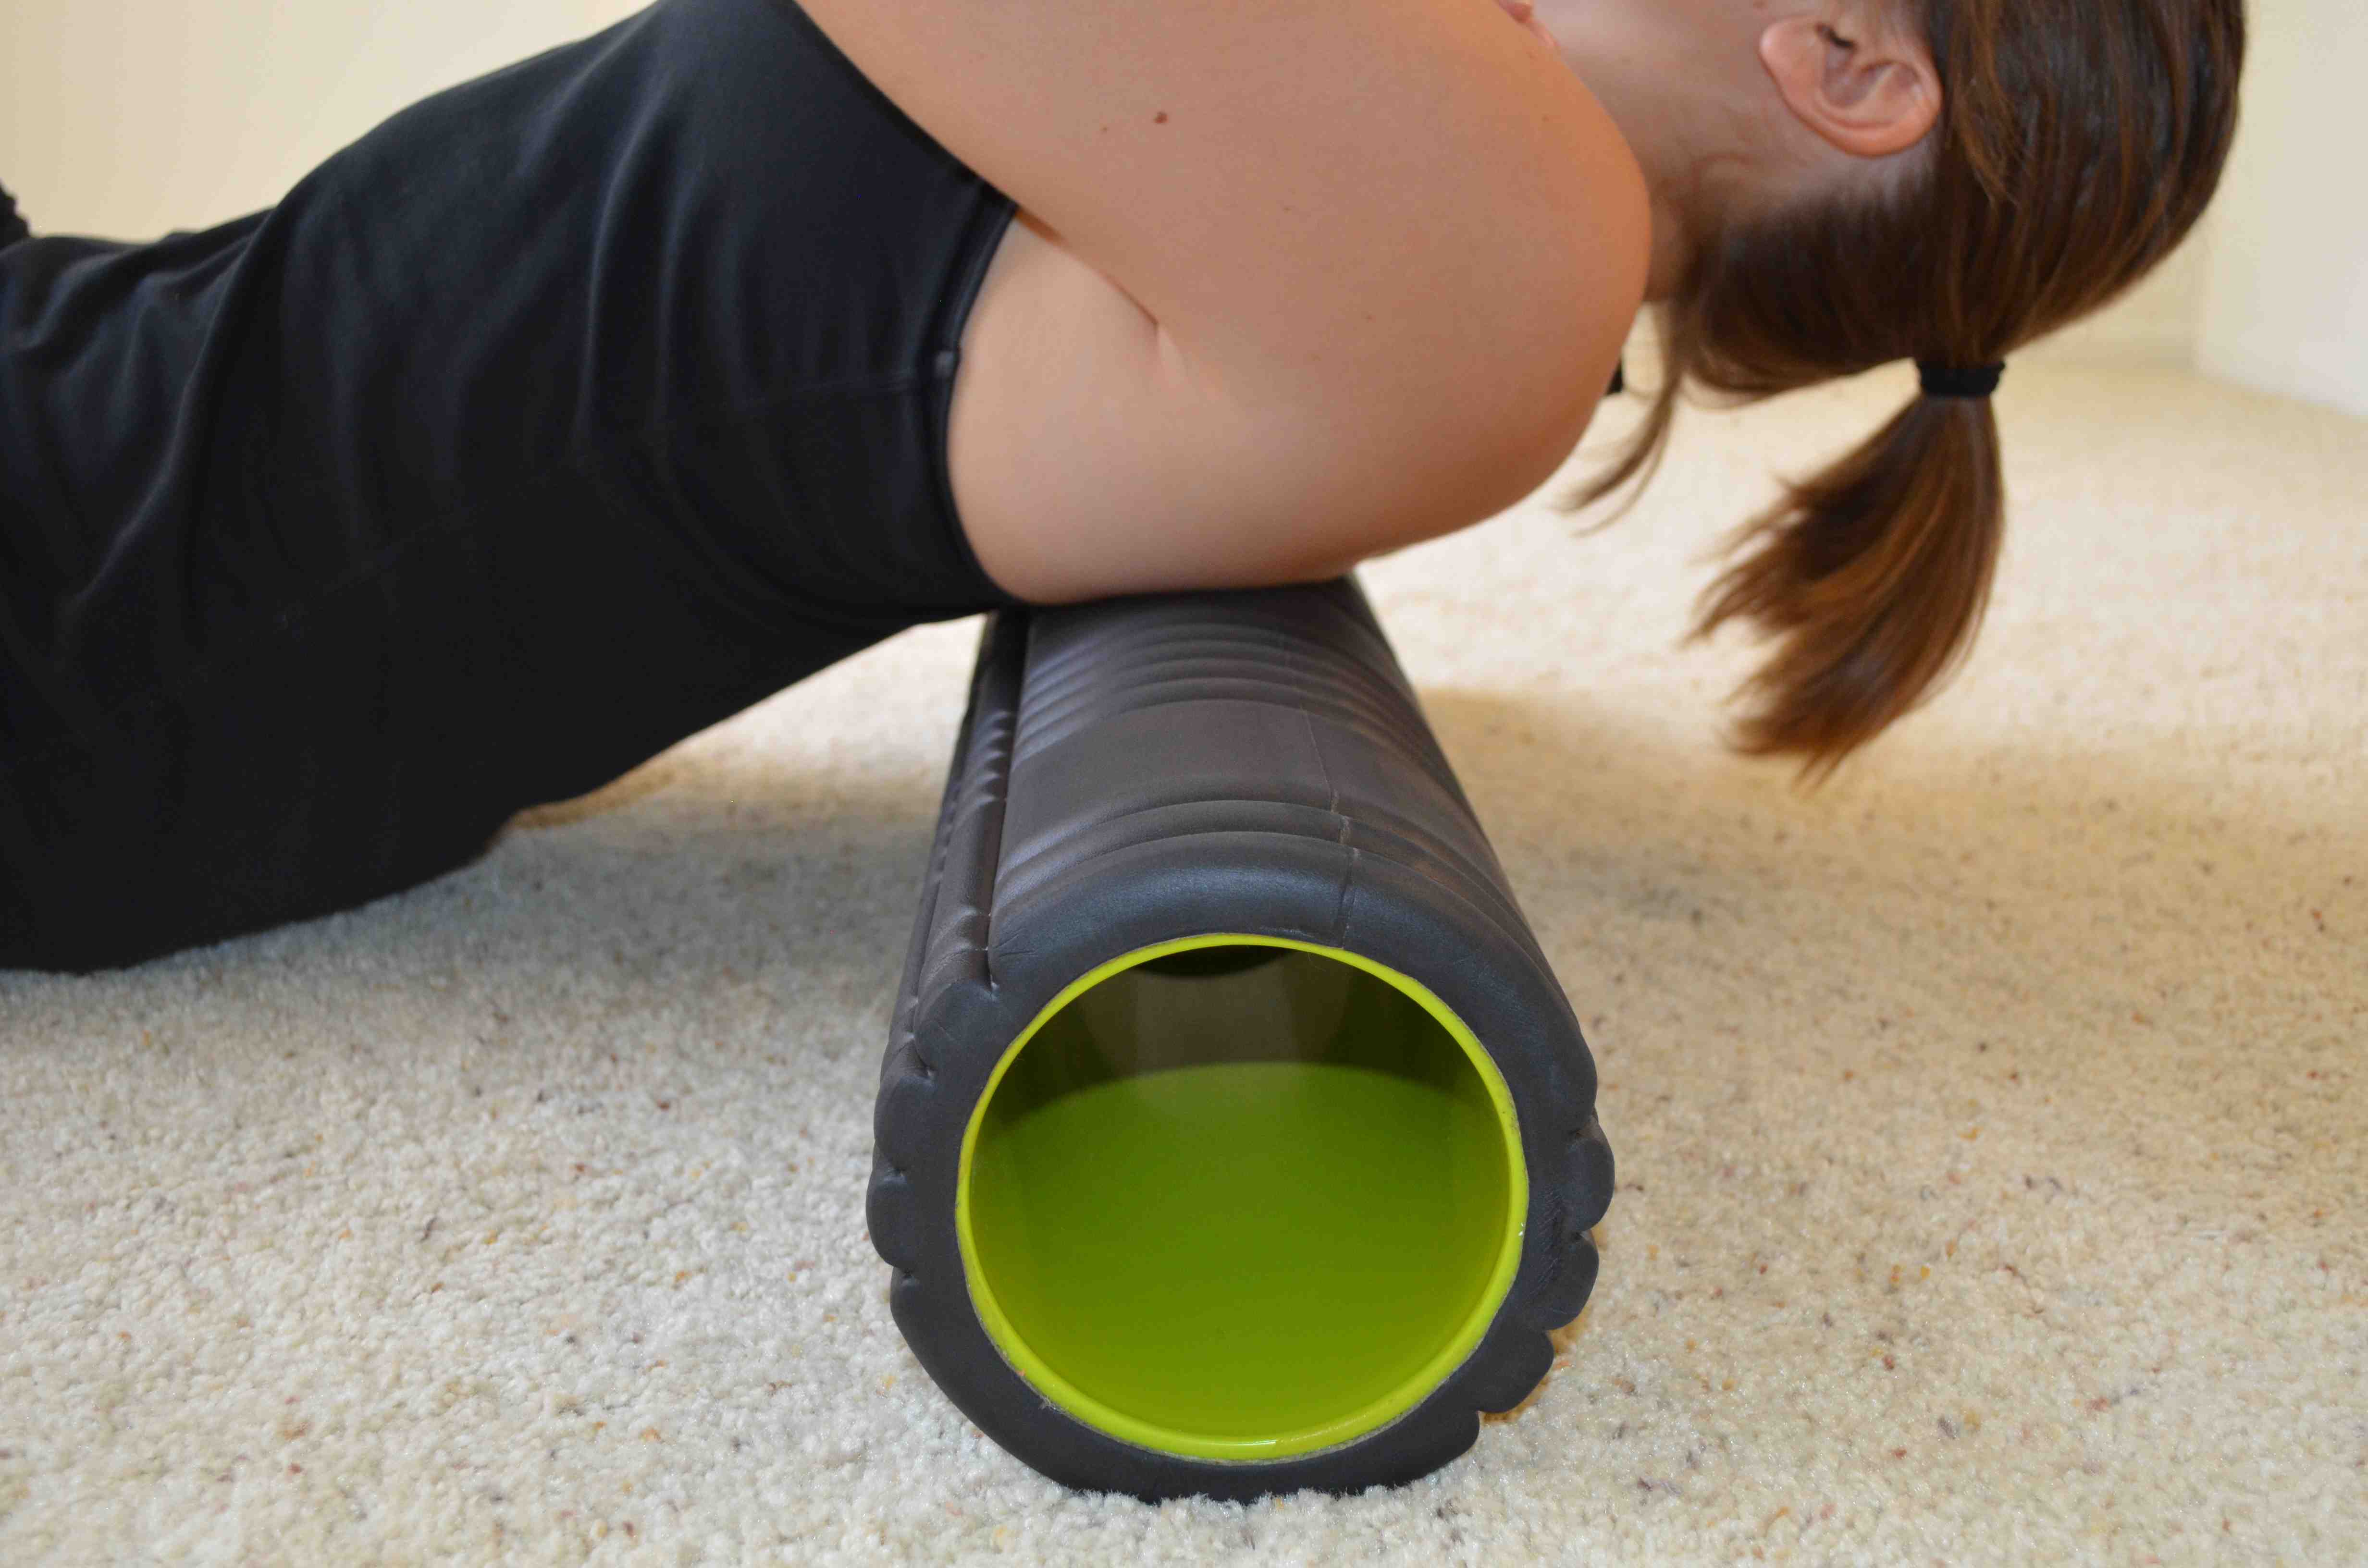
For more great foam rolling techniques, check out the Redefining Strength video library.
STRETCHES
THREE WAY STRETCH – You can do this move seated or standing. Reach one hand behind your back and then grab that wrist with the other hand. Pull the arm behind your back toward the opposite side. Then lean your head to the side you are pulling to. Do not tense your shoulders and bring them up toward you ears. Relax into the stretch. Then change the direction of your gaze. Look up and hold for a second or two. Then look straight ahead. And then look down. Move your chin as you look and not just your eyes. Changing the direction of where you look, will change exactly which muscles in your necks and upper back that you stretch.
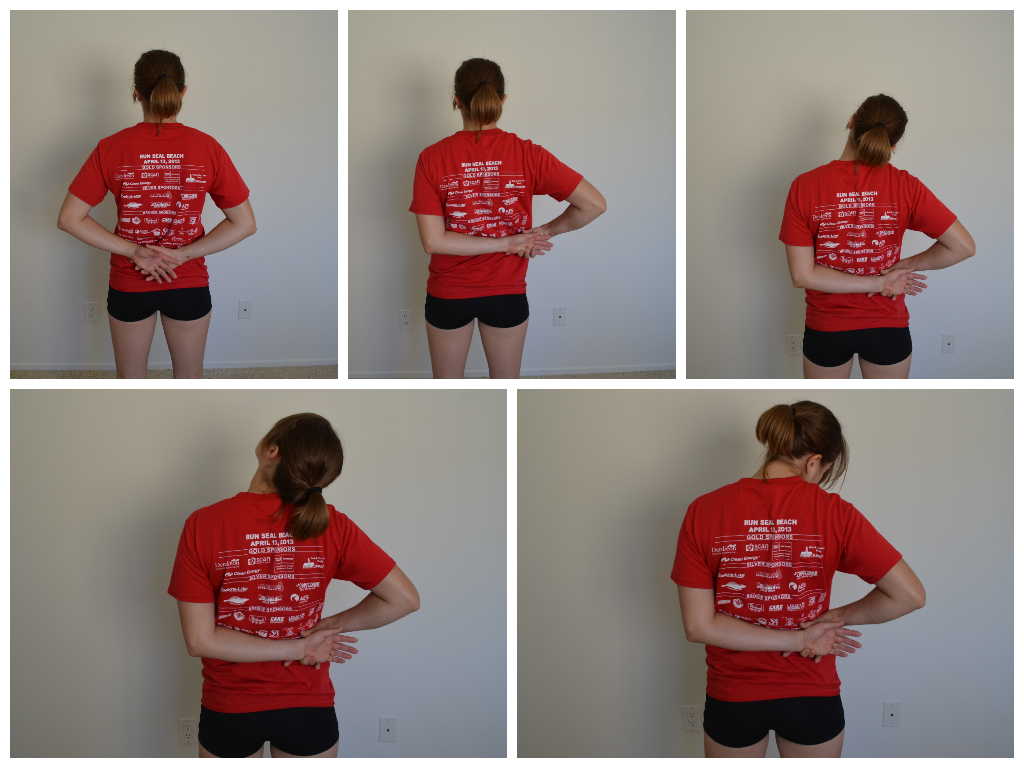
HEAD NODS — There are three types of head nods I like. The “yes” head nod where you look down toward the ground then lean your head back and look up at the ceiling as if doing a big nod yes (move slowly trying to open up your range of motion). The “no” nod where you look side to side, trying to look as far both ways as possible as if you doing a big slow no nod (do not move to quickly and make yourself dizzy). And the “rooster” nod where you pull your chin back in toward your chest as if trying to create a double chin and then you extend your chin back out (it kind of reminds of the rooster head movement). All should be done slowly and with the shoulders relax. If you feel your shoulders creeping up by your ears, stop and relax them. You may even want to slightly reach down toward the ground with your hands to keep them relaxed.
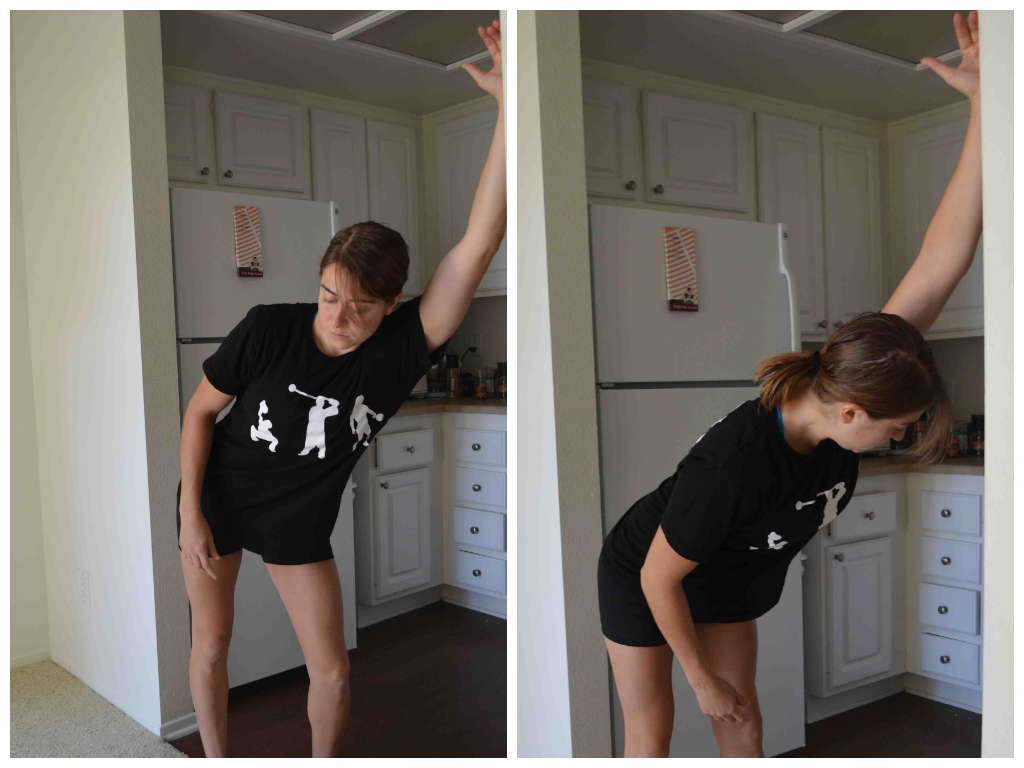
WALL SLIDES – An oldie but goodie, this one works on thoracic flexibility. Stand against a wall with your core tight and your butt and upper back firmly against the wall. Place your forearms against the wall with your elbows bent. Then try to reach your forearms and hands up the wall as far as possible without losing contact with the wall. Don’t let your head, butt or upper back move from the wall either and try to keep your core tight. Slide your hands up and down, increasing the range of motion if you can with each rep.

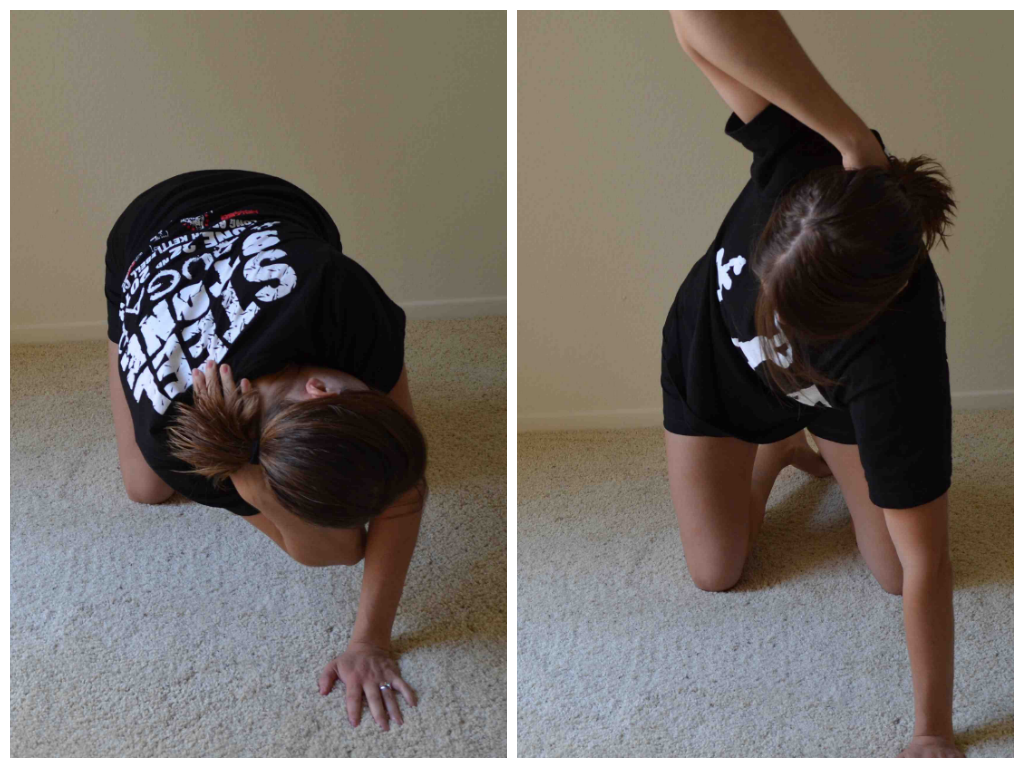
KNEELING THORACIC EXTENSION – On your hands and knees, reach one hand down your neck and spine. Fingertips should be pointing down your back toward your butt. Then rotate your core so that your elbow goes under your arm on the ground. Then rotate open driving the elbow up toward the ceiling. Try to focus on just opening up your back and not really shifting your weight in your lower body. Then rotate back closed and repeat.
CAT/CAMEL – You can do this move standing or on your hands and knees. The basic move is that you round your back as much as possible and then you extend back the other way as much as possible. So on your hands and knees. Round your back up toward the ceiling. Then drop down and arch your back driving your belly button toward the ground and even looking up toward the ceiling with your head. If you do this standing, you will round forward as if hunching over your desk. Even bring your hands and arms forward as you round. Then extend open, opening your arms and even looking up toward the ceiling. Really exaggerate the extension if you can.

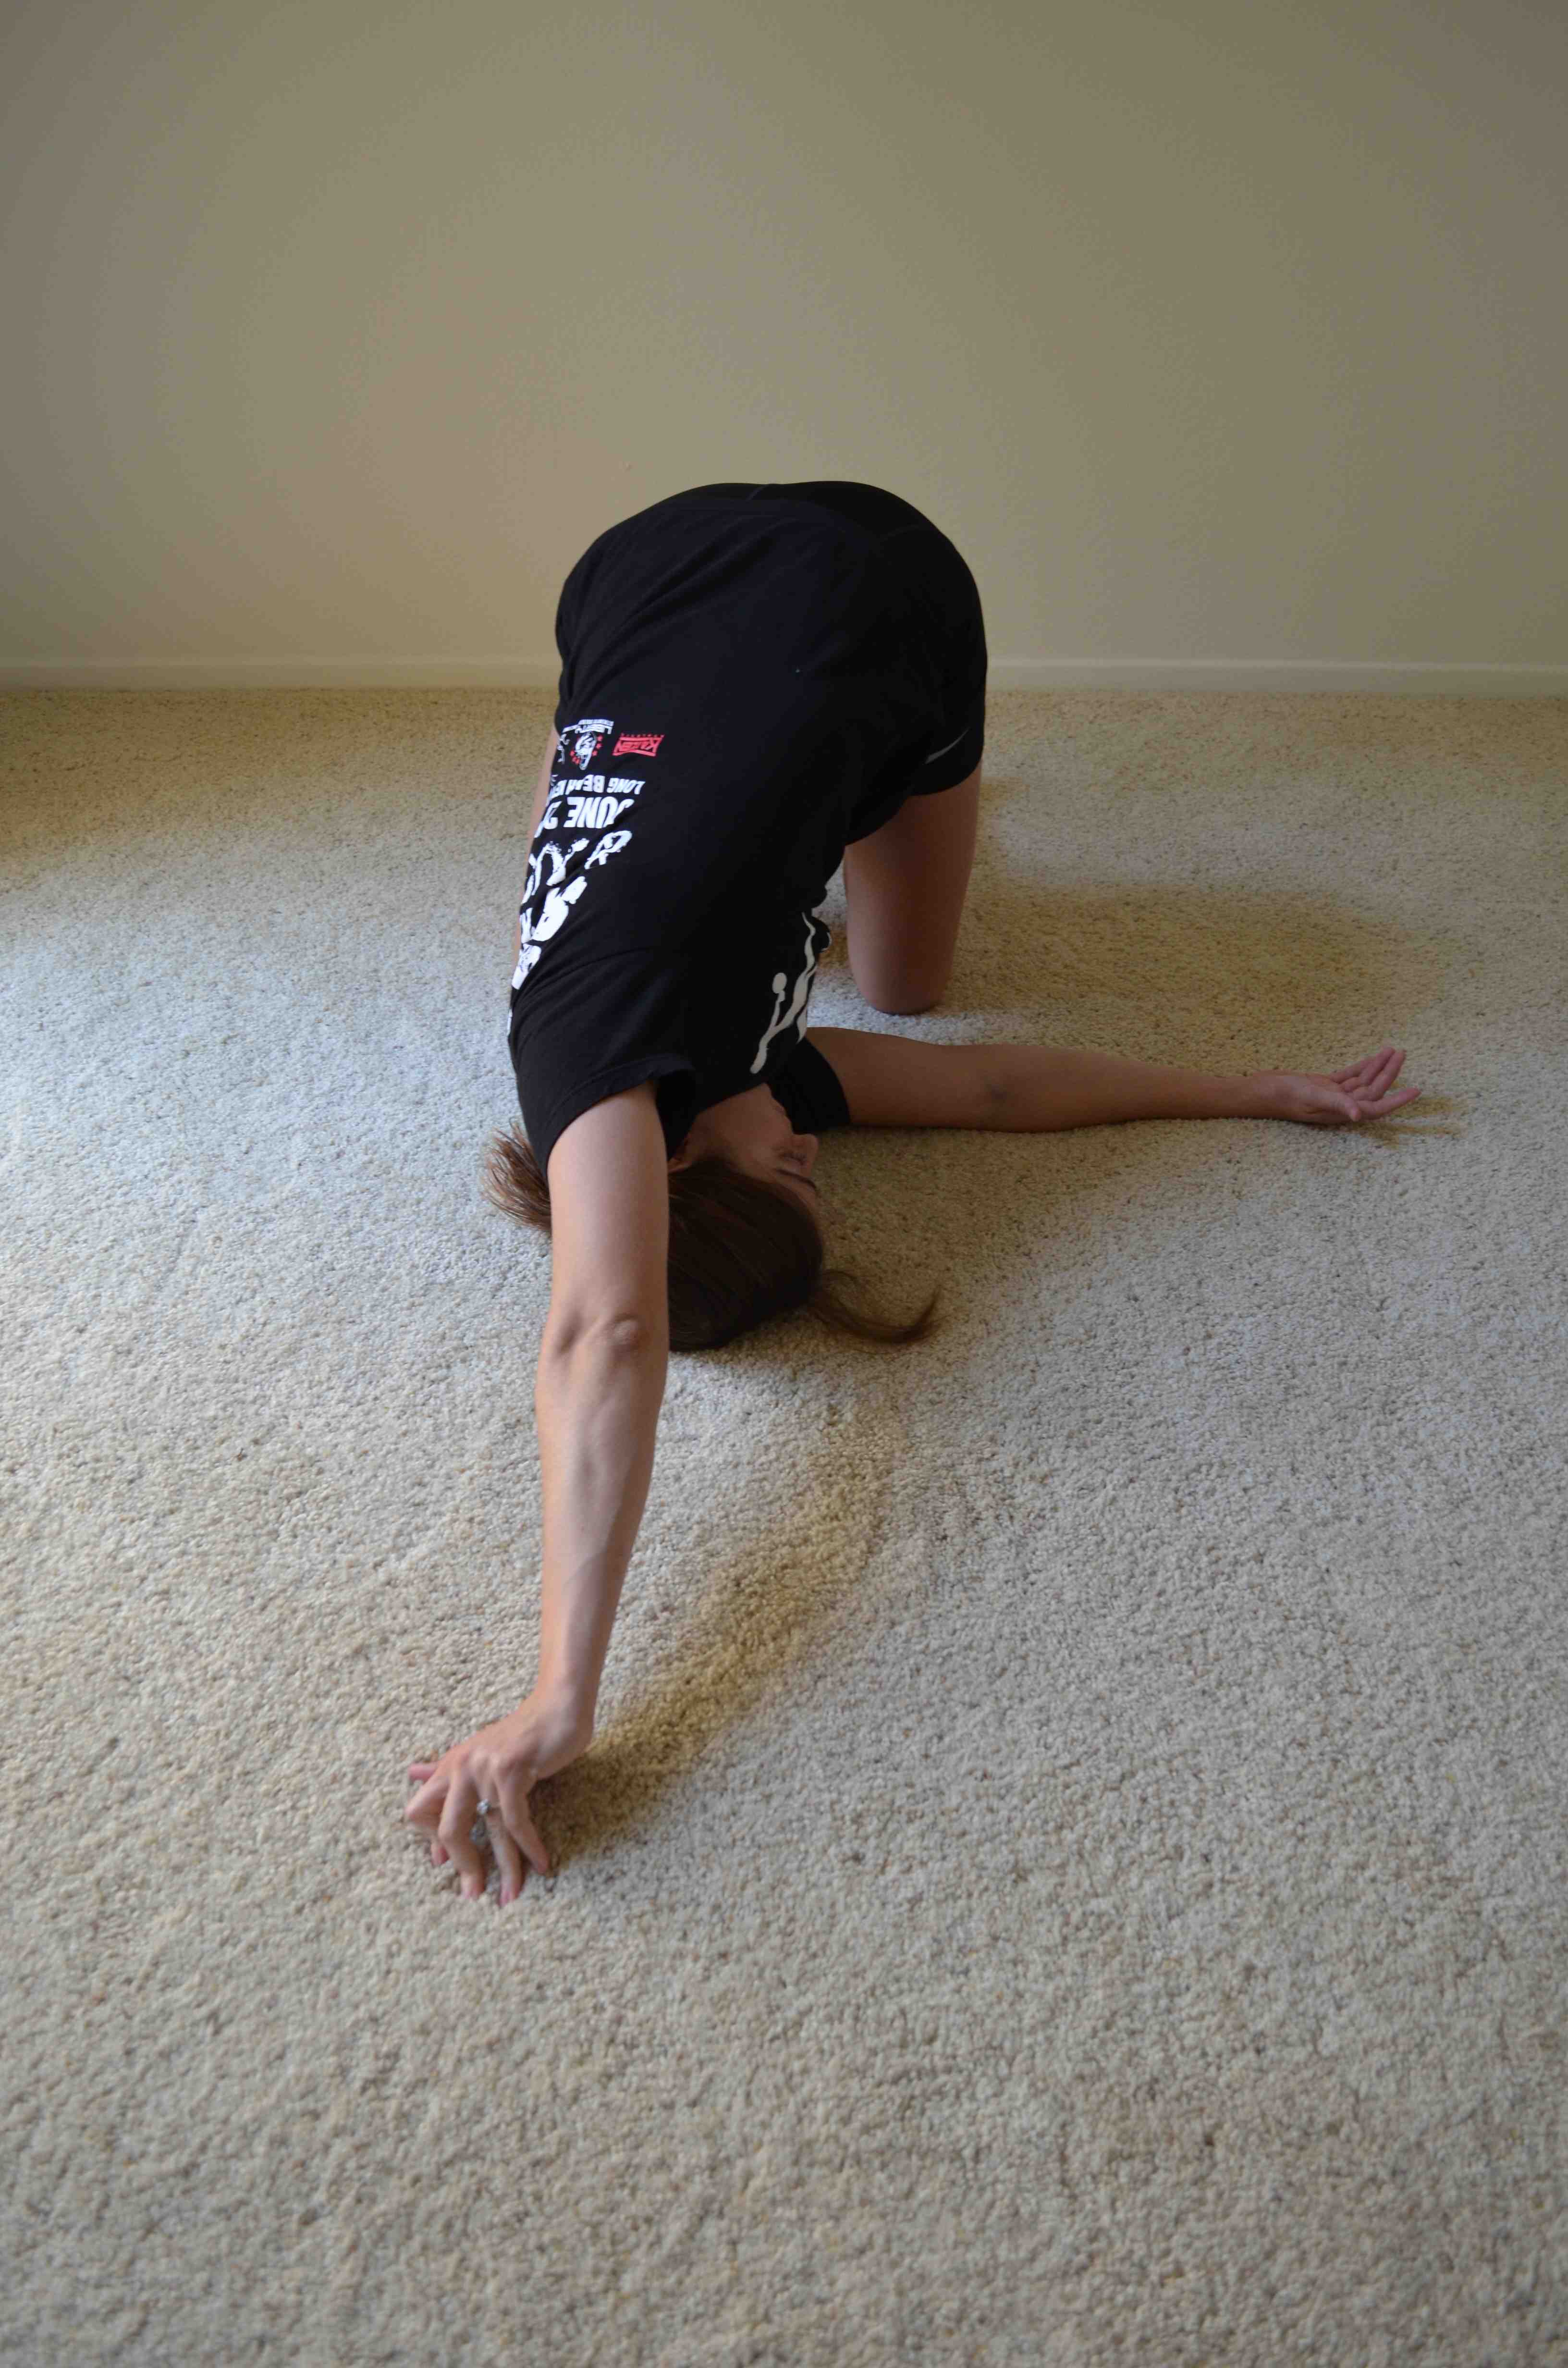
UPPER BACK AND LAT – Probably my favorite stretch of all time shown to me by Mark at the gym. Kneel on the ground. Then lean forward and rotate onto one side. Drop the side of your head and shoulder down to the ground. Reach the bottom arm out in front of you. Then reach the top hand back and overhead. Really try to rotate your chest open toward the ceiling. Hold and then repeat on the other side.
LAT STRETCH – Child’s pose can be a great way to stretch your lats and your upper back. You can also simply place the side your hand on a bookshelf or desk and then straighten your arm and bend over (if needed) and walk away. Even rotate a bit so you are looking under the arm on the desk or wall and then away from the arm. Feel a nice stretch down your arm and into the side of your back. Hold and repeat on the other side.
CHEST STRETCH – A doorway, pole or corner is great for this stretch. Place your hand or forearm on the side of the doorway. Step through the doorway until you feel a stretch down your chest and into your shoulder. Do not rotate toward the arm in the doorway. Try to face straight ahead. Hold and then switch.
STRENGTHENING
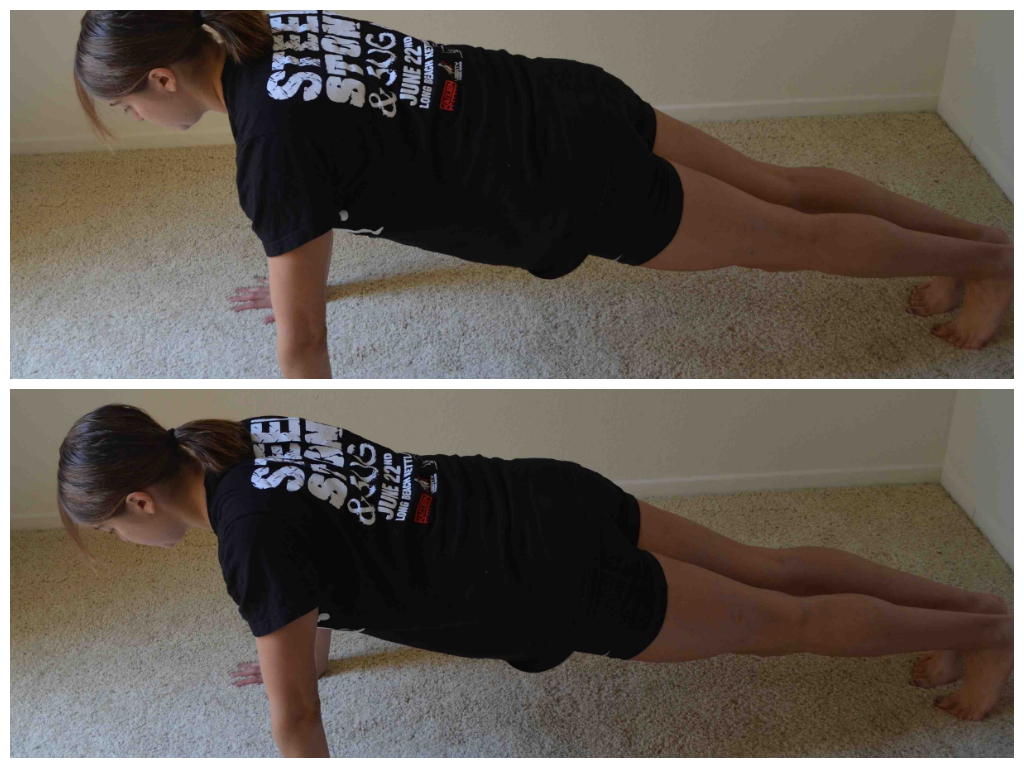
SCAPULAR PUSH UPS – These are hard for many people to do so you may want to have someone watch your form the first time. This is a very small range of motion. Set up in a push up position from your knees or toes. Create a nice straight line with your body. Then pinch your shoulder blades back and together and press your chest out. Then relax. It is really only a few inches of motion. DO NOT ALLOW YOUR CORE TO MOVE. Many people will drop their hips and move their core or bend their elbows. All you are doing is pinching your shoulder blades back and together. Do not let your shoulders shrug up by your ears.
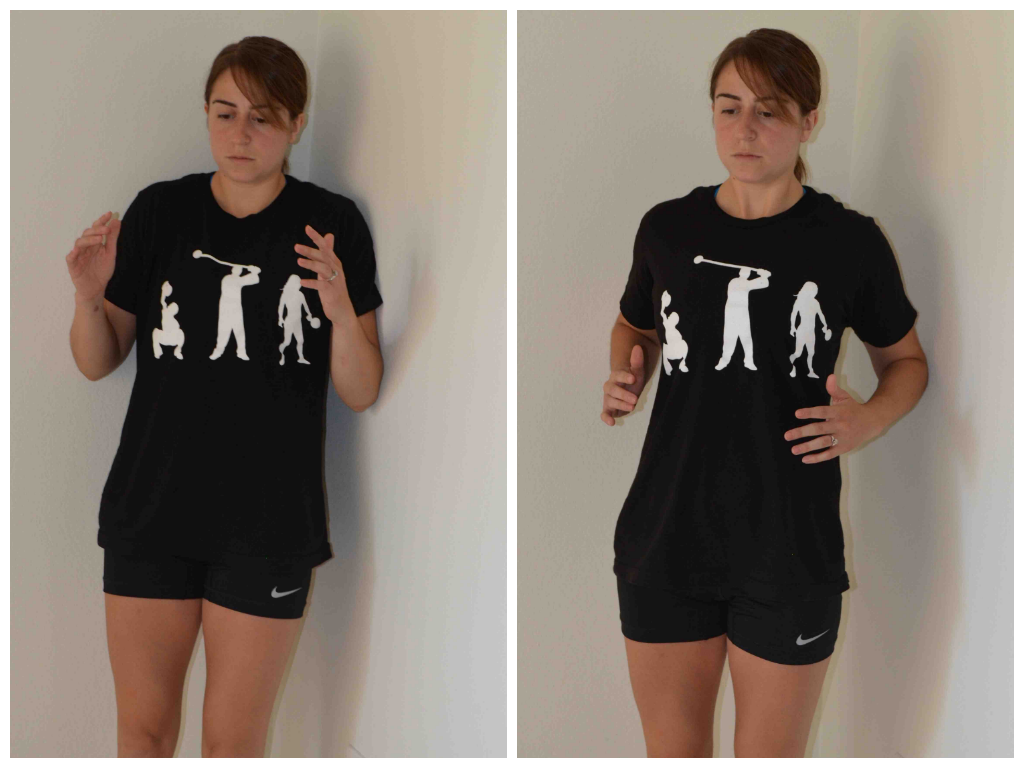
SCAPULAR WALL HOLD – An essential move if you sit at a desk all day. Stand with your back to a wall. Bend your elbows with your arms at your side. Drive your chest out and pinch your shoulder blades down and together. Do not let your shoulders shrug. Lean back into the wall. Only your elbows and maybe your head should touch the wall. Walk your feet away from the wall only if needed to increase the resistance. Press your chest out and draw your shoulder blades together as you hold. You create the tension and this move will only be difficult if you really activate the muscles.
CORNER ROW – A dynamic scapular hold. Stand in a corner in the same position as the scapular hold. Place one elbow on each side of the corner. Drive up into the scapular hold and then relax back into the corner and repeat. Do not let the shoulders shrug up as you row out. Also the farther from the wall your feet are, the harder the move will be.
LAT TOWEL PULLDOWN – You can do this move with or without a towel. It is very much like the wall slides except you aren’t against a wall. Reach your hands up with your elbows bent. Your hands should be on either side of your chest with your palms facing forward. You can hold a towel tight between your hands. This sometimes helps to remind you to keep tension between your shoulder blades and activate your lats. Reach your hands up overhead, keeping tension on the towel. Then pull the towel back down, pulling with your lats as you pinch your shoulder blades down and together. Repeat, keeping tension between your shoulder blades and using your lats to pull.

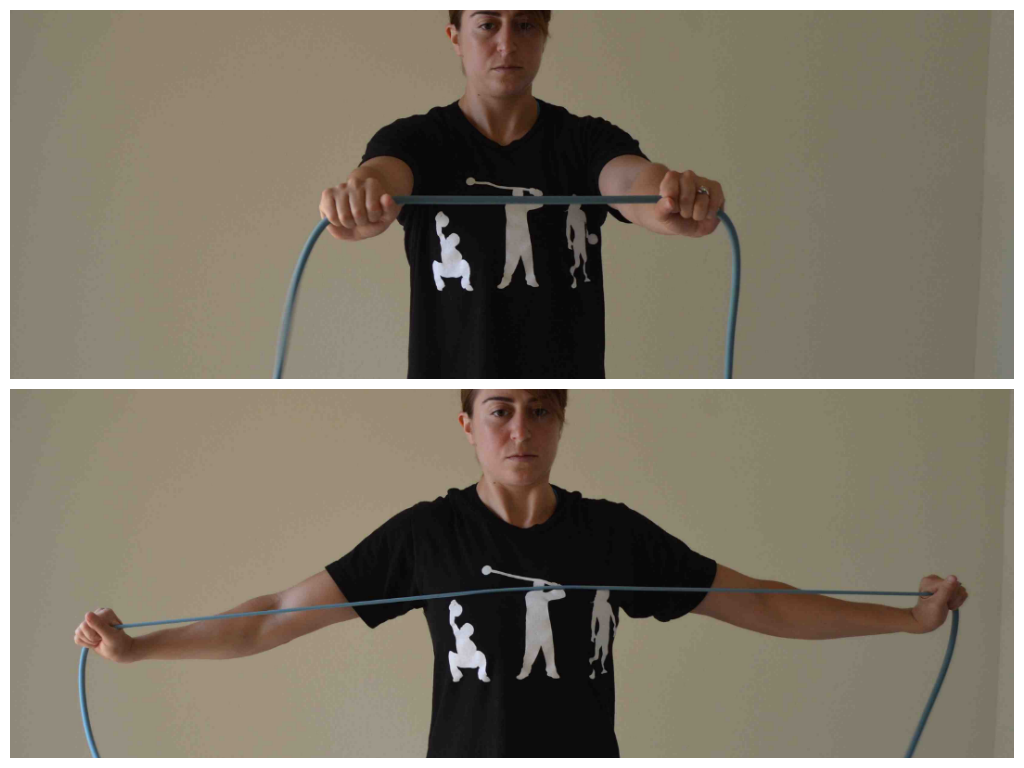
BAND SCAPULAR FLY – For this one you need a light resistance band. Hold the resistance band with your hands about shoulder-width apart. Arms should be straight out in front of you at about shoulder height or right below. Keeping your arms straight, open your arms out to the side. Pinch your shoulder blades together as you open. Do not let your shoulders shrug up. Then once you open the band to your chest with your arms straight, bring your arms back together so your arms are about shoulder-width apart again and there is no slack in the band. Repeat.
Many of these moves can even be done in your office when you need a quick break from looking at the computer screen. I tell clients all the time that at least every hour or so they should get up and do a couple quick stretches and a scapular hold for a minute or two. Great way to reverse the effects of hunching over AND a great way to become even just a little bit more active!
Here is actually a great move to extend EVERYTHING that is basically flexed all day at the computer.
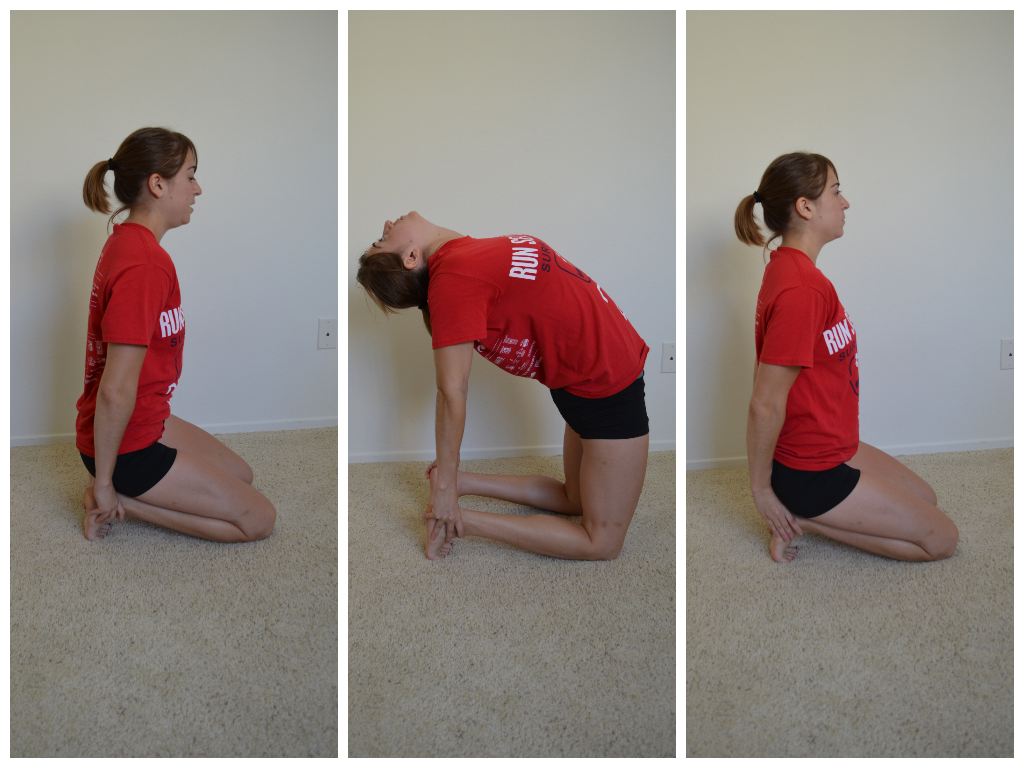
Kneeling bridge
NOTE: Anyone love…I mean hate…burpees? Look out for some cool burpee variations to come later this week!
Monday Motivation – All you need is a Monday?
I’ve seen lots of Instagram photos with “You don’t need a New Year to make a change. All you need is a Monday.”
Monday means a new week.
A fresh start.
A chance to change right from the BEGINNING of something.
But why do you really need to WAIT till Monday?
I hear it all the time, “I’ll start Monday.”
But seriously….Why wait? Why not start TODAY! Why is Wednesday not as good as Monday?
Because Monday is the “BEGINNING” of the week and that means you have all week to make changes?
HAH! You really think Monday you are instantly going to be more motivated? Do you really think starting at the beginning of a new week is going to make you more successful?
I mean maybe you will be more motivated after eating crappy all weekend and not working out for even longer…
But maybe you won’t be….Maybe you will have lost the motivation you had on Wednesday – maybe whatever inspired you on Wednesday will have worn off after four more days.
When the desire hits to make a healthy lifestyle change, START RIGHT THEN AND THERE!
You don’t need a Monday OR a New Year.
Start while the you are motivated!
The more we can capitalize on our initial motivation the more likely we are to succeed. But that initial passion to succeed at our goals doesn’t last long.
That initial drive is fleeting. What keeps you on course is HABITS.
Healthy habits and values you’ve instilled because you’ve had to time create them because of your initial motivation.
But habits take a while to create. And they are most easily developed when we have the willpower, drive and determination to turn down temptations and old bad habits.
It is hard to say, “No” to bad habits when new habits aren’t yet in place and your initial passion is waning.
Heck it is hard to get started when you don’t feel that burning desire that you felt the Wednesday before.
It leads to a lot of failures early on and more statements of “Oh…I’ll get back at it Monday.”
STOP THE SICK CYCLE!
START WHEN THE MOTIVATION STRIKES!
Freaking start at 12 am on Tuesday night when you are motivated by something you saw on Instagram or TV or read in a book!
Oh but what can you do on a Tuesday at 12 am when you are just about to fall asleep?!?
The crazy part is actually a lot.
You can make lists of things you need to get started with tomorrow to help you realize your goal. You can write your goal down in black and white. You can really quickly print or write out or even draw whatever thing you read or saw that motivated you and place it some where that you’ll see it right when you wake up.
You can take little baby steps to start getting the momentum moving in the right direction.
It isn’t about starting when you can have a completely perfect year, or month, or week or even day.
It is about getting started right then and there and GETTING THE MOMENTUM GOING.
Momentum builds upon itself.
You’ve just got to get it rolling in the right direction.
So when the motivation strikes, get the momentum going.
Results will follow.
You don’t have to wait till Monday.
Of course since today is Monday and you are now hopefully motivated, you really have no excuse not to get the momentum going….RIGHT!?!
Happy Monday! Let’s not waste another moment wishing, waiting or wanting.
DO IT NOW!
Motivation creates Momentum. Momentum creates Habits. Habits create Results.

In case you needed a little Monday Motivation haha
How To Stay Young – Learn to do a new activity!
I firmly believe that age is just a number and that at any age you can feel great and be in shape – You can be a BEAST at any age.
I don’t think getting older has to mean feeling crappier, being less coordinated and suffering from illness and injury.
I think the key to staying young is to always keep learning. And that doesn’t necessarily mean reading text books or taking educational classes.
I think some of the most beneficial LEARNING we can do is the learning of new physical skills. And I don’t think learning new physical skills is just important because of all of the health benefits of exercise (which by the way…are quite numerous).
Learning how to do a new activity not only makes our body stronger….not only helps keep our mind young and agile….not only improves our coordination….not only improves our mind-body connection…
NOT ONLY!?!
Shoot learning a new activity KEEPS US YOUNG!

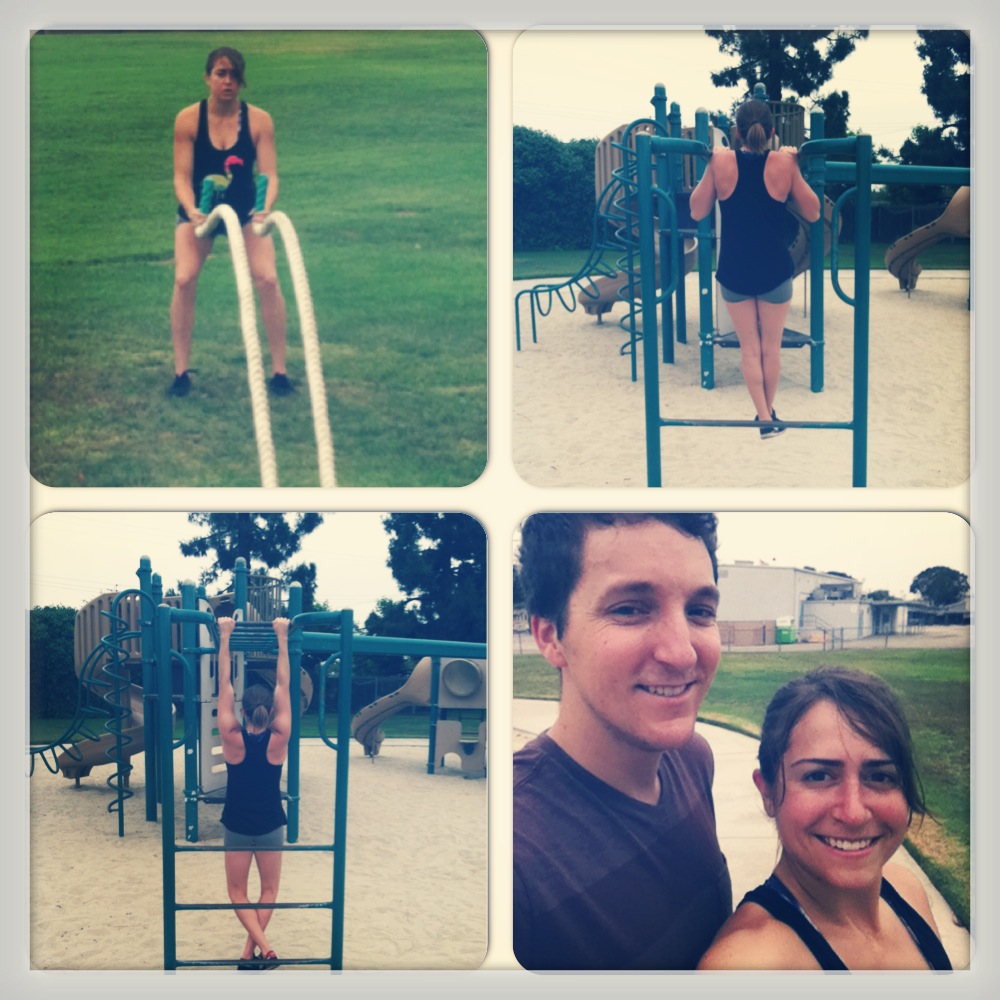
Kevin took a chance and gave battling ropes his all…And soon he was up on the wall for completing 10 minutes straight!
It gives us control not only over our body but also over our mind.
I think about every time I’ve learned a new skill – Olympic lifting, Powerlifting, Kettlebell Sport…Heck even boxing…actually, especially boxing….
Every time I’ve learned a new skill, I’ve learned to control my body in a new way.
Part of that physical control and strength that I feel, part of that feeling of being better in tune with my body, has to do with a better mind-body connection. And for that matter, more confidence!
That mind-body connection, that confidence in my ability, keeps me active. But not only does it keep me active, it keeps me MOVING WELL.
MOVING WELL, FEELING GOOD, is truly how we define youth.
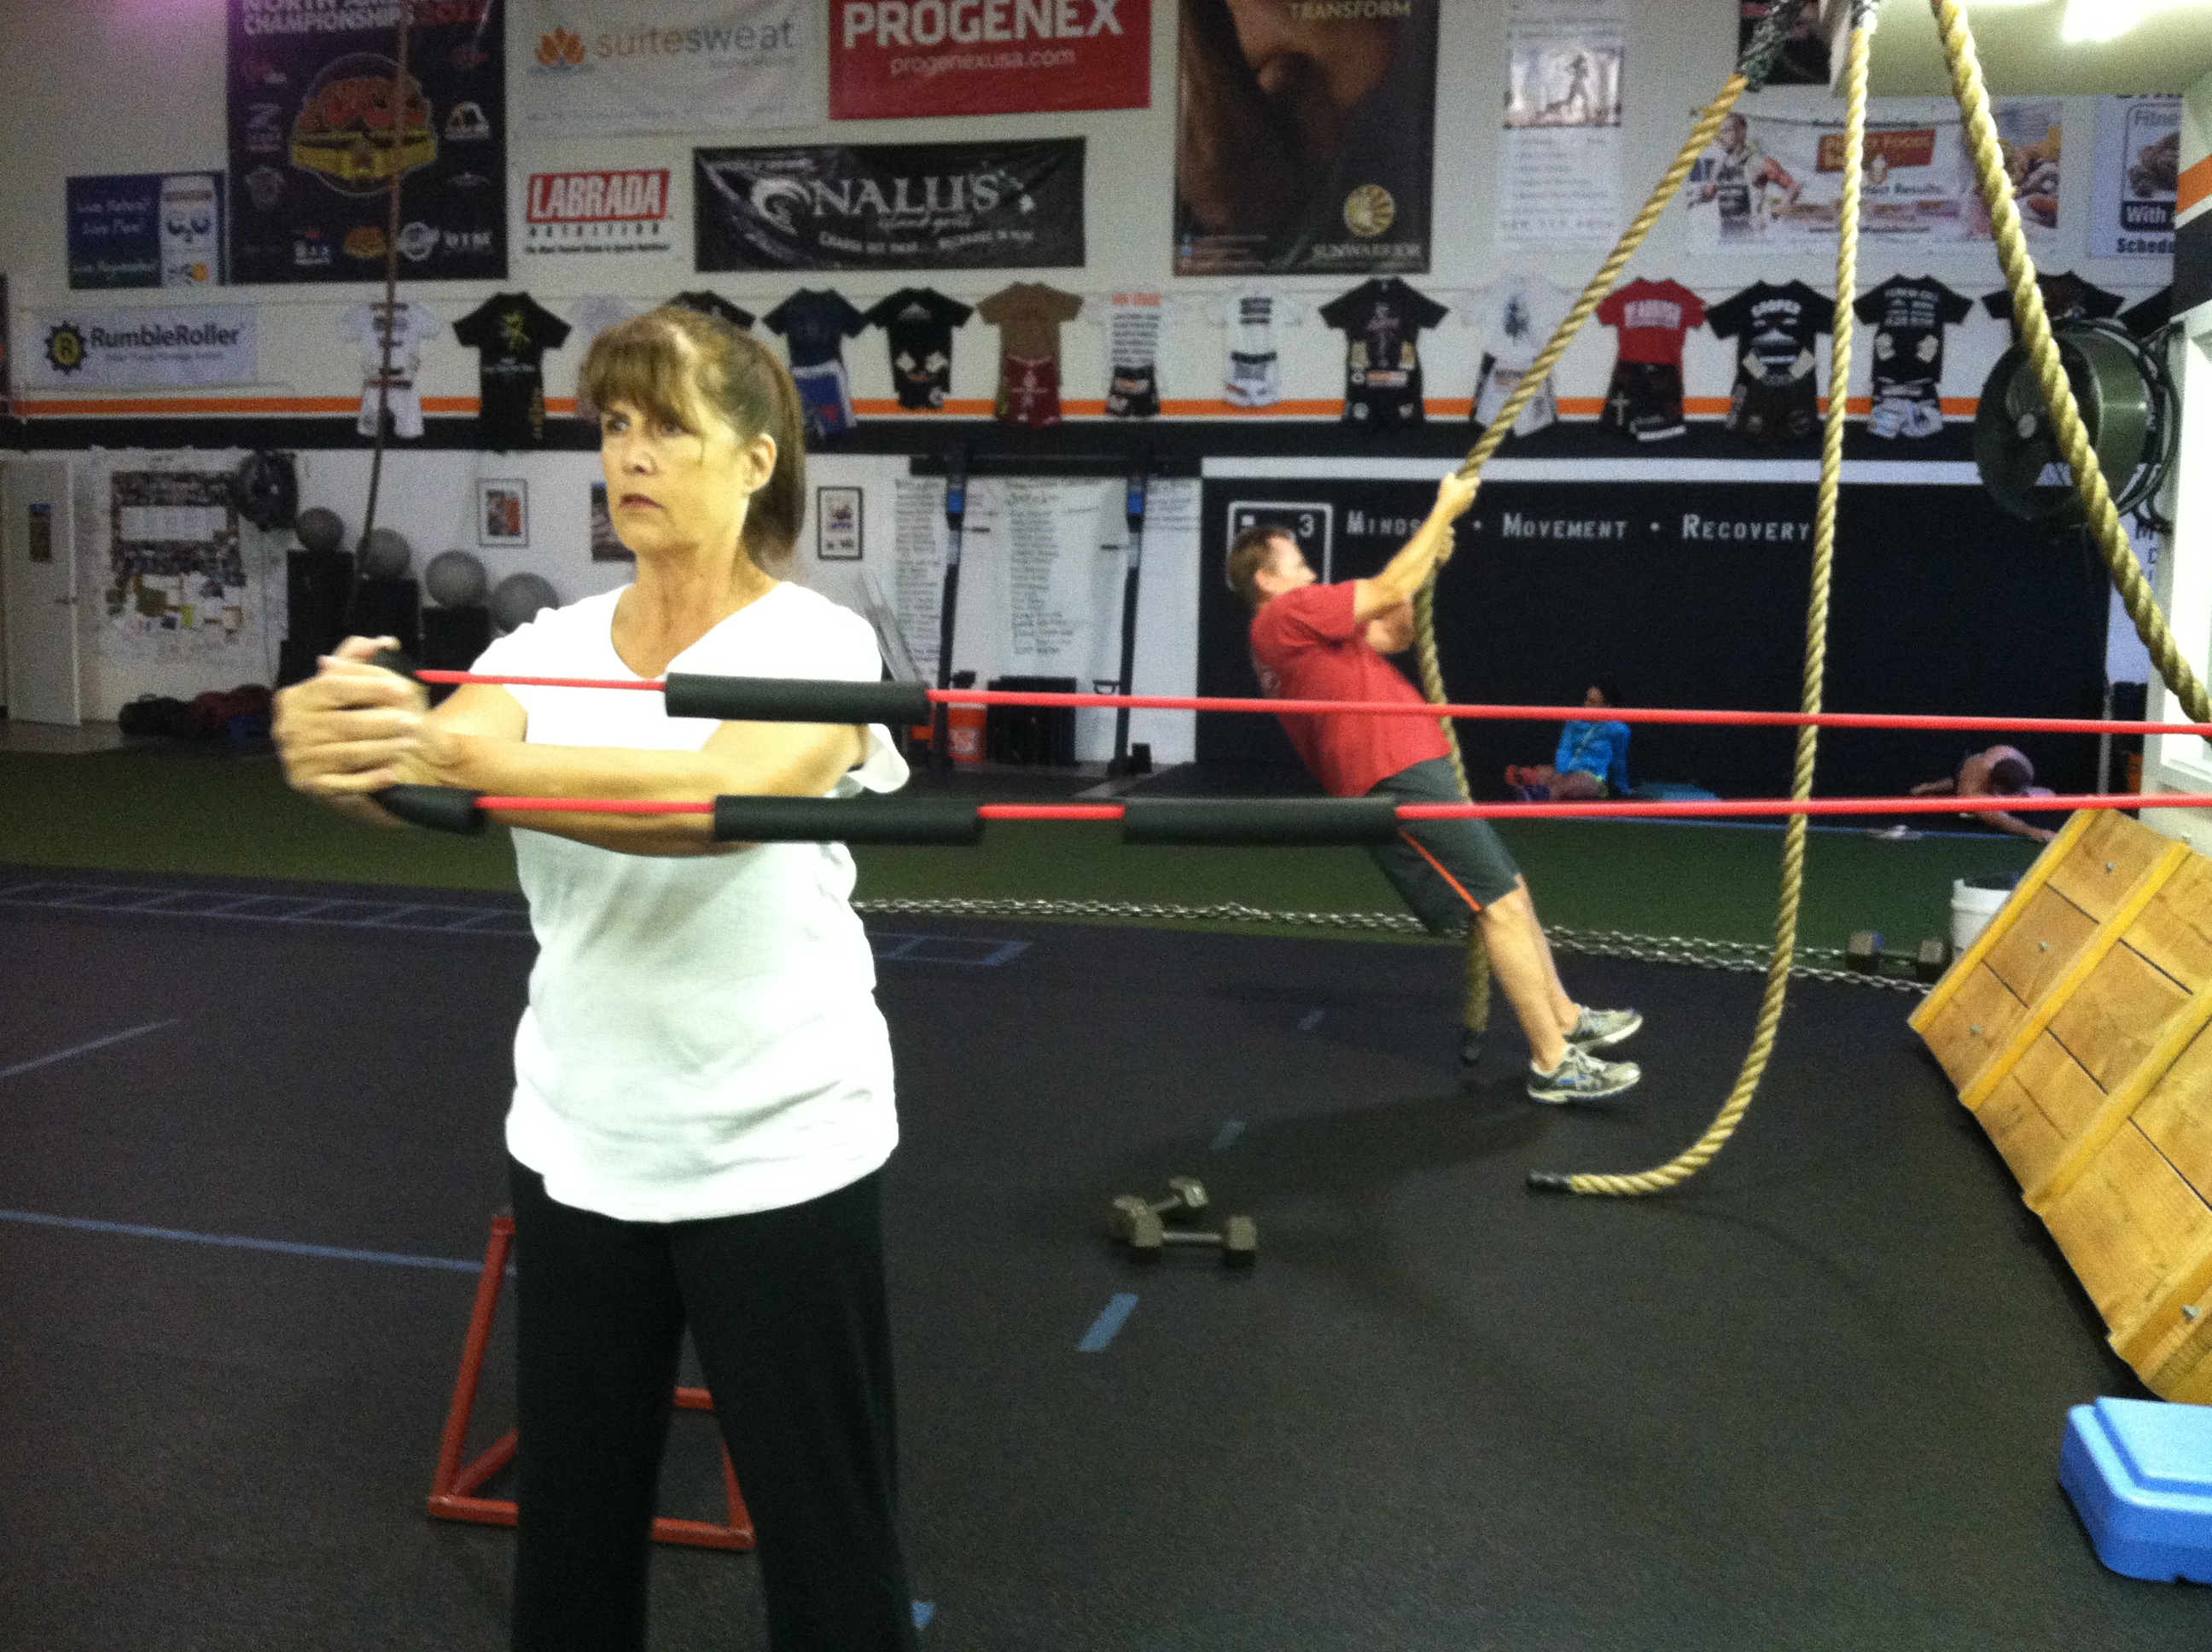
Doing some work and learning some new skills!
And the craziest thing is that we tend to STOP LEARNING new skills as we age.
We become more set in our ways and tend to stick to our routines and our comfort zones.
When we really should almost be putting ourselves out there to learn MORE as we age because it keeps us young.
So you know how you really wanted to try Zumba at the gym? You know how you really wanted to try powerlifting, kettlebells or boxing?
You know how you were afraid you would be clumsy or bad or uncoordinated and slow?
Well sure. Most of us are awkward when we first try to learn a new skill. BUT only through learning a new skill can we create a better mind-body connection so that we are MORE COORDINATED.
Age is just a number and you really can teach an old dog new tricks.
And the best part is, the more that “old dog” learns, the younger that “old dog” will really feel!
So stop thinking your age is holding you back.
Let yourself try a new activity and learn a new skill. It may just be what you need to feel younger and move better just like the Man Bicep Mom!
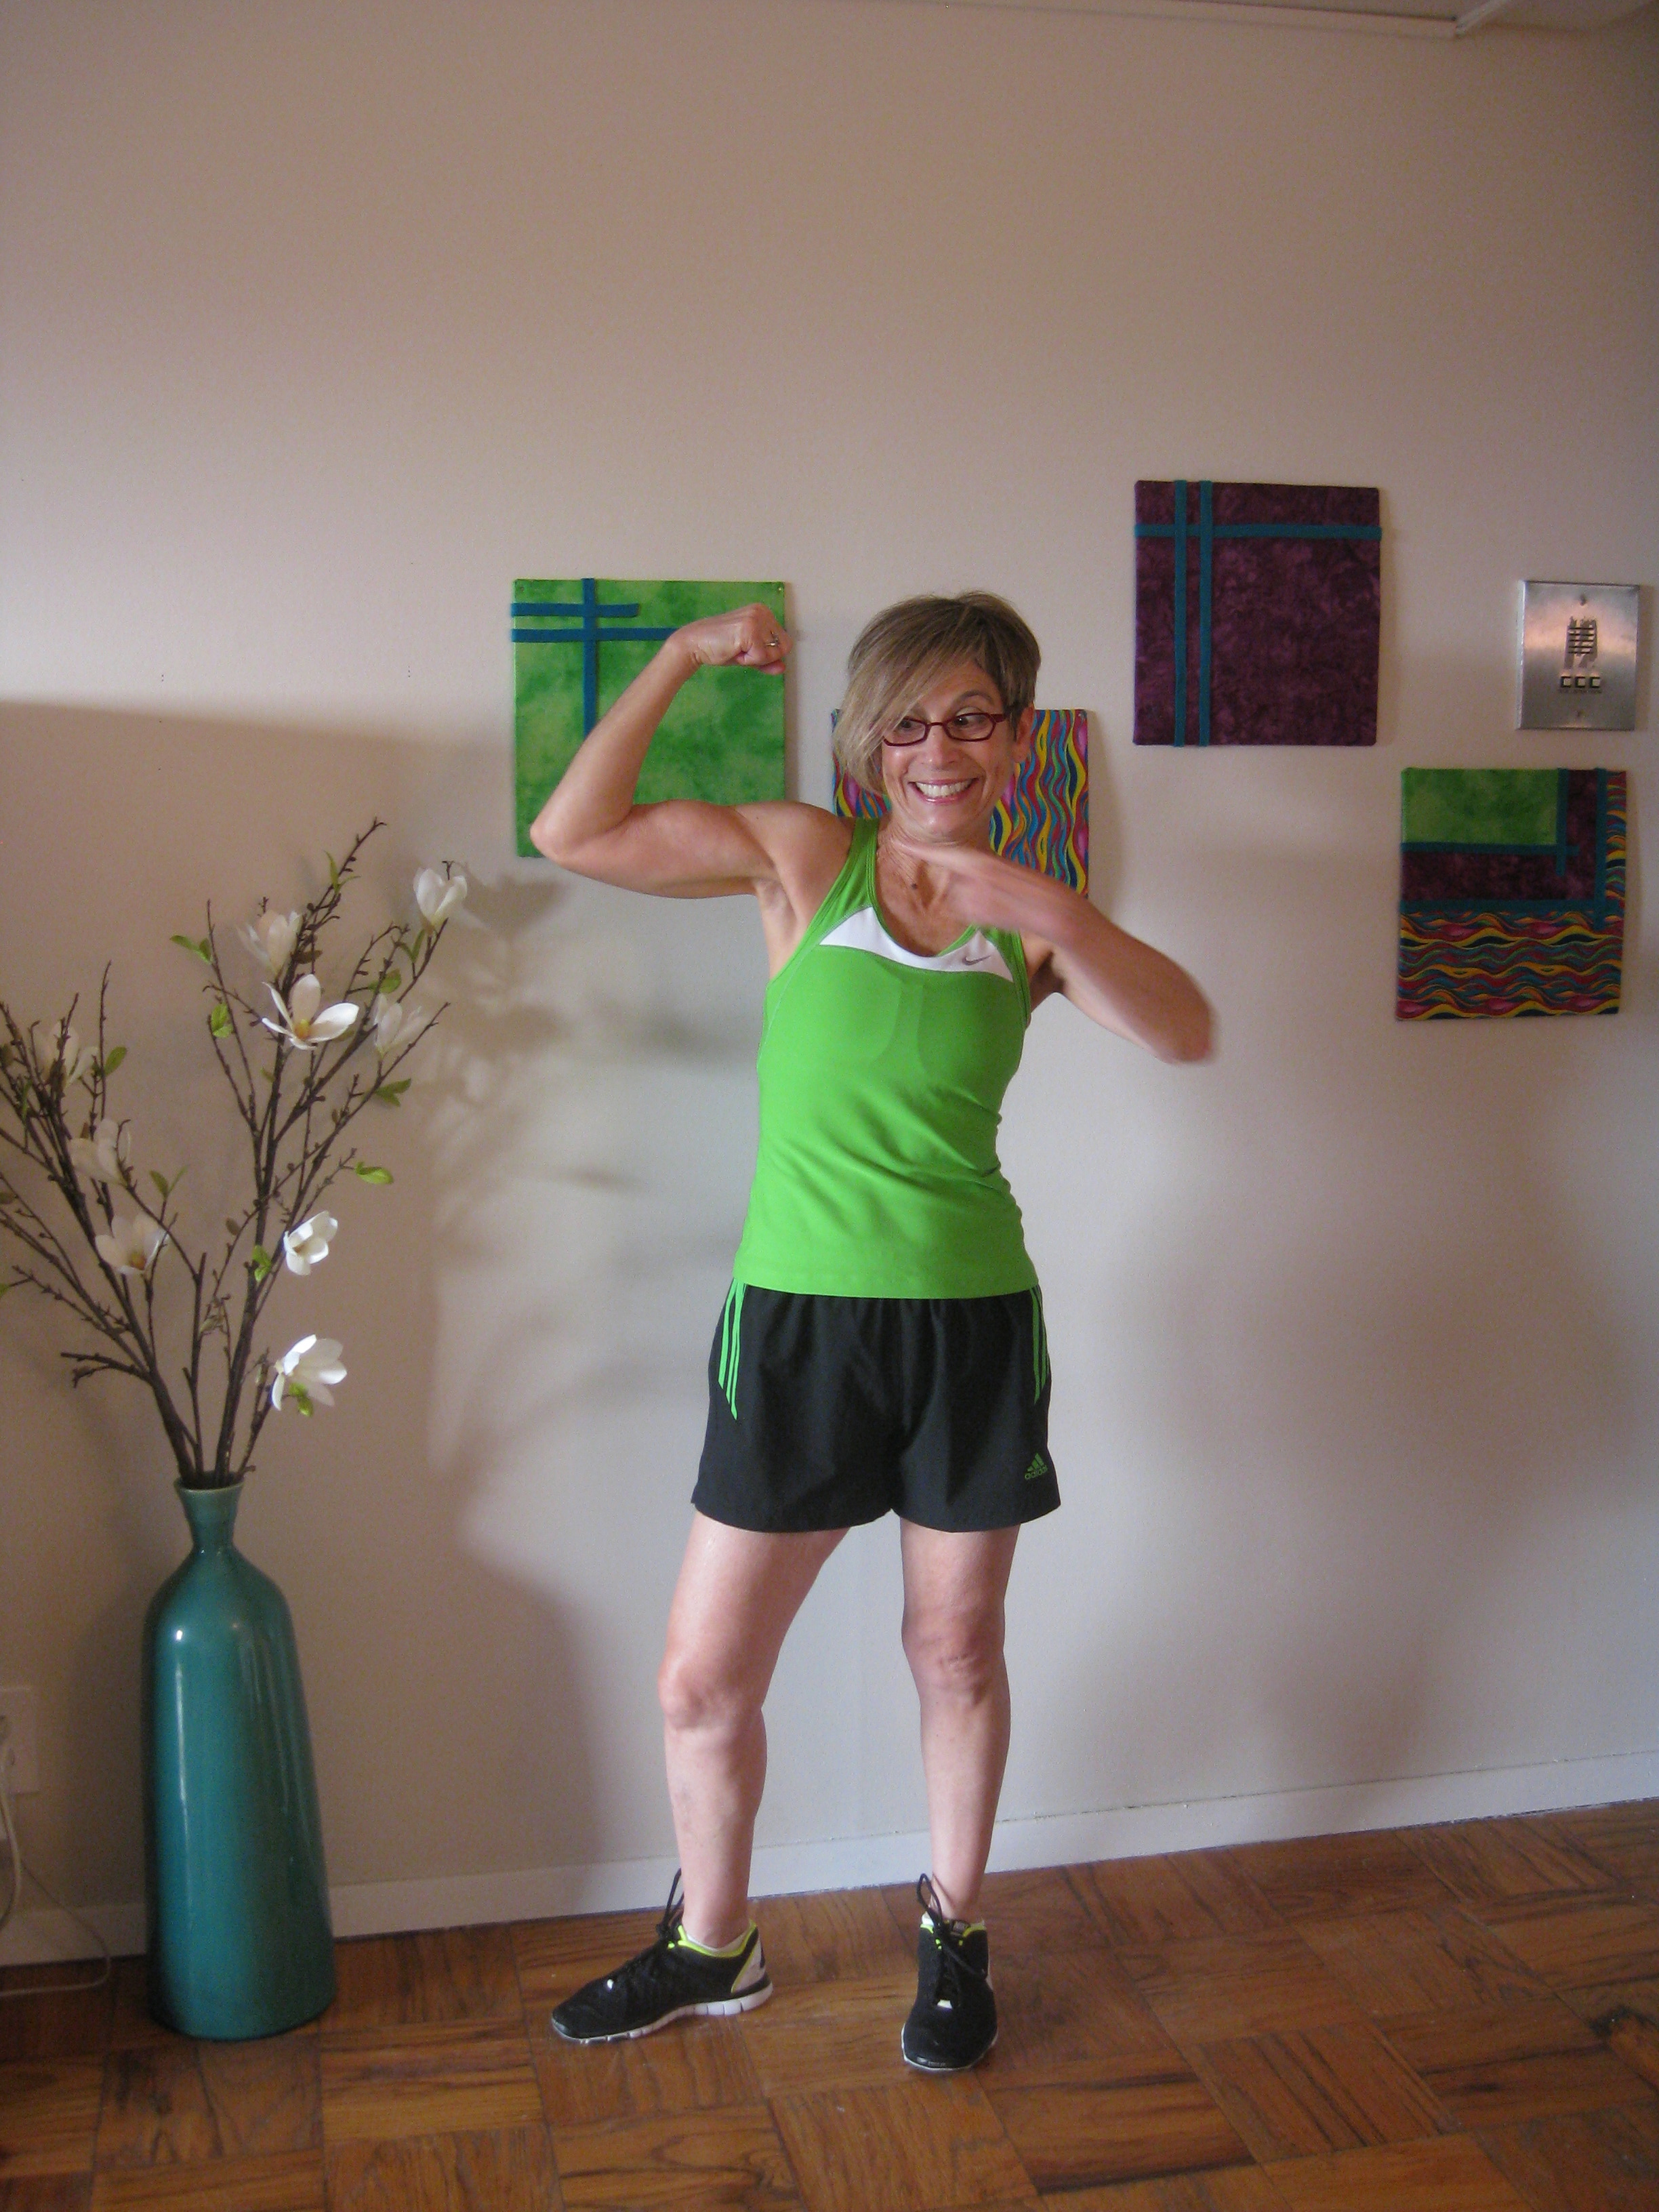
Showing off the man bicep!
P.S. If you are looking for some extra glute activation exercises, check out this new Redefining Strength post!
Macadamia Nut Butter Recipe
When I bought the nut butters from Eddie of Ingr-EAT-ients, we talked about a macadamia nut butter.
I love macadamia nuts. They are super tasty and also low in phytic acid, which makes them the best nuts to consume.
The only downside is that they are generally more expensive – at least in all the places that I’ve lived.
But anyway, since I love macadamia nuts, so does Ryan, and Eddie doesn’t YET offer macadamia nut butter, we decided to make our own.
Sweet and Salty Macadamia Nut Butter

Sorry for the flash making the bottom one look yellow.
Ingredients:
1lbs Macadamia Nuts
1 tsp Organic Raw Honey (Trader Joe’s)
1 tsp Coconut Oil
1 tsp Salt (a little less than a full tsp…add slowly to taste)
Put macadamia nuts in a food processor. Start to blend. (Save a handful for the end if you want a crunchy nut butter.)
As the nuts blend, they will start to stick to the side. Scrap them down until the nut mixture begins to form a ball.
Add honey, oil and salt. Keep blending until completely smooth and oil, honey and salt are combined.
If you want to have a crunchy butter, add in the handful of macadamia nuts now and process for just a few seconds.
Serve on anything you want or eat by the spoonful…which we may or may not have done….
YUMMMMMMM!
For other delicious nut butters, head over to Ingr-EAT-ients and try one of theirs!
Especially their new MAPLE BACON ALMOND BUTTER! Bacon…YES!


