Blog Archives
Accepting Pain aka STUPIDITY
So there are all sorts of “pain” related discussions that really get on my nerves.
One is when clients who are working hard for the first time in their life tell you that an exercise “hurts” when, upon further investigation, you find out that it is merely making their muscles fatigued and that they aren’t used to the burning sensation of a muscle working.
While I don’t like the phrase “no pain, no gain,” being sore and working hard isn’t always “comfortable.”
But at the same time having the attitude “no pain, no gain” and never recognizing when something hurts isn’t good either.
While I can get annoyed when someone can’t recognize the difference between “injury pain” and “discomfort from muscles working hard,” I get way more annoyed by the client who thinks they are cool because they push through the pain.
And honestly this “no pain, no gain” client WAY worse than the client that mistakes muscles working for pain.
You may be shaking your head and going, “Heck no! They aren’t near the same! You have to work through the pain sometimes! You are TOUGH if you just push through!”
Uhm no…I’m sorry….You don’t…and you aren’t.
You are stupid.
Period.
Yep that’s right…STUPID.

Oh yes…Let’s put some sexy people on a poster working hard and say “no pain, no gain.” That way when people get injured they will think it is all just part of the process to look and perform like the attractive people in the photo! ARGH!
I can say this as someone who has been stupid one too many times in her past. I have the torn muscles and scar tissue to prove it.
And guess what I have now?
Improperly rehabbed injuries that years later I’m now having to deal with.
Trust me…injuries aren’t cool.
You aren’t “bad-ass” if you push through.
Honestly, unless you are a highly paid athlete, there is never a reason to push through true pain and injury. And even if you are a highly paid athlete, there is a very fine line between stupid and something you push through because it is your job.
When you work through the pain, generally all you do is make the injury worse. And then you are either eventually going to have to take time off, and probably MORE time than if you had rested and rehabbed it immediately, OR you are going to have something that restricts your movement and causes pain for the rest of your life.
Doesn’t sound like great options if you don’t just DEAL with the pain immediately.
But rehab and pre-hab aren’t “cool.”
It is way cooler to be like, “I can’t do push ups because of my shoulder.”…Right!?!
AH!
I can’t tell you how many people recently I’ve encountered coming from other gyms who say they “can’t do” something because of an injury they’ve never dealt with and just “worked through.”
And every time I say to them the same thing, “Well what have you been doing for rehab?”
And I always get the same answer…NOTHING.
Can someone please explain this to me?
Why is pain cool and rehab not cool?
Don’t we workout to feel BETTER!?! Don’t we go to look BETTER? Perform BETTER?
If we want exercise to make us BETTER, how do we expect to do that if we are restricted and in PAIN?!
If you have an ankle injury, even one from decades ago, and you never rehabbed it, it may be causing problems up your leg. It may be why you have low back and hip pain. It may be why you have balance issues. It may be why you can’t lift as much as you want to. It may be why your butt isn’t as strong and perky as you would like!
It may be causing a whole load of problems that aren’t even related to the initial injury!
But it is better to just push through…huh?
Ok here is your chance to stop being an idiot and stop accepting pain.
Take five minutes at the beginning of your workout and add in an exercise or two to rehab or better yet “pre-hab” any weak points or areas of past injury. (Just because at one point in your life you did some rehab for an injury doesn’t mean you are just now done with it now. That area may always need some extra TLC.)
Here are a couple quick things you can do for four common areas of injuries…
- ANKLE/FOOT PAIN/INJURY (Heck these are even good for some knee and hip problems) – Roll out the bottom of your foot, your shin and your calf with a roller or small ball. Then work on your balance. My favorite balancing drill is when you either stand on one foot on the ground or on a foam pad and then you swing the other leg. Do swings forwards and backwards, side to side and even rotational (like you are lifting your foot to step back over a fence and then bringing it back forward over the fence without touching down). Then do glute activation drills. Pick one or two from this list and do 1-2 rounds of 10-20 reps.
- LOW BACK/HIP PAIN/INJURY – Low back pain is a super common problem. While rolling out the whole leg is ideal to find all trigger points, you can start with your hips, glutes and low back. A great way to roll out your hips, can be to take a bigger, foam ball and lay over it. The ball will actually be pressing into your abs right above your hip and beside your belly button. Relax over the ball as much as you can. You will also want to stretch your glutes and hips. Here are some more great trigger point release tips for your hip area. You will also probably want to do some stretches and trigger point release for your thoracic spine and lats. We can sometimes compensate and use our low back because our thoracic mobility is bad. A great thoracic stretch is one you do when kneeling. Kneel on the ground with one hand planted on the ground under the shoulder. Then reach your other hand back over your head with your finger tips pointing down your spine. Then rotate your elbow of the hand down your spine, under your arm that is down. Then rotate open, reaching the elbow up toward the ceiling. Again, glute activation exercises are key. If our glutes aren’t firing, we are going to use our low back and hamstrings more than we should!
- WRIST/ELBOW PAIN/INJURY – Yup…you can even roll out your forearms. If you have wrist or elbow pain, rolling our your forearms, triceps and biceps can help, especially if you target the areas of insertion. Wrist/forearms stretches are also important. We sit at computers all day with our wrists flexed and never really think to do anything to extend and release the muscles. One of my favorite wrist stretches is, when I kneel down and place my hands on the ground under my shoulders. I then turn my finger tips to face my knees with my palms flat on the ground. I then rock back and sit on my heels, keeping my palms flat on the ground, and then return back to kneeling and release. To also help activate the extensors of my wrist and forearm, I use a trick I was taught by Corey…The rubber band extension. Take a rubber band and place it around the outside of your fingers when they are all together. Then spread your fingers out as wide apart as you can before bringing them back together. This really helps with a lot of elbow pain!
- SHOULDER/UPPER BACK/NECK PAIN/INJURY – Roll out your traps, chest and lats. You will also want to stretch your chest and neck. You can easily stretch your chest using a wall or doorway. Place your hand and even your forearm on the wall or door frame and then step forward till you feel a stretch. To stretch your neck, lean your head to one side and gentle pull your head down toward your shoulder, making sure you keep your shoulders relaxed. To change exactly which muscles you hit, look up, down and straight ahead. Then you will want to do a scapular wall hold. If you do it correctly, you will activate your lower traps which will help you relax your upper traps and usually helps with neck pain. YTWLs are great too to activate the muscles in your upper back and strengthen your rotator cuff. Check out this video by Nick Tumminello on how to do them.
Here is another article with some essential mobility drills that can help you move better!
You don’t have to do these every day, but you do want to make sure that spots that need improvement get attention! So stop accepting pain and start doing something about it. It really doesn’t take that much time.
Be smart…It’s way more “bad-ass!”
NOTE: If you are suffering from an injury, it is best to get checked out by a doctor. Most of these drills are meant for already diagnosed injuries or minor recurring injuries/pains. Also, this list is by no means comprehensive. It is just to give you an idea that there are some quick things you can do before your workouts, to correct problems!
Part 2: Being Bootilicious – Inhibition
So this post should actually have been post number one because what you need to start with is inhibiting and lengthening the tight, overactive muscles!
If you want to work your butt, the first thing you have to do is relax the tight muscles.
You aren’t going to feel butt exercises in the correct places if the right muscles aren’t activated!!! And you won’t activate the right muscles if other muscles are overactive and tight!
SO what do you do?
The first thing I do before I workout is roll out.
And if I really want my butt to work, I’ve got to make sure that everything around my hips is loose.
While I’m fortunate enough to not be confined to a desk all day, I sit enough that my hips are flexed for a good portion of the day.
That means they are tight. And tight hips can lead to low back pain. They can also restrict your glutes from really activating during exercise.
If your glutes don’t activate during leg movements, you are going to use your low back, have inefficient movement patterns, not lift as much AND risk injury. You are also going to miss out on working one of the biggest muscles in your body!
SO roll our your hips before you begin!
While a foam roller is great, I find any sort of ball to be WAY better at getting into those trigger points around your hips.
I prefer a tennis ball, trigger point ball or lacrosse ball. I find the golf ball to be too small.
If you are just starting out, you may want to invest in one of the foam blue balls that are a little bigger and a little softer. The smaller and harder the ball you use, the more you are really going to dig in.
Ok so to roll out your “hips,” and I use this term a bit loosely, my three favorite moves are:
- The Hip U – So in this move you start by digging out the fleshy part of your butt. Literally sit on the ball with it under one butt cheek. Roll it around until you find a sore spot. Hold it on that sore spot and remember to breathe. You can also lift and lower the leg to help get deeper into the muscle. As you roll out your butt cheek, move the ball up to your low back. Find any trigger points there and hold for a bit. Then make an arc over the hip bone once you dig out your butt and low back. Hit your side butt, or glute medius. This is usually very tight on people. Again hold as you find trigger points. Then roll the ball to the front of your hip. Dig out the TFL and all the muscles right around that hip bone. Remember to HOLD if you find a sore spot…also remember to breathe! So that is the U over the hip
- Ab release – So most of the time we go for the exact spot where we “feel” pain. So we roll out our low backs if we feel pain when the cause of the pain may actually be somewhere else…like our tight hip flexors! BUT that being said that doesn’t mean we need to target the muscles that insert right below our hips. A hip flexor muscles actually connects up at a point in our spine! Which can mean that by placing a ball in your abs by your belly button and relaxing over it, you can actually help release your hip flexors! So try it…get a ball (and if you have a small ball you may need to put it on a trigger point block to really get it to dig in, but lay over the ball and relax. The ball should be to the side of your belly button and above the hip.
- The peanut – So one of my absolute favorite foam rolling tools is what I call the peanut. It is two tennis balls tapped together. They are perfect to use on the area around your spine. I like to hit my lower (and upper back for that matter) with these two balls. You can really get in and around your SI joint and then up into your low and mid-back. You can even target the spot where you psoas connect up in your spine.
So while these aren’t the only moves to use and you may also want to hit your adductors, calves and chest (other common tight muscle groups) these three moves are a great place to start!
After foam rolling, you will then want to do some dynamic stretches for these muscles before you begin your workout.
Notice I said DYNAMIC. Save the static stretching till afterwards!
A dynamic stretch is a stretch that you don’t hold for a long period of time, but actually move through (not bouncing though). A static stretch is one you hold for about 30 seconds or so. A static stretch is great for flexibility BUT has been show to reduce power during the workout.
So in an effort to increase mobility without any strength or power lost, we will use only dynamic stretches BEFORE exercise.
Here are some great moves I use to open up my hip area:
- Leg swings – You can do these swinging your legs forward or back or side to side. Both ways open up your hips. Try to increase the range of your swing without leaning your upper body forward and back. It is best to hold a wall when doing these.
- Hurdles – These are a variation of the leg swing. You can do these going forward or backwards (or BOTH!). What you do is bend your knee and swing your hip as if stepping over a hurdle. Alternate sides. Do about 10 per side.
- Simple kneeling hip stretch – So the basic stretch for your hip and even your quad is the kneeling hip stretch. Kneel on your right knee with your left leg bent to 90 degrees in front. You can make this dynamic by stretch by pushing the hip forward and then relaxing back. You can also add in a reach overhead and across. So if your left knee is forward, your right arm is going to lift up overhead and across. Then you will relax back down. You can also do a rotational stretch, so rotating over the front knee. To increase this stretch down your quad, you can also pull in the foot of the knee that is down and then release. By pulling the foot of the knee that is down up toward your butt, you will bring the stretch lower in your quad.
- Lying glute stretch – Lay on your back with your right knee bent and foot flat on the ground. Cross the left ankle over the right knee. Then grab behind either your right hamstring or in front of your right shin. Pull the right leg with the left foot across it unto your chest and then release. You should feel that in your glute. This stretch will make sure you are loose all around the hip joint! (I love doing the pigeon pose after my workouts as my static stretch!)
- Spider stretch – So this stretch is great to open up the hips. It can get your groin and your hamstrings and even calves too! So to do this stretch step one leg forward in a lunge. If this is too much you can put your knee on the ground. So if you lunge your right leg forward, you will then drop your right elbow right into your instep. Then rock back and sit on your other heal and straighten that forward leg to stretch the hamstring. Then rock back forward and drop your elbow again. Do about 10 each side moving smoothly through the movement.
- 360 Lunges – One of my favorite dynamic moves to warm up the hips is the lunge. BUT I don’t just use the forward lunge…I lunge in a few different angles. One lunge out front. Maybe one front at an angle. One out to the side. One opening up back. I do those four lunges on each side to create a 360 circle!
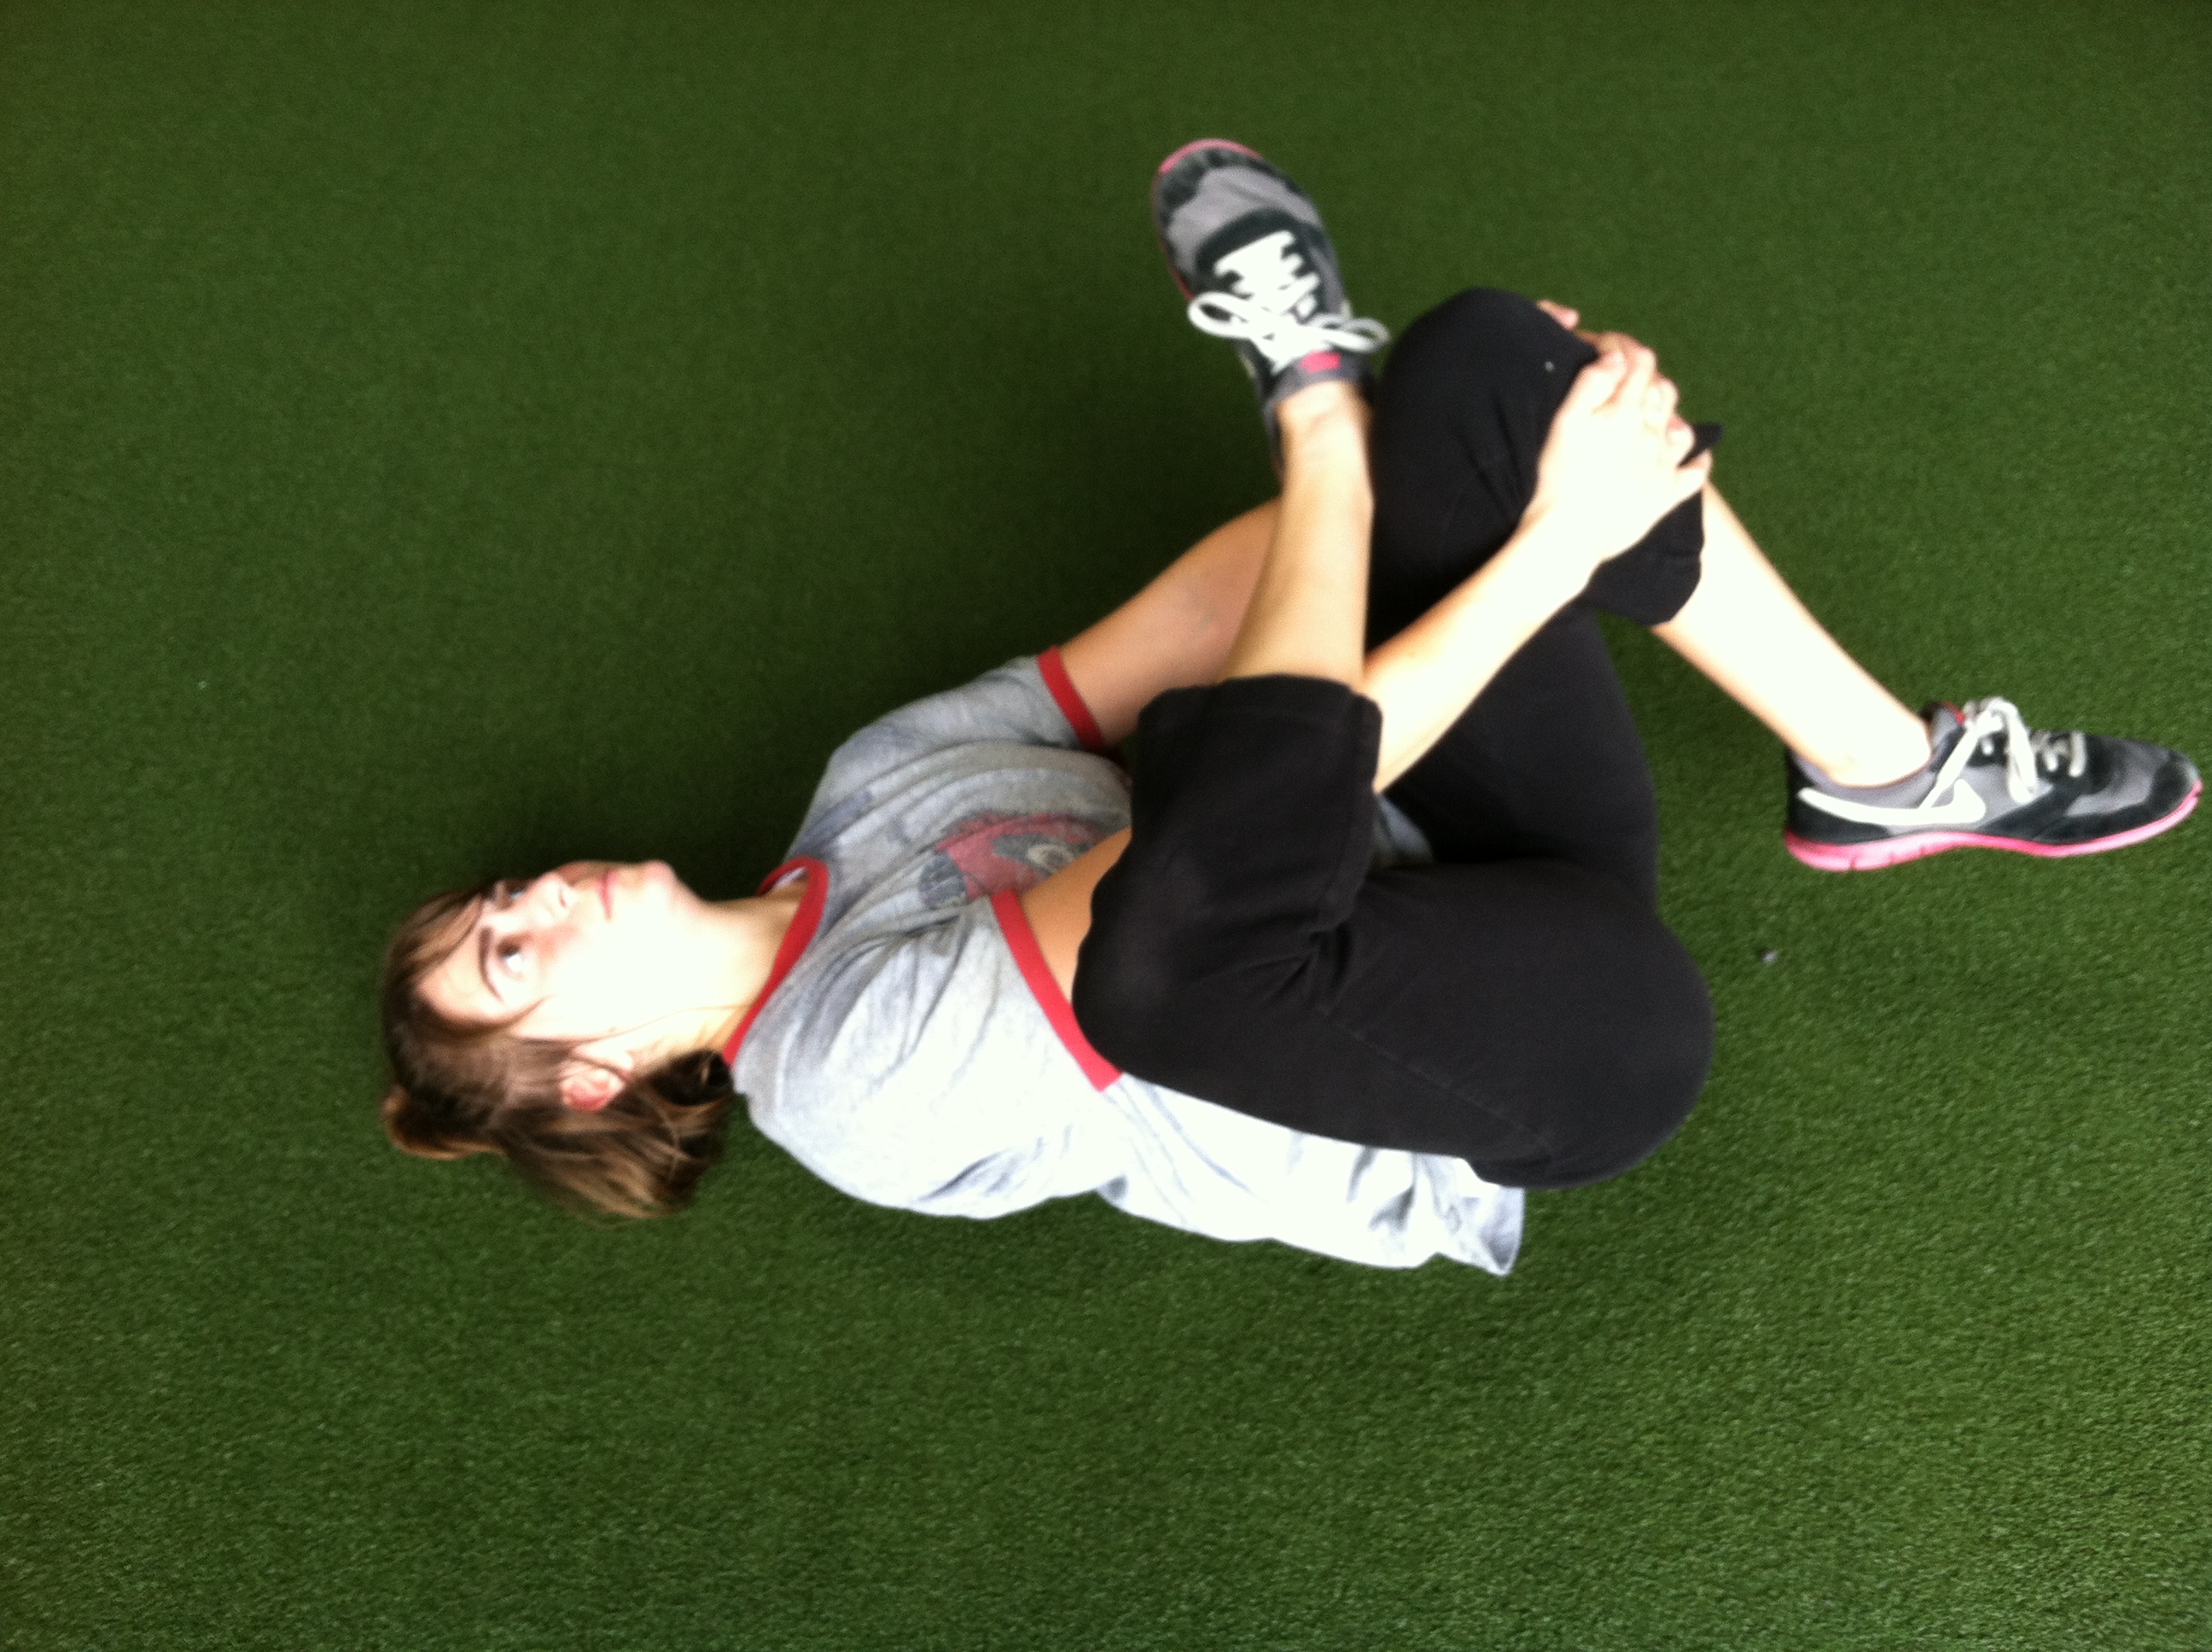
Glute Stretch
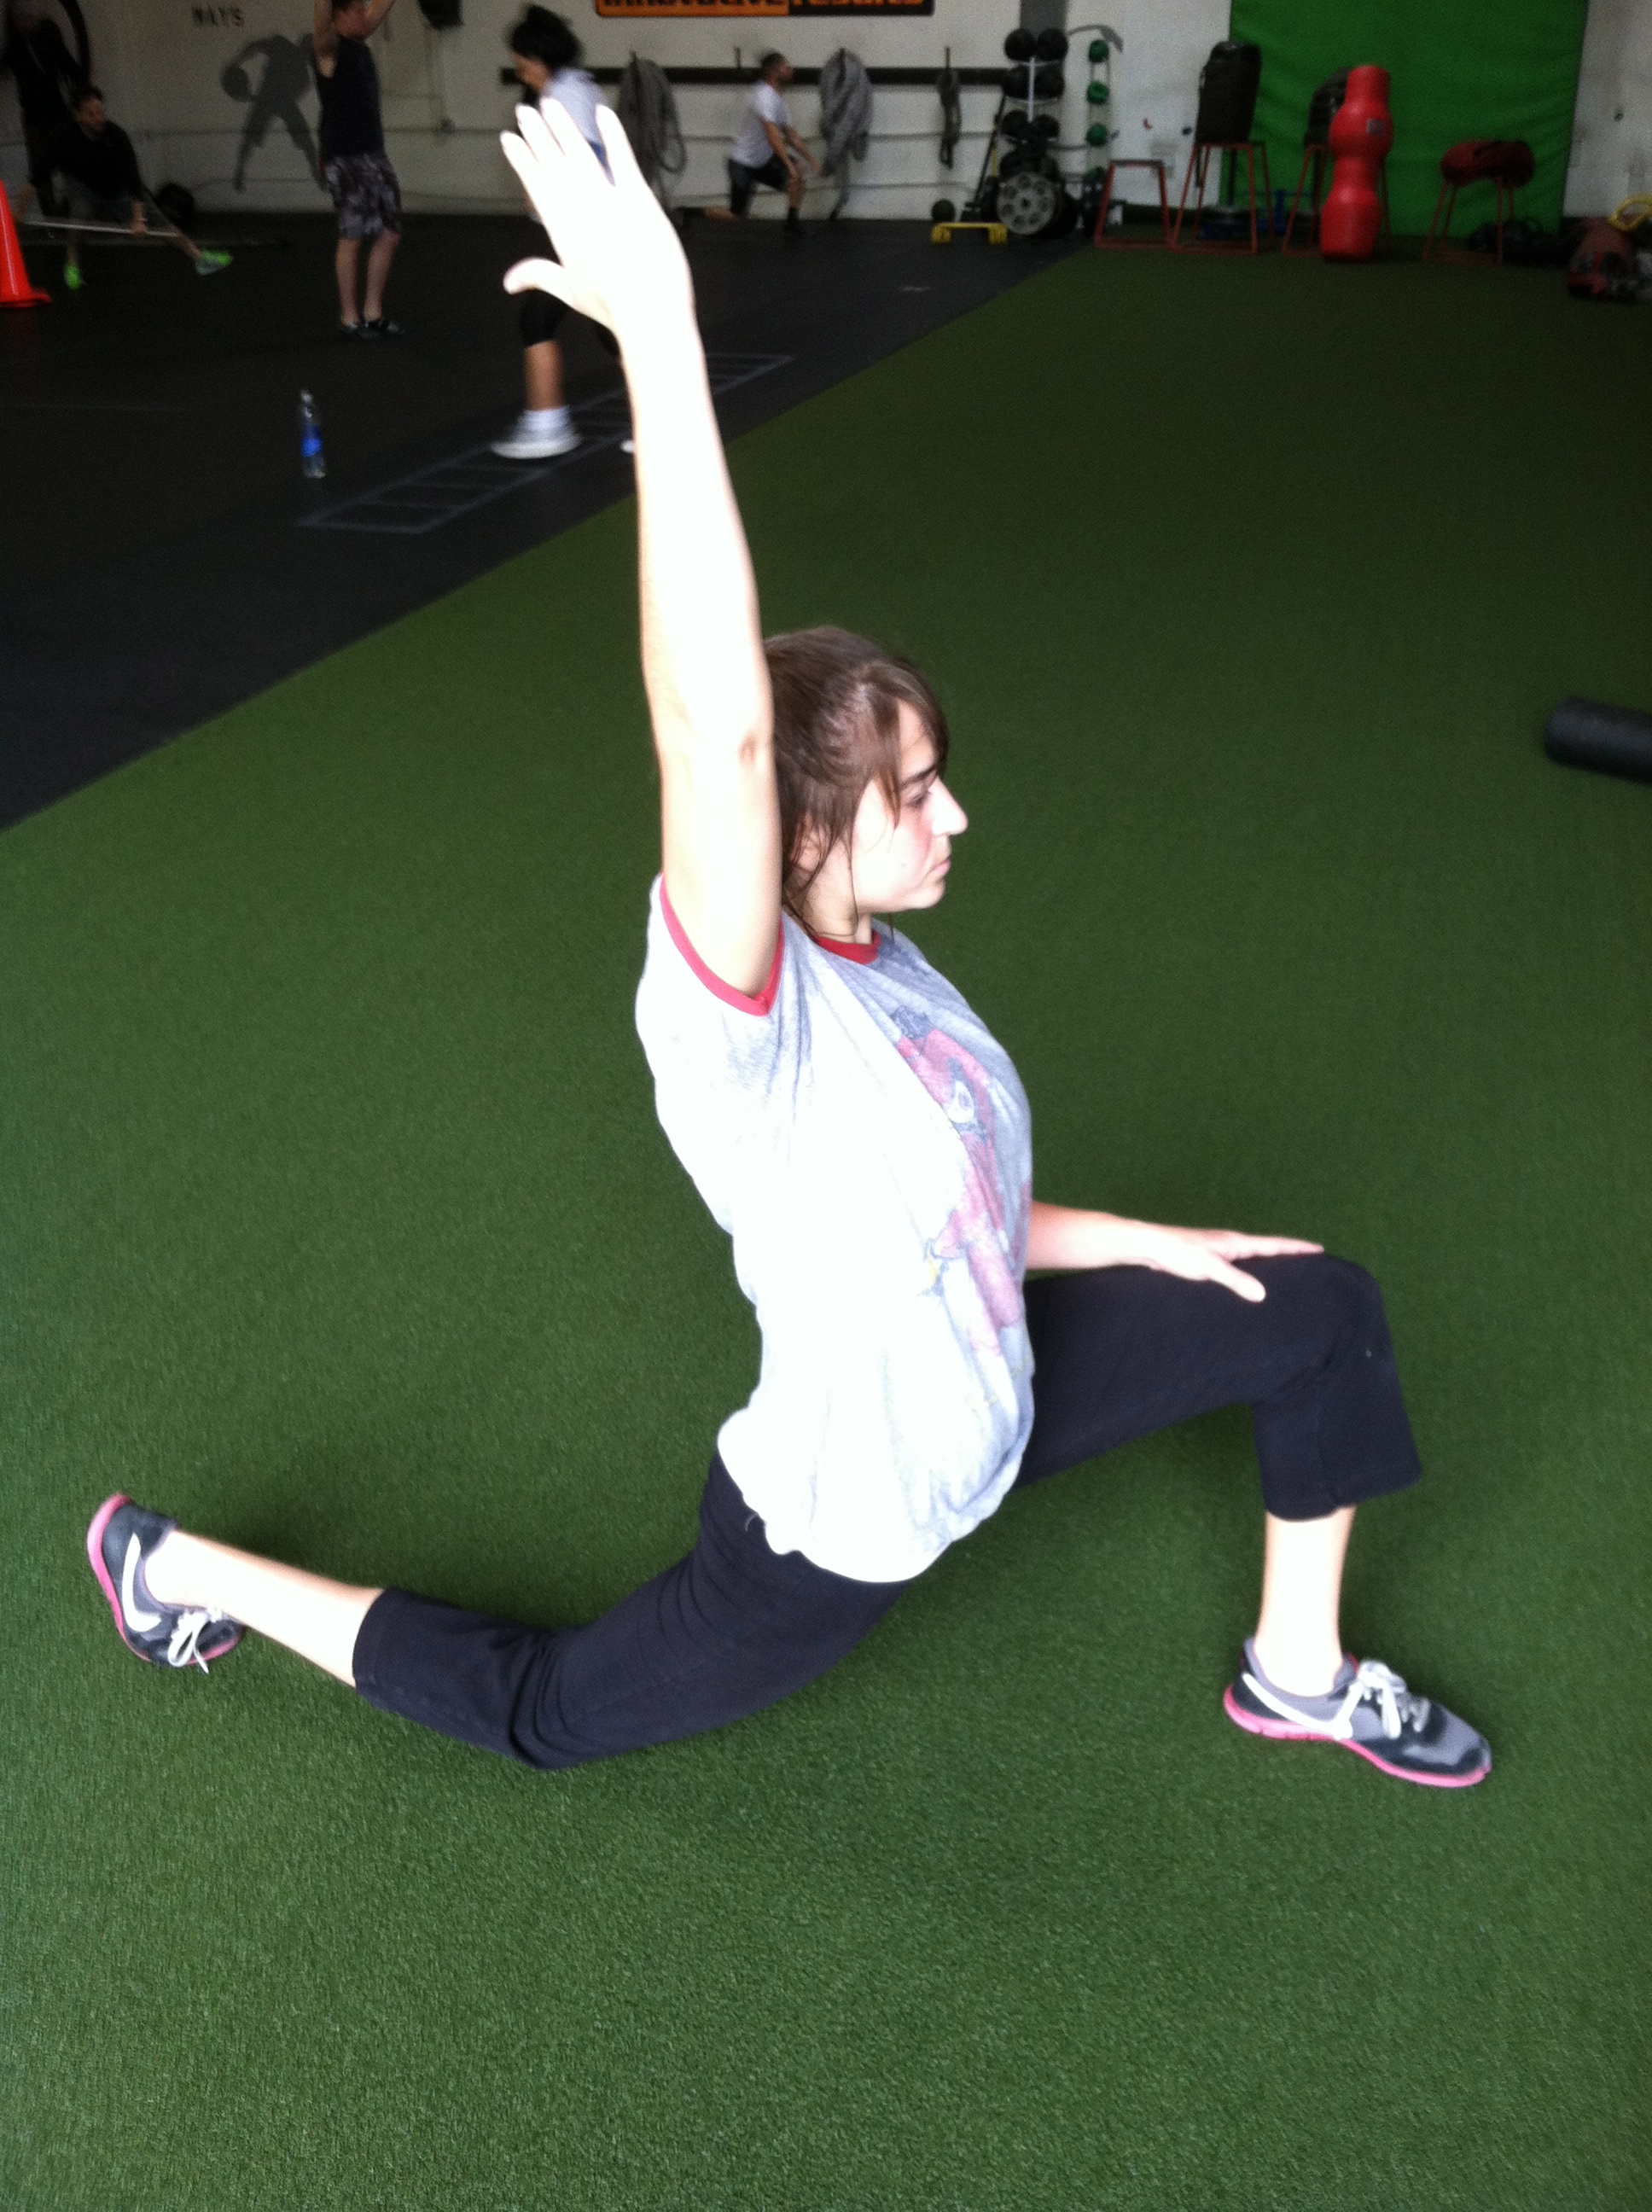
Kneeling hip stretch variation
These stretches and even the foam rolling moves aren’t the only ones you can do. I didn’t even really get into static stretching…BUT the point is these are good ones to start with and are very efficient ways to target all the muscles in and around the hips.
So between the foam rolling and stretches, your hips should be loose and ready to let your butt be activated!
Check back for Part 3 when we discuss glute activation exercises to use in your warm up!
P.S. I will add more photos! Sorry for these few that I managed to quickly take a few weeks ago after a workout!


