Category Archives: Man Bicep Form Bible
How many sets? How many reps?
So recently I’ve gotten a ton of questions about how many reps and sets people should be doing.
Which actually is a really great question – and is completely dependent upon your level of fitness and fitness goals.
So then…how many reps and sets should you be doing!?!
Let’s say you are a beginner…or doing a recovery week…or simply working on muscular strength endurance.
Then you are probably going to go for higher reps, and by higher reps I mean 15-20 reps, and 1-3 sets.
When you work in the higher rep ranges, you aren’t using the heaviest weight possible. You are using a weight that starts to fatigue you toward the end of your rep range.
So basically doing 15-20 reps is going to get you the same results whether you do 15, 18 or 20 as long as you use a weight that means you are fatigued before the final rep.
Higher reps can be a great way for beginners to focus on form and really get the move ingrained WHILE still building up their basic strength.
How many sets you do in that higher rep range is based on how experienced you are, your training intensity for the day and even the volume of your workout.
If this is your first workout ever, you are probably only going to do one set. If you’ve been working out and building, you may be pushing through three sets.
If you are going super heavy and can barely make it through those 20 reps (like breathing squats), you may only do one set because any more would simply be overtraining (and if you went as heavy as possible for those 20 reps, you shouldn’t have anything left in the tank to push through a second round!).
If you are doing a leg workout for the day, you may only end up doing one set of the exercise because you are doing a ton of volume for your legs. You don’t want to overdo it by doing three hundred thousand reps of everything!
Ok, so 15-20 reps, 1-3 sets.
This rep range is where you find many women. They fear bulk so stay within this range.
But then they are missing out on the huge amount of benefits that lower rep ranges have to offer them!
So let’s say you do actually want to really get toned, buff and build some muscle while lifting some heavier weight. Let’s say you’ve become more advanced and your tendons and joints are ready to handle more load. What rep range do you enter next?
This is when you enter the supposed hypertrophy range of 8-12 reps. In this rep range, you supposedly have the great chance of actually increasing muscle size. I rarely ever mention this since most women then get scared and flee toward the higher rep ranges.
But let me tell you…you won’t get freaking bulky just cause you lift a heavy weight only 8 times!!! You may burn more fat. You may look more toned. You may get stronger and perform better…
BUT YOU WON’T FREAKING GET BULKY!
Anyway….
I love the 8-12 rep range. You can use heavier weights than the higher rep ranges. More rest is generally required between moves because you are moving heavier loads, but you really do get a big bang for your buck in terms of strength gains. You also are lifting heavy enough loads for just enough reps to get your heart rate up a little, which isn’t bad either.
If you are doing 8-12 reps, you should have good form. If this is really your first time out of the 15-20 rep range, don’t just start lifting 30 more pounds and go straight to 8 reps!
Start out by adding a little weight and doing 12 reps with good form. If that is easy, add a bit more weight and shoot for 12 more. If you say only get 10 with the new weight, stick there until you can lift the weight for 12 reps with good form and then add a bit more.
Add weight slowly so your body can adjust to the new loads.
When working in the 8-12 rep range, you don’t want to just randomly select 10 reps and perform them. You want to only do 10 reps because at 8 or 9 you want to drop the weight and quit right then and there.
In this heavier range, you want to make sure that you aren’t just stopping at 8 reps because that is what you said you were going to do. You want to have the weights make you stop at 8.
Using the heavier weights with 8-12 reps, you should be doing between 3-5 sets. You will need more rest between rounds with this rep range than you probably needed with the higher rep range unless of course you are doing something like breathing squats.
The number of sets you do for any rep range is based on the intensity of your lifts (how much weight are you using, how much rest are you getting) AND the training volume.
To simplify things, generally speaking, more reps means fewer sets…fewer reps means more sets.
So say you really want to work on gaining maximal strength. How many reps/sets do you do?
Well 1-5 reps and generally 4-6 sets.
If you are doing basically the heaviest weight you can handle, and nearing your one rep max, you probably aren’t going to be able to do very many reps of that weight over the workout.
I mean 25-30 reps in total at a heavy heavy weight (so a weight you can handle for 5 reps at a time for 5-6 sets) is going to be pretty killer. You probably AREN’T going to be doing that many supplemental lifts after it and if you do most of them are going to be with pretty darn light weight. (Remember training volume is key….too much volume equals overtraining which means your results won’t be as good as they could be if you just did less!)
Anyway, to sum all this up….
When considering how many reps and sets to do:
- Think about your level (Are you new to lifting? Do you have a solid base?)
- Think about your goals (Maximal strength? Building some great muscle tone? Building up strength endurance?)
- Think about the intensity of your workout (Do you need a lighter day? Have you done 3 heavy days already this week? How much rest between sets? Is it a circuit? Are you lifting super heavy?)
- Think about how many exercises you are doing for that body part during the workout (A workout with 5 leg exercises vs. 10 leg exercises means very different set ranges per exercise)
- Think about the weight you are using (You shouldn’t just say you are doing 20 reps or 12 reps and stick with an easy weight that you could do for 30 reps! Your weight needs to match the rep range. You should want to stop and have muscle shake-age, but good form!, 1-3 reps before you stop. Muscle shake-age is a very technical term meaning your muscles are shaking from working very hard.)
So if you have considered all of the things above, you will then want to use these three very basic rep/set ranges. I do want to note, however, that there are times when doing more than 20 reps is really beneficial AND that there are times when doing as many reps in a certain amount of time is an even better workout for strength endurance than 15-20 reps. (Sorry nothing is ever black and white!)
Anyway, to boil things down…
Strength endurance/beginner/recovery-variety for the advanced lifter – 15-20 reps, 1-3 sets
Hypertrophy aka sexy muscle range/Strength for performance – 8-12 reps, 3-5 sets
Maximum strength/sexy muscle-building – 1-5 reps, 4-6 sets
You should then choose weights and rest periods appropriate to the range that you select. You aren’t simply doing 8 reps to do 8 reps or 20 reps to do 20 reps!
Know why you are doing certain things! Don’t just do 10 sets of 10 reps because you think 100 reps of something seems gnarly!
Consider your variables and know what your goals for the workout are…THEN you can pick a rep and set range that will help you accomplish your goals!

This really isn’t super relevant….just funny haha
SIDE NOTE: Remember these ranges are GUIDELINES. AND you shouldn’t just only do one rep range for the rest of your life. I cycle through all 3 rep ranges since all three work on different things, but at the same time really do overlap. The point is to consider how intense you are training and the volume of your overall workout so that you don’t overtrain OR undertrain, but instead get the most out of your workout!
Part 1: Being Bootilicious – The Deadlift
So over the next week or so I’m going to write a series of posts focusing on the butt.
It is one of the biggest, most powerful muscles and also one of the most underactive.
Over the next few posts, I will discuss how to activate this amazing muscle and make it perky and perfect!
Of course while it would be logical to start with warm up/activation movements, I’m going to instead start with my favorite posterior move – the deadlift.
So the deadlift is hands down my favorite exercise. If I could only do one move the rest of my life, it would be the deadlift.
Why do I like the deadlift?
For one, it is super empowering. It feels so great to be able to lift a huge weight successfully off the ground.
Two, it is a full body move that really works the entire posterior of your body (back, butt, hamstrings….).
And three, there are a bazillion different variations that are just so beneficial and really get your butt activated, and honestly all too often people’s glutes really aren’t firing!
It is the perfect move to really build glute strength and power!
And when I got the honor of designing the workout progression for our gym for the next three weeks, I made sure to use it. My progression is very leg intensive and very very focused on improving people’s posture and getting the right muscles activated.
I was proud today to find out that everyone has most definitely been feeling the workouts working. While I never want to push people too far, I do like to hear that their butt cheeks are sore because it is very very hard usually to get people to really activate their glutes and use their butt (many people are quad dominate, which can lead to issues).
So if people’s butts are sore then they must be activated!
How did we get people’s glutes firing and start building some butt strength!?!
Through variations of the deadlift! DUH!!!
And not every variation even needs to be weighted down!
Of course you have the traditional deadlift, which is a great posterior exercise since it hits everything from behind your shoulder blades down to your heels.
However, this move isn’t always the best place to start since many people have limited range of motion in their hips and bad posture. If you can’t get your butt low and keep your shoulder blades down (chest pressed out), then you are at risk for a hurt low back.
So one of my favorite deadlift variations, especially to start with, is the single-leg deadlift. It works on balance, posture AND your glutes and hamstrings.
You don’t need weight to make this move challenging AND it is perfect for the beginner or the advanced lifter!
For the beginner it will really work on balance and posture while starting to get the glutes activated. Make sure they keep their back flat as they hinge over. Make sure their hips don’t rotate open. This will teach them good posture when they move to using weights.
For the advanced lifter, you can weight down this move, which will build more strength in the glutes. This version of the deadlift really forces them to really engage their core AND it forces them to use each leg independently. When we isolate each leg, we make each leg work independently, which can prevent the dominate leg from always taking over and perpetuating imbalances.
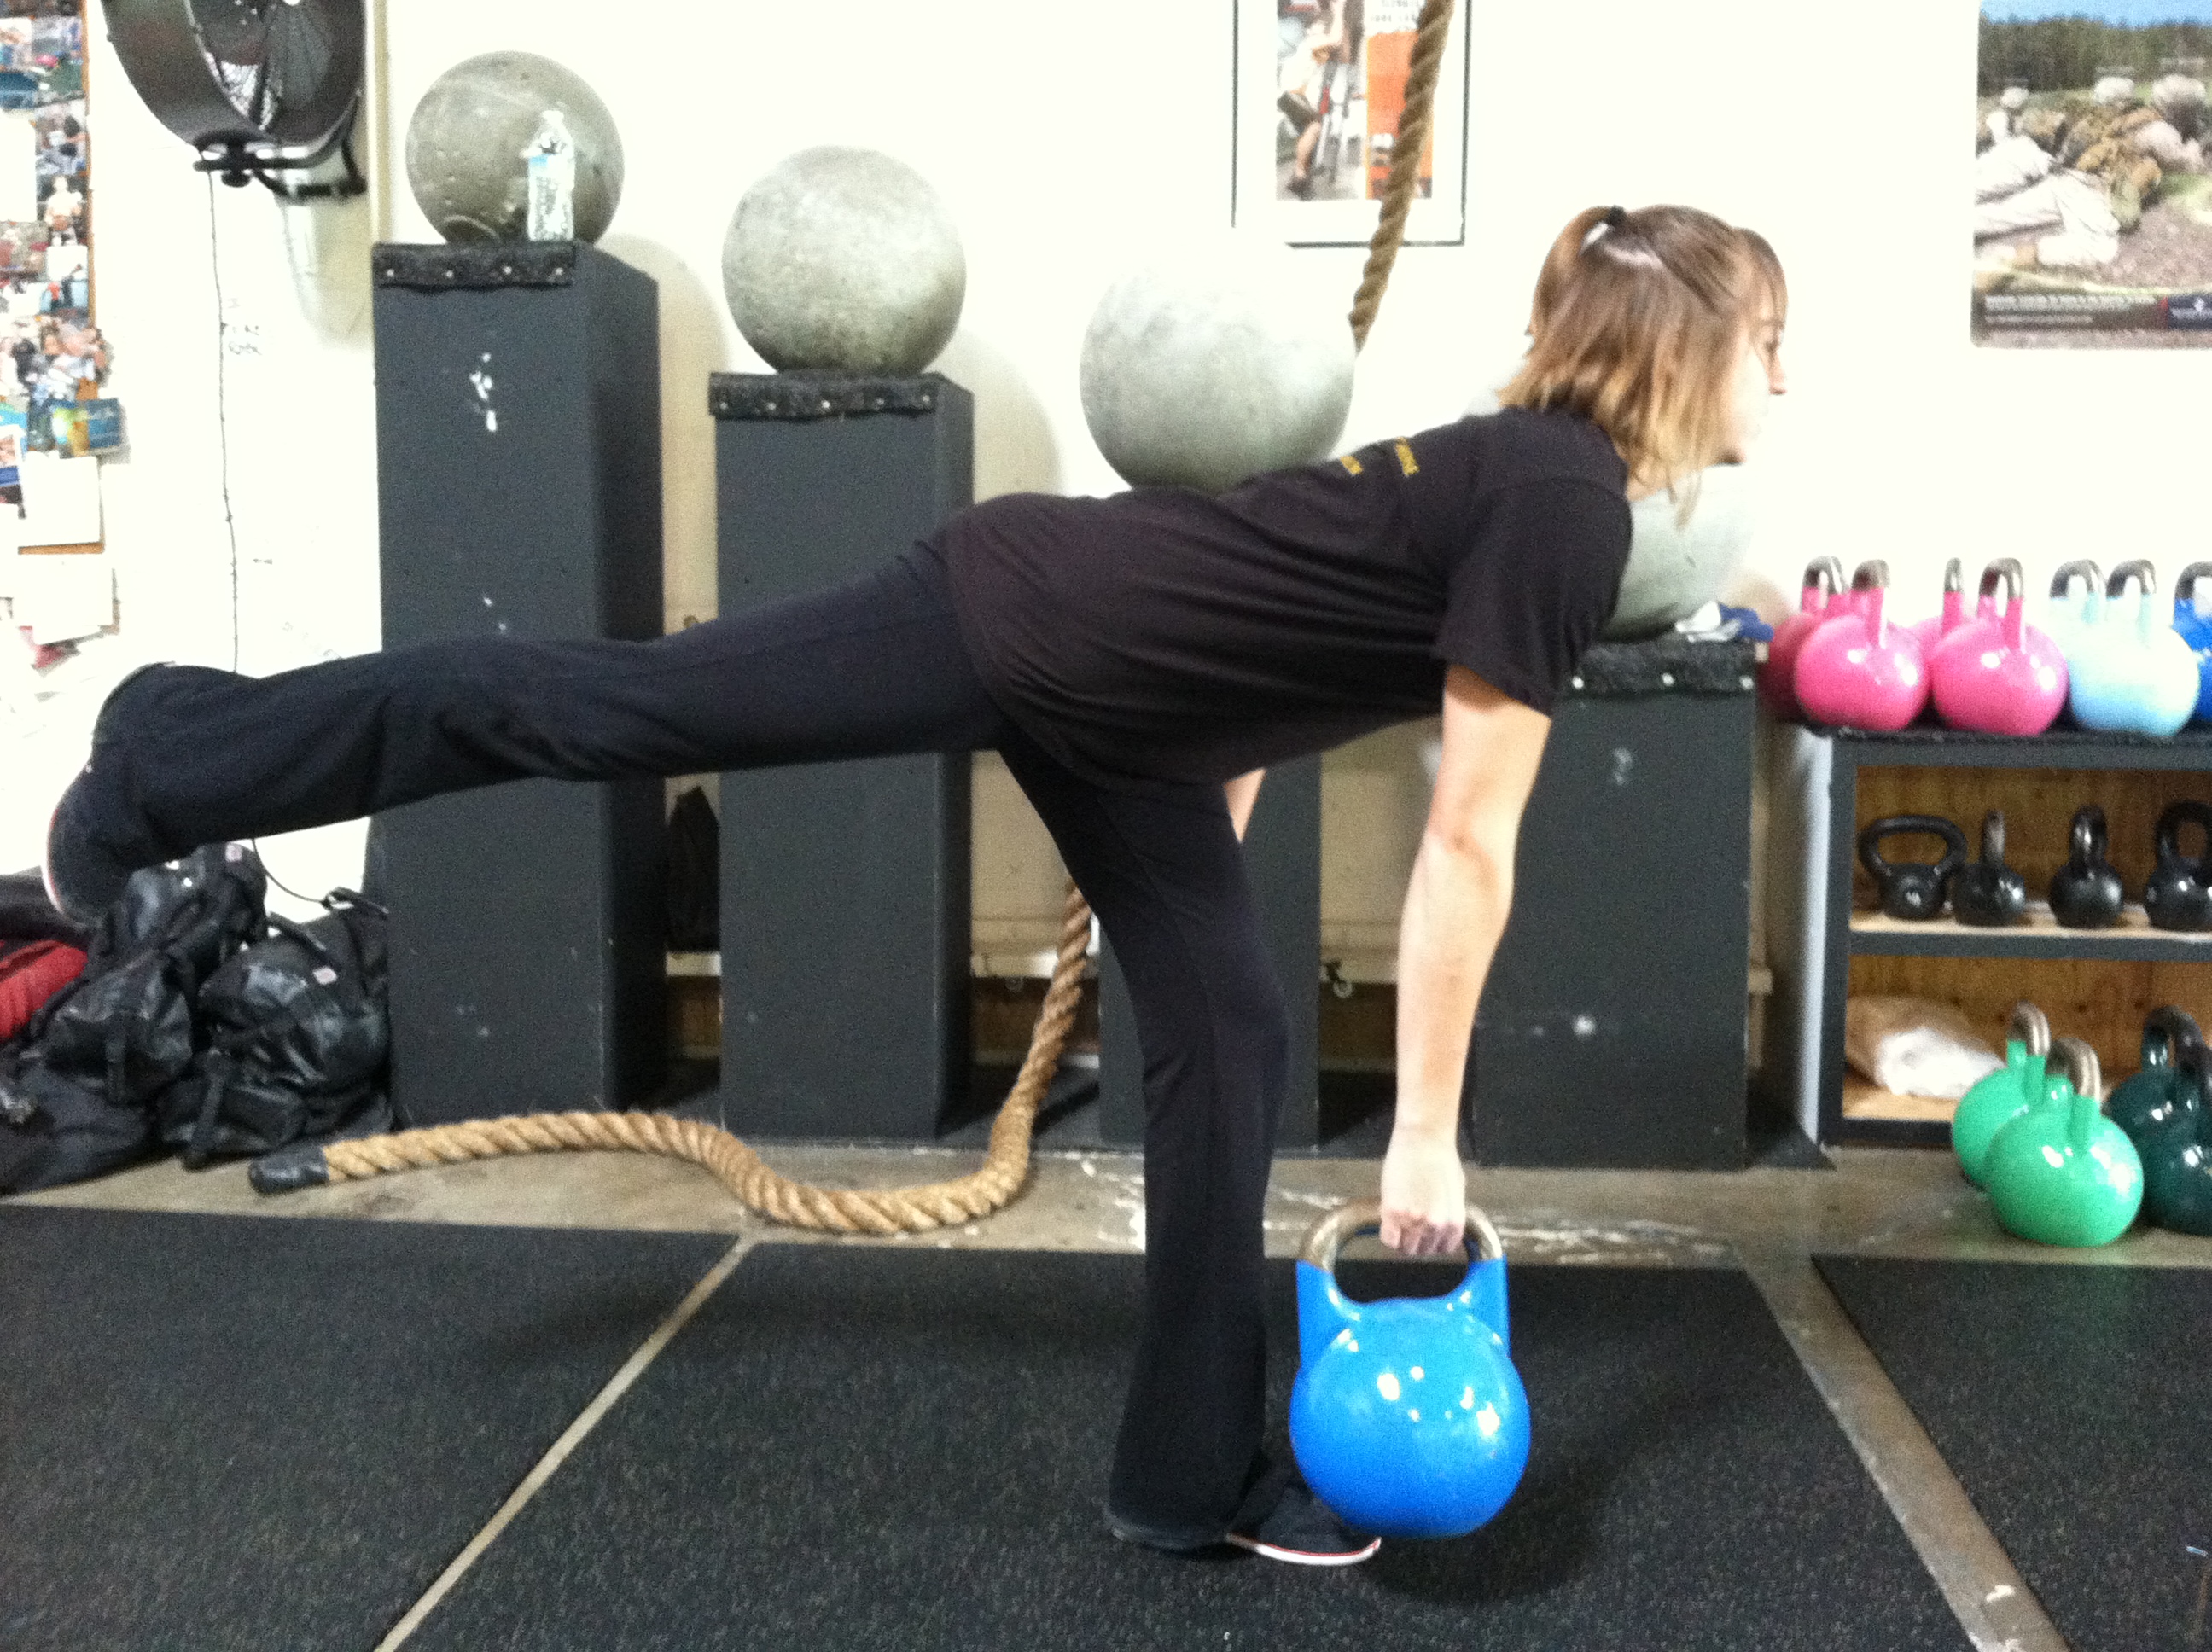
I like weighting the move down with a kb in the opposite hand from the leg working…P.S. This isn’t a fun move to hold for a picture!
So then another great deadlift move to use is the straight leg deadlift.
I usually use this move before I move to full deadlifts since it doesn’t require as much hip mobility BUT starts to teach people to keep the correct upper body posture while adding more weight. (It is also just a great way to add variation to your glute workouts!)
So with this move, knees are only slightly bent. It is a hinge from the hips with the back staying nice and flat as you hinge over toward the ground pushing your butt backwards toward the wall behind you.
Watch when people do this move. The key here is to make sure they are pushing their butt BACKWARDS.
Seriously a great way to work the glutes and hamstrings while starting to add weight! Since balance isn’t an issue it can be an easier way to start adding heavier weight!
Probably my FAVORITE deadlift variation because you can use heavy weight is the sumo deadlift. It is a great way to start really building glute strength and start pulling heavy weight.
So in this variation of the deadlift, your feet are wide apart and your toes are turned slightly outward (by turning your toes out a bit you engage your glutes a bit more). This variation of the deadlift is MORE leg intensive than the traditional deadlift so is ideal for butt building!
Using this move you can really start to develop maximal strength since it is easy to use heavy weights. However, before the person can add heavy weights, they must maintain good posture – aka their chest must stay up and their back can’t round.
The sumo deadlift can be harder on the hips though so don’t over do it! Rotate it with the regular deadlift to make sure you blast the butt from a couple of different angles and to give your hips a bit of a break.
So…if you want to get the butt firing and build some serious glute strength, use a variation of the deadlift.
Looking to work on balance, core strength and posture while targeting the glutes? Use the single leg!
Looking to add more weight while really focusing on the glutes and hamstrings? Use the straight leg!
Looking to build maximum strength in the butt cheeks? Try the sumo deadlift!
Mix it up and target those glutes!
Which variation is your favorite?
Coming soon to the Bootilicious series….glute warm up exercises, glute bridges and multiplanar lunges!
Coordination – The drills most people skip
Ever feel like there is a huge disconnect between your limbs and your brain when you are doing an activity?
Then you probably need to start doing more speed, agility and quickness drills like the ladder – which are honestly drills for the mind as much as they are for the body.
Coordination is all about how fast your mind and body can communicate.
Balance drills and most speed, agility and quickness drills work on neuromuscular control, which means they work on your mind’s ability to communicate quickly and efficiently with the body to produce a specific movement.
Besides being a great workout, these drills will help you master form in other workout moves and help you realize your true strength. These more efficient movement patterns will lead to fewer injuries AND you will probably see strength increases in your lifts because you are recruiting the right muscles in the right order quickly!
Ok so what drills should you add to your workout to improve your mind-body connection?
Balance drills are a great place to start.
Have you ever tried balancing on one foot? Maybe one foot up on your toe (it’s actually very difficult and you may want to start on both toes)? Maybe one foot on a foam pad?
Balance work will help you start improving that mind-body connection and it will strengthen your feet and ankles.
You can then move onto some plyometric training.
Most people define plyometric training as jump training, but that isn’t correct. Plyometric training is training that improves your ability to move quickly between an eccentric and concentric contraction – it improves your body’s ability to decelerate and then accelerate then decelerate quickly without much pause.
Jumping can be a great way to train this. Think about the squat jump. Start by loading or squatting down a bit. Then jump up and squat back down to jump up again. A beginner should pause after each jump before jumping again. Someone more advanced will try not to pause between jumps because their body can quickly decelerate and accelerate. The goal of this training is to go as fast as possible while maintaining control.
A HUGE part though of jump training is the landing. You should land softly….like a ninja. This requires that you bend your knees and don’t land flat-footed. It may mean squatting down enough that you swing your arms as if you are grabbing gravel off the ground. The landing is key…it is when most people get hurt. So if you are new to jump training, you may want to even start by jump UP to a very very low box. As you master this, go a bit higher or even work on the jumping OFF of the box part.
Using the ladder or cones can be another great way to improve your neuromuscular control. Shuffle quickly around cones. You can do this in a straight line or in a circle. You can sprint then shuffle then back pedal then sprint. You can mix it up. The key is quick movements and quick changes in direction.
The ladder is one of my favorite tools because it is super easy to see improvement in. You can do running forward with one foot in each box or make it harder by doing both feet in each box. You can do ins and outs or the Ali shuffle. Or one of my favorites the “icky shuffle.” The goal is to do any of these movements perfectly as quickly as possible. Start as slow as you need just do it PERFECTLY. Add speed as you learn the move and perfect it. Remember it isn’t about just going quickly. It is about doing it PERFECTLY.
Anyway, here is a little SAQ portion to do before you do your strength training.
3-5 rounds: Rest between each round. Move quickly through all three exercises.
5 Squat Jumps (or up to a box or barely off the ground depending on level)
Icky Shuffle down ladder
4 Soccer Throws each side (So overhead throw against a wall stepping forward with the same foot for 4 before switching)
All these should be done as QUICKLY as possible with good form. Try to increase your speed each time you do everything with great form.
Remember this doesn’t have to kill you. It can actually just be the end of your workout after you’ve rolled out and gotten the muscles a bit warm.
Try it. Watch how much your coordination will improve after a few weeks of just a few drills before your workout!
You make the workout hard
So this month we’ve changed up our training a bit at the gym and have been on a new progression.
A “back to basics” progression.
And apparently a few people complained that it was “too easy.” Which honestly made my jaw drop.
I’ve done basically all of the workouts in the progression and I’m sore as all get out. There have even been a few that have made my legs want to give out or my food to come up.
The workouts in our progression…Easy?!?!?
HAHAHAHHAHAHAHHAHAH! NOPE!
But as I began to really watch people around me do the workouts with me, I realized one big thing….They weren’t pushing THEMSELVES.
They were used to a more complex workout that forced them to become fatigued and when we simplified it, they just didn’t know how to push themselves through simple moves.
They didn’t know how to challenge themselves with weight….or rest…or reps…or ANYTHING!
And the worst part is that being able to push yourself is the KEY to success!
Any success for that matter.
I can write someone up a workout and diet plan, but if they don’t do it when I’m not there to push them….well they won’t make near the progress they could.
They need to be able to PUSH THEMSELVES.
Anyway, so I was watching people cruise through the same workout that was literally destroying me….And it started to piss me off.
Why are they wasting their time using weights that are way too light? Or why are they doing only 10 reps when they could do 12? How can they complain that crawling is easy when their butts are way up in the air!?!
And then I realized another key thing…Most people don’t really know what it means to push themselves. Their workouts have to be an hour long or they have to do some crazy moves to be satisfied that they got a great workout because they can’t challenge themselves enough with a simple squat.
Well let me just clarify something right here…YOU DON’T NEED FANCY MOVES OR HOURS OF WORKING OUT TO GET IN A KILLER WORKOUT!
You just need to make sure that you are challenging yourself with weights and reps and even rest times. You just need to make sure that you are doing moves correctly and getting the most out of them.
Not to ramble or side track, but let’s just pause a moment to think of a move that most people do incorrectly – THE PUSH UP.
Most people don’t do the push up….They do the worm.
Their core is flopping around and the have scapular winging and their heads are jutting forward and their arms are out at some odd angle.
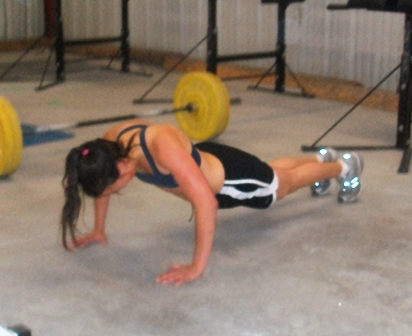
Found this on a crossfit website…The caption they had is that she is “working on her push ups.” I really hope someone corrected this form….OUCH…Sorry chica.
So of course they aren’t getting the most out of the move.
BUT neither are those guys who do keep a decent push up line but only move up and down an inch when they do their push ups.
THOSE DON’T COUNT! Think push ups are easy…THEN DO A FULL ONE! Lock your arms out at the top and hit your chest to the ground!!!
And then if that is too easy, PROGRESS THE MOVE. Move your feet up to a chair. Add a weight to your back.
Don’t just whine that it is easy and think you need to be doing some other fancy move.
MAKE THE MOST OUT OF SIMPLE MOVES!
Anyway, I’ve ranted enough. I’m just sick of hearing about how a workout is too easy because if you give a workout 100% effort, trust me….It won’t be easy!
So try this workout and REALLY REALLY give it everything you’ve got.
WARM UP
SAQ x5 rounds with a little rest in between each
Ladder ICKY Shuffle
Zigzag cone shuffle
Lateral step and throws x6 reps
REST
STRENGTH x5 rounds with little rest in between each round
Sandbag pull throughs x 8 each side
Sandbag Zercher lateral lunges x 8 each side
Circle crawls x 10
CONDITIONING x 5 at least double the rest to work
Sidewinders 25 seconds on as fast as you can
(The last can be subbed for any full body “sprint” activity for 25 seconds if you don’t have ropes)
This workout left me fatigued and sore. And I only did 8 reps on two of the strength things when many people did more. It is all about choosing a weight that you want to give up on before you’ve completed all your reps. Like with the lunges…I wanted to give up around 6 reps….Like literally just wanted to drop the bag and NEVER pick it up again! BUT choosing a challenging weight DOESN’T mean choosing a weight that you can’t use correct form with.
Anyway…CHALLENGE YOURSELF! Take a seemingly “easy/simple” workout and really focus on doing everything perfectly. Really choose a weight that makes your muscles scream. Push yourself to rest less or do more reps. PUSH YOURSELF!
Not everything’s a circuit
So I’ve always loved circuit training. You can get your heart rate up and work your entire body quickly and efficiently.
But circuit training isn’t necessarily the best way or the only way to get great results.
I think most often circuit training is our go to for workouts because it is easy to great a program using the model and usually the workouts are KILLER.
But a “killer workout” doesn’t necessarily mean that it is helping you reach your specific goals.
Just because you don’t feel like death after a workout doesn’t mean that it wasn’t amazing and even more beneficial than one that completely destroyed you.
Anyway, I’ve definitely been playing around with program design recently. I always think that if you are open to learning, you will continually find better, more efficient ways of reaching your goals.
You just can’t be stuck on having to do a workout that “destroys you” every time.
One great design I’ve been using more often is supersets either with strength and stabilization or strength and power OR, as I mentioned in a post a month or so back, even just sticking with one exercise for a period of time before moving on to the next.
So on that note, I just wanted to share my wonderful workout from today, which is actually courtesy of Aaron the owner at Innovative Results! Honestly the only part I wanted to “die” on was the Versa Climber…but we have a love-hate relationship anyway….
Workout:
Warm up (foam roll!, band walks, lunges, locomotion)
Kettlebell Jerks (30 seconds right arm, 30 seconds left arm, alternating 5 minutes)
Rest
Battling Ropes (30 seconds intense waves all the way down, 30 seconds easy sidewinders, alternating for 5 minutes)
Rest
Kettlebell Snatches (30 seconds right arm, 30 seconds left arm, alternating 5 minutes)
Rest
Stage Coach Ropes (double arm waves) (30 seconds intense waves all the way down, 30 seconds “punching” rotational work, alternating for 5 minutes)
Rest
Kettlebell Long Cycle aka clean and jerk (30 seconds right arm, 30 seconds left arm, alternating 5 minutes)
Rest
Battling Ropes (5 minutes)
Rest
Versa Climber (30 second sprint, 30 second rest for 5 minutes)
DONE!
Walk around until you don’t feel like you are going to fall over and not get back up and then foam roll!
A great workout that is challenging, gets your heart pumping, works on full body strength and explosive power and even works on patient endurance!
It does it all…And it isn’t just a workout that “murders you.”
P.S. If you haven’t ever done snatches or long cycle (aka clean and jerk) with a KB before, please check out the videos on the site I linked to above. Kettlebell lifts are way safer than Olympic lifts but that doesn’t mean you shouldn’t have some technical guidance before attempting them!
Progressing toward the elusive perfect push up and pull up

I have many women and even some men tell me that they want to be able to do perfect full push ups and push ups.
And I say “OK!”
Because there is a way to get there! Consistent hard work and a well thought out progression based on what you need to work on will get you there!
So this really applies to any exercise that you want to be able to do, but honestly two of the exercises that most people can’t do, but should be able to do are the push up and pull up (also, most people recently have been telling me they want to be able to do these two moves so I figured I would focus on them).
First, consider all of the muscles used in the move.
For push ups, you use your pecs, shoulders, triceps, core and even your quads and legs. Most often though, people need to focus on core strength and either shoulder or tricep strength.
For pull ups, core and back strength are essential. The grip you use will also determine how much bicep is involved.
Once you identify the muscles used, you can work on those muscles. That doesn’t mean you have to start doing tricep extensions and bicep curls.
You can still do compound movements.
So to work on improving your push up, first assess where you are. Can you do a push up with your hands on an incline? Can you do a push up from your knees? And when I say “Do a push up.” I mean a PERFECT form push up from that position.
Same goes for pull ups. Can you do jumping pull ups? Can you do pull ups where you jump up and slowly lower yourself down? Can you do a pull up and hold? Or can you do a chin up but not a full pull up yet?
Get a clear picture of where you are starting from. If you know exactly where you are at, you can design a program that will get you to where you want to be.
If you don’t have a clear starting point, how the heck are you going to outline a clear progression!?! You won’t know how long it will take you to get somewhere if you don’t even know where you are starting from!!
So once you know what muscles are involved and where you are starting from, you must create workouts that strengthen your weak areas and progress you toward you end goal.
While you will want to do lots of push ups and pull ups during your progression they shouldn’t be the only thing that you are doing.
For push ups, do some core strengthening exercises. Do some crawling that targets your shoulders, core and quads. Do some form of dips, be they full dips or dips off a bench. I mean even get creative with it. Try some chest flies on the slider. Do some ab roller to work your arms and core. Battling ropes can be good. Medball chest passes are a good explosive way to work your upper body.
There are lots of ways to work. Pick exercises that target your weak points!
For pull ups, battling ropes again can be good. Working on different variations of pull ups can help. Try some medball slams into the ground. You can do ones straight ahead or rainbow slams where you slam it down on each side. Do some inverted rows. Some pivot prone pulldowns. Work on your grip strength. Heck even just playing on the monkey bars will definitely help!
And the good part about some of the things that you can do to work on both of these moves is that they will improve your overall posture and strength not JUST progress you toward a perfect pull up or push up.
There are even moves that can benefit both exercises in some way such as the parallel bar press. Just hold your body straight up off of parallel bars or a dip machine. Don’t be a “turtle” aka keep your shoulder blades pull back and down and your spine long. Your neck should be long and not tucked back into your shoulders like a turtle pulling its head into its shell. Just hold. Keep your abs engaged and your shoulder blades retracted. You will feel this in your back and your arms and even your core.
Anyway, there are a bazillion ways to strengthen your body to progress toward a pull up or push up. Don’t just flounder blindly and HOPE you will get there. SET UP A PROGRESSION!
If you need help or want some exercises to help you strengthen your weak points, let me know! 🙂
Babies do it – So should we!
I hear too many people complain that they just don’t have time to go to the gym. That they just don’t have time to get in a good workout.
Seriously!?!
You only need 20 minutes to get in a killer workout. You just need to pick the right exercises.
And crawling would be one of those killer exercises that are perfect to include in a workout when you don’t have much time.
Yea you can make crawling more difficult by adding in chains and weights and such, but you really don’t even need more than your body weight to get in a great workout using crawling.
You can go forward, backward, left and right and do a bunch of different types of crawls. You work your arms and legs and core. AND you will get out of breath doing it if you push yourself to go fast.
Really crawling works it all.
A great crawl to start with is either the baby crawl (basic) or the table top or bear crawl.
To crawl forwards and backwards:
- Start on your hands and knees with your knees under your hips and your hands under your shoulders.
- If you can, lift your knees off the ground so you are on your toes and hands. If this is too much at the beginning, start with a baby crawl from your hands and knees.
- Begin to move forward with a contralateral movement – opposite hand and opposite foot move. Ex: Reach out with your right hand and bring your left knee up to the back of your left wrist. Then bring your left hand forward and your right knee.
- Keep crawling forward for a set amount of feet. Keep a nice table top position with your back. Don’t put your butt up in the air and keep your core tight.
- Once you reach the end of your set distance. Crawl backwards. You will do the same movement just going backwards. This will feel awkward. Do not get too spread out.
To crawl sideways:
- Set up the same way you did with the forward crawl except facing sideways.
- Have your hands wide and your feet together.
- As you move sideways, you will bring your feet wide and your hands together and then bring your hands back wide and your feet together.
- Repeat this motion all the way down and back.
- You can also straighten your knees and remain in a high plank if you would like to change it up.
- Again keep your hips down! No butts up in the air.
The crawl can be used as part of your warm up or added to your workout. Either way you will work your entire body and get some cardio out of it!
Yesterday I incorporated crawling into my workout out at the park and it only took about 20 minutes! Yay sun and yay crawling!
10 rounds as fast as possible
5 pull ups
10 push ups
15 body weight squats
50 ft crawl forwards
50 ft crawl backwards

I’m pretty sure this is the look I gave Ryan at some point during this deadly quick workout.
Squat form – Babies can do it, but most adults can’t

If a baby can do it...
When do we lose the ability to perform a perfect squat?
As children, we all have perfect form, but I can tell you that most adults don’t. Usually during the first couple of sessions with a client, I have to work on a client’s squat form. Which always shocks me because of how often we perform squats throughout the day.
We squat to sit down in a chair. We squat to go the bathroom. We squat to pick something up off the floor (or at least we should be squatting instead of just bending over).
But if you watch adults squat to sit down, they don’t have near as good of form as children do. Most adults lean forward and don’t keep their weight in their heels. Most let their knees fall together or flare out. Most adults let those toes flare out.
Most adults have lost the ability to squat. They don’t know how to activate their muscles to squat down properly. Why is this? Is it because the more we sit around, the more our muscles forget how to move properly? I mean inactivity and all the sitting we do can result in tightness and altered muscle length-tension relationships, which can cause bad movement patterns…but when do we start losing the ability to move properly? Maybe this phrase is true – use it or lose it!
I mean you really do have to teach most adults all the steps to squatting that a baby is born knowing.
I have to tell them to stand upright with their feet pointing straight ahead, about shoulder-width apart. I have to tell them to push their butt back as they lower themselves to the ground, keeping their weight in their heels. I have to tell them to keep their chest up and head in a neutral position. I have to tell them to tighten their core to stabilize as they sink down. I have to remind them that if they are sitting back correctly their knees won’t go past their toes.
I have to remind them of everything that the baby above is doing without thought. Seriously, does anyone else find it sad that what a baby can do, most adults can’t?
Maybe play and recess need to be kept a part of the school day for longer so that we don’t lose our ability to move correctly (like until college at least…or maybe we should get recess at work….).
Man Bicep Form Bible – Deadlifting and Benching
So today during our workout, we took a couple of videos to show our form.
The first video is of one of our favorite exercises – deadlifts. This is during my warm up round.
1. I set my feet and my hands. My feet are a little wider than shoulder width apart and my hands are right outside my shins.
2. I sink low, putting my weight in my heels.
3. I put tension on the bar by pulling up as I raise my head and chest. (You always want your head and chest up instead of sagging toward the floor. This will keep your back from rounding. I sometimes even like to raise my chin right before I settle in to remind myself to keep my chest up. And you can also look at the ceiling to remind yourself not to round. Don’t pull your whole head up. Just pick a place with your eyes.)
4. I pull up on the bar by pushing through my heels, keeping my butt down. (Don’t let your butt come up too fast or you will put more strain on your back.)
5. As I pull up, I keep the bar close to my legs. (Usually my pants or shins are scrapped up from the bar after a deadlifting workout!)
6. At the top I lock out by squeezing my glutes and pressing my hips forward.
The other main lift we did today was bench. After a push up/pull up pyramid yesterday it wasn’t easy. Candy rocked it out though. Below is one of her sets.
1. Set your hands about shoulder width apart.
2. Tuck your elbows in slightly as you lower the bar. (Your upper arms actually shouldn’t be at a 90 degree angle to your torso because this puts more pressure on your shoulders.)
3. Lower the bar all the way to your chest/upper abs.
4. Press back up, locking out your elbows. Always push back toward the rack.
5. Throughout the movement try not to arch and keep your feet on the ground.
Now go out and lift!! Work on those Man Biceps! 🙂


