Category Archives: Recipe Box
Protein Powder Recipes – Coconut Mocha Protein Shake
While I love to get all my nutrition from whole natural foods, I do love the ease of protein powder.
You can make a ton of pretty healthy snacks and treats like bars and cookies and shakes and smoothies.
It is a great if you are on the go as long as you still make whole natural foods your top priority.
Anyway, today, I made a little caffeinated shake with coffee. Let me just say right now, I really don’t like coffee.
I love the idea of coffee – that morning beverage to get you going. To drink while you do your morning work.
But the only way I drink coffee, or espresso, is with a ton of sugar and lots of cream. It is more like cream and sugar with a hint of coffee, but whatever. So because I only like horrible-for-you coffee, I try to restrict it to only cheat days.
BUT I sort of miss the “treat” of coffee in the morning on the days when I don’t feel like consuming a ton of sugar. Because even though I don’t like coffee, I like coffee-flavored things.
So today I decided to try to satisfy my non-coffee, coffee cravings with a coffee protein shake.
So while Ryan sat at his desk drinking the most disgusting black coffee (I don’t understand how anyone likes it that way), I got to indulge in this…And yea…ok it doesn’t look that great but it was GOOD!

So the recipe…
Coconut Mocha Protein Shake
Ingredients:
1 scoop Chocolate Whey Protein (I used Gold Standard Whey for this)
1/2 cup chilled coffee
1/2 cup water
1 tbsp heavy cream (I used the organic cream from Trader Joe’s)
1 tbsp coconut butter (We actually found this for a great price at TJ Maxx home goods store!)
So brew your coffee however you normally do. Ryan makes french press for himself so he just made some extra for me. Chill that until nice and cold.
Then mix coffee, protein powder, water, cream and coconut butter in a protein shaker. My shaker has a little strainer like thing at the top which really helps break up the coconut butter and protein powder chunks.
Then pour into another glass and enjoy!
You can also make this into an iced beverage by pouring it over ice OR you can make the changes below to turn it into a “frappuccino/blended ice beverage.”
CHANGES FOR FRAPPUCCINO PROTEIN SHAKE: Sub in whole milk for cream and water…So instead of the 1/2 cup water and 1 tbsp cream, use a little over a half cup of whole milk. ALSO, add ice to the mixture in a blender instead of using the shaker and pulse till the ice cubes are broken down and the mixture is combined. I would use anywhere from a 1/2 cup to a full cup of ice depending on the size of your ice cubes.
Enjoy!
P.S. Everyone gets freaked out when they see HEAVY CREAM. They think “Oh no! So much fat and so many calories!” So below is the basic nutritional breakdown for the shake.
Coconut Mocha Protein Shake nutritional facts:
Calories: 273
Fat: 16g
Carbs: 6.5g
Protein: 25g
AND…Soon to come Ryan’s amazing deconstructed Shepard’s pie!

Deconstructed shepard’s pie with grass-fed beef and cauliflower mash!
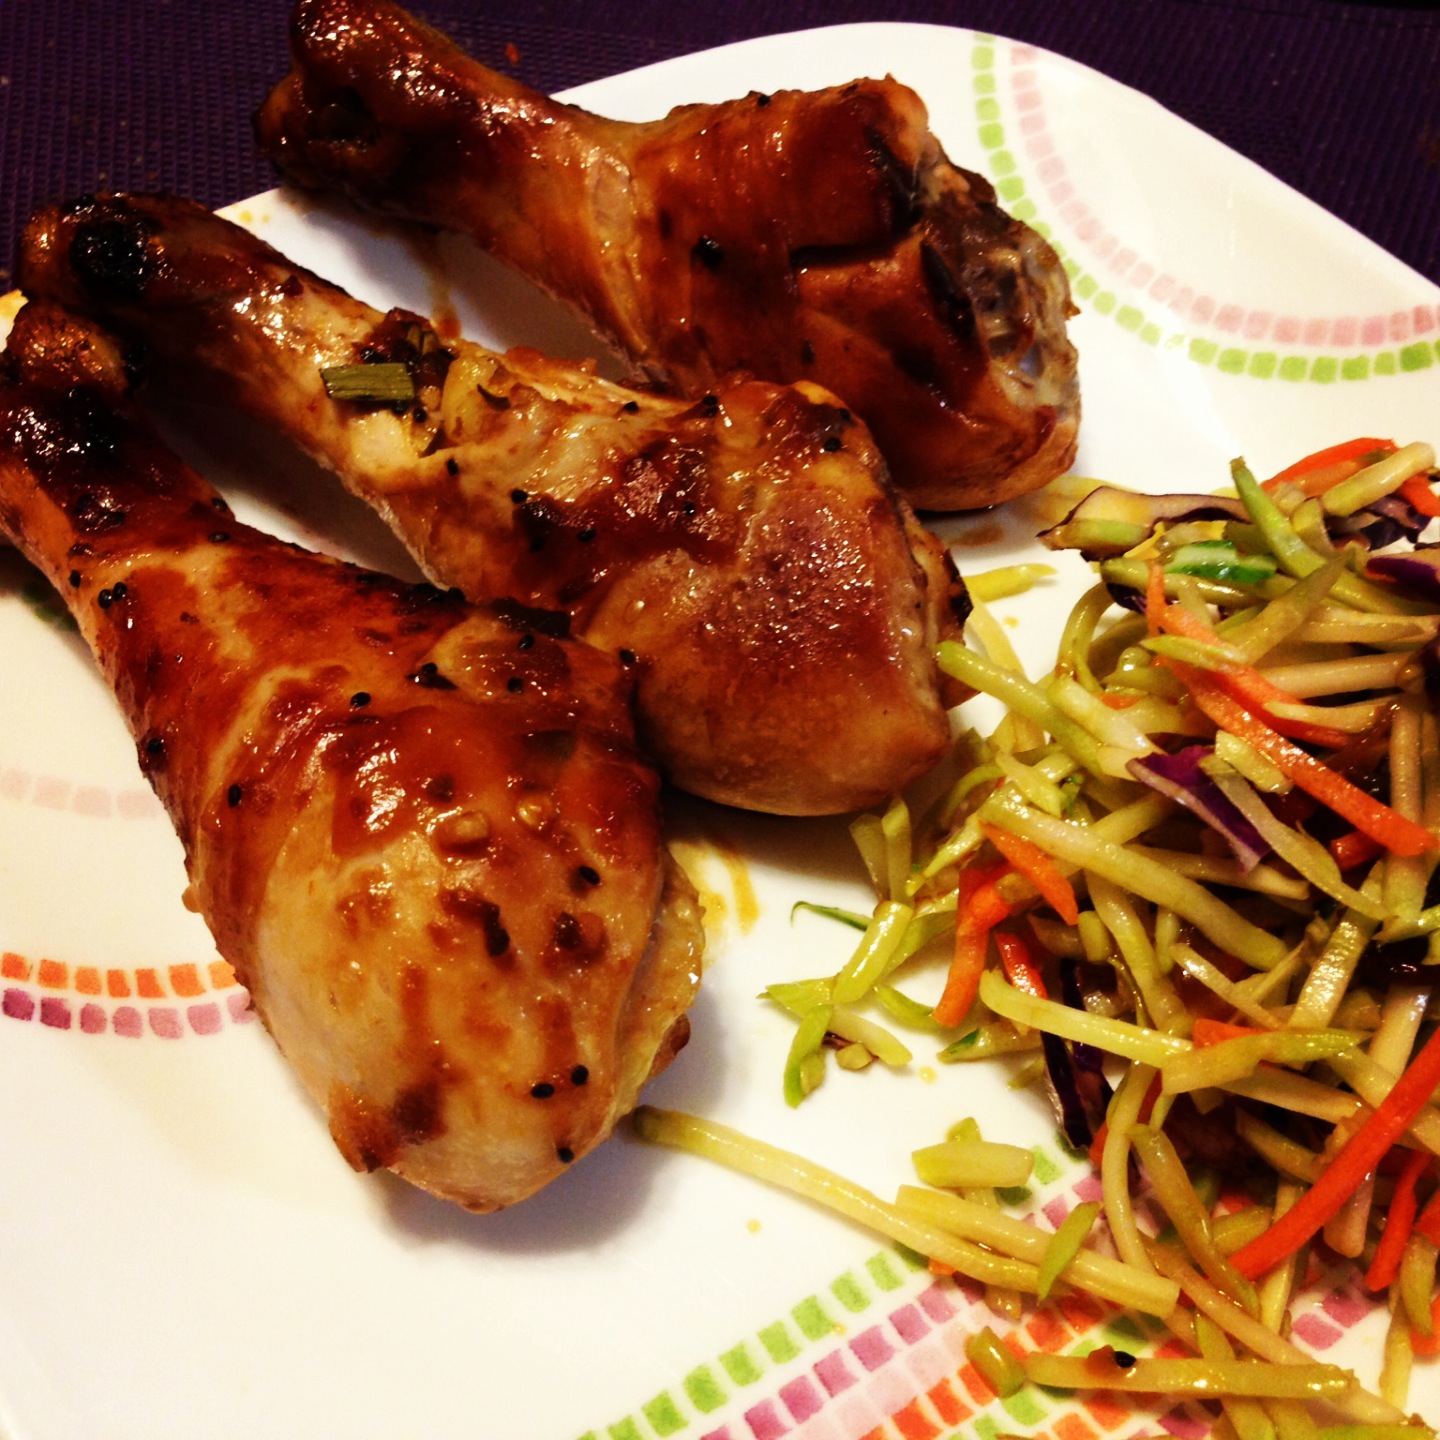
Feed the Beast – Roasted Chicken and Broccoli Slaw
While I’m sure “Roasted Chicken and Broccoli Slaw” doesn’t sound utterly delicious, it really really was.
But while I meant today to be a simple recipe post, I feel the need to comment on a lot of what I’ve read this morning..and well…this week in general actually.
A lot of you have probably seen, or heard about by now, Bob Harper’s new dieting tips…Jumpstart to Skinny and the recommendation that women eat 800 calories a day.
Can I just pause to comment and say, “And people call me crazy because I do intermittent fasting and skip breakfast sometimes!?!”
At least I’m not starving myself! I’m just eating when I’m hungry. Whereas 800 calories a day is simply NOT eating! It is LITERALLY starving yourself!
I’m sorry but if you have to eat 800 calories a day to make his diet work on time, it isn’t a diet you should be doing!
Why?
Because it isn’t realistic! That isn’t something you can maintain for longer than the three weeks if even that long!
Yes…yes…I get that it is a JUMPSTART…And yes I do see the benefit sometimes of going stricter or working harder to break a plateau or get the momentum going, but honestly 800 calories a day is just ridiculous.
And so many of his 13 rules just sound like the same old bull crap. I mean come on don’t eat carbs after lunch?
I mean I even promote going low carb but believe that statement is utterly ridiculous! If your body needs the carbs, protein, fat…WHATEVER…it is going to use it no matter what time you eat them.
And really go to bed hungry!?! COME ON! No wonder everyone thinks that a healthy lifestyle is impossible. Who the heck wants to go to bed hungry!?!
AH!
Also, did anyone notice that his list says “Eat protein with every meal” and then also says “Make one day a week meatless”?
Yes I do realize that you don’t need to eat meat to get protein, but do you know how much harder it is to get all the essential amino acids if you don’t? Do you also know what most people turn to when they try to get protein without eating meat and aren’t supposed to drink their calories so protein shakes are out!?!
PROCESSED CRAP!
Most people don’t go eat beans and rice and do all the research to find out what foods pair together to give you a complete protein. Instead they eat some processed veggie burger….or a whole jar of Jiffy Peanut Butter…that has some protein right!?!
AH!
Anyway, I was utterly annoyed by his list, but really not surprised. It is the same old conventional wisdom crap spewed out over and over again.
Shoot if people really sold the truth, they wouldn’t get to keep churning out book after book!
And you want to know what the truth is!?! I can sum it up in four basic, and slightly redundant, rules….
1. Eat WHOLE NATURAL FOODS!
2. Cut out PROCESSED CRAP!
3. Eat when you are HUNGRY! (Not bored, or stressed or tired, but when you are hungry…be that one meal a day or 20).
4. Don’t starve yourself. (Not eating enough can stall fat loss and hinder performance and make you feel like CRAP)
But those rules wouldn’t sell. There is no secret there. No super specific directions to make you drop weight instantly.
But guess what?
Those are the truth!
Anyway, I’m done rambling about this. If you want a blog post that tears apart these rules much better than my rant above just did, check out Nia Shanks’ post.
Back to my original posting topic…FEEDING THE BEAST…aka feeding myself!
Recently, Ryan and I have become very into “Asian inspired” dishes. I use the term “Asian-inspired” rather loosely…basically meaning we used some sesame seed oil, rice vinegar and Tamari in our dish.
Anyway, Ryan made a great roasted chicken dish the other night and I wanted to share it!
Ingredients:
1.5lbs chicken legs
2 cups Broccoli Slaw
1 tsp sesame oil
2 tbsp Tamari
1 tbsp Jalapeno-Kiwi relish
1 tsp Siracha
1 tsp garlic
3 green onions
1 tbsp Rice vinegar
Preheat oven to 375.
Combine oil, tamari, relish, siracha, garlic and onions. Remove a few tablespoons and combine with rice vinegar to mix into the broccoli slaw.
Brush a bit of sauce onto the chicken and bake for 20 minutes before applying more sauce. Total baking time will be about 45 minutes.
In the last five minutes dump on the rest of the sauce. Mix broccoli slaw with the sauce/vinegar mixture.
Then enjoy the roasted chicken legs and broccoli slaw!
Get your veggies!
So Ryan LOVES chili. For me…well it depends on the chili.
Anyway, chili is an easy Primal meal to make and you can make a huge pot of it and have leftovers for days, which is a real plus!
But honestly, I get bored with chili. It is just meat with tomato sauce to me after a while (since we don’t use beans and only use rice on high carb days).
So how did we make it more interesting? Add some more texture and even more vegetables?
We added CAULIFLOWER!
This might sound a bit strange, but when you either “rice” or put cauliflower in a food processor, you get what looks a lot like rice or couscous.
It adds a nice texture to the chili, hides another vegetable in the chili for those who don’t like veggies and it makes the chili even more filling without adding more calories (actually it may even make the portion you take less calorically dense!). More bang for your buck!
So here it is…Cauliflower Chili
Ingredients:
1 lb ground beef (grass-fed)
1 onion
15 oz can of Tomato sauce
1 tbsp chili powder
1 tsp Garlic salt
1 tbsp Cumin
1 tbsp Frank’s Hot sauce
Cayenne pepper to taste
1 cup Couscous-ified cauliflower (Yea…I made the word up)
Heat a skillet on medium and add onions and half the cumin.
When those are translucent, add ground beef.
When ground beef is almost cooked add tomato sauce and spices and let simmer on low.
You can let the chili simmer on low heat for awhile. If you can let it simmer for about 20 minutes it will be more flavorful.
While chili is simmering, add cauliflower to a mixer and dice/chop/couscous-ify. Once it is all like couscous, and once chili is about a minute away from serving, add couscous cauliflower.
Serve and top with either just a tiny sprinkling of grass-fed cheese or some guacamole!
I haven’t yet taken a picture of the meal, but it has become a regular in our diet! Enjoy!
Also, do you ever add random vegetables to dishes where they aren’t supposed to be and found the new recipe to be delicious!?! If so, let me know!
I love the high carb days!
So right now Ryan and I are doing a carb cycling experiment and so far I LOVE it. ABSOLUTELY LOVE!
Also, I’ve seen great results over just about two weeks. We will see how things continue over the next month or so.
But anyway, one of the things I love the most is that I can now add in one of my favorite meals that I used to make when Ryan and I did our low-fat (ICK!) experiment.
FRIED RICE….or at least my version of the dish!
We’d stopped eating fried rice because we used soy sauce in it and soy sauce has gluten in it.
We also stopped making the dish because we in general preferred to get our carbs from fruits and veggies.
HOWEVER, I’ve found that I feel better during my intense workouts when I consume a few more carbs so I started to add back in potatoes and rice. This summer I even went through a big homemade corn tortilla phase, which I’ve now grown out of.
Anyway, since we started adding in more carbs, I started to want to make the Fried Rice again since I’d loved the dish.
Which is when we found Organic Tamari, which replaces soy sauce and has no gluten. YUM!
I now make this dish as often as I can. We literally have had it every single high carb day during our carb cycling!
With a little chicken or fish and the gluten-free Tamari, this is a great lower fat, high carb meal…that is still perfectly Primal!
Below is the recipe. I hope you enjoy it as much as Ryan and I do!
Fried Rice

Ingredients:
1 lbs chicken breasts
2 cups uncooked white rice
3 chopped green onions
1 cup bean sprouts
2 eggs
1 tbsp sesame oil
1/4 cup Tamari
Cook the rice based on the directions on the package. We usually get the “slow” cooking rice but that is up to you.
Chop up the chicken and cook it in a separate pan. Once the chicken is basically cooked, add in bean sprouts and green onions. Add cooked rice to meat mixture. Put in sesame oil and Tamari.
Make sure the heat is up on your pan so you can get a little crisp to the rice.
Then make two holes in the mixture and crack an egg into each hole. Let the egg cook for a second before tossing the rice with both eggs.
Once everything is mixed, enjoy!
On our high carb days we keep our protein intake the same, but try to get no more than 50 grams of fat, which isn’t easy after being so used to eating high fat!
However, there are only 42 grams of fat if you eat ALL of the fried rice that the above recipe makes. This really should serve about 4-6.
(Picture to come tonight after I make it!!)
Also, a big shout out to Epic! Awesome training session today! Haven’t climbed a rope in a while. Also got to experience my first faux knife fight! LOVE IT! You guys are awesome!
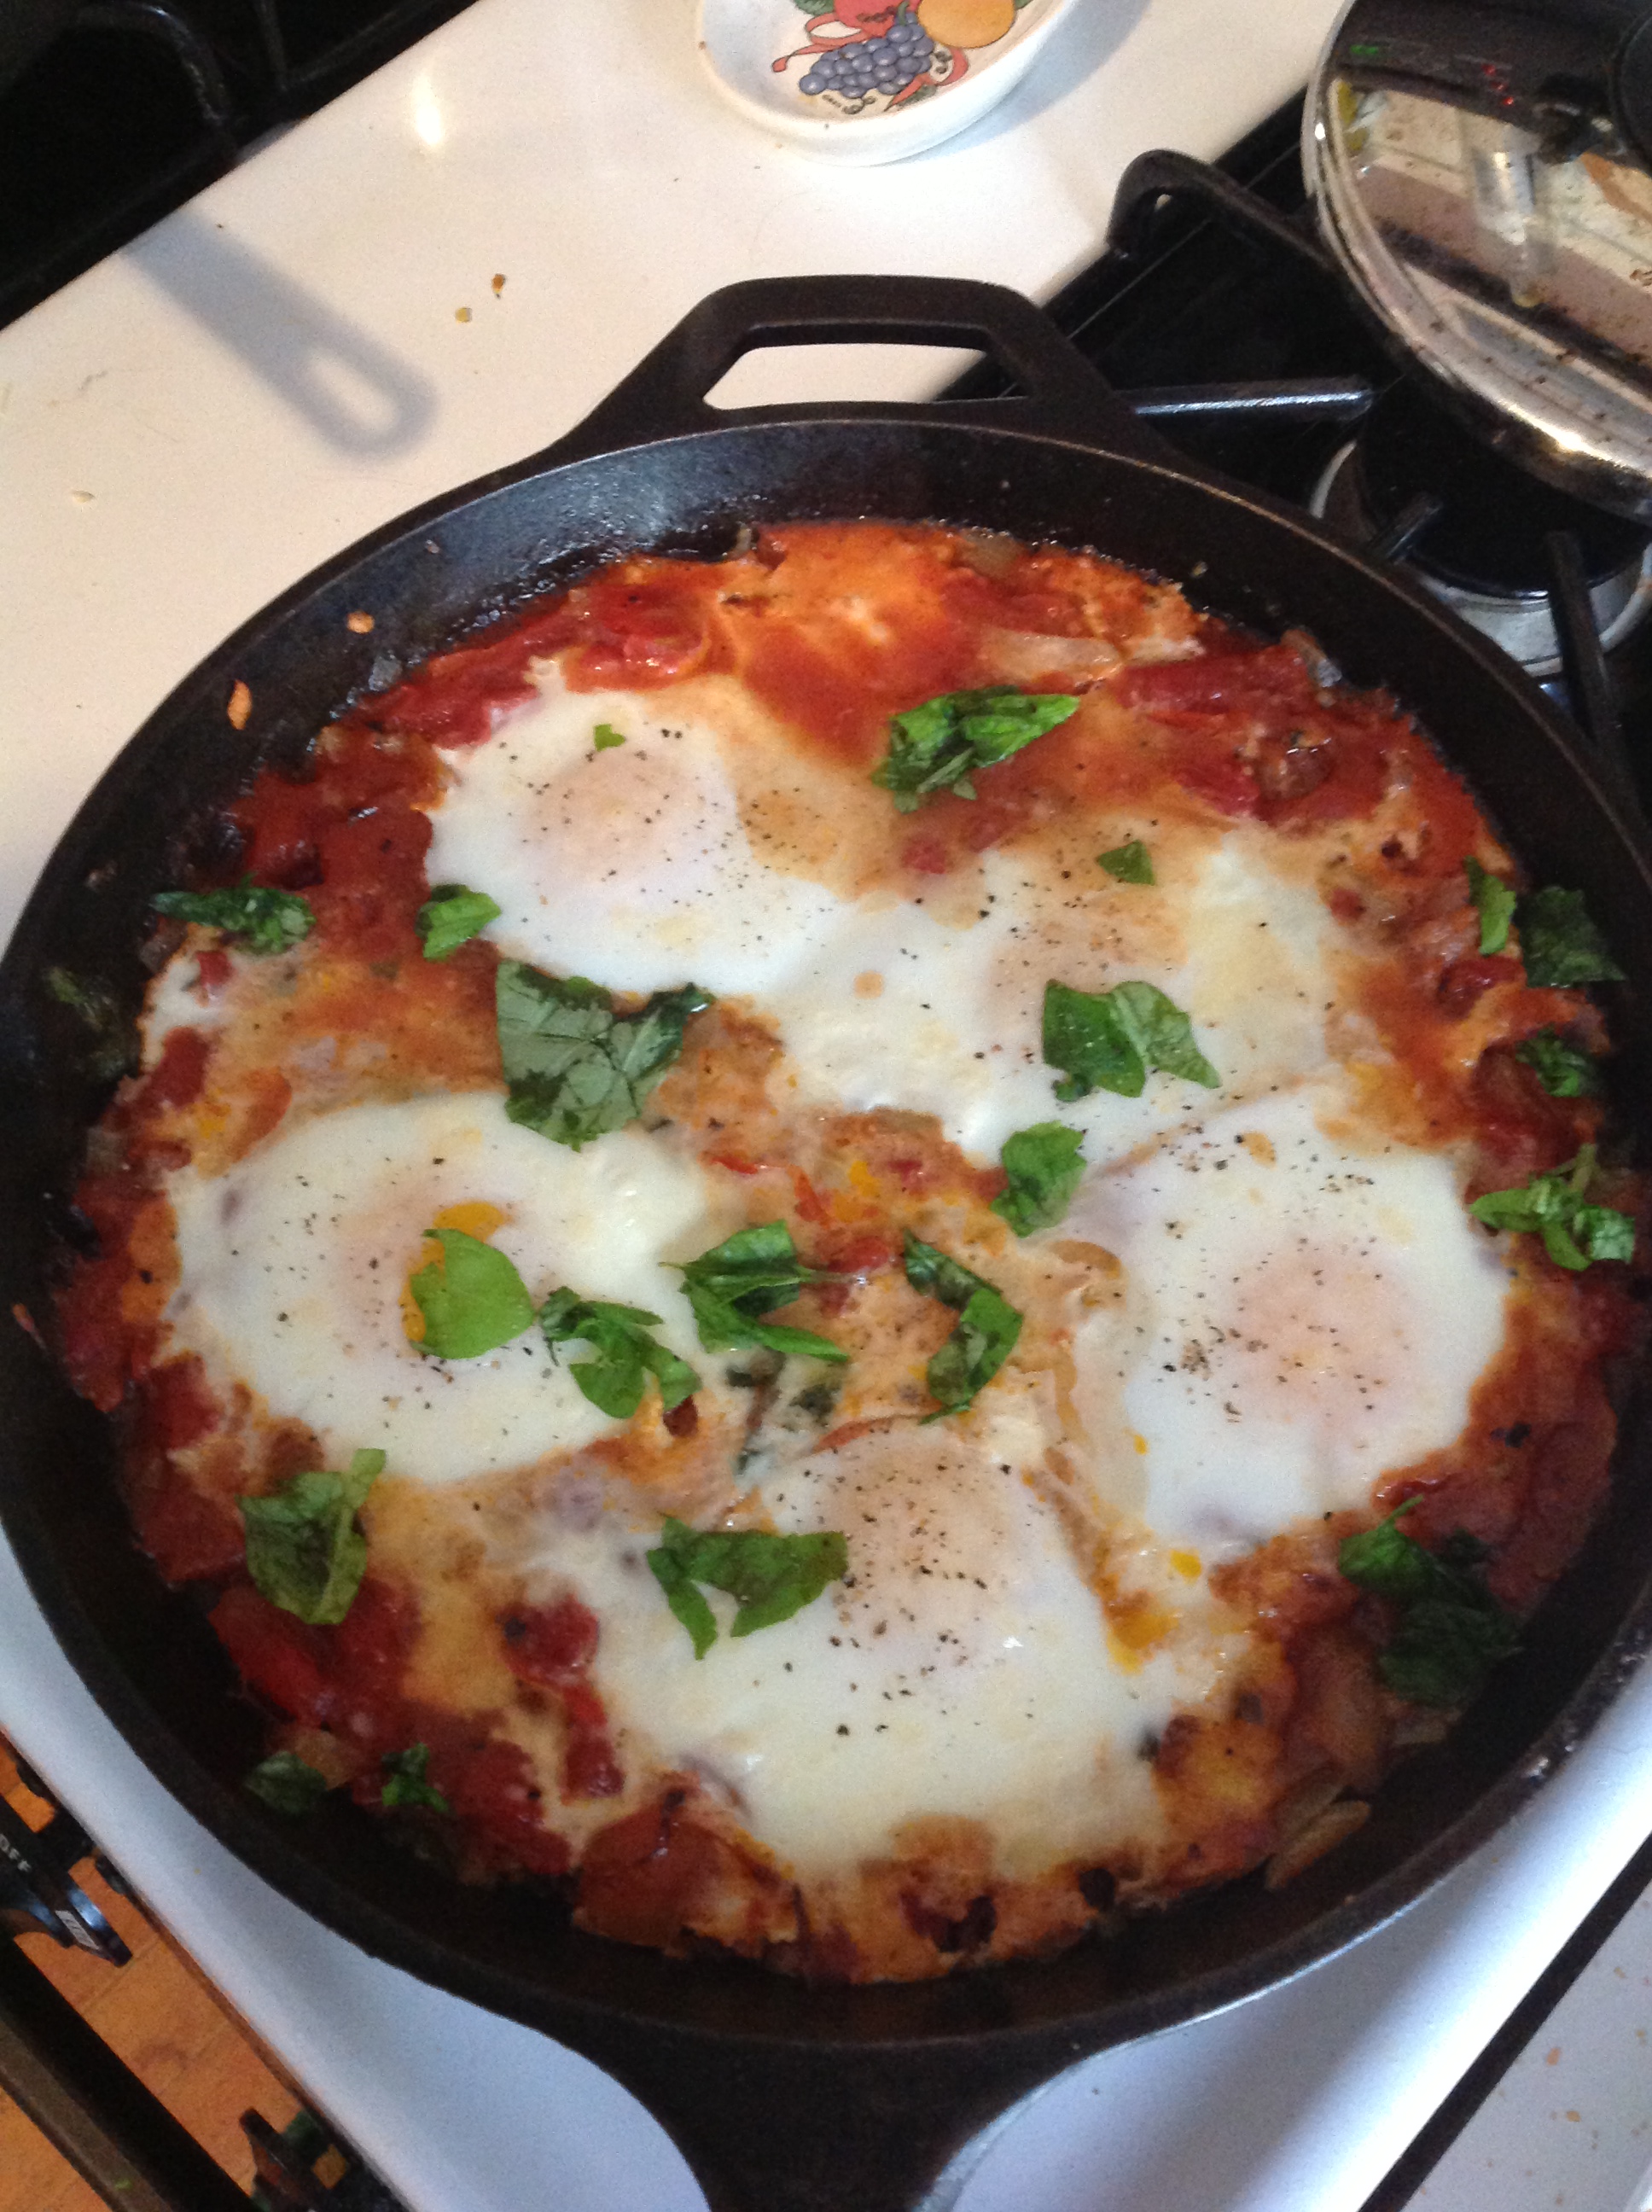
Erin’s Eggs in Purgatory
So one of my best friends EVER, Erin, posted a picture a while back of a DELICIOUS looking breakfast.
I asked her for the recipe and I have to share it now!
So thank you Erin for your wonderful take on Uova in Purgatorio or Eggs in Purgatory!
Eggs in Purgatory
Serves 2 (generously)
Ingredients
1 1/2 tablespoons olive oil
1 small yellow onion, chopped
4 cloves of garlic, finely chopped
1/2 red bell pepper, chopped
1 tsp red pepper flakes
2 Tablespoons chopped fresh basil split
1 (28oz) can fire roasted diced tomatoes
1 tbsp grated Parmesan cheese
4-6oz Farm sausage
4-5 eggs
Salt & pepper to taste
Preheat oven to 375. Heat oil in cast iron skillet over medium/high heat. Add onion, garlic and pepper sauté until onions are translucent about 5 min.
Add sausage and red pepper flakes and cook till sausage browns. Add diced tomatoes, salt, pepper and 1 1/2 tbsp of basil and simmer for 15 min.
When finished simmering use bottom of spoon and make little indents in sauce, crack eggs into the indents and top with some of the Parmesan cheese (save some to top finished eggs with).
Place in preheated oven for 10-15 min, this is just an estimate because I didn’t actually pay attention to time. Cook until egg whites are cooked though but yolks are still runny. It may actually be closer to 15-20 min.
Once finished take out of the oven and top with remaining basil, Parmesan cheese, salt and pepper. Enjoy!!!!
ALSO, on a side note…I got nominated for Top 100 Health and Fitness Bloggers of 2013. Please go vote! And check out some of the other great blogs on there!
BBQ Tacos
So I decided to cook up a slab of ribs we had and chop them up to make BBQ tacos. I ended up using about half a slab for our Sunday night dinner.
Ryan then decided to make his own version of BBQ tacos for us on Monday night.
I will admit….His were better….

BBQ ribs, homemade corn tortillas and a spicy slaw with cheese. DELICIOUS!
Ryan’s DELICIOUS BBQ Tacos with Spicy Slaw
Ingredients:
1/2 slab ribs
6 corn tortillas
1/2 cup Purple cabbage
10 Jalapeno slices
1 tbsp Heavy whipping cream
4 oz Cheddar cheese
Salt and pepper to taste
1/2 can Tomato sauce
2 tbsp Dijon
1 tbsp Orange juice
1 tbsp Ketchup
2 tsp Paprika
Chili powder to taste
6 tbsp mashed pinto beans
So the ribs I pre-cooked in the oven and the corn tortillas were homemade. Check out the Recipe Box for both recipes.
Heat a skillet with shredded rib meat, tomato sauce, Dijon mustard, orange juice, ketchup, paprika and chili powder.
Heat tortillas in a skillet.
While meat is cooking in the sauce, mix together chopped cabbage and chopped jalapenos. Add in cream, cheese and salt and pepper.
Place warm tortillas on a baking sheet and heat oven to 350. Place 1 tbsp of beans on each tortilla. Divide meat mixture between tortillas and top with cabbage mixture.
Put in the oven till the cheese is melted and the tortillas has a little golden brown on the edge.
Enjoy!
Huevos Rancheros
So before starting this week, I wrote out a meal plan breaking down calories, fat, carbs and protein for each and every day.
My goal is always to keep my carbs under 150 grams per day, which honestly I don’t find too difficult.
I also like to cycle my carbs. This week I had two days close to 150 grams, one day near ketosis and the others in that safe range that keeps me energized.
Here was my breakfast/lunch from this morning. (And one of the very rare times that I do in fact eat beans…Rare…But it happens.)
Huevos Rancheros
")
May I just say, “YUM!”
Ingredients:
2 eggs
2 homemade corn tortillas (Visit the Recipe Box for how to make your own!)
1 1/2 slices bacon
2 tbsp mashed pinto beans
5 slices of jalapeño diced
Shredded cheddar cheese
Cook the bacon. Remove once it is browned to your liking. Using the bacon grease to then heat up your corn tortillas.
While the tortillas are cooking up, mash up pinto beans. Remove tortillas once crispy and slightly brown. Put one tablespoon of beans on each tortilla. Sprinkle on jalapeños.
Once you remove the tortillas, cook the eggs in the remaining grease. Once eggs are cooked to your liking, place on top of the beans. Top the eggs with bacon pieces and some cheddar cheese.
Enjoy! (Or at least I did!)
Stress Eating – Healthy Munching!
So one of the most common excuses I hear about why people can’t lose weight is…
“Well, I eat when I’m stressed. I just can’t help it.”
It makes me want to laugh/cry.
Well I would love to eat when I’m stressed too, BUT I DON’T!
Ok but I do understand the lack of self-control and a desire for SOMETHING to comfort you after a long stressful day. And hopefully you can teach yourself to use other things as an outlet…A good workout, reading a book, sitting and chatting with a loved one.
But as you transition to better habits, or on those days when you really can’t resist eating to relieve your stress, that doesn’t mean you have to turn to BAD FOOD.
I have found what I consider to be one of the BEST SNACKS EVER – KALE CHIPS!
Let’s face it, when we stress eat we consume unneeded calories that are really really bad for us.
BUT I have a snack that will keep you from destroying your diet even when you need to munch a bit when you are stressed.
Kale Chips
")
Ingredients:
Kale
Olive Oil
Garlic Powder
Salt
Paprika
Cayenne Pepper
Heat oven to 350 degrees. Wash and dry kale (make sure it is dry!). Tear into pieces and put it on the baking sheet. Drizzle with olive oil and spices. Bake in oven for about 10 minutes.
Enjoy!
No Filler Crab Cakes
Just because most recipes use breadcrumbs or saltines or some gluten filler doesn’t mean you have to!
Below are some delicious crab cakes we made with some jumbo lump crab we got at Trader Joes.
")
Ingredients:
16 oz crab
1 slice nitrate free bacon cut into thick chunks
2 eggs
1 tbsp Dijon mustard
1 tsp garlic powder
1 tsp paprika
Salt and pepper to taste
Chop the bacon into thick chunks and cook until browned. Then remove and place in a bowl to use later.
While bacon is cooking mix together crab, eggs, mustard and spices. Don’t mix so well you completely destroy the crab chunks!
Once the crab mixture is combined, form into patties. We made 12 individual cakes.
Then place the patties in the pan that you just cooked bacon in. While patties are cooking on the first side, push a few bacon chunks into the top of each patty. When you turn the patties over, the bacon will cook into them and infuse the whole crab cake with a bacon flavor!
Top the patties with a sauce of your choice (they don’t even really need sauce though!). We did use a little chipotle blue cheese “aioli”. Sour cream can be combined with some blue cheese chunks, dill and chipotle powder to make an easy, tasty sauce!
Serve with a nice light salad! We used arugula, tomatoes, green onions, garlic, and lightly tossed it in our homemade blue cheese dressing!
These crab cakes are high in protein and pretty low calorie! The whole can of crab is just 350 calories! That with just two eggs and one slice of bacon (on top of the fact that you aren’t eating the whole can yourself!) makes the meal great if you are watching your calorie intake!
Lobster, Bacon tacos with a Kiwi-Jalapeno Relish
")
Ingredients:
2 Lobster tails
Diced bacon (about 2 slices)
1 tbsp butter
1 tsp Cumin
1 tbsp Paprika
1 tsp Cayenne
Salt and Pepper to taste
Grass-fed Cheddar cheese
Kiwi-Jalapeno relish
Homemade Corn tortillas (recipe to follow after tacos)
Cook bacon bits in a saute pan.
While bacon is cooking, de-shell lobster and dice. Season with cumin, paprika, cayenne and salt.
When bacon is brown, remove bacon bits and add butter and lobster tail to pan. Cook until lobster is fully cooked and add bacon back in.
Add bacon-lobster mix to corn tortillas. Top with a few thin slices of grass-fed cheddar and two tsp of kiwi-jalapeno relish.
Serve warm with a side of your choosing. (We made a nice romaine salad with tomatoes, blue cheese and an olive oil, balsamic and dijon mustard dressing.
Note: I linked out to the company that made the relish we got at the farmers market (All-natural ingredients! YAY!). I will be making my own though next time and will then post a recipe!
Corn tortillas:
2 Cups Masa Harina (make sure you get non-genetically modified corn)
1/2 tsp salt
1 1/2 to 2 cups hot water
Put the masa harina into a bowl and add in salt.
Heat the water then slowly add it into the masa harina and salt. Mix as you go. I don’t usually use more than 1 1/2 cups. Add water until the dough is spongy, but not sticky.
Roll dough into a log and wrap in a damp paper towel. Let the dough sit for 1 hour.
Then roll out 2 inch balls after the dough has sat for 1 hour. Flatten the dough using a rolling-pin or a tortilla press. (I use a tortilla press and put cling wrap on both sides of the press so the dough won’t stick.
I then cook the tortillas in a hot cast iron about 1 minute on each side or until the tortilla is cooked to your liking.
Serve warm!


