Category Archives: Workout
NOW NOW NOW
When we get it into our head that we want something, we usually want it NOW!
Not in two weeks, two months or two years…NOW!
It’s like we become a child again and our head is screaming “NOW!” “NOW!” “NOW!”….”I WANT IT NOW!”
Sorry….But you CAN’T HAVE IT NOW!
Success takes time. And sometimes pushing harder, faster WON’T get you there any quicker.
Sometimes pushing harder, faster actually hinders your progress.
At the same time, you can’t just sit back and wait for things to happen.
If you want to get stronger, perform better, lose weight, tone up or rehab an injury, you’ve got to give it your all WITHOUT becoming impatient (AKA pushing too hard too fast).
Two things I’ve found that have help me become more patient about accomplishing fitness goals are setting up a timeline and setting short-term goals.
When I say “setting up timelines” I mean that I outline how long it will realistically take to accomplish my goal and then I outline how much time I will spend potentially “testing” out ways to get there.
Let’s face it, if you want to lift a ton more weight or even lose a ton of weight, it isn’t going to take a month…it may even take a year. You’ve got to figure out a realistic timeframe in which to accomplish your goal.
And realistic means looking at what obstacles are in the way that may slow things down – it means planning out your timeframe based on the fact that there may be unforeseen plateaus!
Granted you can’t account for all setbacks, but the more you plan in a little extra time to deal with them, the more likely you will be to hit your goal on time if not early (which will make you very very happy…trust me!).
And setbacks can come in all forms. Unless you’ve had to work toward your specific goal before and already have a program in place, you are probably going to have to experiment a bit even if your friend/coach gives you a program that has worked for them and people they’ve known before.
Let’s face the facts…just because a program has worked for someone else, doesn’t mean it will work for you. So how long do you potentially “waste” on a program that doesn’t work before switching (especially if you have a deadline to hit!)?
My rule of thumb is…”Give it 30 days.”
You’ve got to give a program just a bit of time. I know 30 days seems like an eternity when you want something NOW, but one week, or even two weeks, doesn’t really give you enough proof as to whether or not something really works.
Give it 30 days and then assess. Did you make any progress? What seemed to help? What didn’t?
THEN make changes!
If you learned something from that 30 days, then it isn’t really wasted time now is it!?!
NOPE!
Because if you learn more about what works for you to accomplish your goal, then you will always have that knowledge if you need to get back there or even build further!
If you never experiment and…for example…just starve yourself to lose the weight, you didn’t really learn about what it takes to truly lose the weight and keep it off (and you definitely aren’t any healthier!).
Anyway, the point is you have to figure that a goal you’ve never set out to accomplish before is going to take some extra time because first you have to establish a program!
So if you’ve set a realistic timeframe, you must have accounted for a bit of experimentation on top of setbacks such as unforeseen cheat days or sickness.
But by setting a realistic timeframe you won’t stress out about having to be at your goal NOW because you know exactly when it SHOULD be achieved! (Not to mention having a timeframe will help keep you on track when you want to cheat because you know you have a deadline.)
But once you have that timeline, the best way to keep yourself to that goal is to set short-term goals within that timeframe.
When we want something NOW, we usually overlook all the progress we are making because all we can focus on is the end goal, which in terms makes us upset and sometimes even depressed about the fact that we aren’t there yet.
So how do you get yourself to stay positive and not overwhelmed by the fact that you aren’t there yet?
You set shorter goals that allow you to see all the progress you are making toward you goal!
Having something to accomplish each week, each month, will keep you on track and even positive about your progress to a goal that will take you maybe even a year or longer to accomplish.
These goals can range from weekly weigh ins or performance measures to simply sticking to a meal plan or workout assigned for that day.
The point is that when you accomplish them they make you feel like you are getting closer to your goal. Accomplishing these short-term goals should provide you with confidence and keep you positive and motivated.
If you are confident, positive, motivated and feel like you are moving forward, even if it is small steps, you are going to be WAY more likely to stay the course no matter how long it takes.
So if you’ve been struggling to stay positive and accomplish your big goal, take time today to figure out what is a realistic timeframe to accomplish it. Then set out some mini goals that will keep you accountable each day, each week, each month…whatever works for you!
NOTE: You will also have to outline a clear program with a progression toward you goal based on your timeframe, but that is a different post!
Single leg/arm/limb work
How often do you do single leg exercises? Or single arm exercises for that matter.
Like single leg deadlifts…or single leg squats…or single arm rows…or single arm presses…
Never? Every once in awhile?
Most people don’t include that many single leg or single arm exercises, but they are incredibly important to mix in.
When you do single limb movements, you are forced to engage your core more AND you isolate the working limb so that a dominate side can’t take over for a weaker side!
By doing single limb movements we can correct any imbalances between sides and improve our balance and proprioception, all of which can help prevent injury.
And the cool part about the single limb movements is that we can use little to no weight and get in a killer workout. You can build great strength with single limb movements, which can make them a great option for at home workouts if you don’t have heavy weights available!
Plus if you do work up to heavy weights on single limb movements just think about how much stronger you will be when you do your traditional deadlift, squat or bench press. A LOT STRONGER! You will have better balance, more core engagement, and each side will be equally as strong. Plus single limb movements are a great time to really focus on posture and form so that when you return to the heavy lifts you will be even stronger with even less risk of injury.
Here are some great single limb moves that you should be adding into your workouts!
- Single Leg Deadlift – Can you tell this is one of my new favorite moves!?! The single leg deadlift, is one of the best ways to wake up your glutes and work on your core strength and balance. You can also really build strength with this move. I love to use a kettlebell, but a dumbbell, sandbag or barbell would also work. Even just starting with bodyweight but taking your time to really use perfect form will blast your booty the first workout or so!
- Single Leg Squat – Can you do a pistol squat? For me that is the epitome of strength. There are some great variations you can do to work up to the full pistol squat. You can do a single leg squat to bench or use a TRX for just a little stability. Once you get up to a decent range of motion, you can simply use a little weight for counter balance. To do that, just hold a plate weight out in front and squat down. Whichever move you do, trust me…your legs will feel it and so will your core!
- Single Leg Glute Bridge – A great move to do to activate those butt cheeks! This can be a great move to add to your warm up or a part of your strength training program for the day. If you can get your hips super high when doing the move from the ground, try it with your feet elevated. A super simple, but great way to tone those butt cheeks!
- Skater Hops – If you want to get a bit of cardio and work in a plane other than the sagittal one, skater hops are a great move. They work your legs from a different angle than the moves above and require you to stabilize in a different plane. If you aren’t ready for this jumping move, start with side lunges. While not perfectly a one leg move, you can really isolate one side and make it work, by stepping out to the side and then by making that same leg push you back center.
- Step Ups – It’s crazy how many people have trouble going up the stairs as they get older. This move is a great way to prevent that from happening! You can do these in all three planes if you want to add a bit of variety to your workout and hit your glutes from all angles. Start with a low box. As you can easily step up, driving through the heel without leaning forward or using the other foot, up the height of the box you are stepping on to. Then add weight. You can make this more about strength by adding weight or you can make it a bit more cardio by challenging yourself to go faster or do explosive step ups! Either way, it isolates each leg and really makes them both work!
- Single Arm OH Press – You can use dumbbells or kettlebells but this move is a great way to isolate each arm. You can stay on one side or do alternating arm presses. You can make this a strict press or even work a bit on your jerk. You can even do some isometric holds at the top! Make sure though that you have the mobility to do this move. Too much overhead pressing and a lack of mobility can lead to serious injury.
- Single Arm Chest Press (anti-rotational) – So there are two basic chest movements that I like to do. One is anti-rotational. What that means is that I use a bad or a dumbbell and perform a chest press without allowing my upper body to rotate. Your core really has to work to prevent any rotation from occurring. I love doing this standing with a super heavy band that makes me want to rotate especially since I’m only pressing on one side. (This can also be a great move to help you work toward a one arm push up….in case you are interested in doing one!)
- Single Arm Chest Press (rotational) – This is the second type of chest press that I like to do…the rotational. When I do this standing with a band, it is almost like throwing a punch with the hand holding the band. This move also works your core, but is focused more on the global musculature and not as much on the stabilizing muscles unlike the anti-rotational move. This move also seems incredibly functional to me, which probably is why I like it so much!
- Single Arm Row (anti-rotational) – So I love doing a single arm inverted row and forcing myself NOT to rotate. It is really hard to keep your shoulders level without holding onto the other strap! I also like doing an inch worm with rows. Anytime you do a plank with row and force yourself not to rotate the hips, you really make your core work! And you are still isolating each side while you are performing a row so each side has to do a full workload.
- Single Arm Row (rotational) – While the anti-rotational row is great, so are moves like the “lawn mower row” (where you reach down toward your foot and then row up a little past your side just like starting a lawn mower…if anyone actually remembers having to do that…). Working on the muscles that support rotation are super important since, let’s face it, we usually aren’t in perfect position when we do things in everyday life. NOPE! Usually we are rotating and pulling and pushing at slightly odd angles. So doing a single arm inverted row with rotation CAN be a good thing! It works everything from a different angle!
So looking at this list…How many of these moves have you ever done? How often do you isolate each side to correct imbalances?
And if you have considered some of these moves, have you done some of the rotational or anti-rotational variations? It all goes back to my post from the other day…Are you working in all the different planes?
P.S. I will hopefully have a few picture shortly to help illustrate some of these things!
Which Plane Do You Move In!?!
So a client at the gym got involved in a discussion with a friend who doesn’t work out at our gym about exercises and moving in different planes.
He was asking her about her workout routine and definitely didn’t approve of the things she was doing…but that is another conversation.
However, what I do want to discuss is one specific question he asked her…
He asked her…”What planes of motion do your workouts emphasize? The sagittal (forward, backward, up and down), the frontal (lateral movements) and/or the transverse (rotational)?
It’s a really really good question. And I guarantee that if you really start to think about your workouts, 90% of your movements are in the sagittal plane, which honestly isn’t very functional or representative of the way you move in everyday life.
It also doesn’t make you as strong or fit as you could be…especially if you are getting in shape for a sport.
If you truly want to get into shape, you need to move in all three planes.
So right now ask yourself…Does my workout include moves in all three planes of motion or is it all just sagittal (aka squats, forward and backward lunges, cleans, snatches, push presses, push ups, pull ups….)?
I’m betting once you assess, you will realize that you aren’t utilizing the other two planes nearly often enough! I know that our client’s friend didn’t.
And you know what her response was when she realized she was basically only moving in the sagittal plane?
She said that nearly 100% of her workouts are in the sagittal plane and that she rarely works lateral. She said she couldn’t even think of any rotational movement that she does.
She then said that it seems to her that lateral and transverse movements would cause the most injury.
AH!
UHM…NOPE!
Just because we love our workouts or our trainer that doesn’t mean that what they are doing is the BEST way.
Sorry, but it doesn’t.
It doesn’t mean that we shouldn’t do our own research and continue learning.
Working ONLY in the sagittal plane is what causes us to GET INJURED.
The transverse and frontal planes are NOT more dangerous!
They are actually essential if you DON’T want to get injured.
I mean think about it….do you really just move forward or backwards…up or down in real life?
Do you not twist and shuffle and rotate and throw and swing and spin?
YEP YOU DO!
So why wouldn’t you be doing that in your workouts!?!
Why wouldn’t you do rotational medball passes? Why wouldn’t you do side lunges and curtsy lunges and lunges at an angle. Why wouldn’t you shuffle and crawl laterally? Why wouldn’t you press with rotation and jump at different angles?
Why would you only workout moving forward and back and up and down if you don’t move only those ways in everyday life!?!

Even playing games…like fake knife fighting, we don’t just simply move forward and back or up and down. If we did, we wouldn’t “live” long!
Elementary School Moves
So when writing up some new workouts, I began to think about all of the games we played in gym class…dodgeball, crab crawl soccer, scooter ball…just to name a few.
And I thought…why not include some of those moves!?! Remember when you used to swing from the monkey bar or do wheelbarrow races? Remember when you’d have to crab crawl around the gym and you considered it to be a GAME!?!
Those moves while super fun in elementary school were actually super good for you!
So now each of our workouts includes some element of elementary school play. And while it might not be as easy as it once was…it is still ridiculously “fun!”
So next time you want to work on shoulder strength, consider a wheelbarrow crawl. Or next time you work your core and upper back, consider a skin the cat.
Or what about climbing a rope? Remember when you used to climb up those poles on the playground?!? Not as easy as you remember it I’m sure!
There are so many great moves that we did as kids, but somewhere along the line we stop. And instead we start doing bicep curls and tricep extensions, which honestly aren’t near as good for us or even half as functional.
So below is a great workout with some simple elementary school moves. Try it…it might be fun! (If you don’t have some of the stuff or understand what it is, feel free to email me at manbiceps@gmail.com and I can either explain it or give you some substitutions!)
Workout
Warm up (make sure to get shoulders, glutes, back and core warm)
3 rounds (Rest in between each round or do with a partner for a relay):
Rope run and drag and then plank hinge and pull (Run down about 50ft and drag a 1.5 inch rope behind you until it is stretched out along the ground. Then go into a plank/table top crawl position facing the same way as the way you ran. Reach back between your legs and grab the rope. Sit your butt back to really get a good reach and then pull the rope through as far as you can, extending your hips as you pull. So you will go from about a plank position on the hands to almost a child’s pose still on the hands to really get a reach back and through. Pull the rope until it is completely piled in front of you and run it back.)
5 rounds:
Rope Climbs (can sub in inverted rows if you don’t have a rope…5 reps if you do it on a rope and 10 reps slowly if you do rows)
Crab Crawl 50ft forward and 50ft back (Crab crawl is with your hips facing the ceiling)
Crab crawls!
Skin the Cat (This is the move where you hold a pull up bar or monkey bar and swing your feet through over your head between your hands and all the way down toward the ground behind you. If this is too tough, simplify it by just first tucking the knees to the elbows and then next by doing a straight leg lift up to the bar) 8-12 reps
Rest and repeat for all rounds!
For our conditioning we actually played tug of war with a few stipulations to prevent injury.
You may be thinking…”Oh that isn’t a workout!”
But trust me….it really really was!
Building a House – Progression
When planning out your workouts, when planning out how to reach your goal, what factors do you consider?
Do you build on what you’ve done the days and weeks before?
Or do you randomly draw exercises out of a hat based on what is sore…or what you want to work that day…or maybe even what just seems like it would be killer?
Most people take no time to create a progression. They just string together exercises and workouts that are tough or have certain moves with no thought as to how they are going to measure their success or how the workouts will actually build toward their goal.
And then they wonder why 3 months later they still haven’t gotten results.
HELLO!
If you truly want to reach a goal, you’ve got to PLAN out a way to get there. I call this plan a “progression.”
It is a progression because over a set amount of time, it will work to step-by-step get you closer to your goal.
It is like building a house.
You don’t randomly throw bricks together and hope it comes out right. You have a plan.
And then you don’t start for with the roof or even the second floor.
You build from the ground up!
Your workout progression should work the same way.
You first build a base, you lay the foundation.
Work on form. Focus on correcting imbalances by lengthening and loosening some muscles and activating others. Learn the basics.
Then once you’ve learned the basics, you start to advance moves or add weight.
Make yourself EARN harder moves…EARN heavier weights.
Build up your strength slowly so that you allow your body to adapt so that you don’t get injured and have set backs.
And while you are planning out what moves and what weights will get you to your goals, consider repetition and set schemes. Think about rest intervals.
Consider how many days you are going to lift and how long the workouts will be. Also how often are you going to include cardio? What type of cardio?
WOW! Lots to consider right?
YEP! But if you put some thought into each of the pieces ahead of time, you are going to be much more likely to hit your goal AND when you hit your goal, you will actually KNOW what it takes to get you back there if you ever need to retrace your steps.
Even if you don’t hit your goal, you can then tweak things, taking out things that didn’t work and adding in new things that may work.
Otherwise you will just end up floundering around time and time again with no way of knowing what works and probably never actually hitting your goal.
I know it seems random, but it really does seem like building a house….not that I know that much about building a house.
You have to create the blueprints so you know where everything is going to go. You’ve got to get the right tools. You’ve got to know where to start. You’ve got to lay out the plans to get it finished. You’ve got to understand your timeline.
You’ve got to lay a foundation and then build upon it sometimes using fancy things and sometimes using the basics.
The point though of all of this is that you’ve got to have a plan and you’ve got to start from the bottom up.
Ok so after all this rambling, I’ll try to break it down a bit more. Say you want to lose weight and get toned (hey it’s about to be bikini season and this seems to be about every other woman’s goal that comes into the gym).
A basic outline of a progression may be strength training 3 times a week with cardio 2.
With the strength training being three times a week, I would recommend some sort of full body-ish workout each of the three days. I would break down each day into maybe something like this…
Monday Press and Squat, Wednesday Pull and Hinge and Friday Rotational.
I would then select appropriate exercises based on the outlined movement patterns above. I would give them basic exercises to start. They would then have to EARN the harder more fun moves. Master the basic squat motion and then we will talk about fun squat variations. You don’t just get to do the fun variations…You’ve got to earn them.
Just like you EARN heavier weights.
I would start the person out with either light weights or even body weight movements for about 15-20 reps (of course depending on their level of fitness). Over the weeks I would progress them to heavier weights and lower reps. I would probably never really get below 8 reps. If I did go below 8 reps it would only be for a week.
Also, the weights would change slowly, allowing the body to adapt slowly.
Yes..Usually drastic changes lead to drastic results. But they also lead to lots of injuries that could have been prevented by just being a tad bit more patient!
While I’m a fan of the maximal strength rep range, it isn’t necessary for a goal like the one listed above unless the person does really fall in love with lifting. It may also be something to bring up in a later progression.
AND even though I’m not a fan of higher rep ranges (they are good…just mentally I hate counting to 20 haha), it is important to cycle back through that 15-20 rep range to give your body a break from the lower ranges.
Plus your body adapts to whatever it is doing so mixing it up can help you break through any plateau you may have hit!
Each progression would last about 4 weeks before I would give an active recovery-ish week and change up the workouts.
If you don’t change things up, you may hit a plateau, BUT this doesn’t mean changing things up every day or even every week.
Some consistency is key. It helps you track progress and it helps your body build up moves before you change things up again and make it adapt to new moves and weights.
And you don’t only need to build slowly with weight training. Cardio is the same way. You need to build an aerobic base first. Start with some long slow cardio. Build your base. Then as you up your aerobic endurance, add in some sprints. Start your sprints with a 1 to 3 or 5 work to rest ratio. Then decrease your rest as you get more fit. You can also play with making the sprint longer, BUT consider what you are trying to achieve.
What energy zone are you trying to work?
Consider the variables! What are you trying to accomplish and will the workouts you are doing TRULY get you there?
Anyway, so next time you lay out your goal, plan out how you are going to get there.
Things don’t just magically happen. If you want something done, lay out a plan to do it! Don’t just flounder around using random tools!
Part 3: Bootilicious – Activation
Ok so you’ve rolled out your hips and have loosened and lengthened the tight muscles.
Next, you’ve got to get the appropriate muscles activated – you’ve got to warm up those butt cheeks!
Most of us are quad dominate and our butts aren’t firing on all cylinders. So a few moves can get your glutes awake and ready to work.
The moves below aren’t the only moves you can use, but they are some that I like. They really make you feel your butt cheeks so that during your workout you will be well aware that your glutes are ACTUALLY working.
These moves may be funny…and yes…some of them are very Jane Fonda…but they are seriously EXCELLENT at what they do!
- Sit and squeeze – One of the simplest moves you can do to activate your butt cheeks is literally sit there and squeeze your butt cheeks. If you can’t do this, then you probably aren’t using your glutes at all during your workouts. If you are doing this properly, you should feel like you become taller.
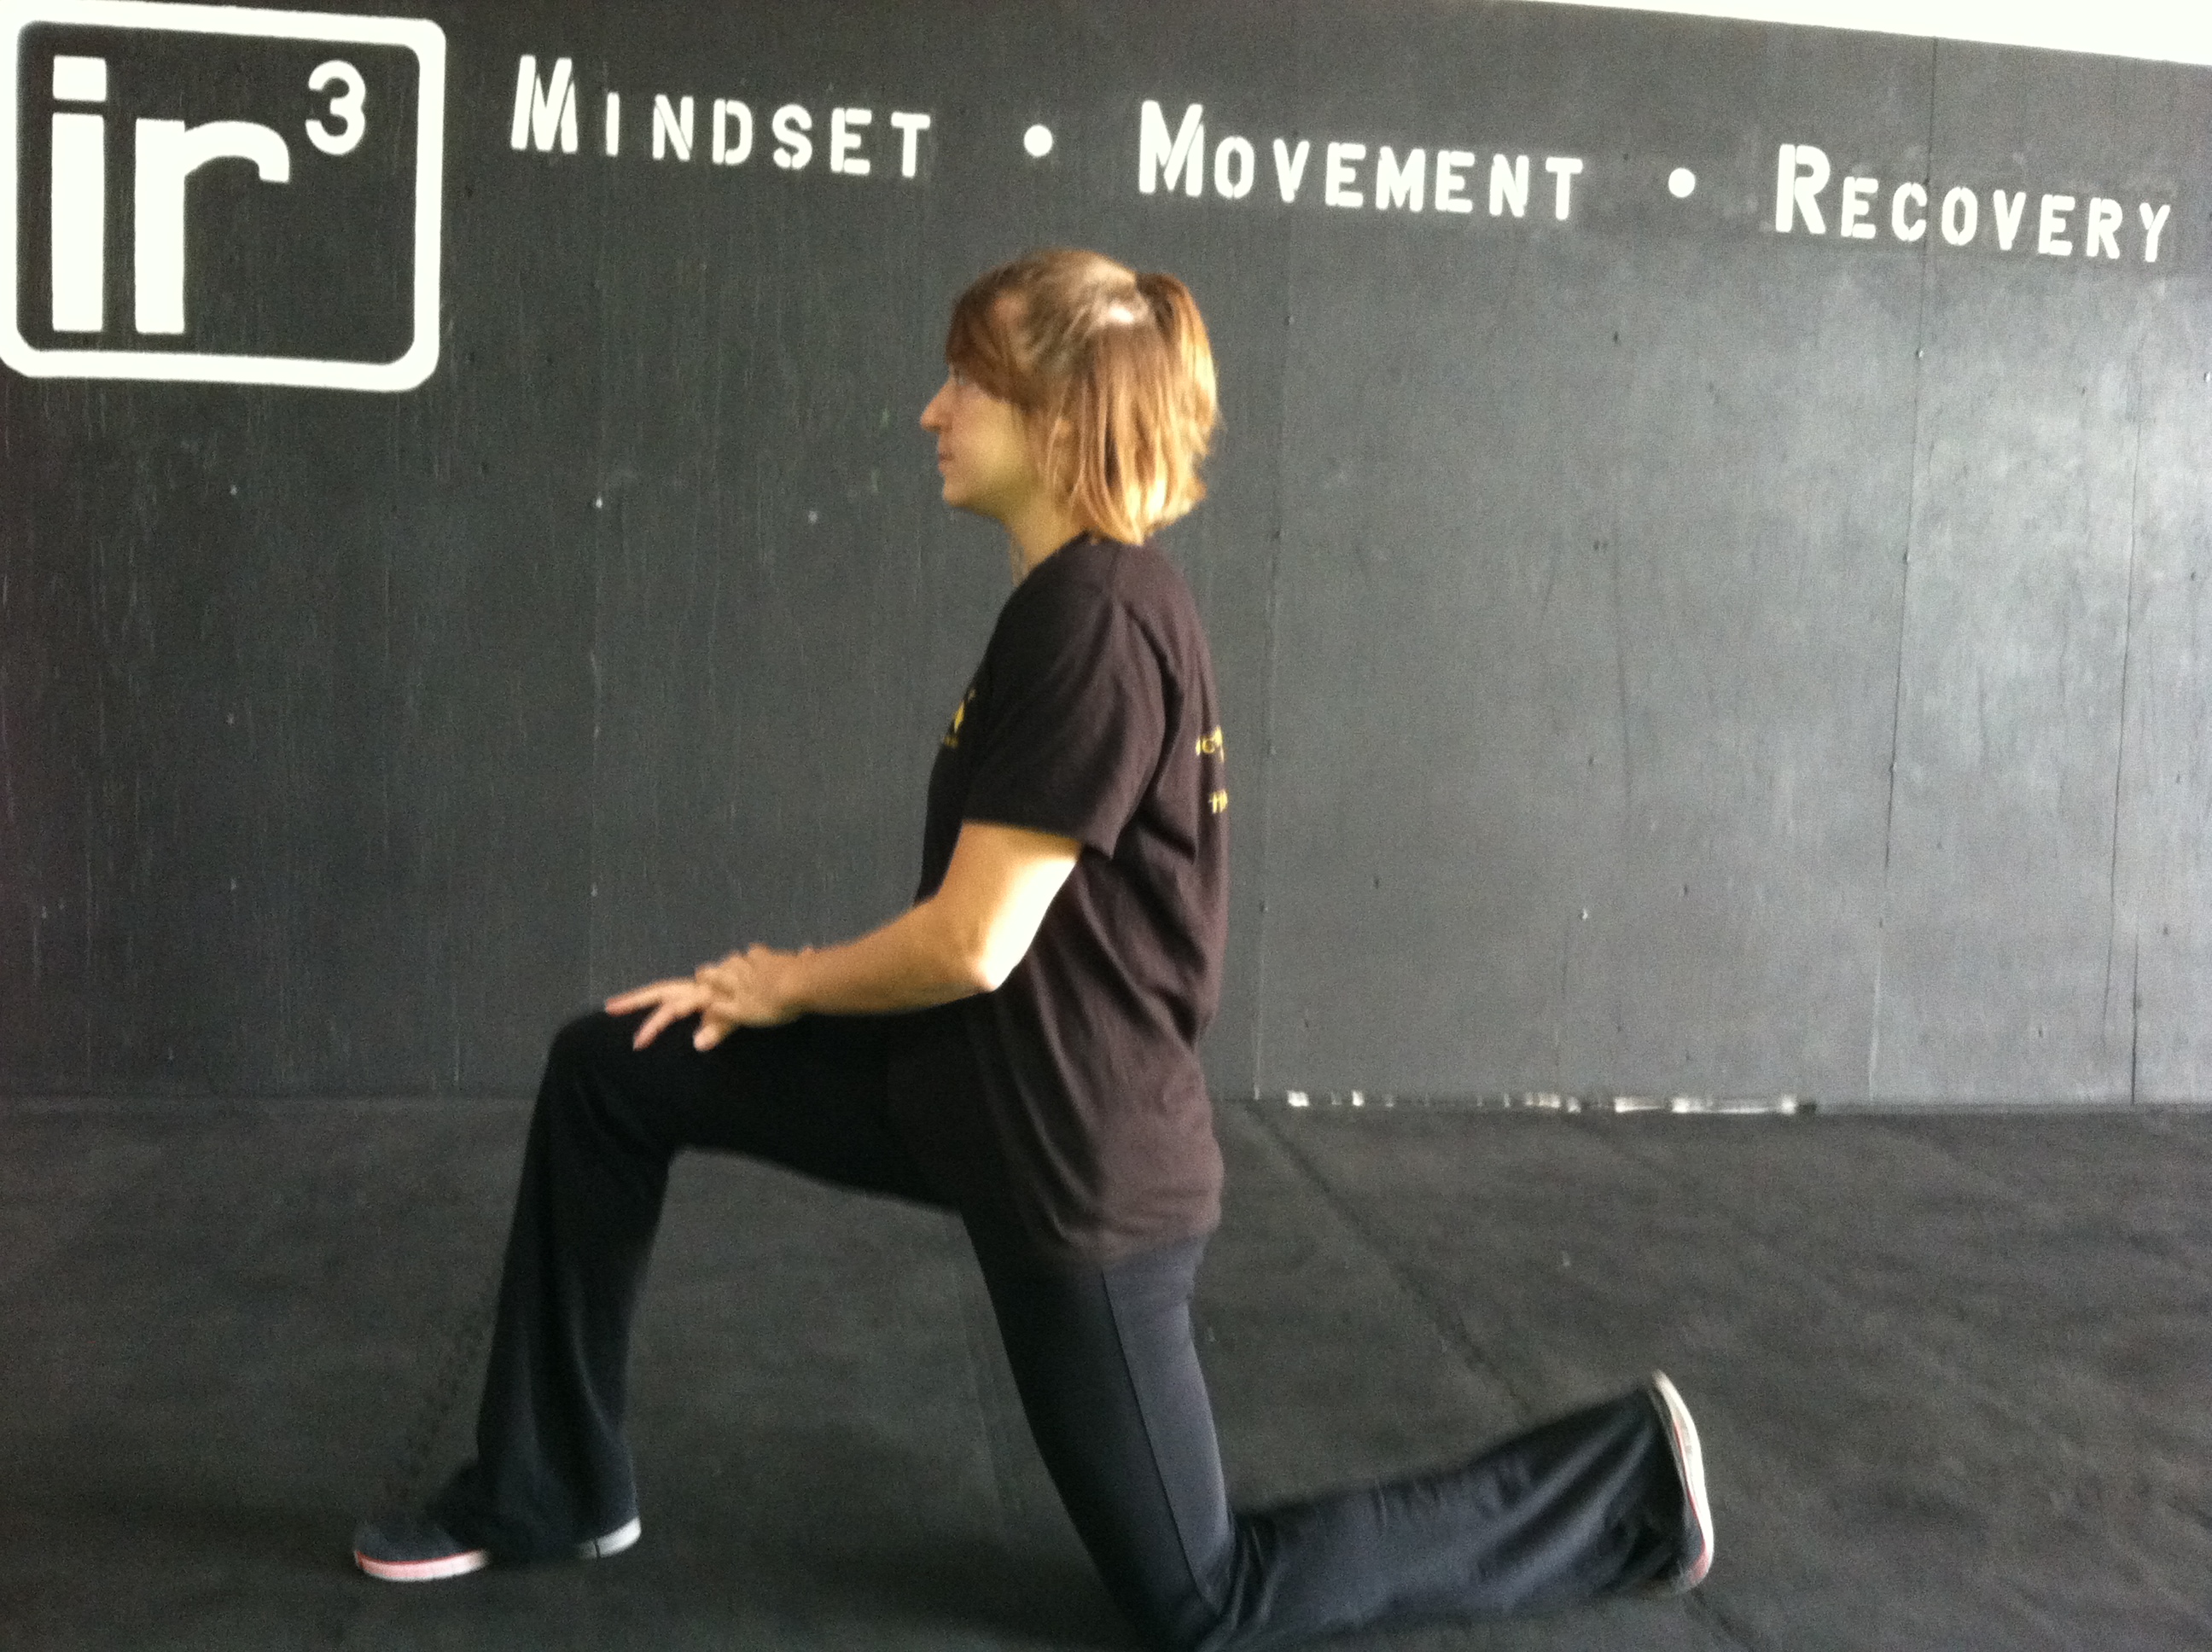
- Kneel and squeeze – So in this one you are kneeling on one knee. So if you are kneeling on your right knee, with your left knee up, you are going to drive your hips forward and really squeeze that right butt cheek. You aren’t leaning forward, you are simply squeezing and hold that back butt cheek. You can make this a bit tougher, if you stand on one leg and bend the other knee to 90 degrees and squeeze the butt cheek of the standing leg. The standing move has the bonus of working on your balance!

- Fire hydrant – So this move basically mimics the move a dog does to pee on a fire hydrant so I’m assuming that is where it got its name. Place your hands underneath your shoulders and your knees underneath your hips. Flex your feet. Then raise one leg out to the side, keeping the knee at 90 degrees. Try to not let the foot get higher than the knee or the knee get higher than the foot. Really squeeze the butt cheek as you lift. Repeat all reps on one side before moving on to the other side.

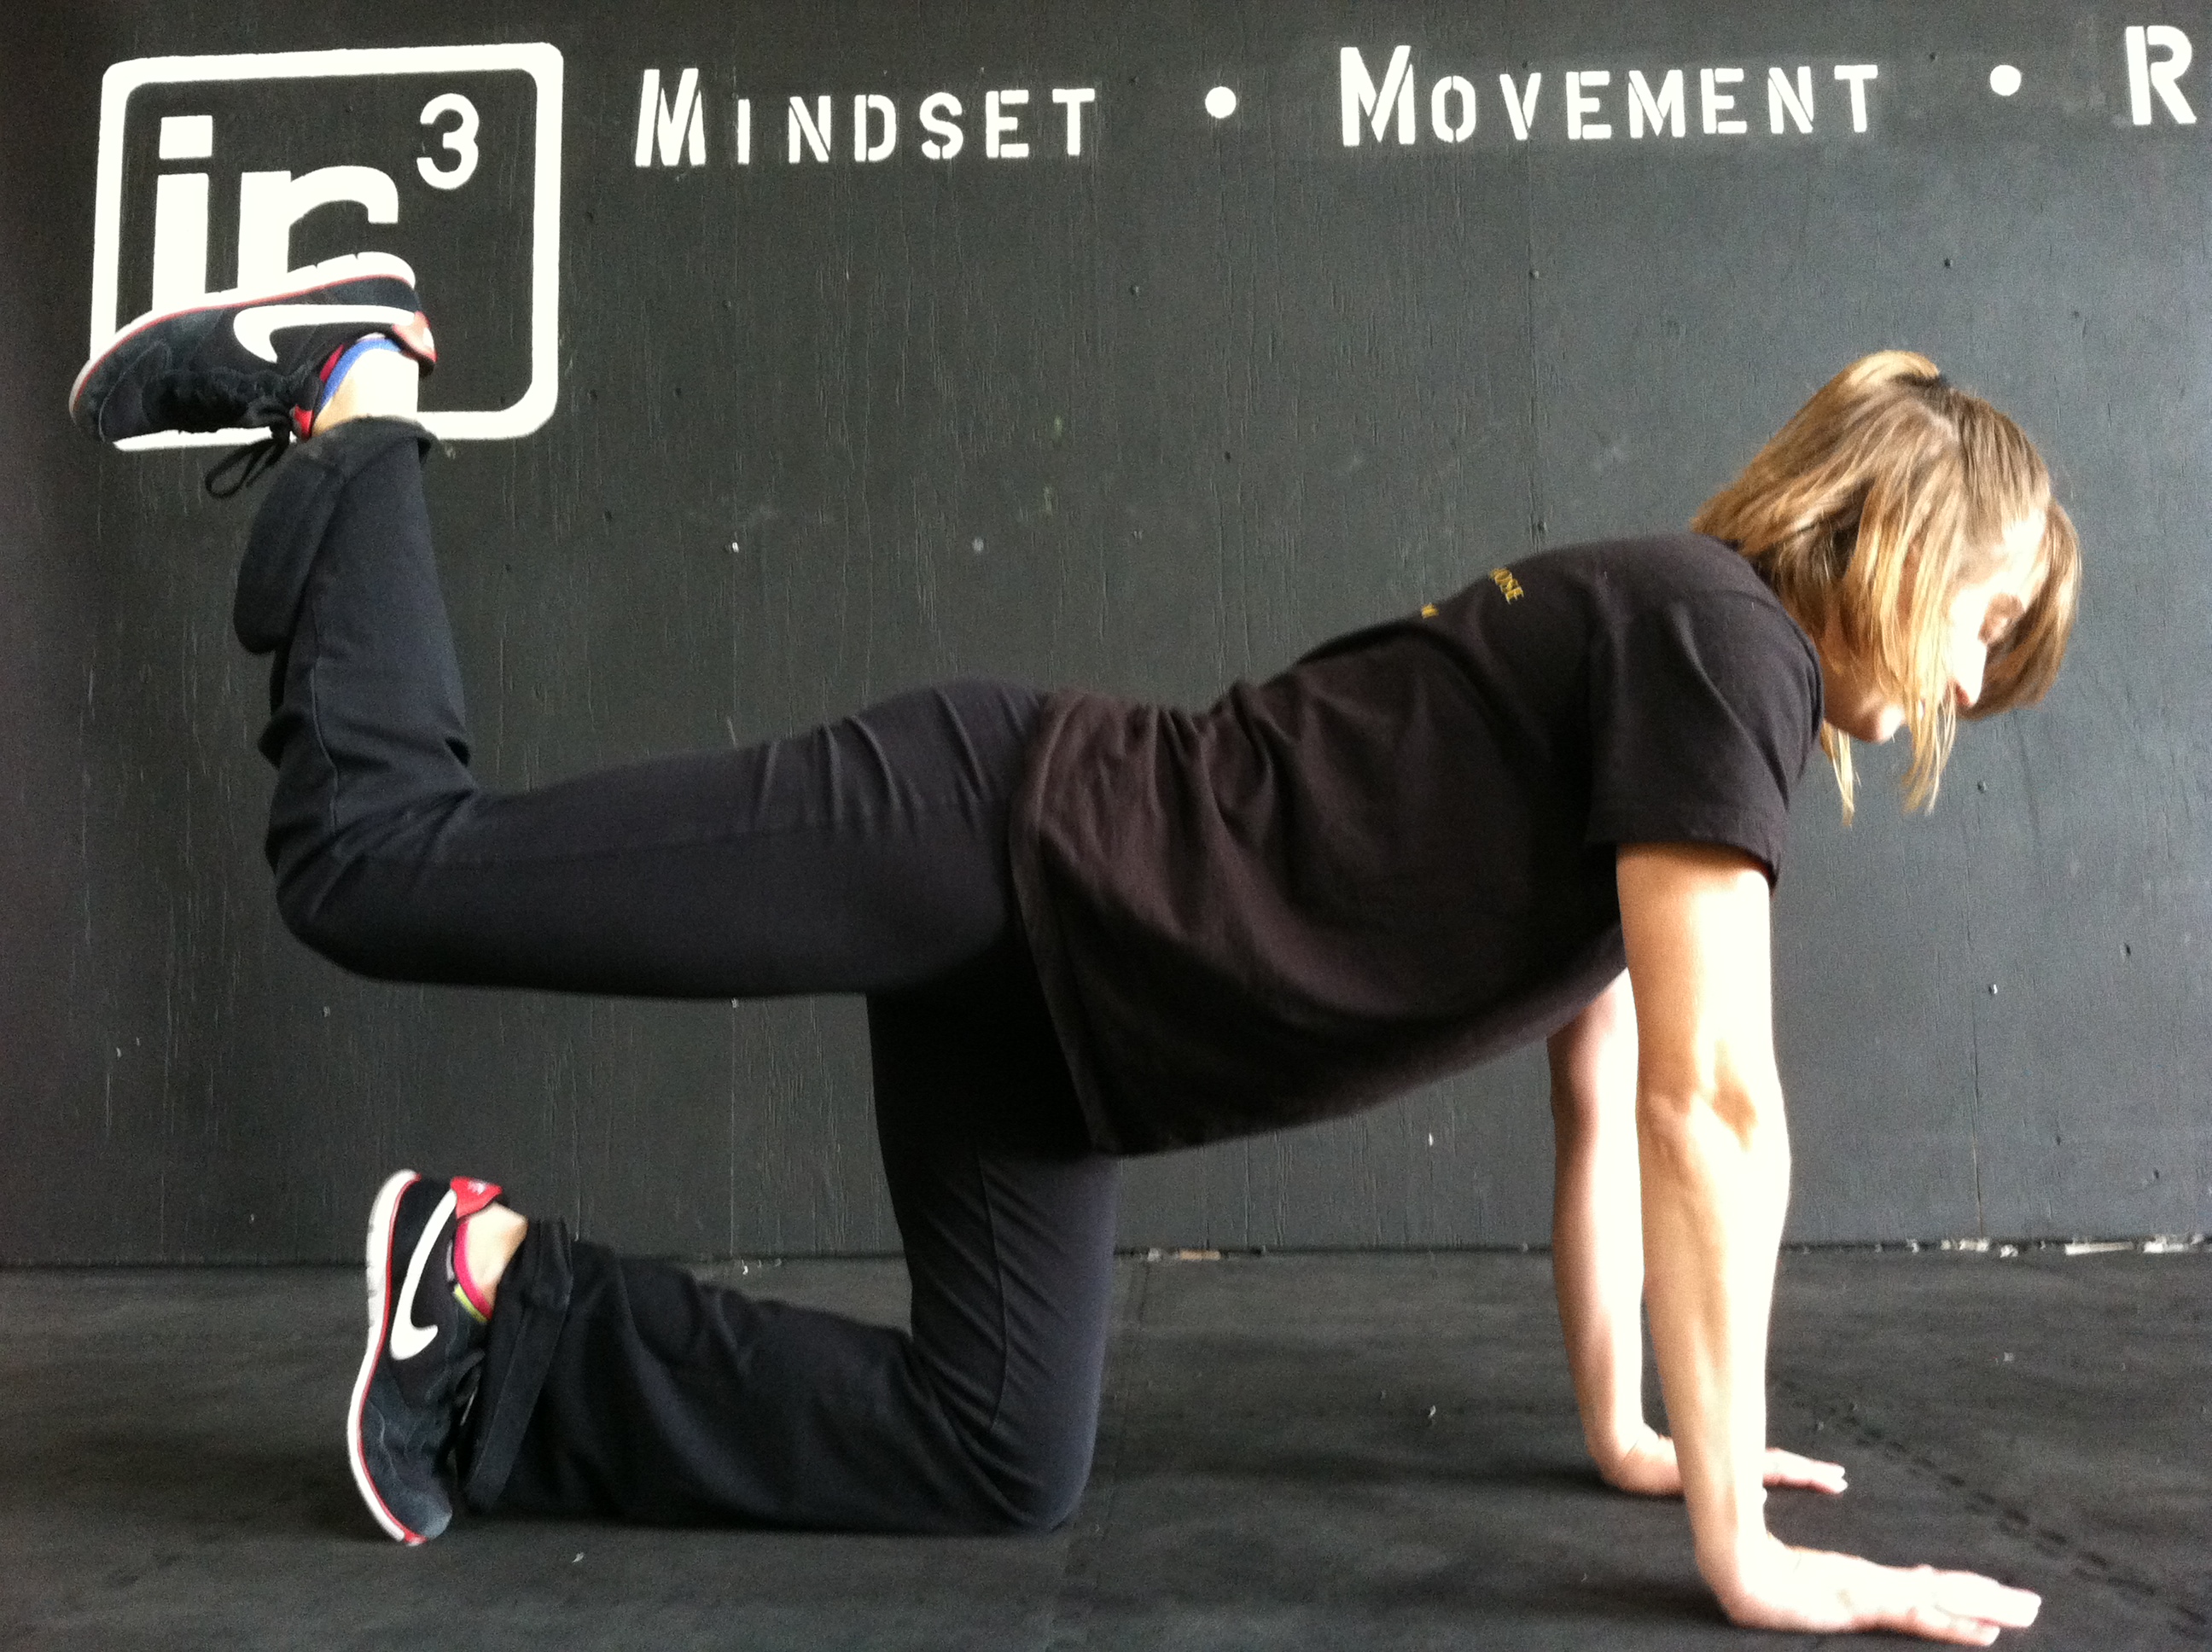
- Straight leg lift – To make the fire hydrant more challenging or to just add some variety, do a straight leg lift. So on hands and knees, straighten one leg out to the side and then lift that straightened leg. On both the fire hydrant and the straight leg variation, make sure NOT to bend your elbows. The straight leg move is tough and you may not lift the foot very high off the ground. Don’t force it or rotate. Just really isolate the glute. It should be firing on the first lift!
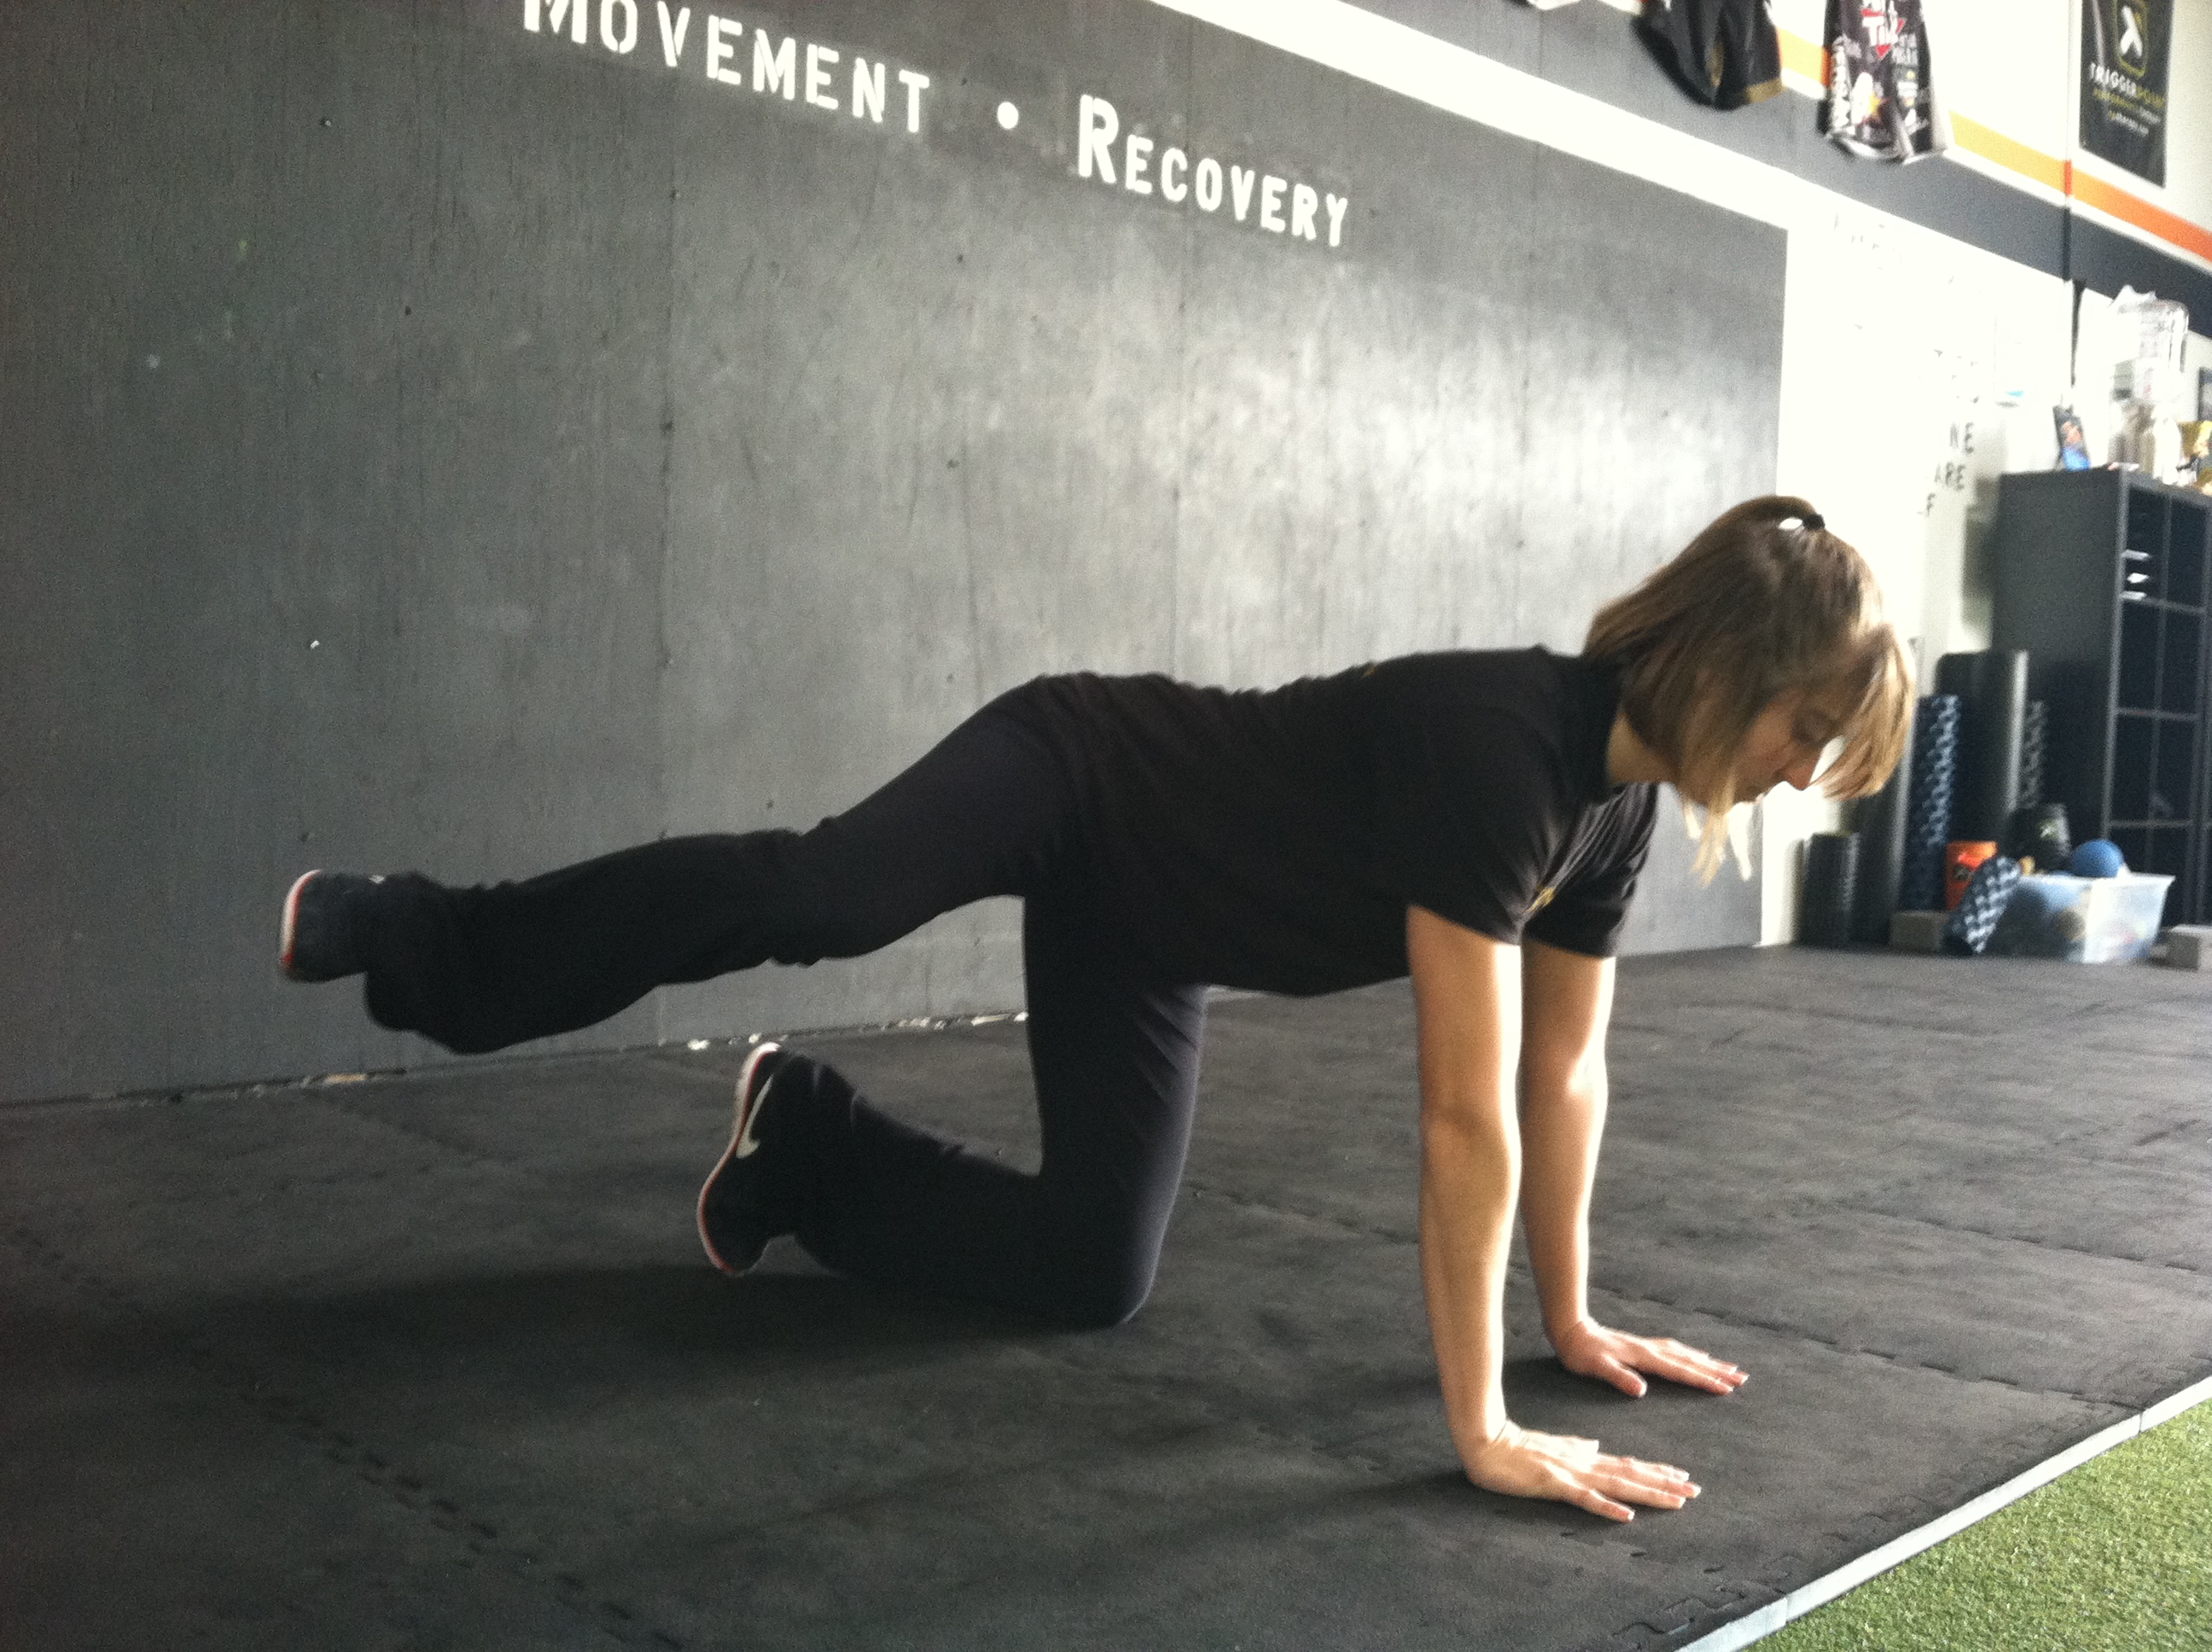
- Donkey kick – So setup just as you would for the fire hydrant. Instead of raising the leg out to the side, you are going to kick the leg straight back. Keep the knee bent close to 90 and keep the foot flexed. Don’t let the low back arch. Make sure that as you lift you are squeezing the butt cheek of the leg you are raising! Also make sure the foot is driving straight up to the ceiling. And do not let your elbows bend.

- Hip Circles – So this move combines the donkey kick and the fire hydrant with a knee drive. To do this move setup on hands and knees. First drive the knee back and do a donkey kick. Then without lowering to the ground, bring the leg out to the top of the fire hydrant move. Then without setting the knee down, drive it forward into the elbow. Keep the foot flexed the entire time. When you drive into the elbow, you should really feel your abs engage. Then lower the knee down and repeat.
- Clams – So these can be done with or without bands for resistance. If you use a band, put it around both legs right below the knees. Lay on your side, propped on your forearm. Place your feet on top of each other and bend your knees to just above 90 degrees. Then without rotating, open the top knee, squeezing the glute. A great way to do this at first is to set up with your butt right against a pole or a wall so you can’t rotate. You are opening your top knee and driving it up toward the ceiling by squeezing your glute. Lower down slowly if using a band and repeat.
- Glute bridge – So this move deserves its own whole post and will get it, but the basic glute bridge is a great activation/warm up move so I had to include it. Lay on your back with your feet about hip width apart. You should basically be able to touch your heels with your finger tips. Then bend your elbows to 90 degrees. Drive your elbows, shoulders and heels into the ground as you drive your hips up. Make sure your knees do not fall apart. Actively squeeze your butt as you drive your hips up. If you feel this a lot in your hamstrings, make sure that you aren’t driving off your heels backwards. You shouldn’t feel like you are driving back into your shoulders. You want to actual feel like you are driving your knees forward over your toes even though you are driving through your heels.

- Posterior Plank – So this move looks like a move right out of Flash Dance to me (maybe she could get her hips up a bit higher, but yep….it is the exact move. Start seated on the ground with your hands behind you. It is best if you can turn your finger tips toward you. Push up onto your hands and heels. Drive the hips up as high as you can and really press your chest out. Relax your head back.

- Band walks – So a great active way to warm up that butt. You place the band around both feet. To make the move easier, for one you can use a lighter band. For two, you can place the band up above your knees or even right below. The higher up the band the easier the move. The closer to your feet, the harder the move. Two great walk moves that I do…one forwards and one sideways. Walking forward…walk with monster steps out to each side. Do not let the feet come all the way back together. Also walk backwards back. Then walking sideways…just like a shuffle. Take a big step out to the side then bring the other foot to almost meet it, keeping tension in the band. Make sure the toes stay pointing forward. Don’t rock side to side. Keep the knees bent and take as big a step as possible.

So those are my top 10 activation moves. You don’t need to do ALL of them each and every time. I usually choose 2-4 depending on which ones I plan to do and what workout I’m doing that day. Today, since I was doing a posterior chain workout with single leg deadlifts and swings, I did 4 activation moves to make sure the glutes were really really awake.
Check back next week for a break down of some great butt STRENGTH moves! And if you missed it, or your butt cheeks are now active and ready to workout, try one of these deadlift variations!
The New Normal and Periodization
It’s funny…when you first lose weight or lift a new PR, you feel super good about yourself.
But then after a while, when you stay at that weight or keep lifting around the same amount, you aren’t as happy or as proud with where you are.
It is obviously still a good point if you were happy to get there, but at some point, you begin to expect and want more.
You can actually become super UNHAPPY with where you are even if it is miles beyond where you started.
It’s like we get used to our success and begin to not see it as the success it once was – we begin to see it as the new normal.
And once something is our normal, we just seem to want to improve on it.
I know I do.
Sometimes I wonder if I’ll ever be satisfied no matter how much I achieve. Sometimes I just keep pushing and pushing expecting more and more NEVER giving myself a chance to take a break and enjoy all that has already been accomplished.
But you will drive yourself crazy that way.
Yes we can always become better, fitter, stronger, faster.
But is always pushing forward really good? Don’t you need to at points sit and enjoy what you’ve already accomplished?
Don’t you need to give yourself a break even if it is just a mental break from constantly pushing forward?
I whole-heartedly believe in giving yourself a “break” every few weeks if not a small break every week.
This new “normal” that you achieve can easily become a plateau if you keep pushing forward at the same pace day in and day out.
Honestly, your body and your mind can’t handle the same intensity day in and day out and sometimes you are lucky if you simply plateau when you don’t give yourself a chance to relax and reflect. You run the risk of actually going BACKWARDS if you never give yourself a break!
So once you’ve achieved a new normal, how do you use a “break” to keep you moving forward?
One word…Periodization.
What do I mean by periodization? I mean that you cycle through times of intense work and really pushing toward your goal, working harder and harder, and then taking a little time to let your mind and body recuperate BEFORE you push forward again.
And when talking about workouts, I don’t mean the day or so you take each week to let your body recover from the week of workouts. AND I don’t mean a complete week off from working out.
When you create your workout program, you want to create a progression. A progression can be anywhere from 4-6 weeks in length. And over those weeks you should build each week on what you did the week before. This means heavier weights or maybe even earning more advanced and complicated variations of moves.
But anyway you look at it you are PROGRESSING. You aren’t randomly picking workouts. You are building each week toward a goal…even if that goal is simply to do a heavier squat or be able to use weight on a single leg deadlift.
And then after building for those 4-6 weeks, you need to recover. This can mean going back to body weight for a week. It can mean completely switching up your progression or even just doing different workouts for a week.
Whatever it is, you’ve got to give your body and your MIND a break from the constant pressure to move forward.
Same goes for dieting. And again I don’t simply mean a cheat meal or even a cheat day each week.
Sometimes you have to let go completely…like on a vacation. Sometimes you have to take a couple of days and just enjoy even if they aren’t on whatever usual schedule/plan you follow.
Your mind and body can’t keep pushing forward all the time. You’ve got to give yourself a chance to relax and enjoy your new “normal” but still improved/better/fitter/happier state before you push forward again.
So think about your program right now…Are you actually building toward something or just haphazardly going about things and then getting mad when a new normal turns into a month-long plateau?
Have you been working at the same intensity for the last three months and been wondering why you haven’t seen results?
Give this a shot. Write up the next few weeks and then PLAN in a week to enjoy how strong you’ve gotten while not focusing on moving forward or your goals for the next few weeks. Plan a week every 4-6 weeks where you are going to just enjoy and PLAY!
Part 2: Being Bootilicious – Inhibition
So this post should actually have been post number one because what you need to start with is inhibiting and lengthening the tight, overactive muscles!
If you want to work your butt, the first thing you have to do is relax the tight muscles.
You aren’t going to feel butt exercises in the correct places if the right muscles aren’t activated!!! And you won’t activate the right muscles if other muscles are overactive and tight!
SO what do you do?
The first thing I do before I workout is roll out.
And if I really want my butt to work, I’ve got to make sure that everything around my hips is loose.
While I’m fortunate enough to not be confined to a desk all day, I sit enough that my hips are flexed for a good portion of the day.
That means they are tight. And tight hips can lead to low back pain. They can also restrict your glutes from really activating during exercise.
If your glutes don’t activate during leg movements, you are going to use your low back, have inefficient movement patterns, not lift as much AND risk injury. You are also going to miss out on working one of the biggest muscles in your body!
SO roll our your hips before you begin!
While a foam roller is great, I find any sort of ball to be WAY better at getting into those trigger points around your hips.
I prefer a tennis ball, trigger point ball or lacrosse ball. I find the golf ball to be too small.
If you are just starting out, you may want to invest in one of the foam blue balls that are a little bigger and a little softer. The smaller and harder the ball you use, the more you are really going to dig in.
Ok so to roll out your “hips,” and I use this term a bit loosely, my three favorite moves are:
- The Hip U – So in this move you start by digging out the fleshy part of your butt. Literally sit on the ball with it under one butt cheek. Roll it around until you find a sore spot. Hold it on that sore spot and remember to breathe. You can also lift and lower the leg to help get deeper into the muscle. As you roll out your butt cheek, move the ball up to your low back. Find any trigger points there and hold for a bit. Then make an arc over the hip bone once you dig out your butt and low back. Hit your side butt, or glute medius. This is usually very tight on people. Again hold as you find trigger points. Then roll the ball to the front of your hip. Dig out the TFL and all the muscles right around that hip bone. Remember to HOLD if you find a sore spot…also remember to breathe! So that is the U over the hip
- Ab release – So most of the time we go for the exact spot where we “feel” pain. So we roll out our low backs if we feel pain when the cause of the pain may actually be somewhere else…like our tight hip flexors! BUT that being said that doesn’t mean we need to target the muscles that insert right below our hips. A hip flexor muscles actually connects up at a point in our spine! Which can mean that by placing a ball in your abs by your belly button and relaxing over it, you can actually help release your hip flexors! So try it…get a ball (and if you have a small ball you may need to put it on a trigger point block to really get it to dig in, but lay over the ball and relax. The ball should be to the side of your belly button and above the hip.
- The peanut – So one of my absolute favorite foam rolling tools is what I call the peanut. It is two tennis balls tapped together. They are perfect to use on the area around your spine. I like to hit my lower (and upper back for that matter) with these two balls. You can really get in and around your SI joint and then up into your low and mid-back. You can even target the spot where you psoas connect up in your spine.
So while these aren’t the only moves to use and you may also want to hit your adductors, calves and chest (other common tight muscle groups) these three moves are a great place to start!
After foam rolling, you will then want to do some dynamic stretches for these muscles before you begin your workout.
Notice I said DYNAMIC. Save the static stretching till afterwards!
A dynamic stretch is a stretch that you don’t hold for a long period of time, but actually move through (not bouncing though). A static stretch is one you hold for about 30 seconds or so. A static stretch is great for flexibility BUT has been show to reduce power during the workout.
So in an effort to increase mobility without any strength or power lost, we will use only dynamic stretches BEFORE exercise.
Here are some great moves I use to open up my hip area:
- Leg swings – You can do these swinging your legs forward or back or side to side. Both ways open up your hips. Try to increase the range of your swing without leaning your upper body forward and back. It is best to hold a wall when doing these.
- Hurdles – These are a variation of the leg swing. You can do these going forward or backwards (or BOTH!). What you do is bend your knee and swing your hip as if stepping over a hurdle. Alternate sides. Do about 10 per side.
- Simple kneeling hip stretch – So the basic stretch for your hip and even your quad is the kneeling hip stretch. Kneel on your right knee with your left leg bent to 90 degrees in front. You can make this dynamic by stretch by pushing the hip forward and then relaxing back. You can also add in a reach overhead and across. So if your left knee is forward, your right arm is going to lift up overhead and across. Then you will relax back down. You can also do a rotational stretch, so rotating over the front knee. To increase this stretch down your quad, you can also pull in the foot of the knee that is down and then release. By pulling the foot of the knee that is down up toward your butt, you will bring the stretch lower in your quad.
- Lying glute stretch – Lay on your back with your right knee bent and foot flat on the ground. Cross the left ankle over the right knee. Then grab behind either your right hamstring or in front of your right shin. Pull the right leg with the left foot across it unto your chest and then release. You should feel that in your glute. This stretch will make sure you are loose all around the hip joint! (I love doing the pigeon pose after my workouts as my static stretch!)
- Spider stretch – So this stretch is great to open up the hips. It can get your groin and your hamstrings and even calves too! So to do this stretch step one leg forward in a lunge. If this is too much you can put your knee on the ground. So if you lunge your right leg forward, you will then drop your right elbow right into your instep. Then rock back and sit on your other heal and straighten that forward leg to stretch the hamstring. Then rock back forward and drop your elbow again. Do about 10 each side moving smoothly through the movement.
- 360 Lunges – One of my favorite dynamic moves to warm up the hips is the lunge. BUT I don’t just use the forward lunge…I lunge in a few different angles. One lunge out front. Maybe one front at an angle. One out to the side. One opening up back. I do those four lunges on each side to create a 360 circle!
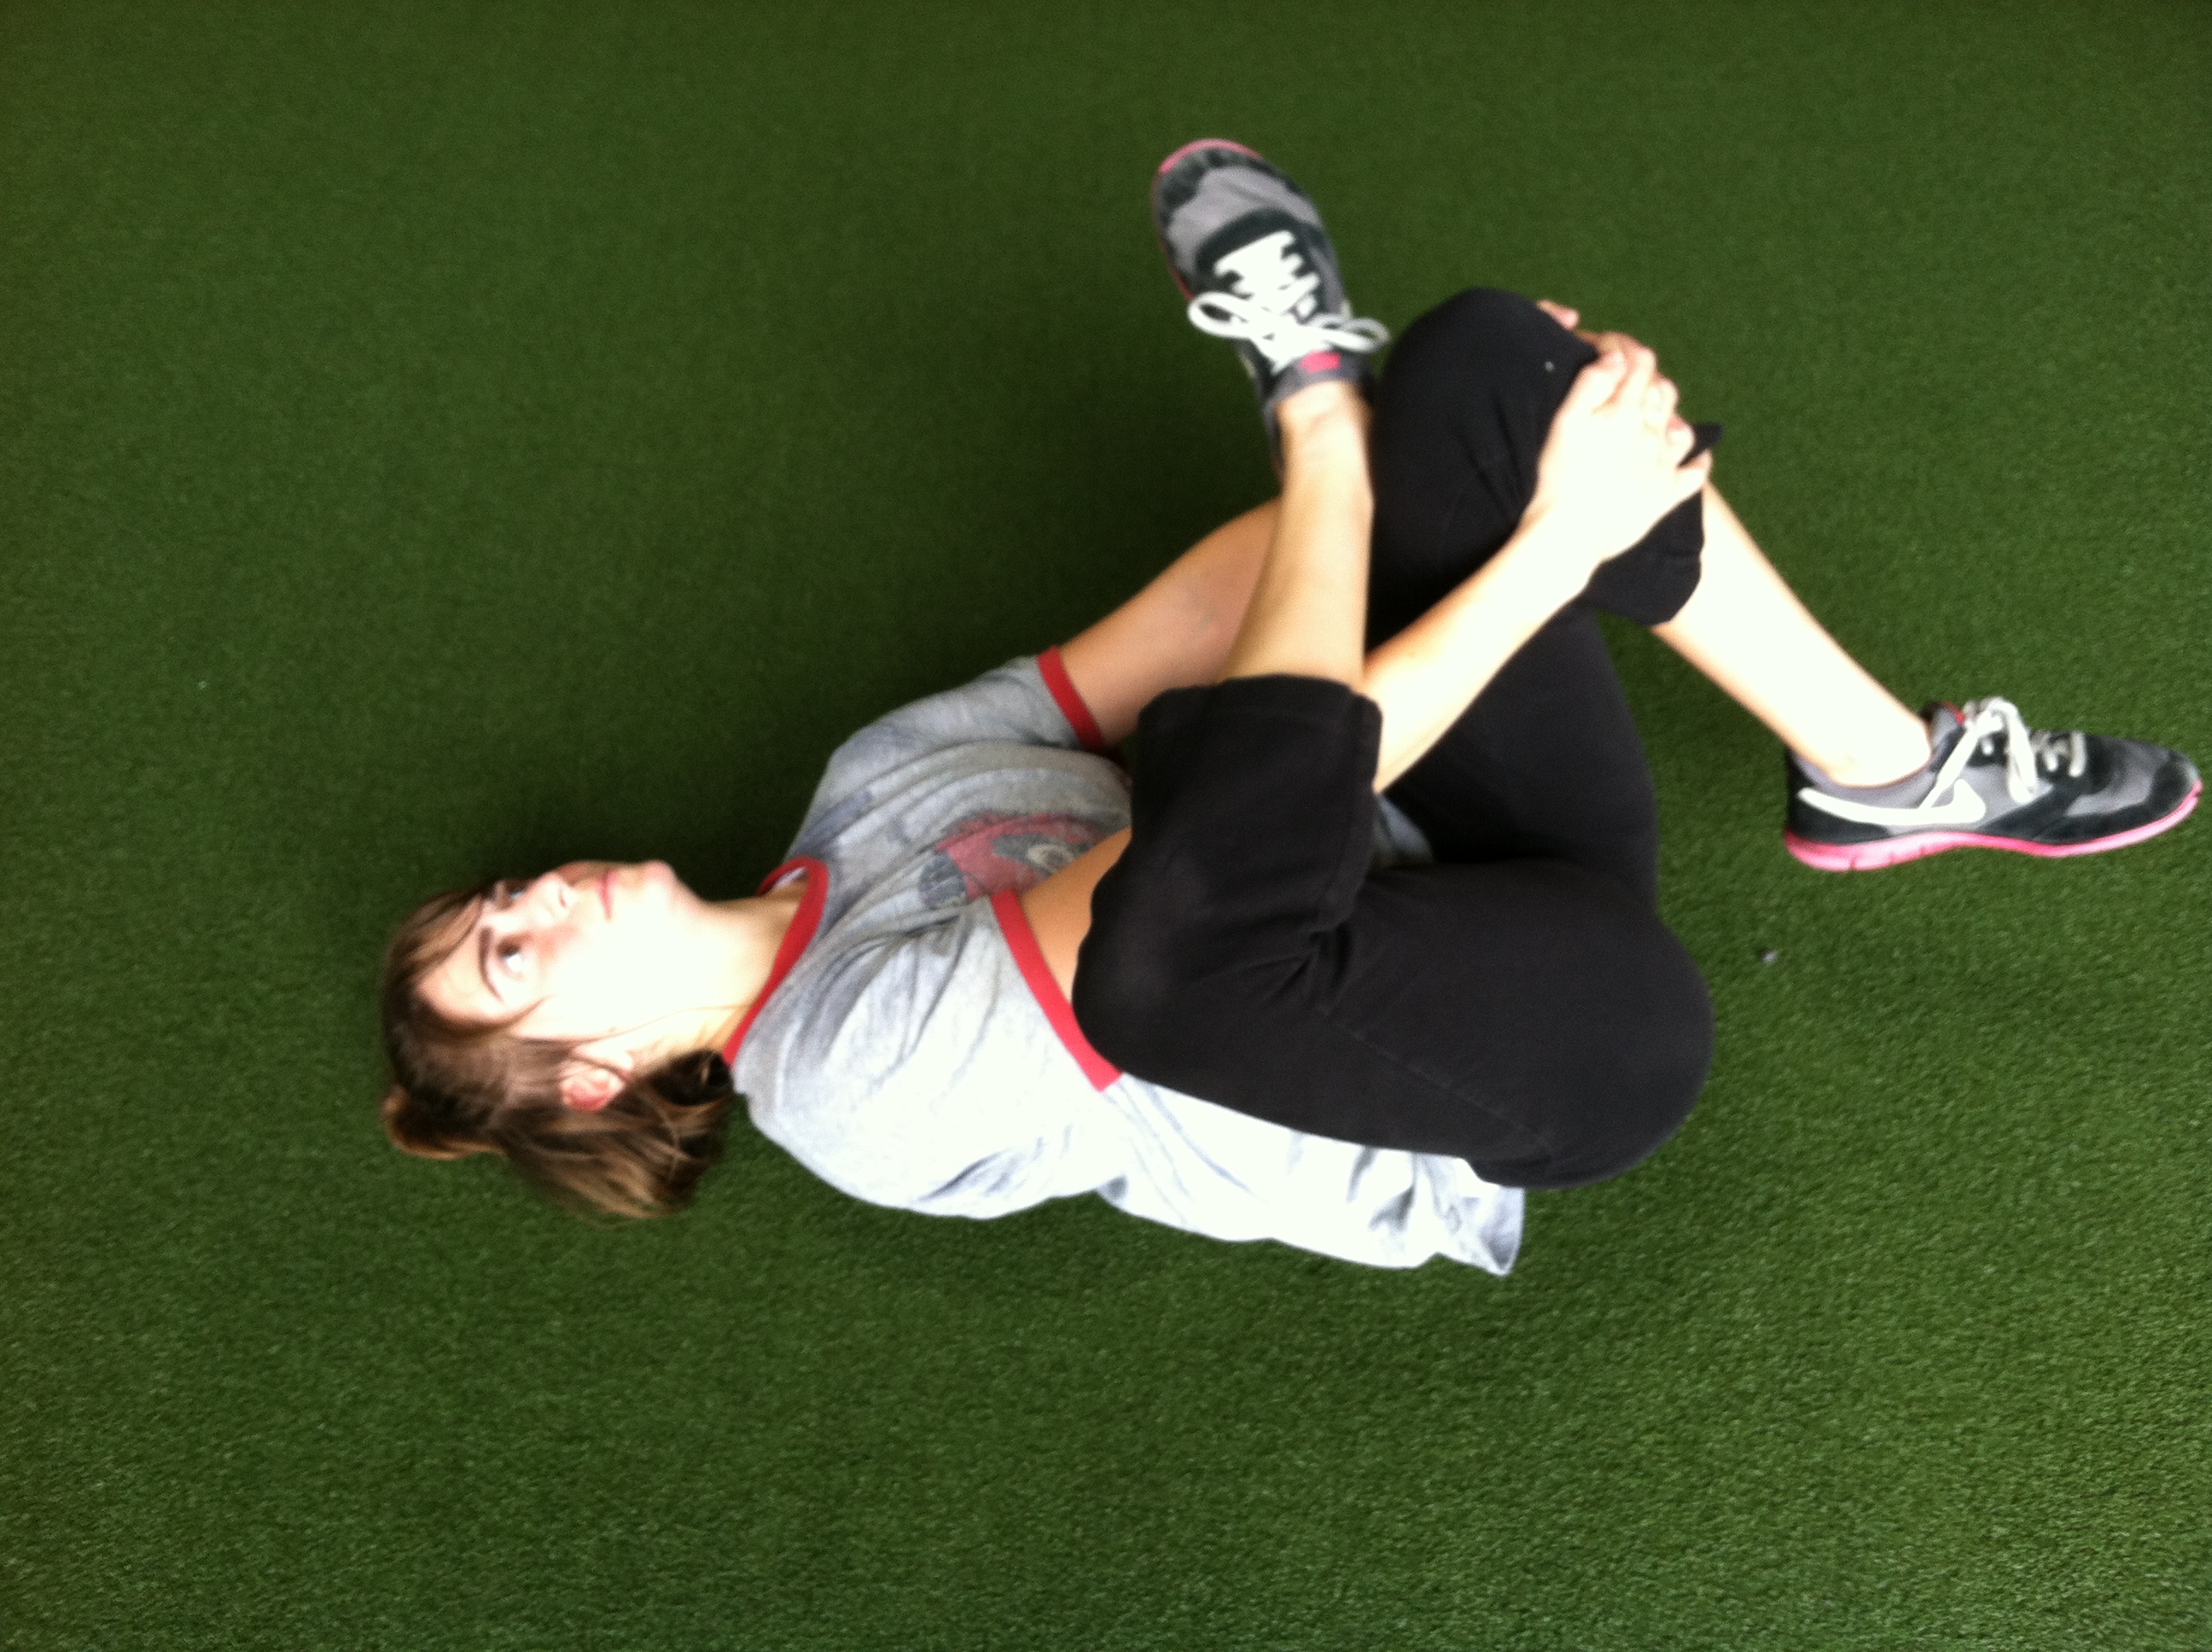
Glute Stretch
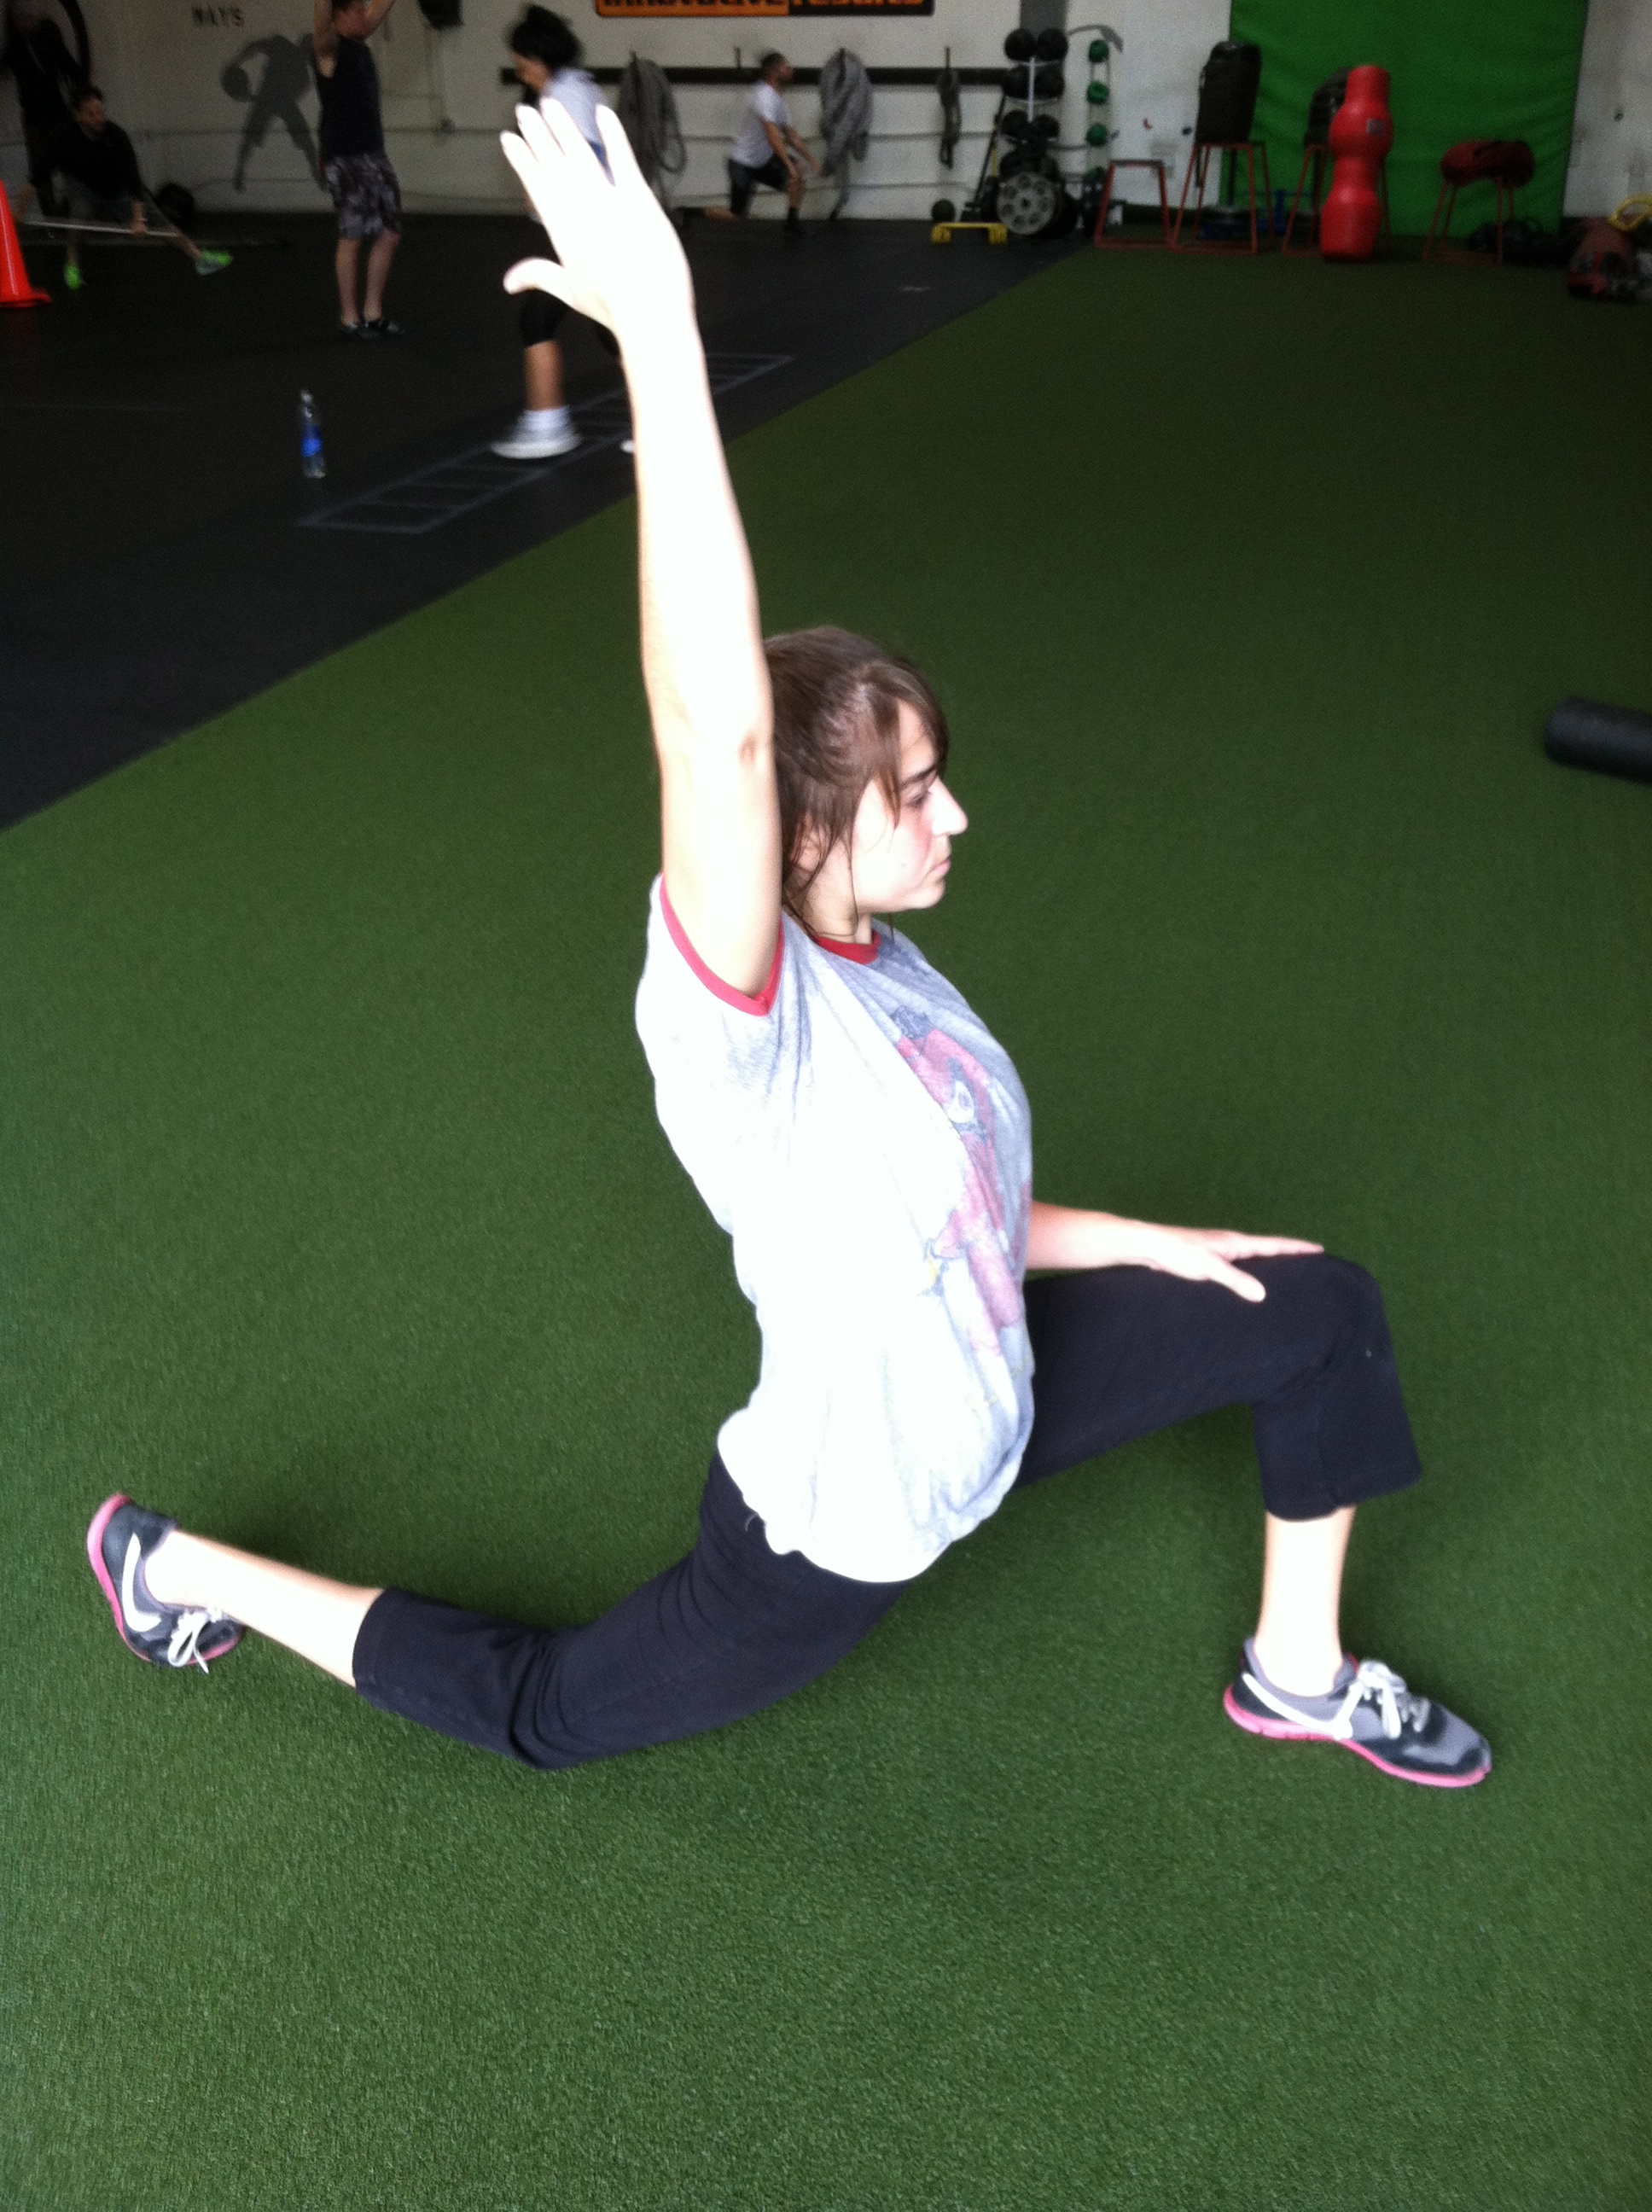
Kneeling hip stretch variation
These stretches and even the foam rolling moves aren’t the only ones you can do. I didn’t even really get into static stretching…BUT the point is these are good ones to start with and are very efficient ways to target all the muscles in and around the hips.
So between the foam rolling and stretches, your hips should be loose and ready to let your butt be activated!
Check back for Part 3 when we discuss glute activation exercises to use in your warm up!
P.S. I will add more photos! Sorry for these few that I managed to quickly take a few weeks ago after a workout!
How many sets? How many reps?
So recently I’ve gotten a ton of questions about how many reps and sets people should be doing.
Which actually is a really great question – and is completely dependent upon your level of fitness and fitness goals.
So then…how many reps and sets should you be doing!?!
Let’s say you are a beginner…or doing a recovery week…or simply working on muscular strength endurance.
Then you are probably going to go for higher reps, and by higher reps I mean 15-20 reps, and 1-3 sets.
When you work in the higher rep ranges, you aren’t using the heaviest weight possible. You are using a weight that starts to fatigue you toward the end of your rep range.
So basically doing 15-20 reps is going to get you the same results whether you do 15, 18 or 20 as long as you use a weight that means you are fatigued before the final rep.
Higher reps can be a great way for beginners to focus on form and really get the move ingrained WHILE still building up their basic strength.
How many sets you do in that higher rep range is based on how experienced you are, your training intensity for the day and even the volume of your workout.
If this is your first workout ever, you are probably only going to do one set. If you’ve been working out and building, you may be pushing through three sets.
If you are going super heavy and can barely make it through those 20 reps (like breathing squats), you may only do one set because any more would simply be overtraining (and if you went as heavy as possible for those 20 reps, you shouldn’t have anything left in the tank to push through a second round!).
If you are doing a leg workout for the day, you may only end up doing one set of the exercise because you are doing a ton of volume for your legs. You don’t want to overdo it by doing three hundred thousand reps of everything!
Ok, so 15-20 reps, 1-3 sets.
This rep range is where you find many women. They fear bulk so stay within this range.
But then they are missing out on the huge amount of benefits that lower rep ranges have to offer them!
So let’s say you do actually want to really get toned, buff and build some muscle while lifting some heavier weight. Let’s say you’ve become more advanced and your tendons and joints are ready to handle more load. What rep range do you enter next?
This is when you enter the supposed hypertrophy range of 8-12 reps. In this rep range, you supposedly have the great chance of actually increasing muscle size. I rarely ever mention this since most women then get scared and flee toward the higher rep ranges.
But let me tell you…you won’t get freaking bulky just cause you lift a heavy weight only 8 times!!! You may burn more fat. You may look more toned. You may get stronger and perform better…
BUT YOU WON’T FREAKING GET BULKY!
Anyway….
I love the 8-12 rep range. You can use heavier weights than the higher rep ranges. More rest is generally required between moves because you are moving heavier loads, but you really do get a big bang for your buck in terms of strength gains. You also are lifting heavy enough loads for just enough reps to get your heart rate up a little, which isn’t bad either.
If you are doing 8-12 reps, you should have good form. If this is really your first time out of the 15-20 rep range, don’t just start lifting 30 more pounds and go straight to 8 reps!
Start out by adding a little weight and doing 12 reps with good form. If that is easy, add a bit more weight and shoot for 12 more. If you say only get 10 with the new weight, stick there until you can lift the weight for 12 reps with good form and then add a bit more.
Add weight slowly so your body can adjust to the new loads.
When working in the 8-12 rep range, you don’t want to just randomly select 10 reps and perform them. You want to only do 10 reps because at 8 or 9 you want to drop the weight and quit right then and there.
In this heavier range, you want to make sure that you aren’t just stopping at 8 reps because that is what you said you were going to do. You want to have the weights make you stop at 8.
Using the heavier weights with 8-12 reps, you should be doing between 3-5 sets. You will need more rest between rounds with this rep range than you probably needed with the higher rep range unless of course you are doing something like breathing squats.
The number of sets you do for any rep range is based on the intensity of your lifts (how much weight are you using, how much rest are you getting) AND the training volume.
To simplify things, generally speaking, more reps means fewer sets…fewer reps means more sets.
So say you really want to work on gaining maximal strength. How many reps/sets do you do?
Well 1-5 reps and generally 4-6 sets.
If you are doing basically the heaviest weight you can handle, and nearing your one rep max, you probably aren’t going to be able to do very many reps of that weight over the workout.
I mean 25-30 reps in total at a heavy heavy weight (so a weight you can handle for 5 reps at a time for 5-6 sets) is going to be pretty killer. You probably AREN’T going to be doing that many supplemental lifts after it and if you do most of them are going to be with pretty darn light weight. (Remember training volume is key….too much volume equals overtraining which means your results won’t be as good as they could be if you just did less!)
Anyway, to sum all this up….
When considering how many reps and sets to do:
- Think about your level (Are you new to lifting? Do you have a solid base?)
- Think about your goals (Maximal strength? Building some great muscle tone? Building up strength endurance?)
- Think about the intensity of your workout (Do you need a lighter day? Have you done 3 heavy days already this week? How much rest between sets? Is it a circuit? Are you lifting super heavy?)
- Think about how many exercises you are doing for that body part during the workout (A workout with 5 leg exercises vs. 10 leg exercises means very different set ranges per exercise)
- Think about the weight you are using (You shouldn’t just say you are doing 20 reps or 12 reps and stick with an easy weight that you could do for 30 reps! Your weight needs to match the rep range. You should want to stop and have muscle shake-age, but good form!, 1-3 reps before you stop. Muscle shake-age is a very technical term meaning your muscles are shaking from working very hard.)
So if you have considered all of the things above, you will then want to use these three very basic rep/set ranges. I do want to note, however, that there are times when doing more than 20 reps is really beneficial AND that there are times when doing as many reps in a certain amount of time is an even better workout for strength endurance than 15-20 reps. (Sorry nothing is ever black and white!)
Anyway, to boil things down…
Strength endurance/beginner/recovery-variety for the advanced lifter – 15-20 reps, 1-3 sets
Hypertrophy aka sexy muscle range/Strength for performance – 8-12 reps, 3-5 sets
Maximum strength/sexy muscle-building – 1-5 reps, 4-6 sets
You should then choose weights and rest periods appropriate to the range that you select. You aren’t simply doing 8 reps to do 8 reps or 20 reps to do 20 reps!
Know why you are doing certain things! Don’t just do 10 sets of 10 reps because you think 100 reps of something seems gnarly!
Consider your variables and know what your goals for the workout are…THEN you can pick a rep and set range that will help you accomplish your goals!

This really isn’t super relevant….just funny haha
SIDE NOTE: Remember these ranges are GUIDELINES. AND you shouldn’t just only do one rep range for the rest of your life. I cycle through all 3 rep ranges since all three work on different things, but at the same time really do overlap. The point is to consider how intense you are training and the volume of your overall workout so that you don’t overtrain OR undertrain, but instead get the most out of your workout!
Part 1: Being Bootilicious – The Deadlift
So over the next week or so I’m going to write a series of posts focusing on the butt.
It is one of the biggest, most powerful muscles and also one of the most underactive.
Over the next few posts, I will discuss how to activate this amazing muscle and make it perky and perfect!
Of course while it would be logical to start with warm up/activation movements, I’m going to instead start with my favorite posterior move – the deadlift.
So the deadlift is hands down my favorite exercise. If I could only do one move the rest of my life, it would be the deadlift.
Why do I like the deadlift?
For one, it is super empowering. It feels so great to be able to lift a huge weight successfully off the ground.
Two, it is a full body move that really works the entire posterior of your body (back, butt, hamstrings….).
And three, there are a bazillion different variations that are just so beneficial and really get your butt activated, and honestly all too often people’s glutes really aren’t firing!
It is the perfect move to really build glute strength and power!
And when I got the honor of designing the workout progression for our gym for the next three weeks, I made sure to use it. My progression is very leg intensive and very very focused on improving people’s posture and getting the right muscles activated.
I was proud today to find out that everyone has most definitely been feeling the workouts working. While I never want to push people too far, I do like to hear that their butt cheeks are sore because it is very very hard usually to get people to really activate their glutes and use their butt (many people are quad dominate, which can lead to issues).
So if people’s butts are sore then they must be activated!
How did we get people’s glutes firing and start building some butt strength!?!
Through variations of the deadlift! DUH!!!
And not every variation even needs to be weighted down!
Of course you have the traditional deadlift, which is a great posterior exercise since it hits everything from behind your shoulder blades down to your heels.
However, this move isn’t always the best place to start since many people have limited range of motion in their hips and bad posture. If you can’t get your butt low and keep your shoulder blades down (chest pressed out), then you are at risk for a hurt low back.
So one of my favorite deadlift variations, especially to start with, is the single-leg deadlift. It works on balance, posture AND your glutes and hamstrings.
You don’t need weight to make this move challenging AND it is perfect for the beginner or the advanced lifter!
For the beginner it will really work on balance and posture while starting to get the glutes activated. Make sure they keep their back flat as they hinge over. Make sure their hips don’t rotate open. This will teach them good posture when they move to using weights.
For the advanced lifter, you can weight down this move, which will build more strength in the glutes. This version of the deadlift really forces them to really engage their core AND it forces them to use each leg independently. When we isolate each leg, we make each leg work independently, which can prevent the dominate leg from always taking over and perpetuating imbalances.
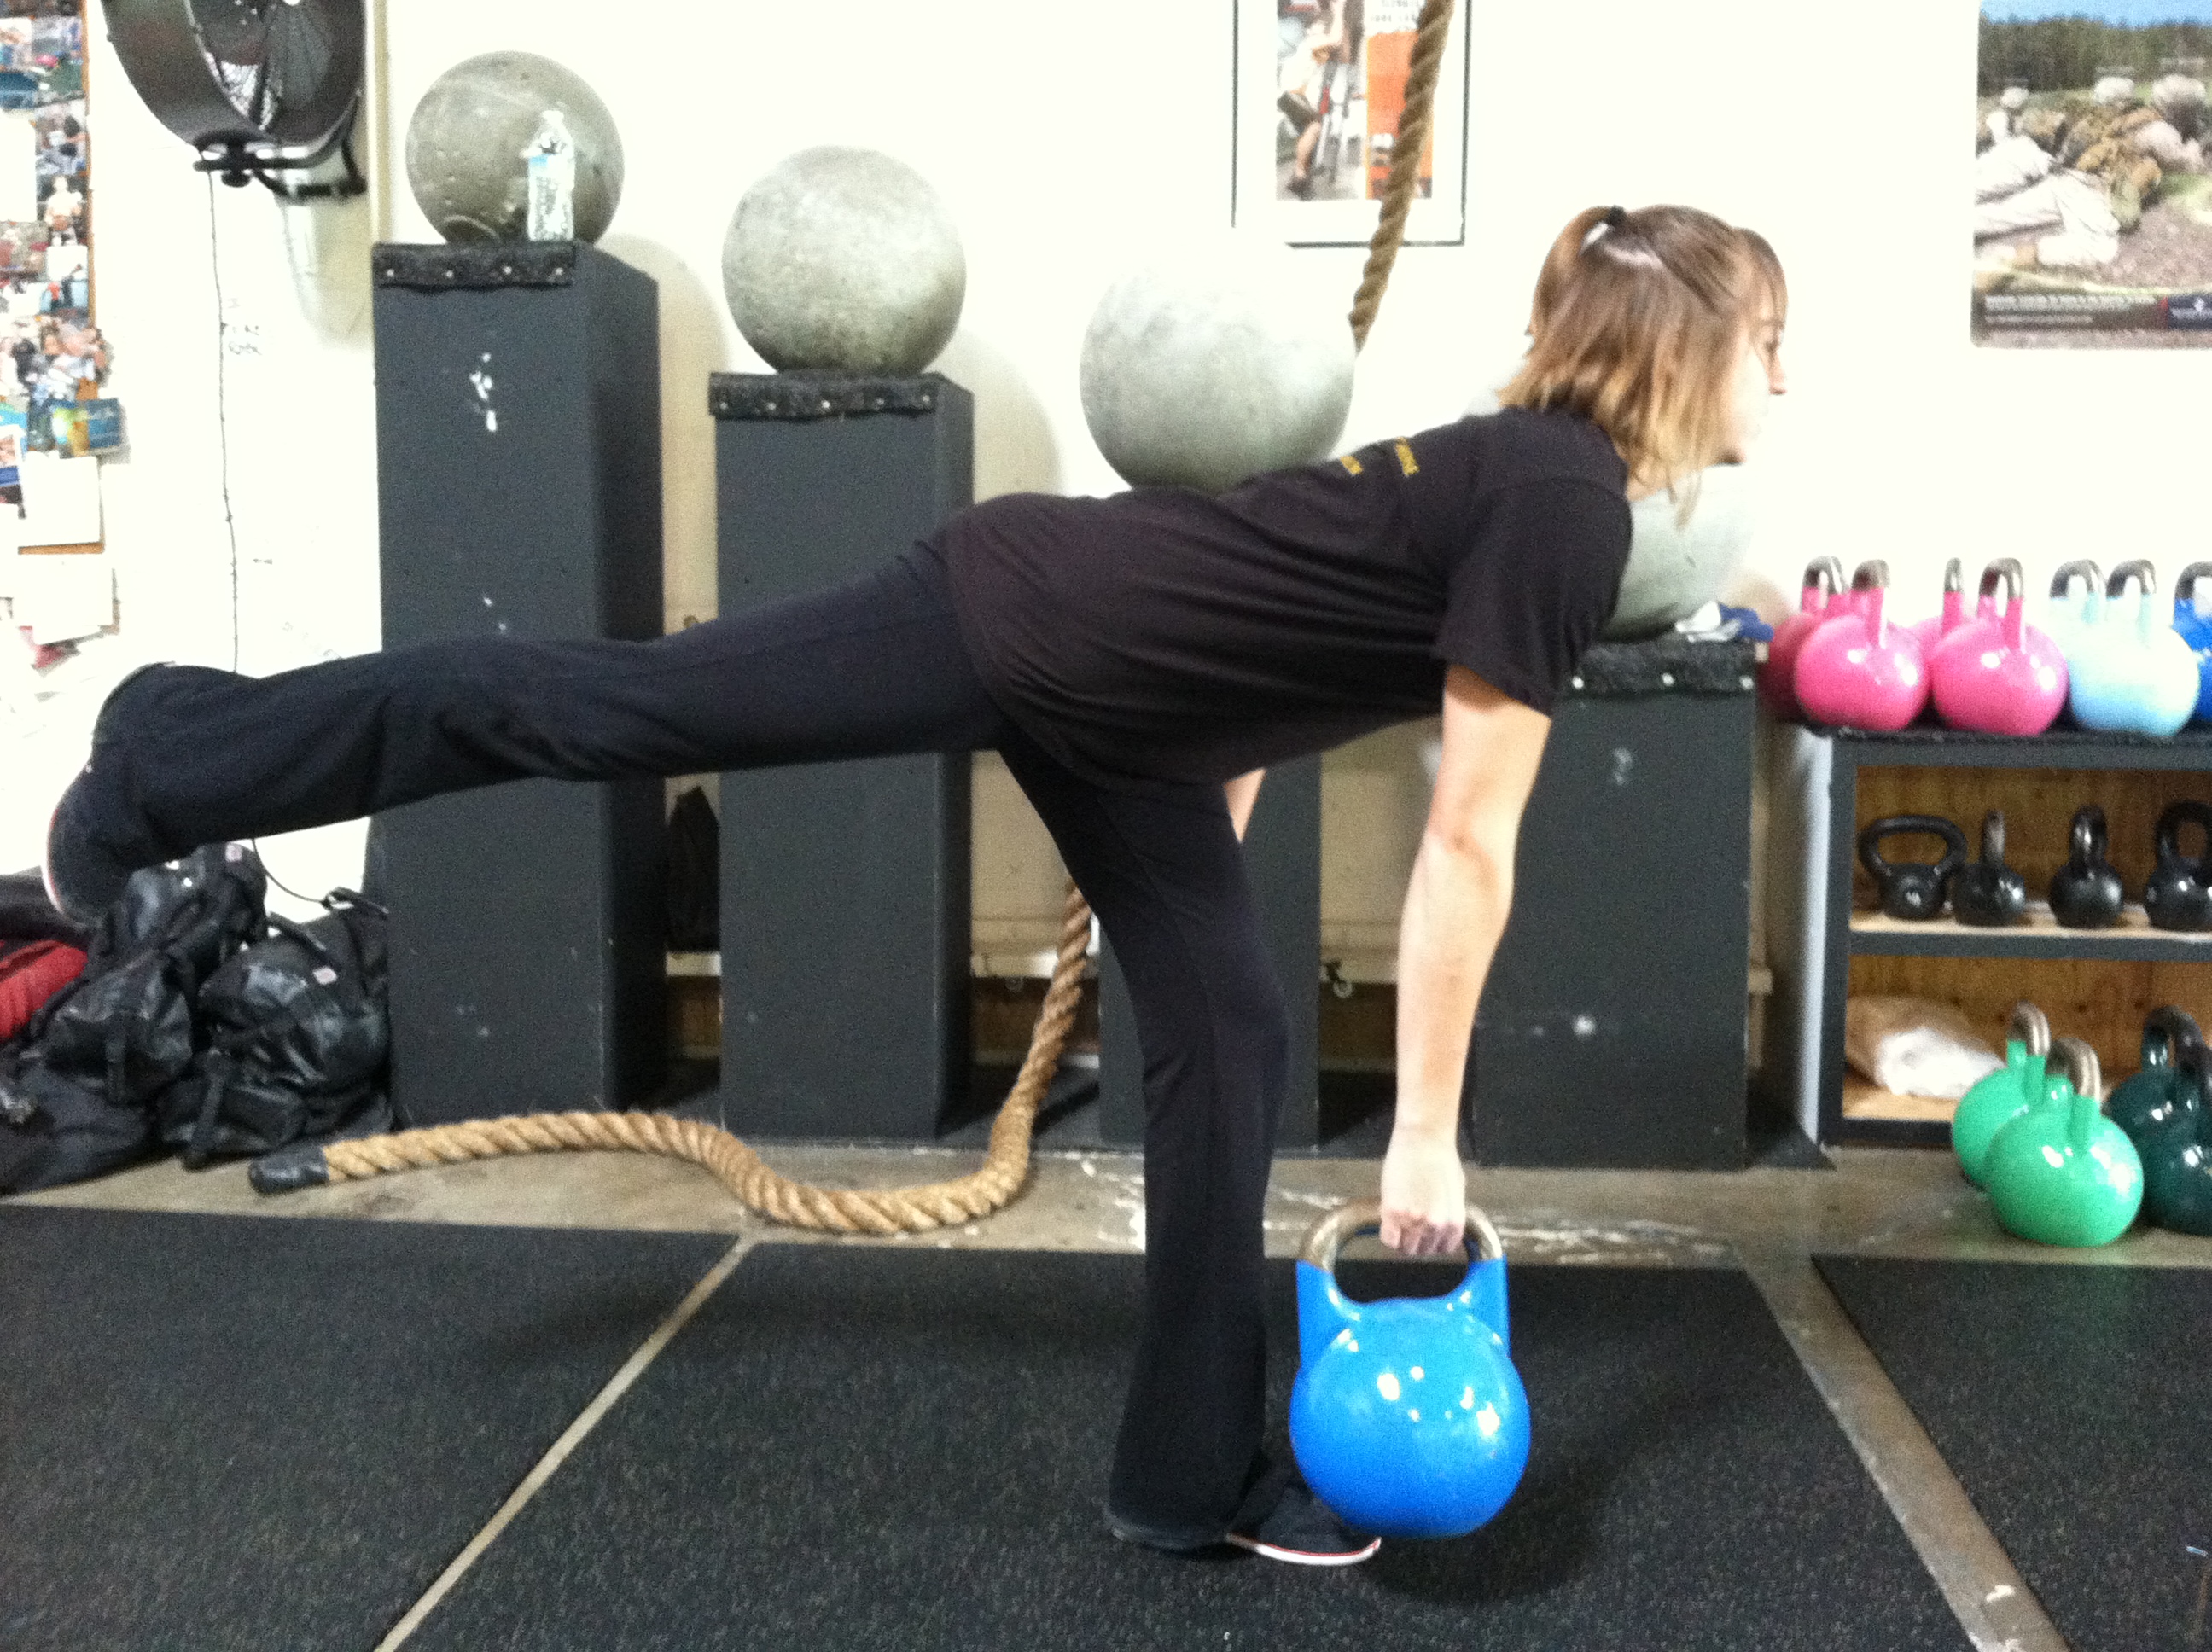
I like weighting the move down with a kb in the opposite hand from the leg working…P.S. This isn’t a fun move to hold for a picture!
So then another great deadlift move to use is the straight leg deadlift.
I usually use this move before I move to full deadlifts since it doesn’t require as much hip mobility BUT starts to teach people to keep the correct upper body posture while adding more weight. (It is also just a great way to add variation to your glute workouts!)
So with this move, knees are only slightly bent. It is a hinge from the hips with the back staying nice and flat as you hinge over toward the ground pushing your butt backwards toward the wall behind you.
Watch when people do this move. The key here is to make sure they are pushing their butt BACKWARDS.
Seriously a great way to work the glutes and hamstrings while starting to add weight! Since balance isn’t an issue it can be an easier way to start adding heavier weight!
Probably my FAVORITE deadlift variation because you can use heavy weight is the sumo deadlift. It is a great way to start really building glute strength and start pulling heavy weight.
So in this variation of the deadlift, your feet are wide apart and your toes are turned slightly outward (by turning your toes out a bit you engage your glutes a bit more). This variation of the deadlift is MORE leg intensive than the traditional deadlift so is ideal for butt building!
Using this move you can really start to develop maximal strength since it is easy to use heavy weights. However, before the person can add heavy weights, they must maintain good posture – aka their chest must stay up and their back can’t round.
The sumo deadlift can be harder on the hips though so don’t over do it! Rotate it with the regular deadlift to make sure you blast the butt from a couple of different angles and to give your hips a bit of a break.
So…if you want to get the butt firing and build some serious glute strength, use a variation of the deadlift.
Looking to work on balance, core strength and posture while targeting the glutes? Use the single leg!
Looking to add more weight while really focusing on the glutes and hamstrings? Use the straight leg!
Looking to build maximum strength in the butt cheeks? Try the sumo deadlift!
Mix it up and target those glutes!
Which variation is your favorite?
Coming soon to the Bootilicious series….glute warm up exercises, glute bridges and multiplanar lunges!


