How To Bear Crawl…Like a Baby
We are born with better movement patterns than most of us have now as adults…Just kidding…sort of…
But babies, that can’t even walk yet, can most certainly do certain things better. They definitely squat better AND crawl better than most adults do.
Babies do rock bottom squats like it is nothing. While trying to get an adult to do just a squat to 90 degrees can sometimes be a painful, long process.
Same goes for crawling.
Babies motor around like it is nothing. They crawl over grass, concrete and carpet, barely even noticing the change in texture.
But when adults are asked to crawl, they barely make it five steps before they are out of breath (or complaining about their hands on the turf)…and that is even if they can first understand the coordination of crawling.
It makes me sad how much we lose some natural movement patterns. It makes me sad that we lose such a great mind-body connection.
And I don’t think it has to be this way!
Everyone should be able to crawl, whether or not it is a table top crawl or a basic bear crawl. We should all be able to do it!
So here is a little breakdown of the basic forward bear crawl and proper form.

Now you are probably thinking…Why the heck would I ever want to crawl when I can walk?
Because crawling is GREAT exercise! (And it is kind of fun too!)
Crawling works your entire body, from your shoulders to your knees. It is a great core strengthener AND it is great cardio.
Plus crawling works on your coordination and agility.
And honestly, the older we get and the more we lose that mind-body connection (our coordination and balance), the more we need to crawl.
People just accept that as they age they won’t have the same coordination or balance that they once had. And while, yes, our body does change with age, that doesn’t mean we have to accept that falling or feeling uncoordinated is just a part of life.
Getting our body and mind to continue to connect and work together is key. And movements like the bear crawl help us work on that connection.
So now the question really is…Why aren’t you crawling!?!
Try it today! Set a timer for 5 minutes and see how long you last crawling around. You can even mix in backward and sideways crawls once you master the forward bear crawl.
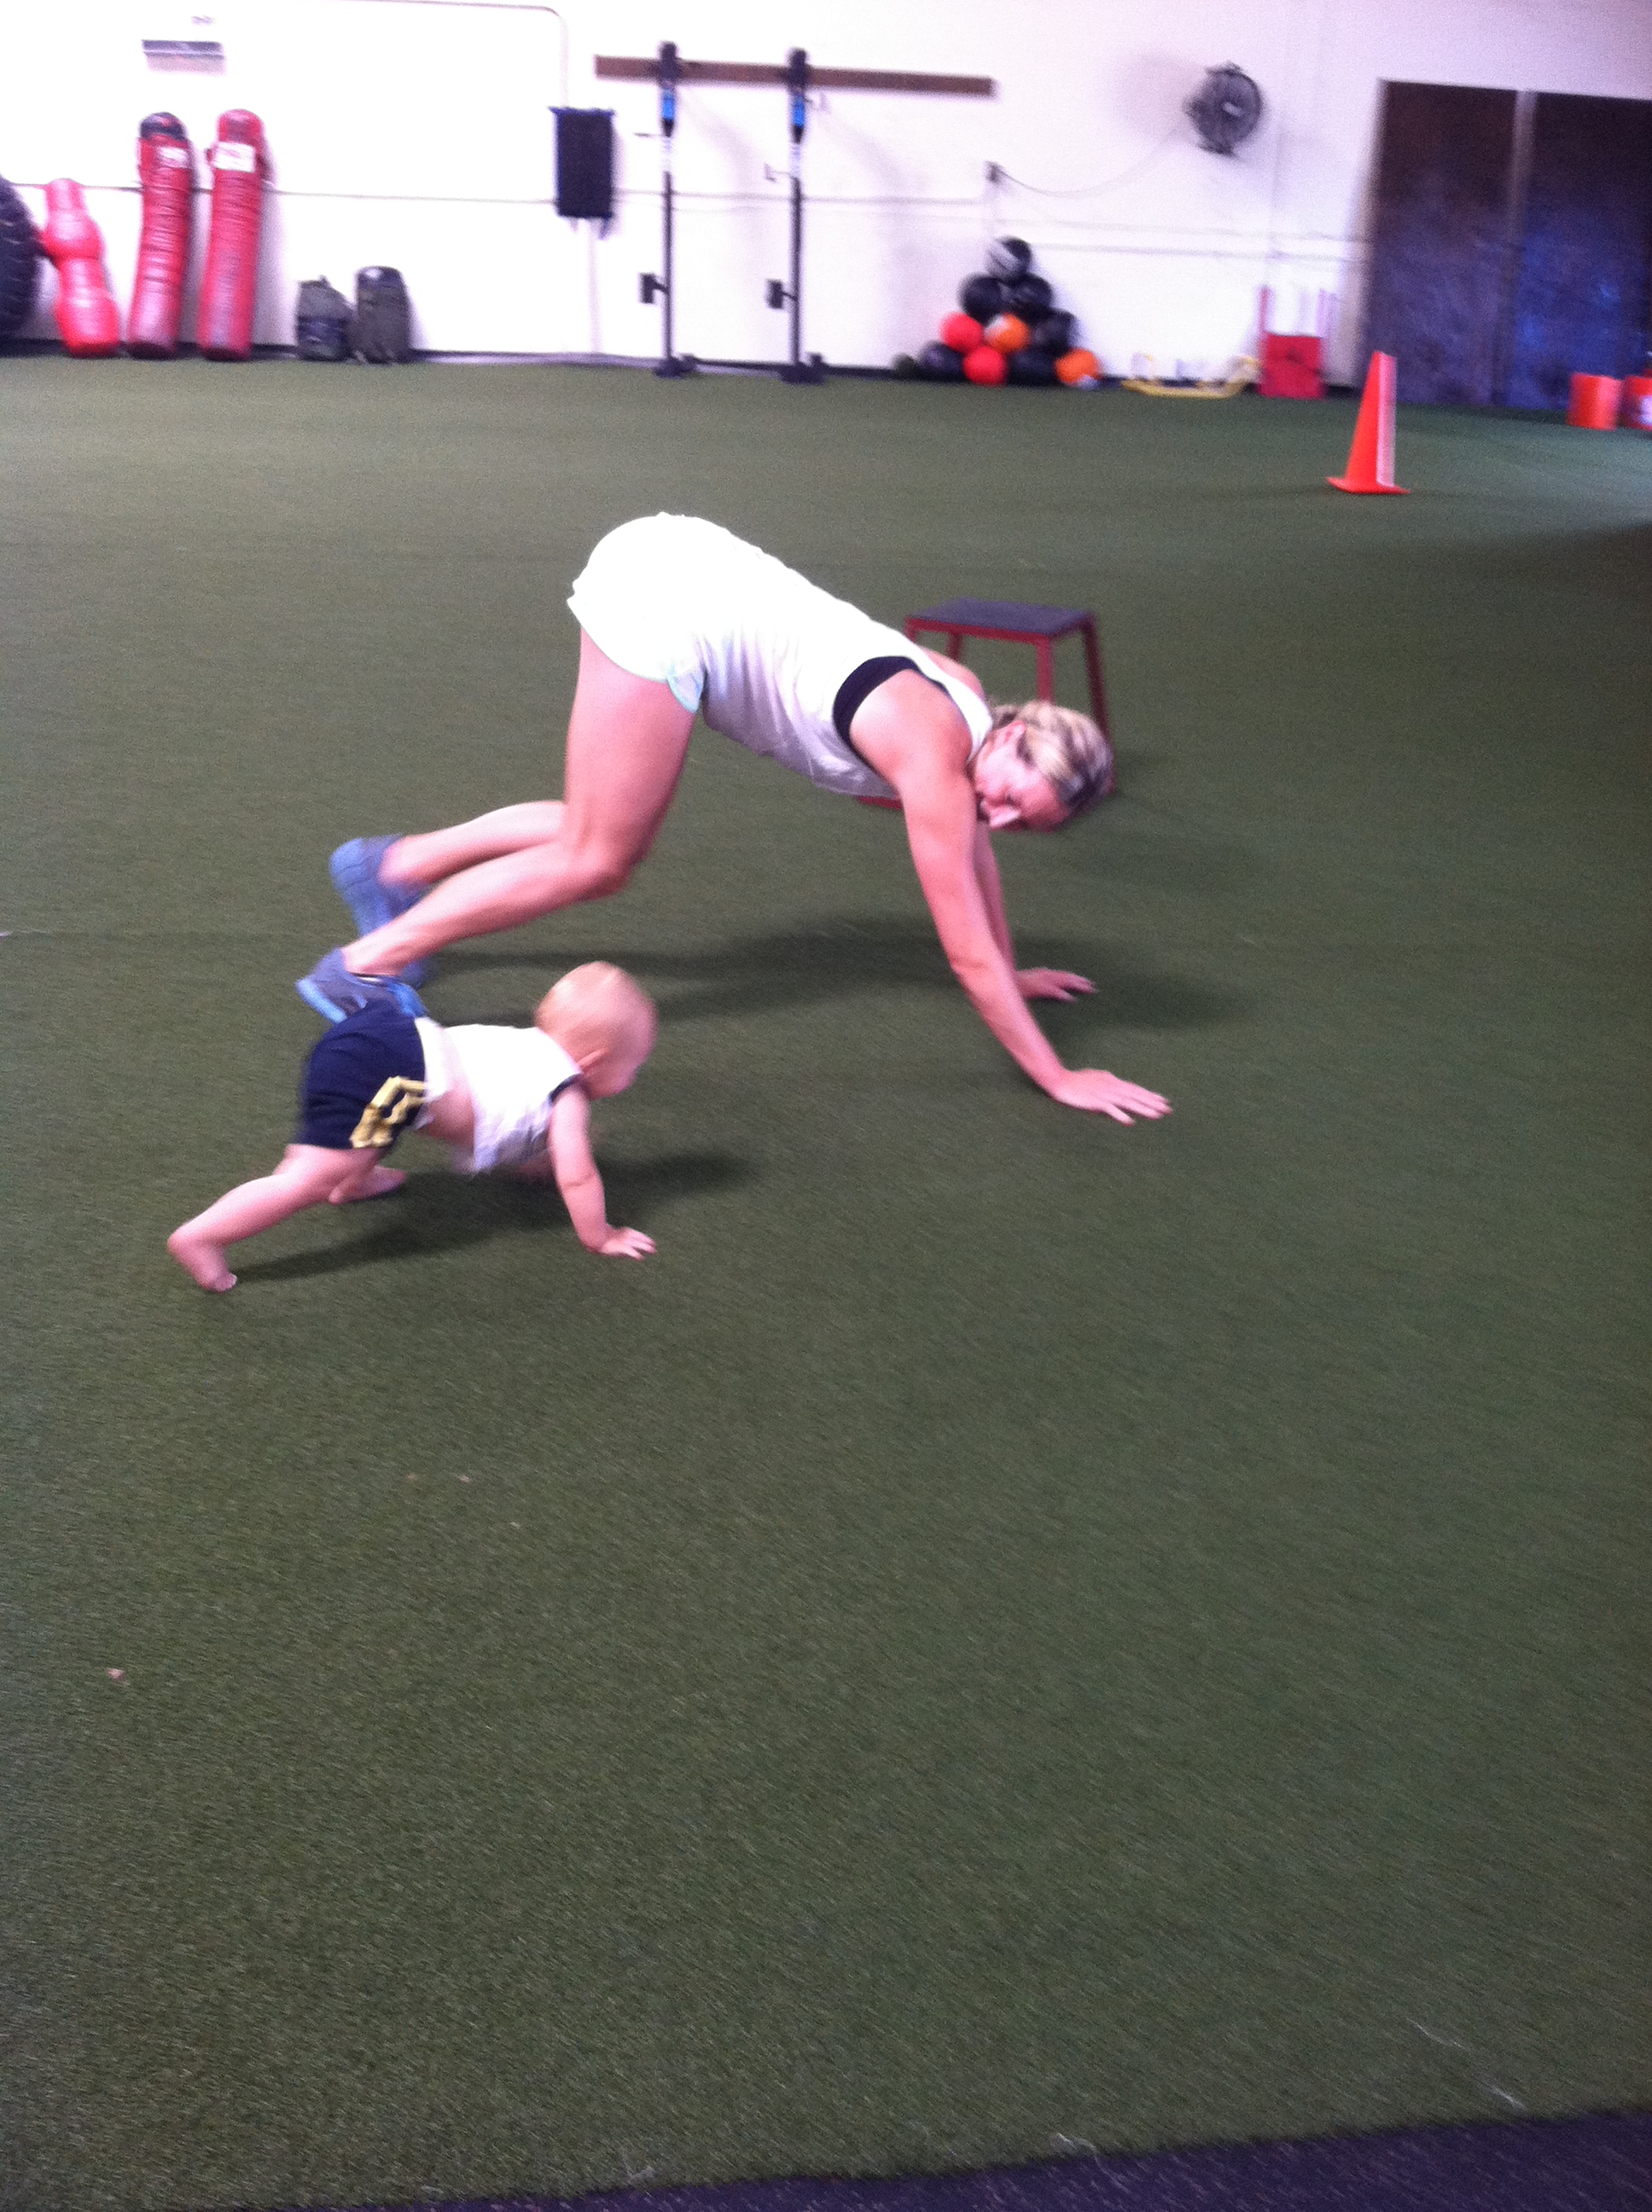
Opposite arm and leg working together. Nice flat back…And boy can he motor!
Sandbag Workout
So Sarah over at Shh…Fit Happens wrote a post about working out with sandbags the other day and it got me to thinking about all the exercises that I use sandbags for.
Sandbags are a great way to add weight to any move because the weight is AWKWARD. They aren’t like barbells and dumbbells. They aren’t easy to grip and the weight can shift from side to side as you lift it. They are super functional and force your core to really engage to stabilize.
They are a great way to add variety to the same basic moves that you are already doing. Like I mentioned in my post Sunday…Mix up your resistance to make moves more challenging.
So below is a great Sandbag Workout:
WARM UP
Dynamic stretches and locomotion to get the entire body warm. Don’t forget to foam roll any tight areas!
STRENGTH:
3-5 rounds of each superset. Complete all rounds of each superset before moving on to the next one.
Reps: 5 for maximal strength (advanced lifters), 8-12 for hypertrophy (advanced and intermediate), 15-20 strength endurance (beginners, recovery week or just working on strength endurance)
1.
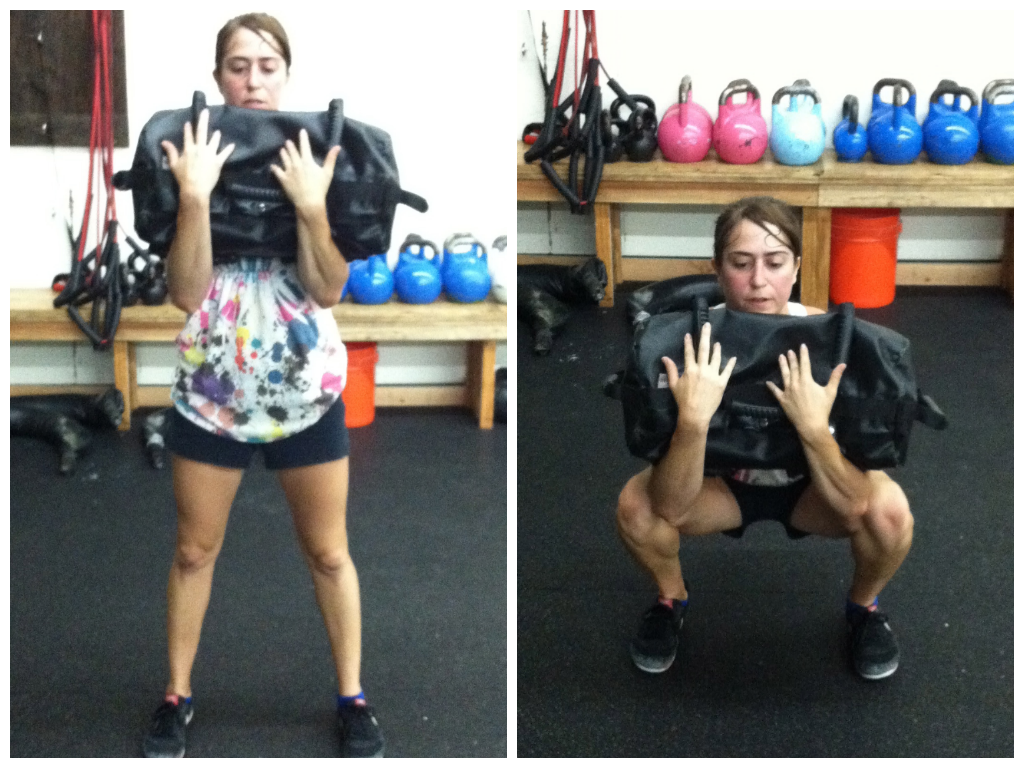
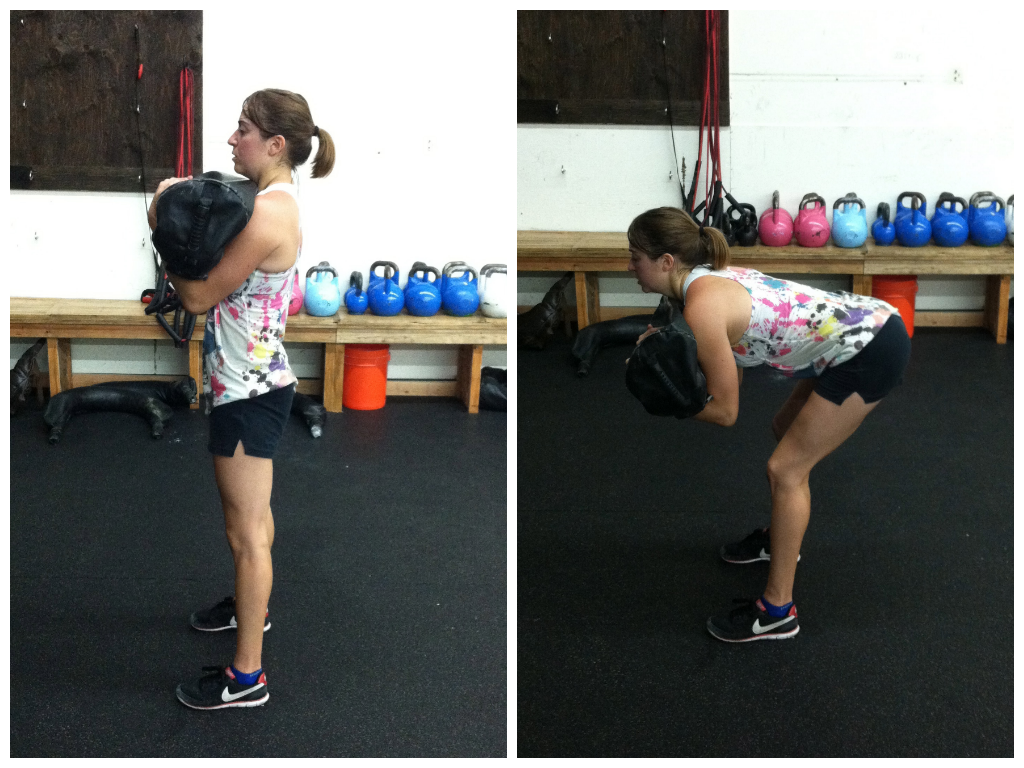
Squat (Do not round forward with the front loaded weight!)
Overhead Press (Do not arch your low back)

2.
Lunge with Rotation (Do not let the sandbag go back too far on each side or it will catch and do not ROUND forward. Start on one side step the back foot forward and swing the bag to the other side as you lunge back.)

Row (Nice flat back. Knees soft.)

3.
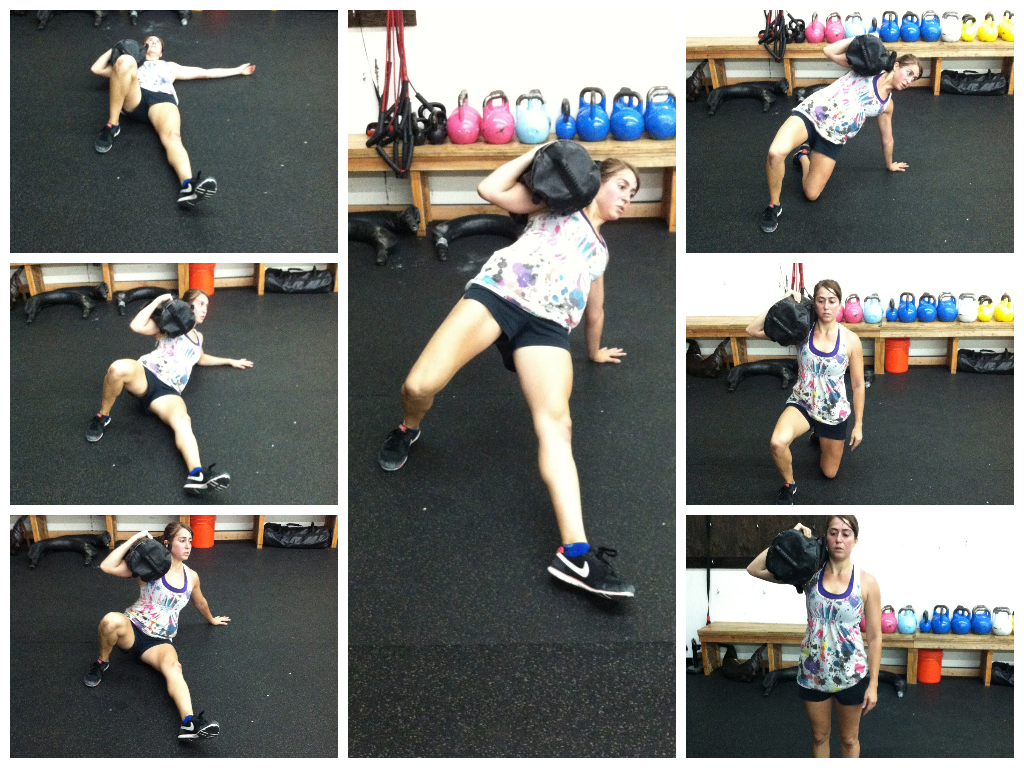
Sandbag Get Up (Will want to do 1-5 reps per side for everyone. The Get Up is doing all the steps to stand up and then following all the same steps to go back down.)
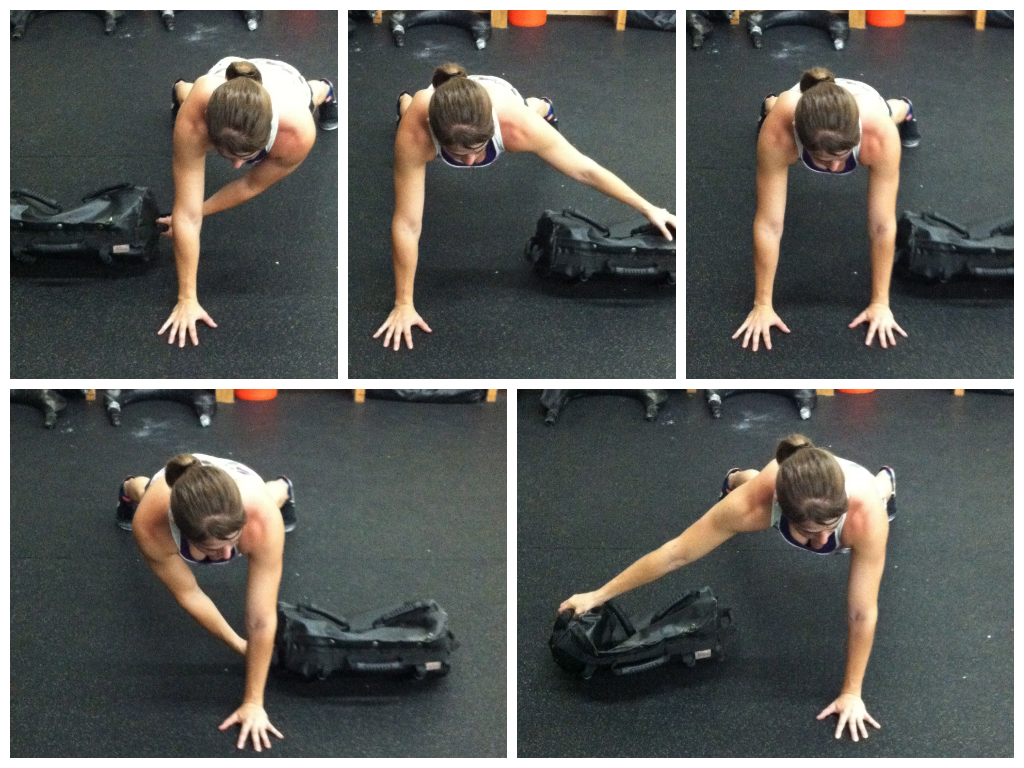
Plank with Pull Thrus (Keep hips from rotating or going up or down)
COOL DOWN
Stretch and foam roll all tight areas!
Bonus Moves:
Single Leg Deadlift (Keep the standing leg soft and your back flat)
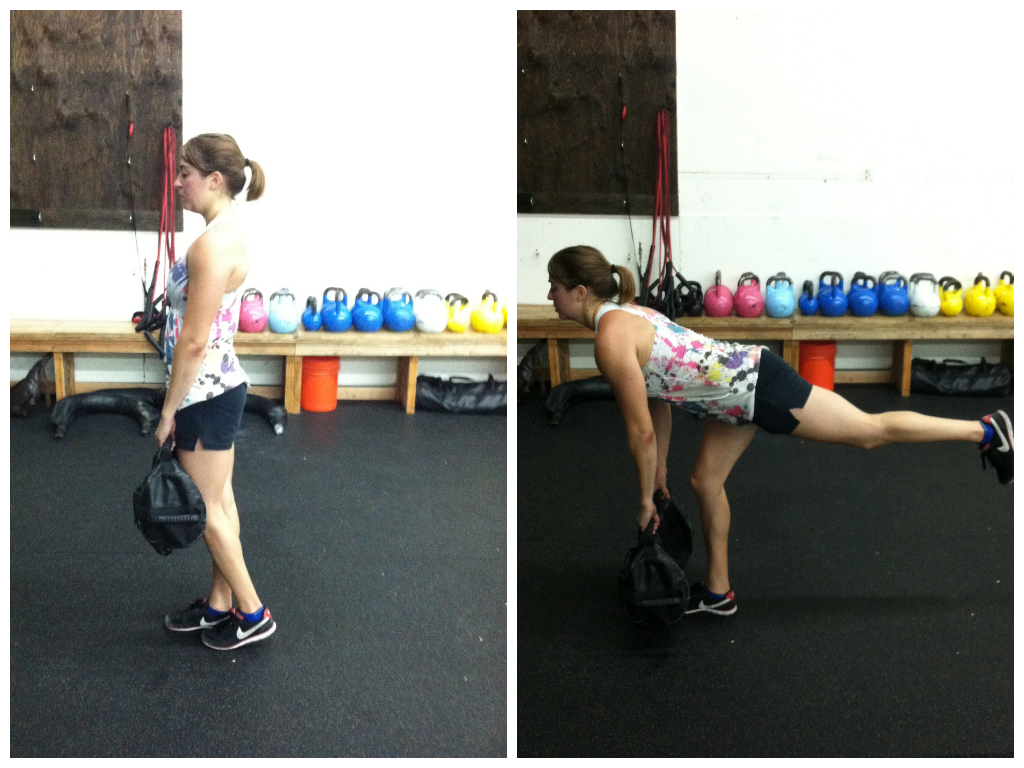
Goodmorning (Keep a flat back)
Crawling with Sandbag Pull (Sit back into your heels and perform a hip hinge to drive the sandbag forward. Don’t just pull with your arm.)

I also want to note that I’ve only demonstrated one variation of these moves. Squats can be done with the sandbag held the long ways up and down (Bear Hug) or even on one shoulder. Loading on one shoulder forces the core to engage even more (which as I mentioned on Sunday, asymmetrical loading is a great way to keep your workouts challenging!).
Deadlifts can also be done in a “suitcase” style where you hold it on one side. This is a great way to progress the single leg move (again ASYMMETRICAL LOADING!).
Note: Sorry for the pictures. I do not “glow” or “glitter” when I workout….I SWEAT!
BONUS WORKOUT:

It’s Easier For You – 10 Ways to Break Bad Habits
It’s funny, whenever someone has success in terms of changing their lifestyle around to be healthier, people who haven’t made the change will tell them…
“Well it is easier for you.”
Can I just say right now…”HOW COULD IT BE EASIER!?!?!”
Any time you break a habit, any time you make a lifestyle change it isn’t going to be easier.
I mean think about all the changes you’ve had to make to your habits over the years. Where any of them really EASY?
I can tell you your parents didn’t think potty training you was easy. Or getting you to stop carrying around the blanket EVERYWHERE you went was easy.
I can tell you my Mom didn’t have an easy time of breaking me of my thumb-sucking habit. She had to coax and reward and take it step by step. And sometimes I had good days and sometimes I had bad days. But slowly the good days won out and I stopped (My desire for the present at the end became greater than my desire to suck my thumb!).
But even something as simple as breaking the habit of sucking my thumb wasn’t easy.
No lifestyle changes are ever easy for anyone.
Habits are hard to break.
There is no magic pill – no key to instant success.
No one is really more gifted when it comes to making a change.
It is all hard work and determination. It is determination that supersedes any other immediate desires.
Changing to a healthy lifestyle isn’t ever easy, especially when you are making the actual CHANGE.
In fact most people will tell you about all the sacrifices they had to make and all the times they wanted to give up BEFORE the change became habit.
So let’s face it. Change is never easy. There is no secret out there or gifted person that didn’t struggle when breaking bad habits.
Honestly, I think that people say “It was easier for you” to let themselves off the hook and to try to make you feel a little less proud of your accomplishment.
It isn’t really that they thought it was easier for you….They are just excusing their own failures.
Sorry, but really, if you think about it, you know this is true.
Because we all know change isn’t easy.
The key is just setting your mind to the change and deciding that nothing is going to derail you.
I write a lot about having a powerful WHY when it comes to creating change.
That powerful reason WHY is what makes your change seem so seamless, so “easy,” to other people.
When you want something bad enough, you are going to make it happen.
Every day won’t be perfect. There will be “slip ups” and missed workouts and cheat meals, but perfection isn’t necessary.
Small forward progress over the days, weeks, months is what will add up. Staying focused on your end goal is what will matter.
Having a powerful WHY, knowing a really motivational, emotional reason why you want to accomplish something, is what will keep you motivated, but it is only a small part of success.
Here is what I tell my clients that helps them succeed even when the going gets tough.
1. Write down your WHY – Write down a powerful, emotional reason why you want something. Just saying “I want to lose 10lbs” or “I want to look good in my bikini this summer” probably isn’t going to be enough. Tap into your emotions. Dig for something important that will not only motivate you to get started, but will keep you motivated when things get hard (which they probably will).

Living seems like decent motivation….
2. Write down a WHEN – Set a deadline. Set multiple deadlines in fact. Set short-term goals with dates when they have to be completed. Deadlines are motivating. And when they are written down they are more solid and we are way more likely to want to achieve them because we can’t weasel out of them. Make the deadline important. Don’t just choose an arbitrary date. Yes, if you are making a lifestyle change, you want it to be FOREVER, but you have to have specific dates when certain things will be accomplished. Because trust me….people do better with END DATES.
3. PLAN, PLAN and oh yea….PLAN – You don’t have to write out exactly what you are going to eat and when you are going to eat it. You don’t have to map out your workouts and the weights you are going to use for the next year, but PLAN AHEAD. We each have triggers that set off old bad habits. Know those triggers and lay out a plan with how you are going to deal with them. For instance, ladies…many of us crave crap around our periods. Plan out how you are going to deal with that. Do you have “cleaner” treats available? Do you plan in a couple cheats then? What is your plan of action? Know what sets you off and plan for it. (Sorry dudes reading this). Developing new habits is about breaking the old ones and a big part of that is PLANNING AHEAD so when the moment arises we know how we are going to change our old patterns. Because trust me, trying to fight against old desires in the moment when you have no plan of attack isn’t easy.
4. Know yourself – Take a look at your current habits. Take a look at what has made you fail in the past. Now take a look at what you’ve enjoyed and haven’t enjoyed with other failed experiments, other times you’ve tried to make a lifestyle change. If you don’t like running, don’t force yourself to run every day. If you don’t like lifting weights, don’t force yourself to lift every day. Find things you enjoy to be active and then on occasion add in those things you “know you should be doing.” If you know that you just can’t go to bed without dessert, figure out a healthy treat that satisfies you. If you know that having that “all or nothing” attitude will lead to you failing, DON’T DO IT! Make small changes over time. You know yourself. You know what you like and what you don’t like. Account for those things and then do number 3 and PLAN FOR THEM!
5. Celebrate small success – Lose half a pound? Avoid eating that brownie at work even though you really really wanted it but you knew it would just throw off the rest of your week? CELEBRATE IT! Give yourself recognition for changing. Give yourself credit for breaking a bad habit or moving even just the teensiest bit closer to your goal. Too often people get so focused on their long-term goal that they don’t recognize all the great things that they are doing day in and day out. And that focus on the long-term goal, and them not being there yet, can lead to them getting discouraged and feeling like they are failing. When they aren’t! Because those small things that they are doing day in and day out will add up to one very large success. They just have to be patient! You have to get rid of that NOW NOW NOW attitude and celebrate your small victories!

6. Don’t seek perfection – Sorry none of us are perfect. And life and achieving our goals, isn’t about perfection. It is about small forward progress over the weeks, months and even years. It is about NOT being hard on yourself when you slip up. It is about NOT expecting yourself to be perfect. Because when we expect perfection, when we come down on ourselves for one little mistake, that is when we derail all the progress we have made. If you have a cookie or miss a workout, don’t tell yourself your day is ruined. Don’t just give up. Accept that you may just have needed that little deviation and then get right back on track. It isn’t the slip ups that matter, it is how we handle them that has lasting results. One slip up won’t add up but letting that turn into a downward spiral will. Give yourself some room to make mistake and to have “life get in the way.” Because guess what? IT WILL! I even recommend that clients account for plateaus and backslides in their goals. Set a deadline that allows you to not be perfect day in and day out because it just won’t happen. That doesn’t mean you give yourself double the time to accomplish something, but it does mean that you don’t expect yourself to never deviate from the plan.
7. Include others – Many people are embarrassed about being on a diet or a specific workout program. They are afraid to admit their goals to others for fear of being judged. They are also afraid to admit their goals because what if they fail? Stop being afraid of failure AND stop worry about being judged. Find some supportive friends and family and tell them what you want to accomplish. Having other people know your goals makes you a bazillion times less likely to fail especially if you choose people who are supportive. They will hold you accountable and that fear of embarrassment if you fail will be a strong motivator (sorry but its true…may as well use it to our advantage!). Plus if you get others involved, they may just end up working out with you, which could be fun! Or they may help you find new ways to commit to your goals that you didn’t even think of. We all bring something different to the table and being able to talk to other people can really help. They may have experienced some of the same problems and have great ways to get through!
8. Don’t isolate yourself – Many people on a “diet” feel like they can’t go hang out with friends and be social. But that just isn’t true. You can plan in days to go out and have those be cheat days. Or you can PLAN AHEAD (#3!) and take a look at the restaurant you are going to and know the healthy options. You can even suggest places to go that won’t tempt you to break your diet. AND not every social gathering has to revolve around food! I love going bowling with friends. Or what about hiking or a movie or a dance class? There are lots of fun active things you can do to be social. You don’t have to be a hermit when you are making a lifestyle change. And actually if you force yourself to be one when you aren’t one, you are most likely going to fail. It’s as simple as that.
9. Don’t worry about what others are doing or thinking – Too often we get caught up in what other people are doing or thinking. And honestly, you just can’t worry about that. We can’t compare our progress to our friend’s. Just because their diet is working for them doesn’t mean it will work for you. You can’t get down on yourself just because your progress is slower. Progress is progress PERIOD. And on top of that you can’t care about the people who will put you down because you are making progress when they aren’t. Who cares if someone thinks you are psycho because you have to go to your workout class every day and you love bragging about how hard the workout was? Seriously who cares what they think if you are happy with your new habits? Ever occur to you that most of the negative crap that comes out of people’s mouths is because they are JEALOUS? Don’t worry about your friend’s diet or what they think of yours. If you feel good, if you are moving forward, focus on YOURSELF.
10. Track your progress – This links back to celebrating the small success and having deadlines. Actually this one really ties everything together. There is nothing more motivating than progress. There is nothing like progress to keep us on track. So figure out ways to track how you are doing. Goals don’t only have to revolve around weight loss or even how much you lifted. Weeks where you just stuck to your program should be measured and tracked and treated as progress. Set up a few different goals to measure and track them weekly, monthly and yearly. And then celebrate those successes. And while tracking our progress can help us see how far we’ve come, it can also tell us when we need a change. If you track your workouts, you will be able to clearly see if you’ve hit a plateau and need a change. If we aren’t moving forward, we may need to change something. If we haven’t tracked what we are doing, how will we know if we need a change! Tracking can help keep us moving forward!
Now thinking about all this, I still stand firm in the fact that change isn’t really “easier” for any one person.
But you know what….let people go ahead and think that! Be proud of your success and don’t let anyone take away from it! Know that all of your hard work paid off!
NOTE: Thank you Shannon. This post was inspired by your emails. You are an amazing, strong woman and an inspiration to us all!
How to make your workouts challenging
Generally when we want to make an exercise or workout more challenging, we add more weight.
And lifting heavier definitely makes a move more challenging.
Shoot I love that feeling of lifting more than I did the week before. I love adding weight!
But adding more weight to an exercise isn’t always the best way to make the move more challenging.
If you feel like you are plateauing or have plateaued, or if you feel like your workouts just aren’t challenging you anymore, here are five ways to your workouts more challenging WITHOUT just adding more weight to the moves.
1. Change up your rep tempo:
I think rep tempo is far too often overlooked. I think most of the time people just do the reps as quickly as possible or in a “controlled” tempo. They never want to slow the reps down. Why? Because slow reps are uncomfortable and HARD! A great way to make any move more challenging without adding more weight is to slow down your rep tempo. I love doing a 5 second eccentric contraction (the part of the movement when the muscles are lengthening). Like in a squat…Take five seconds to squat down to the ground. Then explode up. That slow eccentric contraction is killer!
You can also do isometric versions of the exercises or HOLDS. Instead of doing reps of a squat, or maybe even BEFORE you do squat reps, do a hold (with or without weight). The hold is killer and then makes the reps even more challenging. Here is a great Isometric workout that will challenge you even if you don’t use much weight at all!
Those are just two of the ways you can slow down reps to make them more challenging.
You can also speed the reps up if you always do them slowly. Doing reps more explosively can also be challenging.
The key is to adjust your tempo and use it to challenge yourself instead of just doing reps in the same old “controlled” fashion all the time.
2. Change up your rest:
Not every workout has to be done as quickly as possible with as little rest as possible. On the flip side, not every heavy strength workout has to include a TON of rest between sets.
Honestly, I feel like recently you have more and more people just trying to cut out the rest and go as quickly as possible through everything though.
And less rest doesn’t necessarily mean a better workout.
Change up your rest if you are always doing the same thing.
Try some circuits that are timed so that you have to do as many rounds as possible before the time is up. This will force you to take less rest.
Or try taking more rest if you are always pushing yourself to go faster. Try to recover so that you can really give the same work output each round.
Recovery/rest should be used to achieve specific goals. Don’t just take out all rest because it “feels hard” at the time. Add in rest or take it out to achieve specific goals.
Are you working on your work capacity? Then maybe shorten the rest. But if you are really trying to focus on strength or maybe even on improving your speed or power, you may want to add in more rest.
Longer rest doesn’t mean easier.
3. Do a variation of the current lift (single limb movements are great!):
There isn’t only ONE way to squat. ONE way to deadlift. ONE type of push up! Variations of these moves could help you target your weak spots.
For instance, if you do the sumo deadlift all the time, try doing a week or two of conventional. It will give your hips a break and it will probably end up strengthening your sumo deadlift!
Or try a front squat instead of a back squat. A front squat is going to force you to engage your core more (and you may actually need to lift LESS than you would with the back squat).
There are a ton of variations that may just target your current weak spots without using more weight (and maybe even using less) and make them stronger so that, in the end, you can lift more on the moves you love!
Some of my favorite exercises variations to add in are single limb movements. These exercises work to correct imbalances, develop core strength, and improve balance all while building a stronger mind-body connection.
Try a single leg deadlift or a single leg squat. You may not even need weight at the beginning to challenge your body! Here are some single leg movements to try!
4. Change up the type of resistance/equipment you are using:
Do you do step ups but they aren’t feeling that challenging anymore? Do you usually just add more weight?
How about trying a higher box! Using a higher or lower box can hit your glutes from a different angle.
You can also mix up glute bridges by using different pieces of equipment. It is the same basic move, but it can be done with your feet up on a box or on a powerwheel instead of just simply on the ground.

And same even goes for lunges. Sliders (towels) can be a great way to reduce traction and make lunges harder without adding weight!
Any exercise can be changed up by using a different piece of equipment or a different type of resistance. And sometimes when you change-up the equipment or type of resistance, you will find you even need to go down in weight at the beginning.
A split squat can be done on the ground OR with the back foot up on a bench (balance lunge). The first time you change from a split squat on the ground, even if you use weight, to a balance lunge, you may find you either need to use less weight or drop the weight all together. Both moves can be challenging, but both definitely work the muscles in a different way while being the exact same basic move!
And not only can you add in a piece of equipment to a move but you can also change-up the type of weight that you are using. What about an overhead press with a resistance band instead of dumbbells? Or what about a deadlift with kettlebells instead of a barbell?
Doing the same exercise can feel very different just by switching up the resistance. Bands force you to work on the way up AND the way down. Whereas with dumbbells you really only work on the press overhead, you work harder in both directions with a band because there is consistent resistance throughout the move.
A deadlift with kettlebells is also very different from a deadlift with a barbell. It is way harder on the grip to hold two heavy kettlebells that equal 135lbs than it is to hold a deadlift with 135lbs. For one, neither hand gets assistance from the other. For two, the competition kettlebells have a fatter handle than the barbell, which make them harder to grip.
The point is by making simple changes in exactly how you perform the same moves can make them more challenging and even work on weak points within your lifts by hitting the muscles from a different angle!
5. Load asymmetrically:
Have you ever tried using less weight to make a move harder?
Try dropping a weight on just one side when you lift.
Asymmetrical loading can make moves incredibly hard and really build core stability. It also forces each side of the body to work independently which helps correct imbalances without necessarily being a single limb movement.
Try a unilateral deadlift, single arm bench press or unilateral farmer’s walk. It will be harder than you think. You may even need to go down in weight at the beginning since it takes a toll on your core.
It isn’t easy trying not to lean either too much away from the weight or too much into it. Your body will want to rotate, but you can’t let it.
Asymmetrical loading is one of my favorite way to add some variety to my workouts as it really does build great core strength and can be done with almost any move (it can also really help improve your balance).
Do you always just add more weight to make exercises harder? What are your favorite ways to add variety and keep your workouts challenging?
Mommy and Me Workout
Happy Friday!
Yesterday, one of my beautiful soon to be sister in laws, Jamie, and her baby, my nephew Cooper, came in to workout.
Cooper seriously loves the gym.
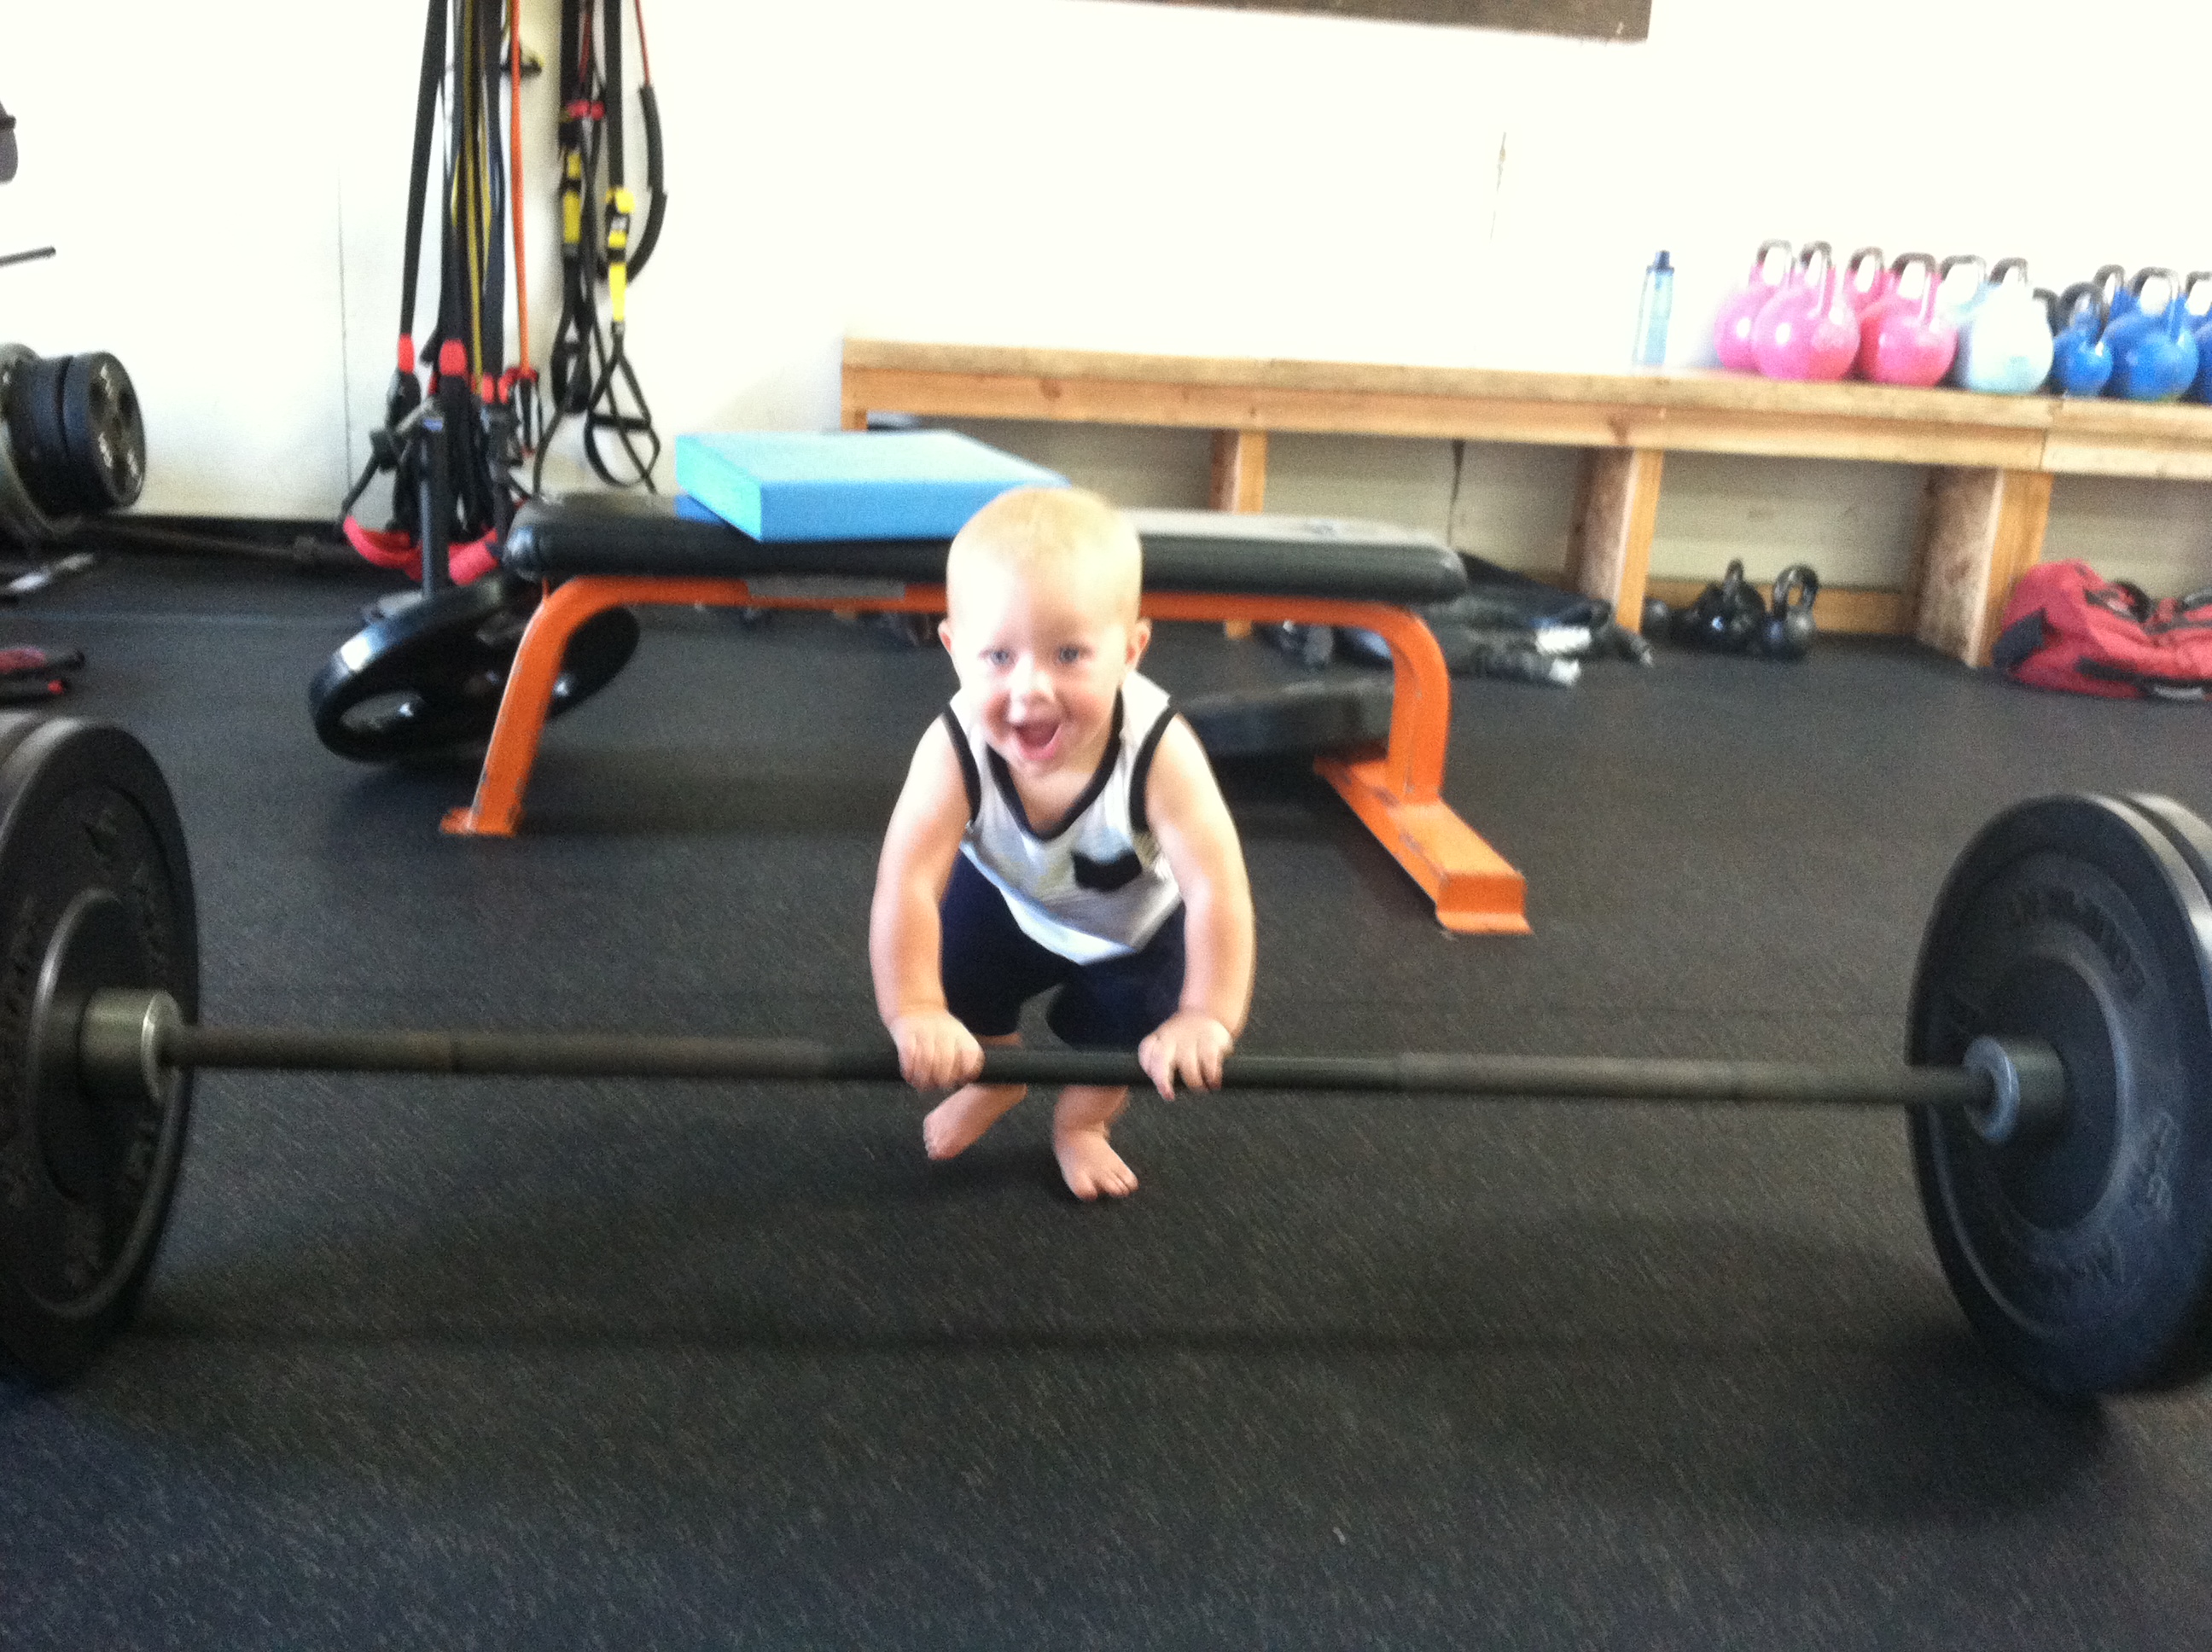
He sees it as one big playroom. He is obsessed with balls and we have balls in every shape, size and color all around the gym.
The last time Jamie brought him in when she worked out, I carried him around as I coached so that she could workout undistracted. (Actually I grabbed him up and ran off with him before Jamie even had a chance to put him down….)
Today though she joined me during my workout with a group so I didn’t really have the chance to watch him.
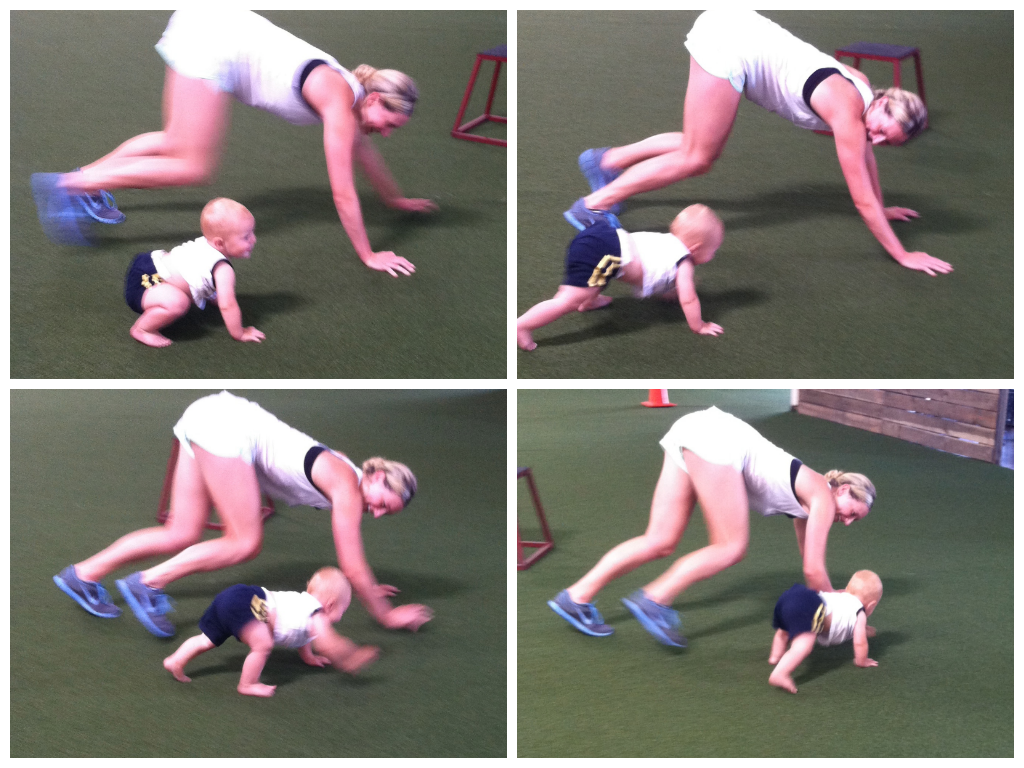
And, of course, she couldn’t just put him down and allow him to crawl around because then he wouldn’t literally get into everything. And trust me…he is one fast bear crawler!
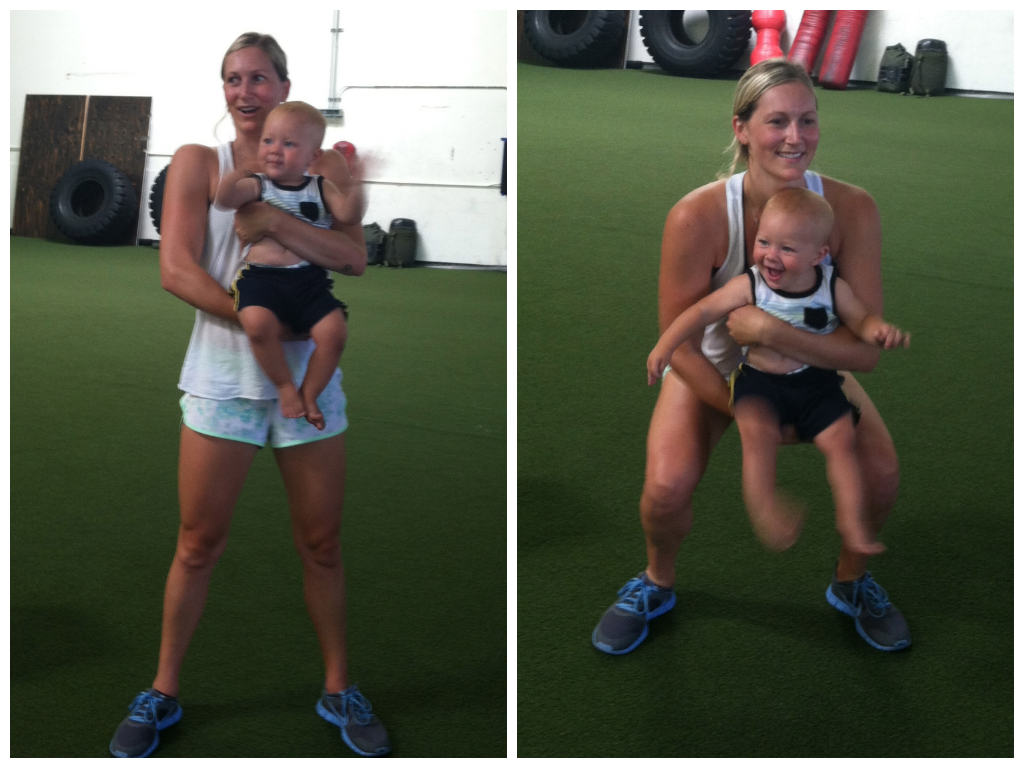
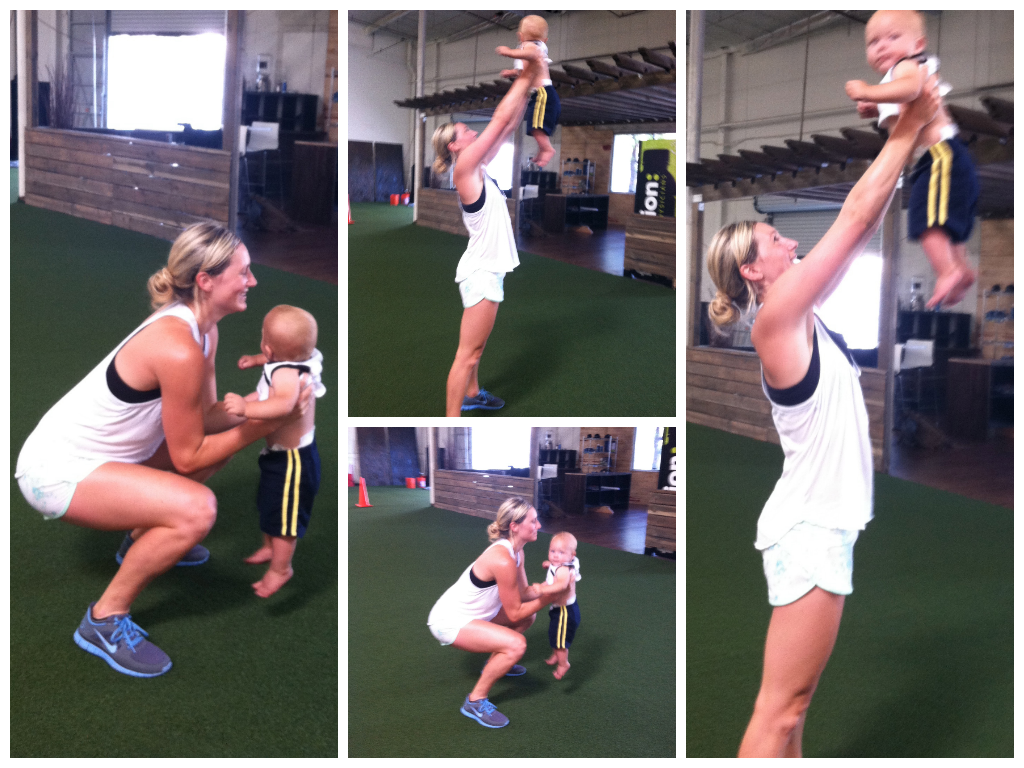
So because babies get into everything and Mommies need a chance to workout, here are some great Mommy and Me exercises demonstrated by the beautiful Jamie and Cooper! (I think Cooper had even more fun than Jamie did!)
Mommy and Me Workout:
Make sure to first roll out any tight areas and stretch and warm up. Then get ready to have some fun!
Strength:
3-5 Rounds:
10 reps each side Baby-weight Step Ups

30 seconds Baby-weight Overhead Carry
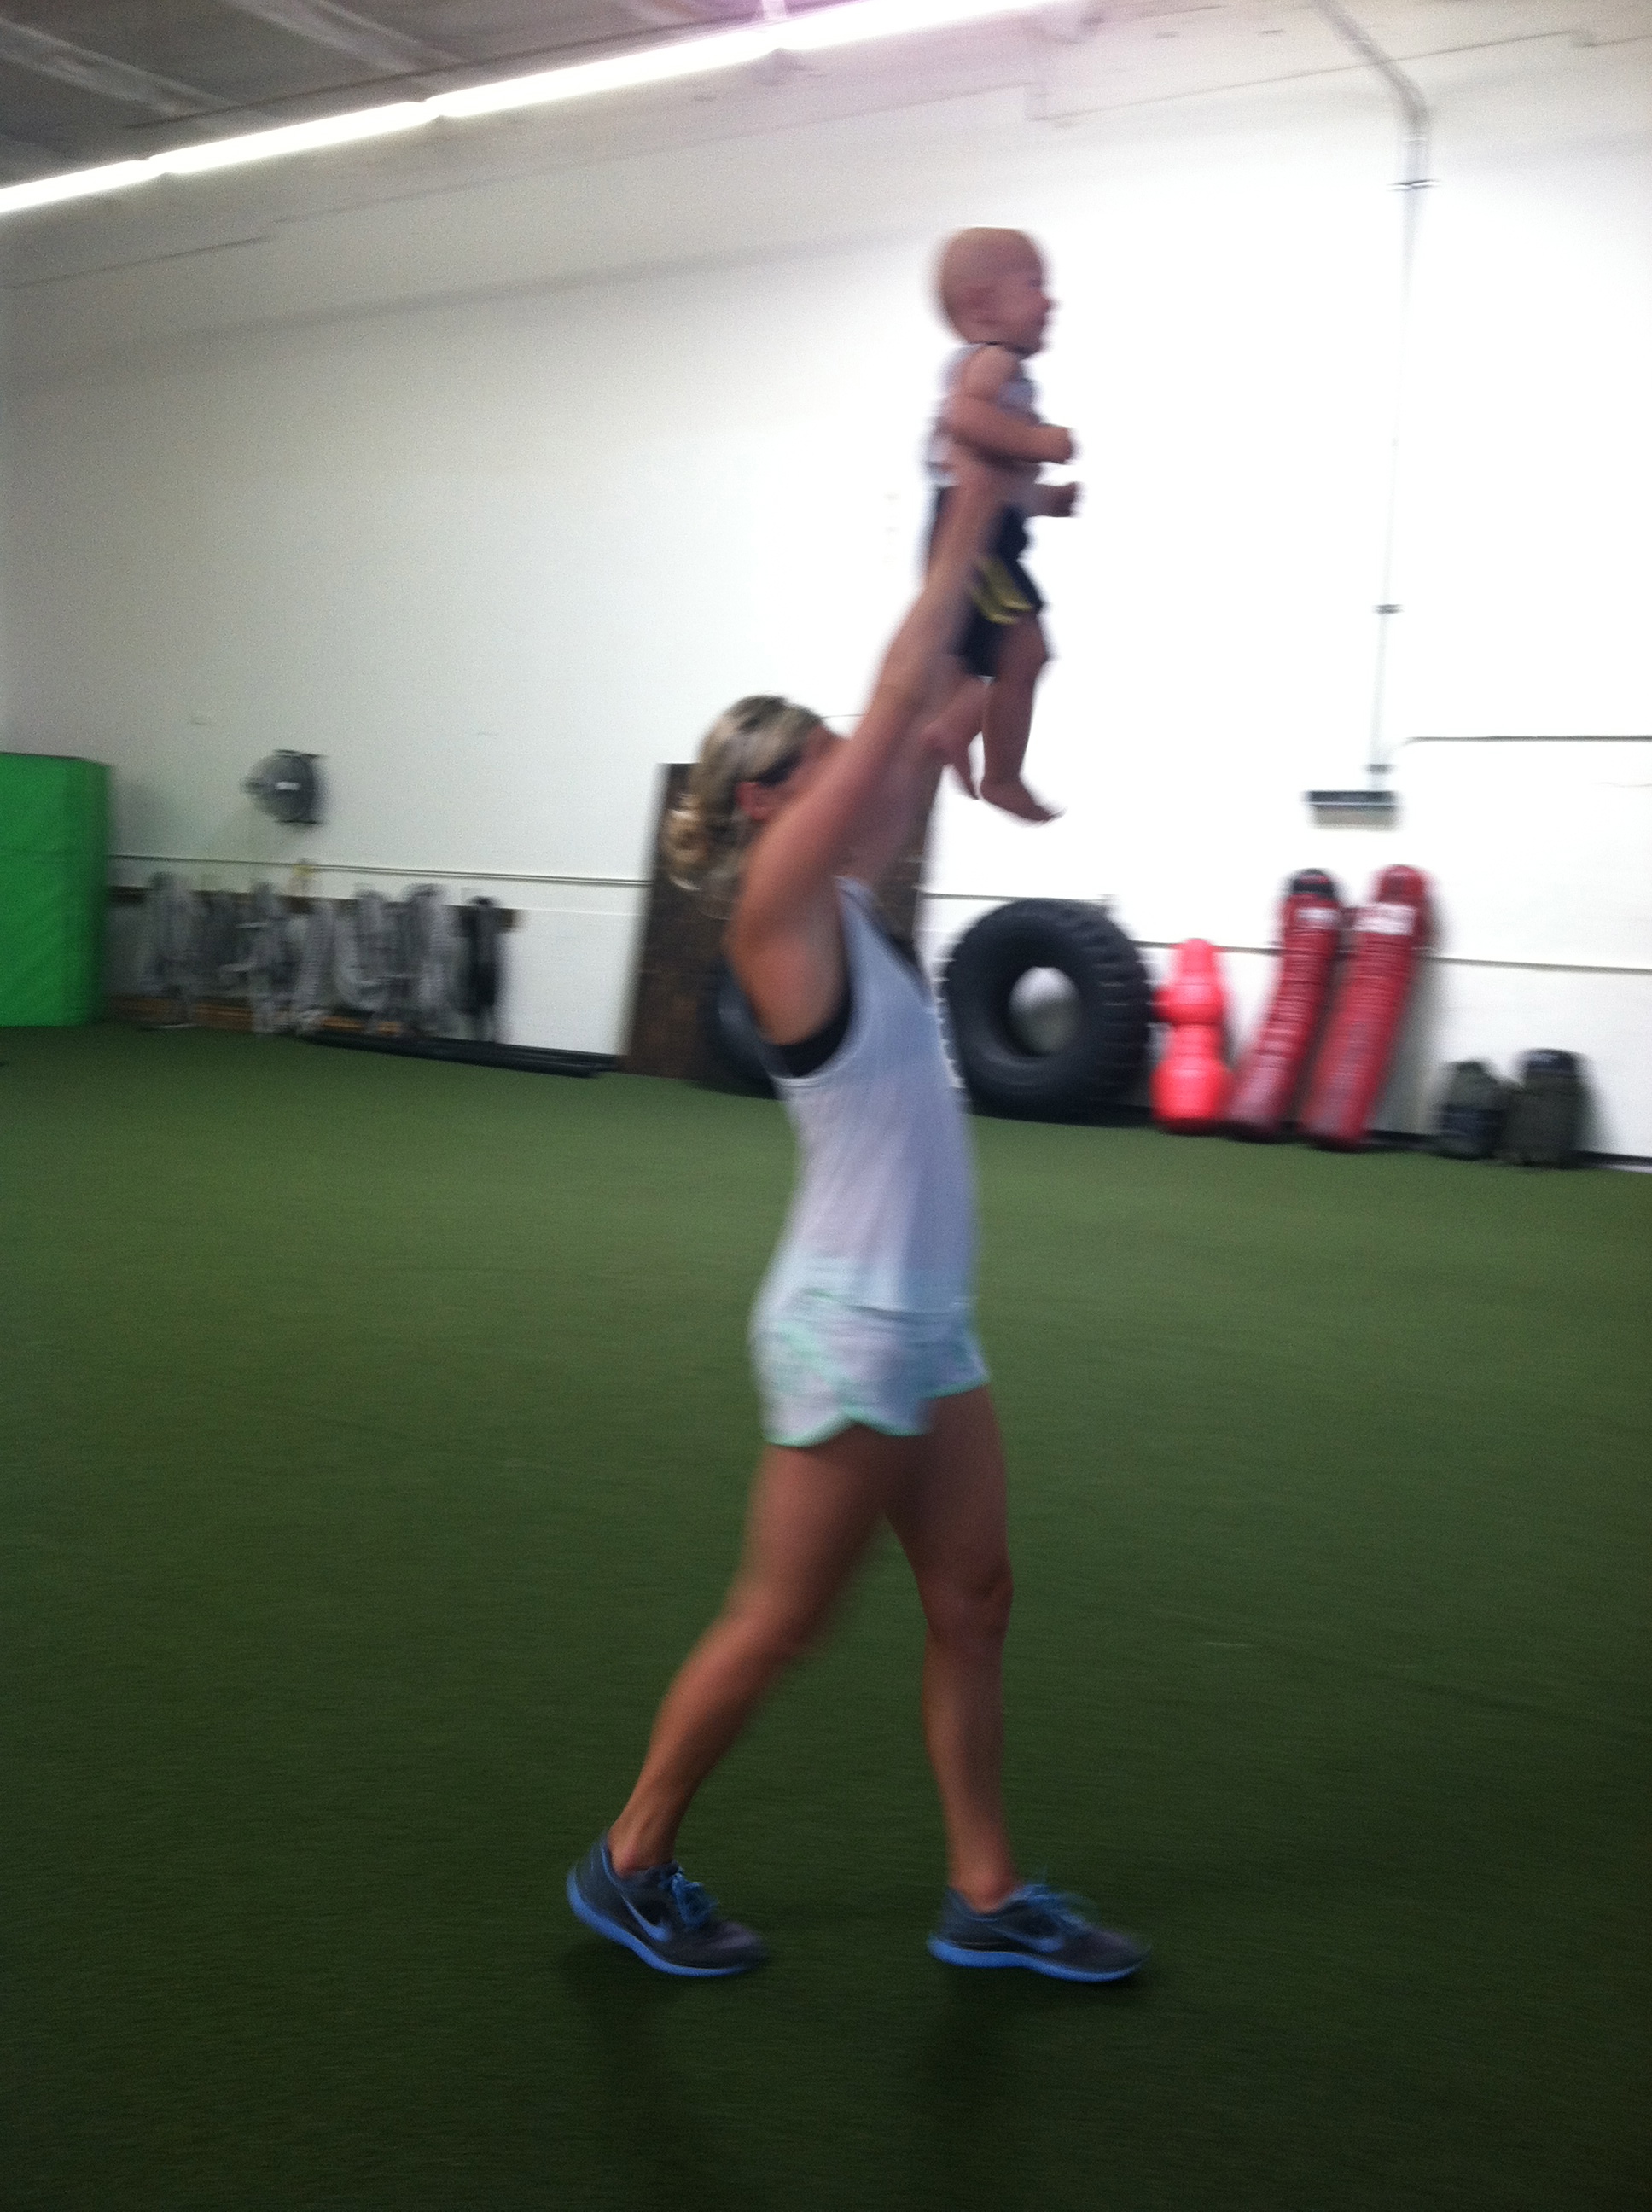
Walk and hold overhead
15 reps Baby Front Squats
15 reps Baby-weight Lying Chest Press

10 reps Baby-weight Squat to Press
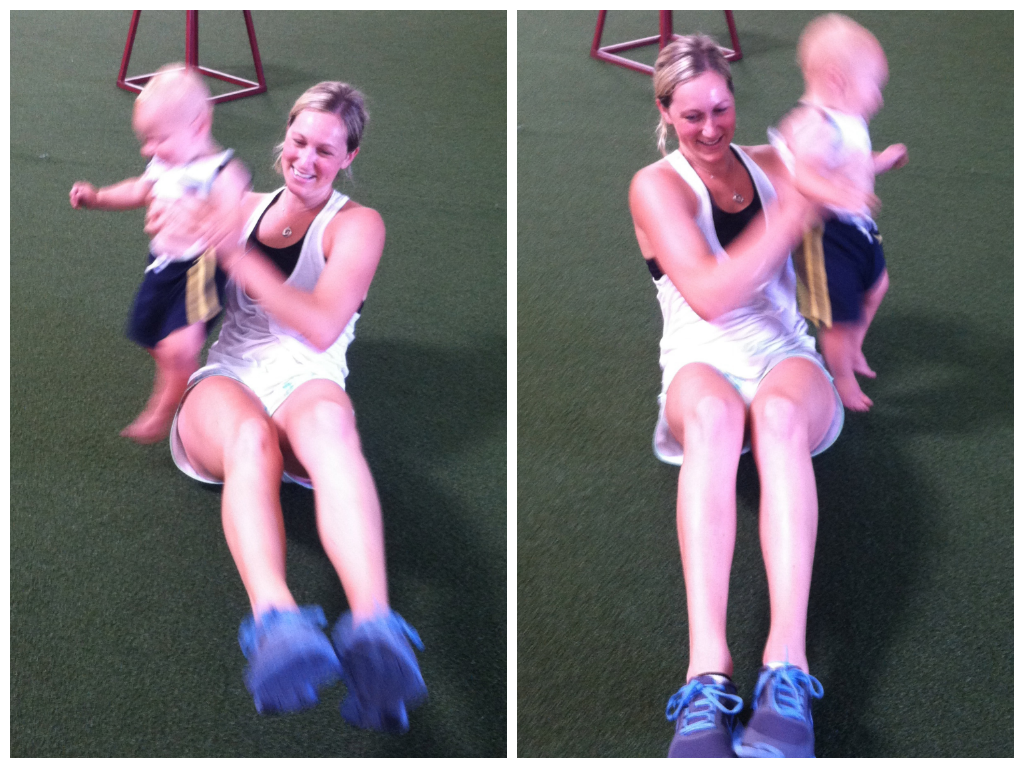
10 reps each side Baby Russian Twists
Conditioning:
3-5 Rounds:
20 seconds Bear Crawl Race
10 seconds rest
20 second Baby-weight KB Swings
10 seconds rest
A seriously fun workout. And probably the best part of all was that Cooper just learned how to clap so he kept cheering Jamie on!
Nuts! – Nut Butters by Ingr-EAT-ients
Yesterday I got two delicious nut butters from Ingr-EAT-ients – Pistachio Butter and Almond Coconut Butter.
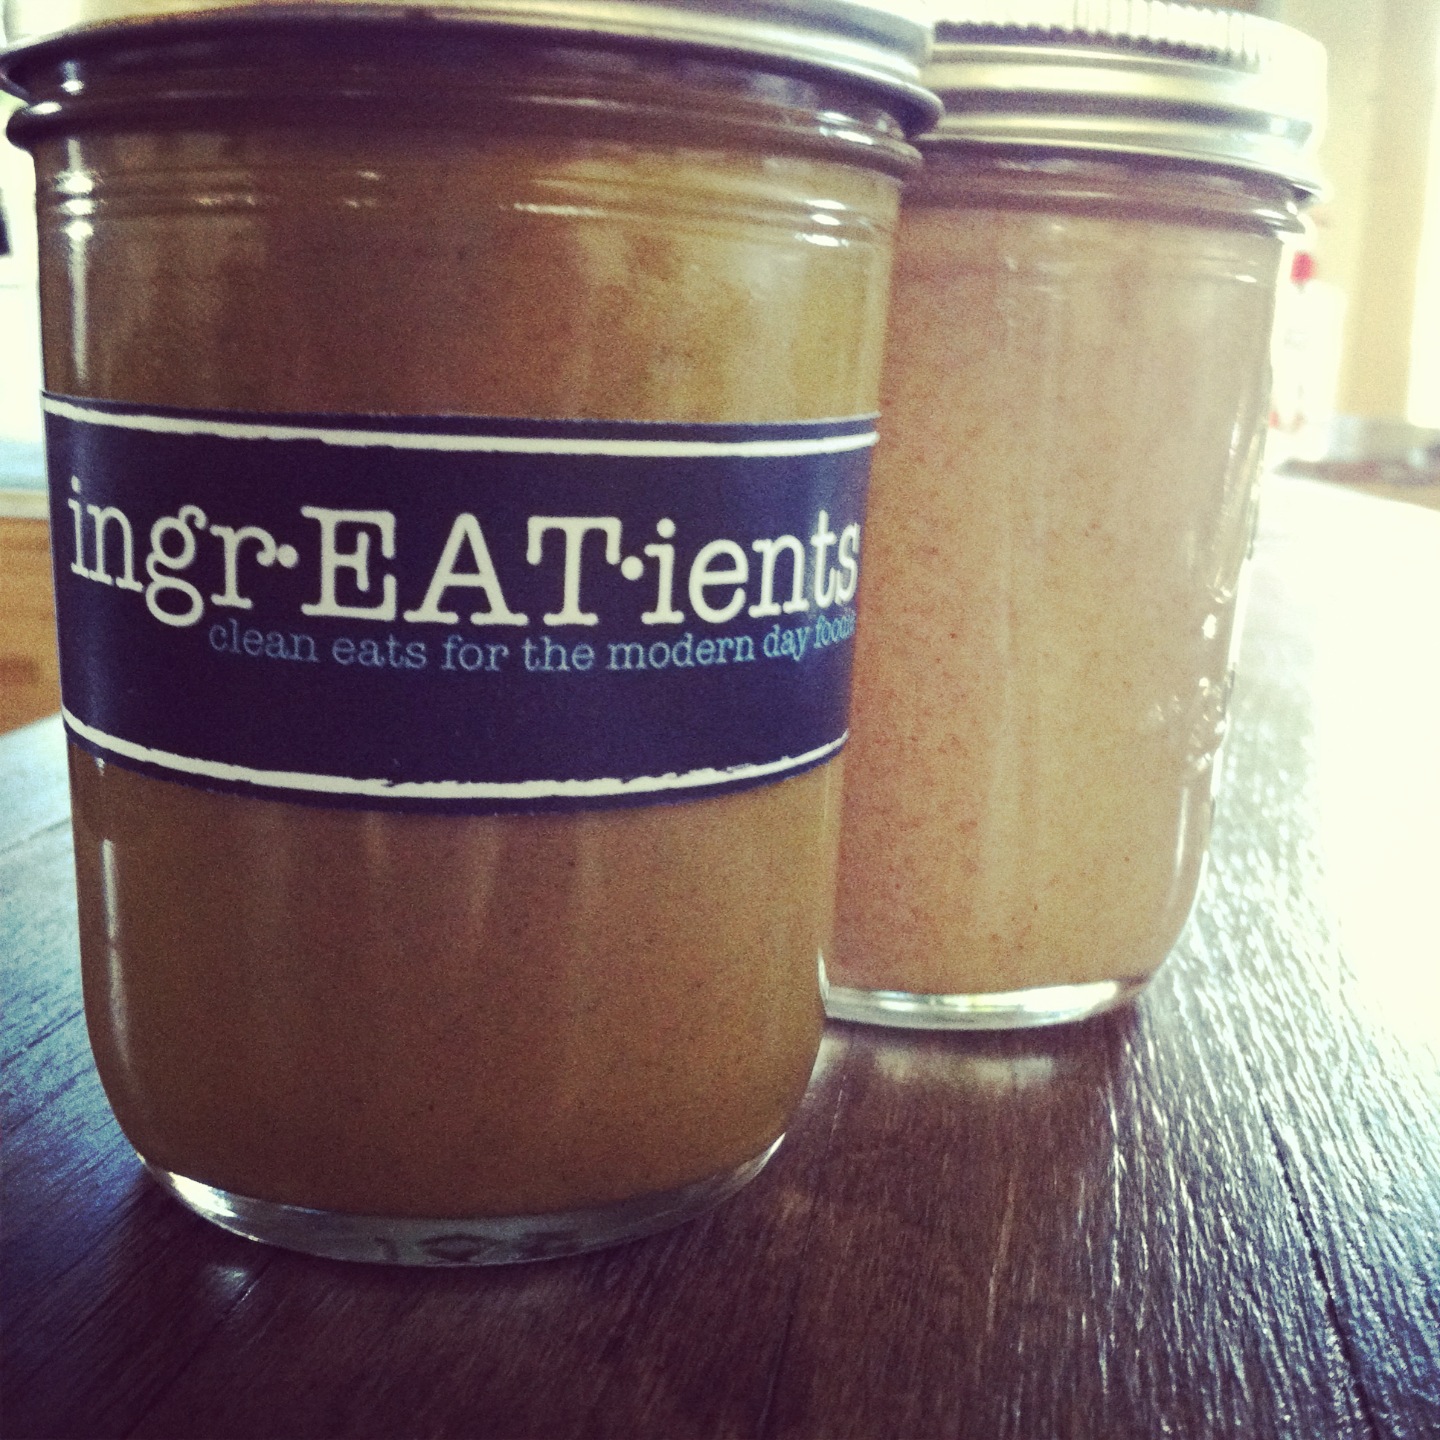
I was super excited to try them partly because a good friend and fellow trainer, Eddie Thomson, makes them and partly because I see his food pictures on Instagram all the time and they always look SO FREAKING GOOD! (Ok mostly because I seriously drool every single time I look at his food prep pictures on Instagram!)
Not only does he make healthy meals, butters, bars, fruit leathers, and shakes that look beautiful and delicious, but he doesn’t use any processed crap.
Everything is all natural and made with the highest quality ingredients…like literally….Even when his go-to stores are out of the product he wants, he doesn’t just settle for a lower quality ingredient.
Nope!
He freaking drives around to other stores and markets until he finds what he wants.
Eddie is fanatical about providing the cleanest, highest quality product. And when I say fanatical, I mean it in the best way.
Anyway, on to the nut butters that I got!
So I got Pistachio (because I’ve never even seen Pistachio butter before) and Almond Coconut (because well…I love both those flavors).
Can I just say…
I LOVE THEM BOTH!
Half of both jars might just be gone after last night because I kept sneaking back to the kitchen to eat just one more spoonful.
I love that “just one more game.”
I tell Ryan, “I’m going to have just one more…”
And then I say that about 50 more times before I actually eat “just one more.”
BUT, regardless of how much more is left, what made both of these two nut butter so special is how FRESH they tasted and how clear the flavors were.
The pistachio butter really tasted like pistachio. And the almond coconut really tasted like almonds and coconut.
I also liked the texture of both. The pistachio was super creamy and the almond/coconut butter had that texture that coconut butter has that I really like.
The neat thing to is that Eddie uses coconut oil in all of his nut butters. Coconut oil is seriously amazing for you. Tons of good healthy fats.
However, the idea of coconut oil in my nut butters made me a bit nervous.
Pistachios and coconut? Hmmm….
But it was really good! And honestly there was only the littlest hint of coconut if you really tried to find it.
So great flavor and a little extra health bang for your buck?!? SIGN ME UP!
The nut butters were amazing and made me feel like I was treating myself to a great little dessert (especially when I put a bit of the almond coconut butter on some local, organic strawberries that Ryan had put in the freezer!)
Ingr-EAT-ientsproducts were DELICIOUS. And the best part is that they are all homemade and have no unnecessary crap in them.
If you are looking for healthy clean eats that make you ENJOY eating well, I would definitely recommend you give these products a try.
(And if you are in SoCal, you can help support a local business!)
The only downside to these products, in my opinion, is that Eddie lists them as vegan…just kidding…but seriously….
My next nut butter to try might just have to be cashew espresso…Although my clients would tell you I’m slightly scary on caffeine!
What are your favorite healthy, clean eats?
P.S. If you like drooling over food pictures and have Instagram, Eddie’s Instagram is @coach_eddie!
Partner Exercises – Great workout to do as a couple (or with friends!)
Working out with friends and family can be super fun. Having a group of people, or a partner, to workout with can keep you motivated, having fun and constantly pushing harder.
Because I think that working out with others can be a great way to have fun WHILE getting in a killer workout, I wanted to share with you all a few of my favorite partner moves.
I generally use these moves on metabolic days as they can really get your heart pumping when you do them quickly for 20-30 seconds. You can also combine just a couple for a warm up and team-building exercise!
Partner Workout Moves!
1. Partner Get Ups – The goal of this move is to try to stand of from lying down as much by yourself as possible. Your partner is just there for a little support. It is a great move to warm up the legs and core. To do this move, stand facing your partner with your feet between hip-width and shoulder-width apart. Your feet can be slightly staggered if you want. Grab hands so that you are holding right to right or left to left. One partner will then sit down on the ground and roll back onto their back. Without using their other hand, they will roll up and drive through their feet to come to a standing position. The other parter will have move forward with them as they rolled back so that they can help “pull” them back up to standing. Once the partner is standing, the other partner will roll back and then plant their feet and come back to standing. Keep alternating partners for the allotted amount of time and then switch to the other hand and repeat.

2. Partner Pulls – Grab your partner’s hand and step the opposite forward into a strong stance facing your partner. This move is a great upper body move that forces you to each act as the other’s resistance. Your goal is to keep tension the entire time you are doing this move and create a little arm “shake-age” (as I like to call it). You want to make each other really work for every inch of movement. HOWEVER, you do not want to resist so hard that the other person can’t move. There should be slow and steady movement back and forth. To do this move, set up and then one person should pull toward their armpit while the other slowly allows their arm to extend, resisting the pull. As soon as the partner is fully extended, they should start pulling back toward their armpit while the other person resists. A slight rotation as you pull is fine, but you shouldn’t rotate a lot. Also do not round the shoulders or really lean back. Keep a nice tall posture and a slight leg bend.

3. Partner Pushes – Partner pushes are just a push variation of the move above. Instead of actually holding hands though, you and your partner will put palm to palm with finger tips pointing up. This will force both of you to really PUSH and not pull at all back and forth.
4. Partner Crawls and Jumps – A great core move. Have one person set up in sort of a pike/downward dog position. They want to have their butt up in the air to give their partner plenty of room to crawl under. The other partner will crawl under. To make the crawl easier, have your knees on the ground. To make it harder, try not to allow your knees to touch the ground while still managing to crawl under your partner. Once you crawl under, your partner will drop to the ground (like at the bottom of a push up) so that you can jump over. To make the drop harder, hold at the bottom of a push up. To make it a bit easier, just rest on the ground. Hop laterally over your partner. Try to hop with both feet together, however, you can jump forward or hop one foot at a time if you are just beginning (Please just don’t land on your partner….they probably wouldn’t like that too much….). Once you’ve jumped over, drop to the ground and set up so they can crawl under you and then jump over. Keep repeating until the time is up.
5. Partner Hamstring Curls – One of the toughest hamstring moves out there and one of my favorite from training in college. (Sorry I forgot to take a picture of this last night but will try to get one today.) One partner should kneel on a mat or slightly cushioned flooring and flex their feet. The other partner will kneel behind them. The partner behind will grab the ankles of the front partner and really hold them into the ground. The back partner is the anchor that helps the other partner curl back up. The harder the back partner presses into the ground, the more assistance they give the front partner. The front partner will then slowly fall forward toward the ground with their hands outside their chest to catch them once they hit the ground. Go as slowly toward the ground as you can to really work your hamstrings. Basically all that should be happening is that the front partner is straightening at the knees as they go over. Their body should stay in a nice straight line. Once the front partner hits the ground, they will then press themselves back with their hands only as much as needed and PULL themselves back up with their hamstrings. They should keep their body in a straight line. If their butt starts to go back first, they didn’t push up enough with their arms. This move (especially the curling back up part) is very advanced. Beginners may want to start with a wall in front of them. Control your decent toward the wall. Truly go as slowly as possible. Once you hit the wall, press yourself away, trying to curl yourself back up as much as possible with your hamstrings. Repeat all reps and then the other partner goes.
6. Partner Drags or Pulls – So this move can be done two different ways. My favorite is with the valslides/sliders/furniture movers just because both partners are working hard the entire time; however, if you are outside/at home/don’t have sliders, the other move is still challenging and fun! To do partner pulls, one partner stands with each foot on a valslide. They will sink into a squat (90 degrees) and extend their arms out in front, crossing one arm over the other. The other partner will grab their hands and then drag them, walking backward as quickly as they can. This kills the legs of both people and really works the core of the person on the sliders. Do not allow yourself to fall forward or round when on the sliders. Also do not let your knees cave in. Maintain proper squat form. (It may take a round to get used to the balance). If you are pulling, try to be steady and smooth in your steps. If you jerk your partner, they will have to work doubly hard to balance. Then switch and the other person pulls while the other is dragged. To do partner drags, one partner will stand with their back to the other partner. They will cross their hands over their chest. The back partner will then reach up under their armpits from behind them and the front partner will then lean back into the back partner. The back partner will then be holding the weight of the front partner. The front partner will not be supporting themself. Their feet will just be relaxed on the ground as the back partner is holding them. The back partner will then “drag” the front partner. After completing the round, the partner that was dragged will then be the “dragger.”
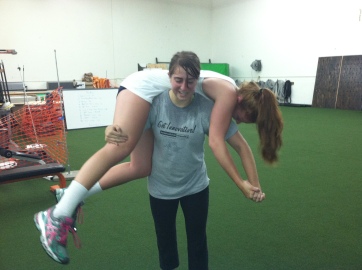
Poor Carla…having to be carried by the sweat monster! (Luckily I wasn’t even sweating that much for me!)
7. Partner Carries – This is an advanced move and a very full body one. Please be careful when attempting this as you must keep your core tight or risk back injury. To do this move, one partner will be carried. To pick up your partner, have them face you while you are sideways. You are going to reach through their legs and hook your arm around and up. As you reach through though, you should have their other hand over your back and in your other hand. Get the partner over your back right up by your shoulders. Brace your core and have your partner put their bottom, free hand, on your low back to help brace. Get them situated up high on your back and then walk. When done, switch and have them carry you.
8. Partner Medball Sit Ups and Throw – Take a light medicine ball. One partner will be standing while the other is on the ground performing a sit up. The partner on the ground should bend their knees and lay back on the ground with the ball extended overhead. As they sit up, they are going to throw the ball to the partner that is standing. The partner standing will then pass the ball back to the partner that is seated and then will lie back down and repeat. Switch once the time or reps are completed.

9. Partner Medball Russian Twists – Sit side-by-side with a foot or two of space between you. The farther apart you sit the more difficult the move will be since you have to pass it that distance. Both of you should lean back slightly and raise your feet off the ground to balance on your bums (if you are a beginner, you can keep your feet on the ground, but still remember to lean back to engage your abs). The partner with the ball will rotate the ball to the outside of the hip that is away from their partner. They will then toss the ball across their body to their partner. The partner will catch it and rotate the ball out to their side farthest from their partner and then throw it back. Repeat all reps and then face the other direction so that you can throw the other direction.

10. Partner Medball Chest Passes and Shuffle – Stand facing your partner. The farther apart you stand the harder the move will be because you will pass further. You can also use a heavier ball to make the move harder. We demonstrated this move as just a chest pass, however, I like it as the chest pass and shuffle. Beginners may want to start with just the pass though. To perform this move, you are going to pass the ball back and forth in a chest pass. As you pass the ball back and forth, you are also going to shuffle sideways down and back. The faster you shuffle and pass, the harder the move. Make sure to not get ahead of your partner. You want to work together not smash the ball at each other’s faces.

Bonus move: Partner sled complex….Because sometimes it is just fun to sit on a sled and go for a ride! (Do Tsunamis off the sled. Pull the sled toward you, push it back and then crawl backward back!)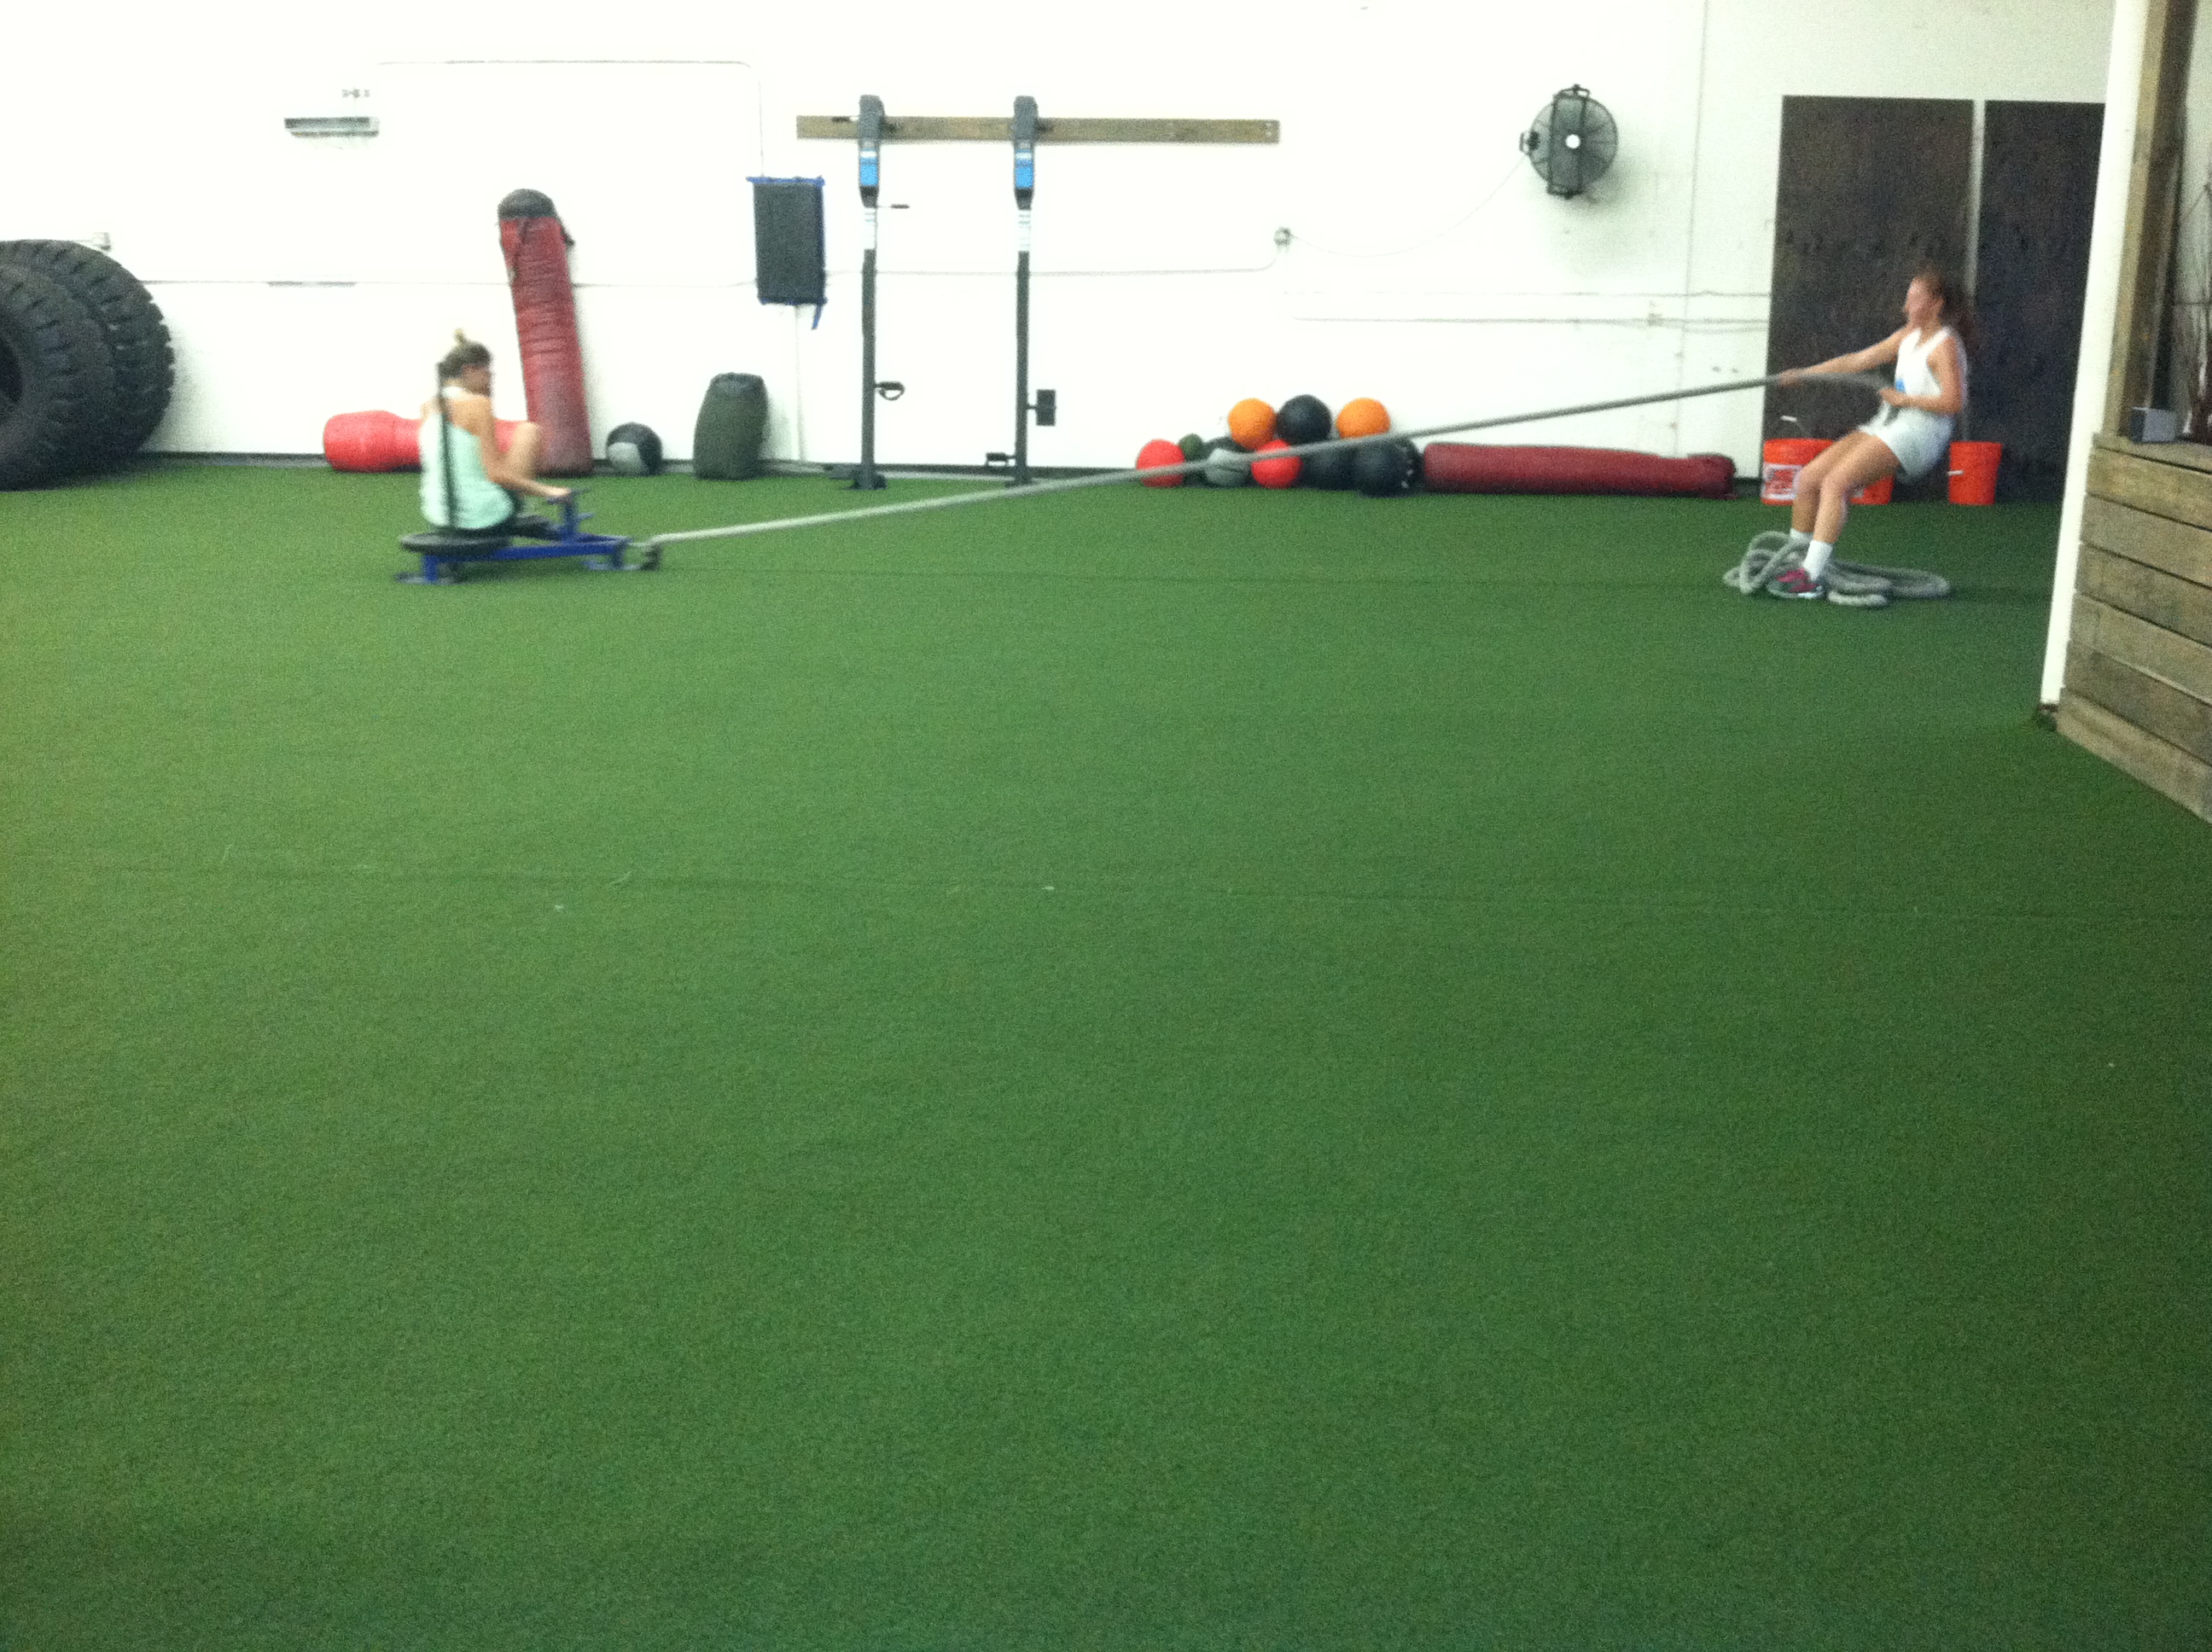
Note: A big THANK YOU to Carla and Jaydee of the Vanguard Volleyball Team for helping me snap some photos! These moves are best done with a partner at your similar fitness level and/or size (if you are short and working with a tall person the crawls will not be easy for that taller person).
Home Workouts – Keep It Simple Stupid
The other week I was contacted by the OC Register about participating in a column they were writing throughout the year about workout moves you could do at home. They were talking to a few different trainers in the area and getting each of them to demo about 8-10 exercises. (My first move will be featured on the 25th…AHHHHHHH!)
You could use equipment. It just had to be something that could easily be stored.
I was super pumped to participate and instantly started writing out a list of things I could do. I debated about a kettlebell or sandbag.
But decided against using any equipment except for something someone would easily have lying around the house.
I’ve become extremely interested in finding and creating great and challenging home workout moves you can do with limited space and no equipment and I wanted to highlight some of those moves.
And when the reporter asked me why I picked the moves I did when there are so many crazy cool new pieces of equipment out there that could be stored easily at home….
I said, “Because you don’t NEED any of those!”
Equipment can be fun. It can keep you interested and add variety to a routine that is getting stale.
But it isn’t NECESSARY.
Equipment doesn’t mean you are going to get a more challenging workout. Heck sometimes it even means getting away from truly functional moves that will truly have the most benefit.
Equipment is a TOY. It isn’t necessary even though people have become convinced that they can only get in a great workout if they have the latest and greatest TOY.
Basically, I explained to him that I wanted to make a point that you don’t really need ANYTHING to get in a great workout at home! That there are a ton of tweaks you can make to traditional moves to make them more challenging and keep your workout interesting.
Yea I love equipment, but sometimes it just takes us away from what is important. Sometimes it distracts us from focusing on what will actually help us achieve our goals.
Sometimes equipment just complicates moves unnecessarily.
Sometimes we would get more out of a workout if we just KEPT IT SIMPLE and stuck to basic moves and movements!
Pull, push, squat and hinge. Those four basic movements are all you need.
Push Ups, pull ups (or rows), squats and lunges. These are examples of each of the four movements above.
Those four moves work your entire body. And those four moves can be made challenging without any equipment. There are also a ton of variations you can do without anything fancy so you never get bored.
Push ups can be done on an incline. Or you can do them on a decline to advance them. You can do handstand push ups. Or set up some books and do a shuffle push up over them. You can also do a push up to side plank or a fly to push up on a towel. (For more push up variations, here are some ideas. You can do all of these at home even the push up to dip.)
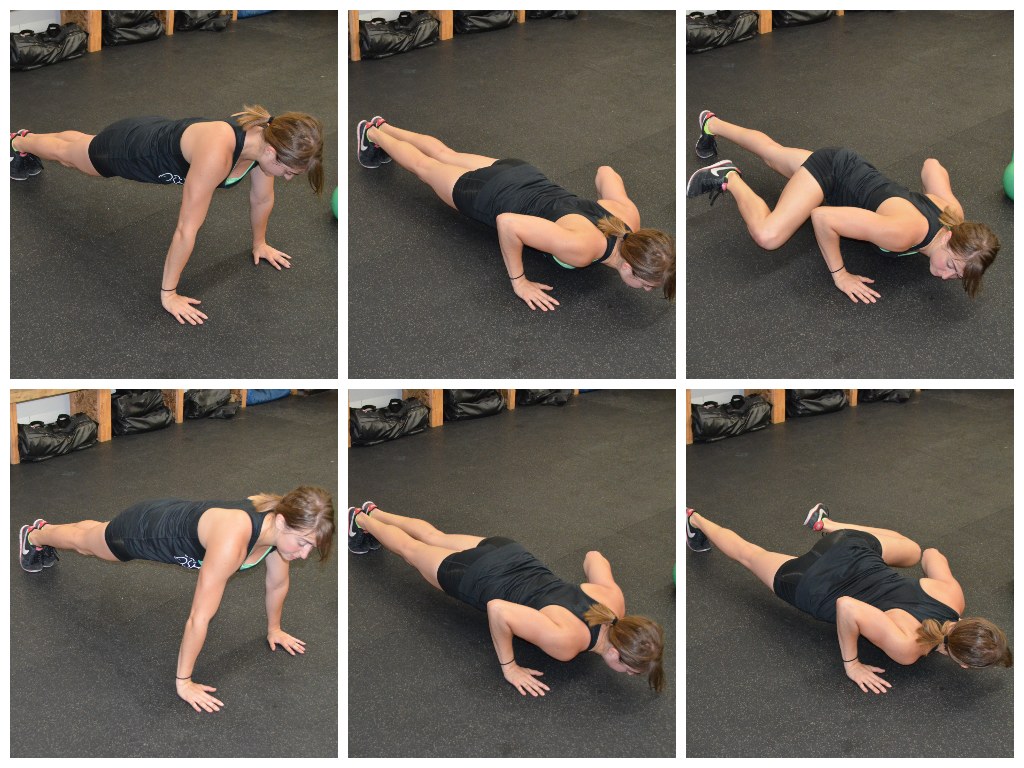
There is always the spiderman push up too….
All these moves are simple. None of them require anything you don’t have at home. And all just are slight variations on the traditional push up.
We aren’t reinventing the wheel here.
We are just tweaking it slightly to make it harder or easier. We are adjusting it to focus on slightly different parts of our body.
Same goes for the pull ups or rows, squats and lunges.
Especially the lunges.
People think of lunges and they think forward and backward lunges….maybe they even include side lunges. But what about curtsy lunges? What about lunges in EVERY DIRECTION? You can do angled lunges. Rotational lunges…You can literally lunge in every direction to hit different aspects of your leg.
You can lunge in EVERY direction!
And on top of that you can add a towel to one foot to increase the intensity of the lunges. Or you can even do a balance lunge with your foot up on a couch/chair/table to make the basic split squat even more difficult.
You can do lunges where the weight is on the leg moving out. Or you can do a lunge where the leg working is more static. For example: On a side lunge, you can either step out into the lunge and sink into the leg that has stepped out OR you can sink into the standing leg and then just reach the other leg out straight to tap the toe out to the side.
Both work the leg in very different ways!
But you don’t need any fancy equipment to make the moves hard or even add variety! You can work your legs from every angle just by doing a LUNGE.
Keep it simple stupid.
Don’t worry about the latest and greatest equipment. Stick with the basics and you will get results!
What are your favorite variations of the push up, pull ups (or rows), squats and lunges? Do you find that you get caught up always looking for the next new piece of equipment? Do you even skip workouts at home because you don’t have “equipment?”
P.S. Who likes working out with a friend or a spouse? Interested in some great partner moves? Check back tomorrow!!!
Common Injuries – Shin Splints and Plantar Fasciitis
I’ve gotten a ton of people recently coming to me with shin splints and plantar fasciitis.
There is a close relationship between the two so I’m not surprised when runners end up having troubles with both. They can be due to improper footwear, over-pronation of the foot, incorrect running/walking form or just plain-old OVERUSE.
Below is a quick breakdown of each injury and then some prehab/rehab stuff you can do to make the pain go away!
Shin Splints
Shin splints are not your bone splintering apart. Shin splints are actually pain in either the anterior or posterior tibialis, the muscles of your shin.
Shin splints can occur from improper footwear, improper gait mechanics (overstriding), over-pronation (when your foot rolls inward) and just plain-old overuse. (Today I will not get into proper gait mechanics or discuss the shoes you should wear, but you should be aware that these two things MAY be a potential cause of your pain.)
Here are some ways you can help alleviate the pain and even start correcting the muscle imbalances that may be occurring because of one of the issues above.
How many of you runners that suffer from shin splints roll out the muscles of your lower legs, other than potentially your calves?
Don’t lie. I know not many of you do.
The fronts and sides of our shins are often forgotten when we roll out.
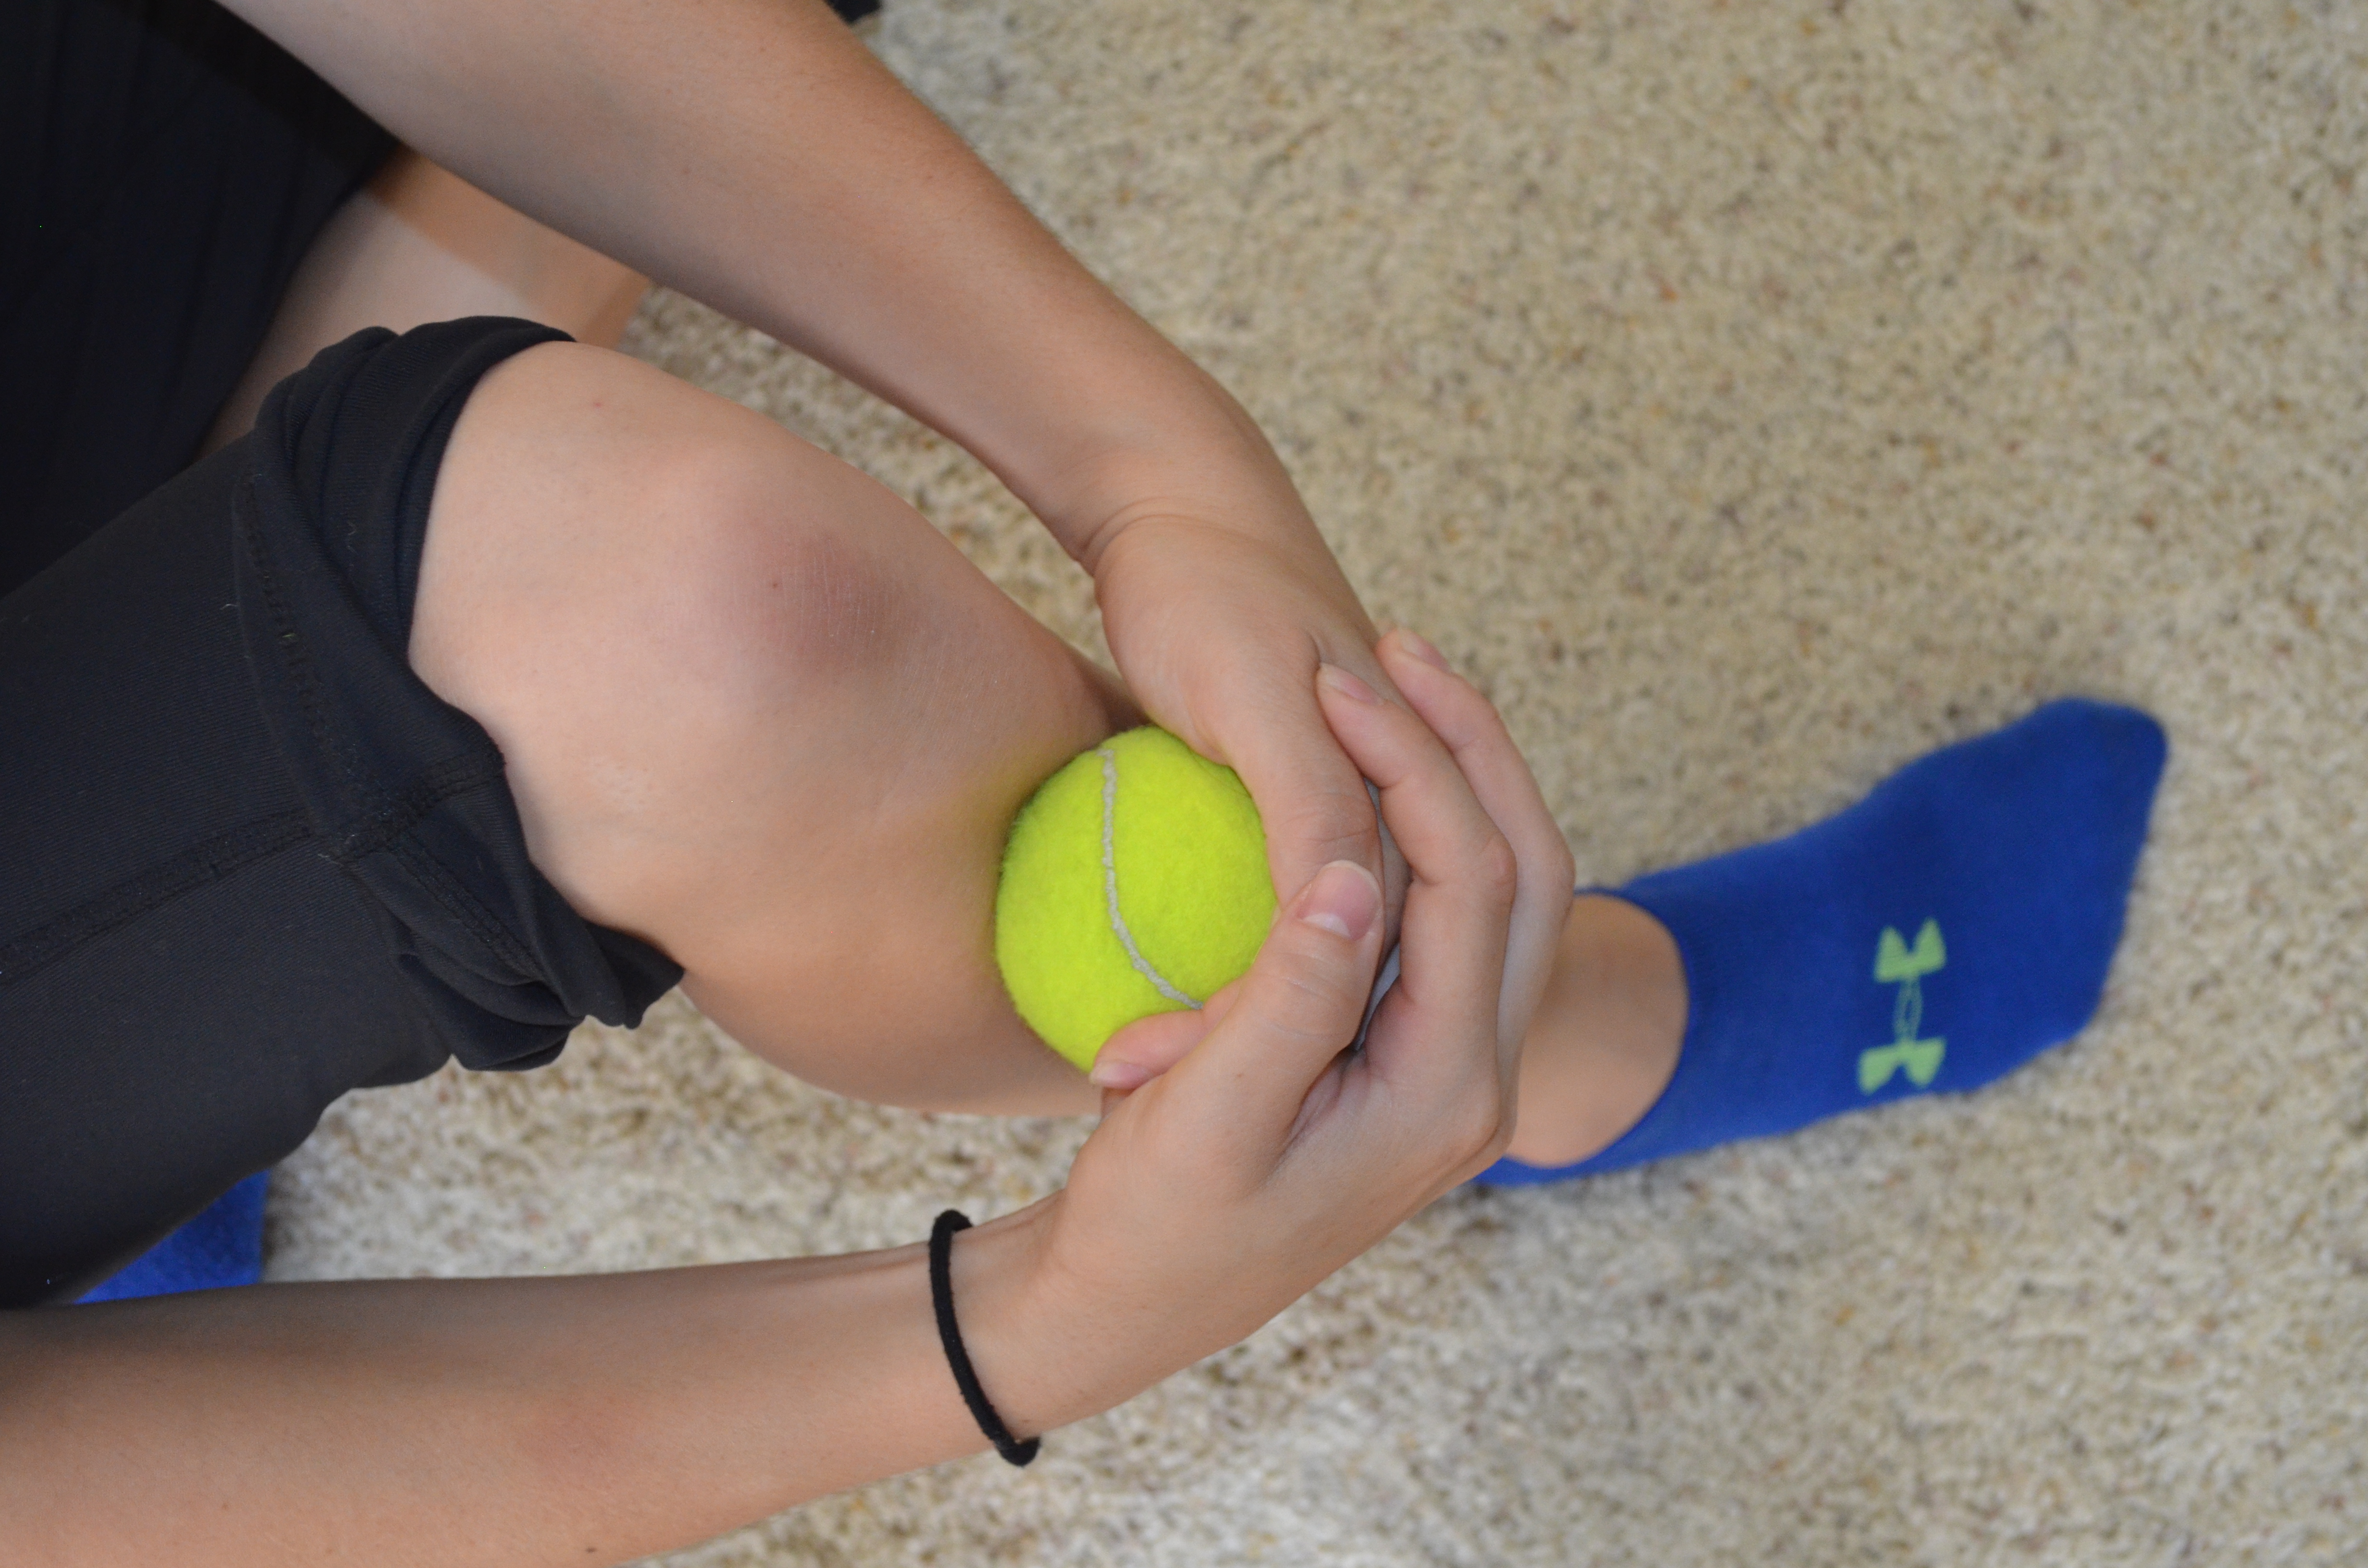
To roll out your shins, sit on the ground with one foot flat on the ground and your knee bent. Take a tennis ball or other small ball and dig it into the muscle down the front of your shin. Start right below your knee. Make small circles, digging the ball in as much as you can. After making circles in one spot, move the ball down lower on your leg toward you ankle. Work your way all the way down your shin.
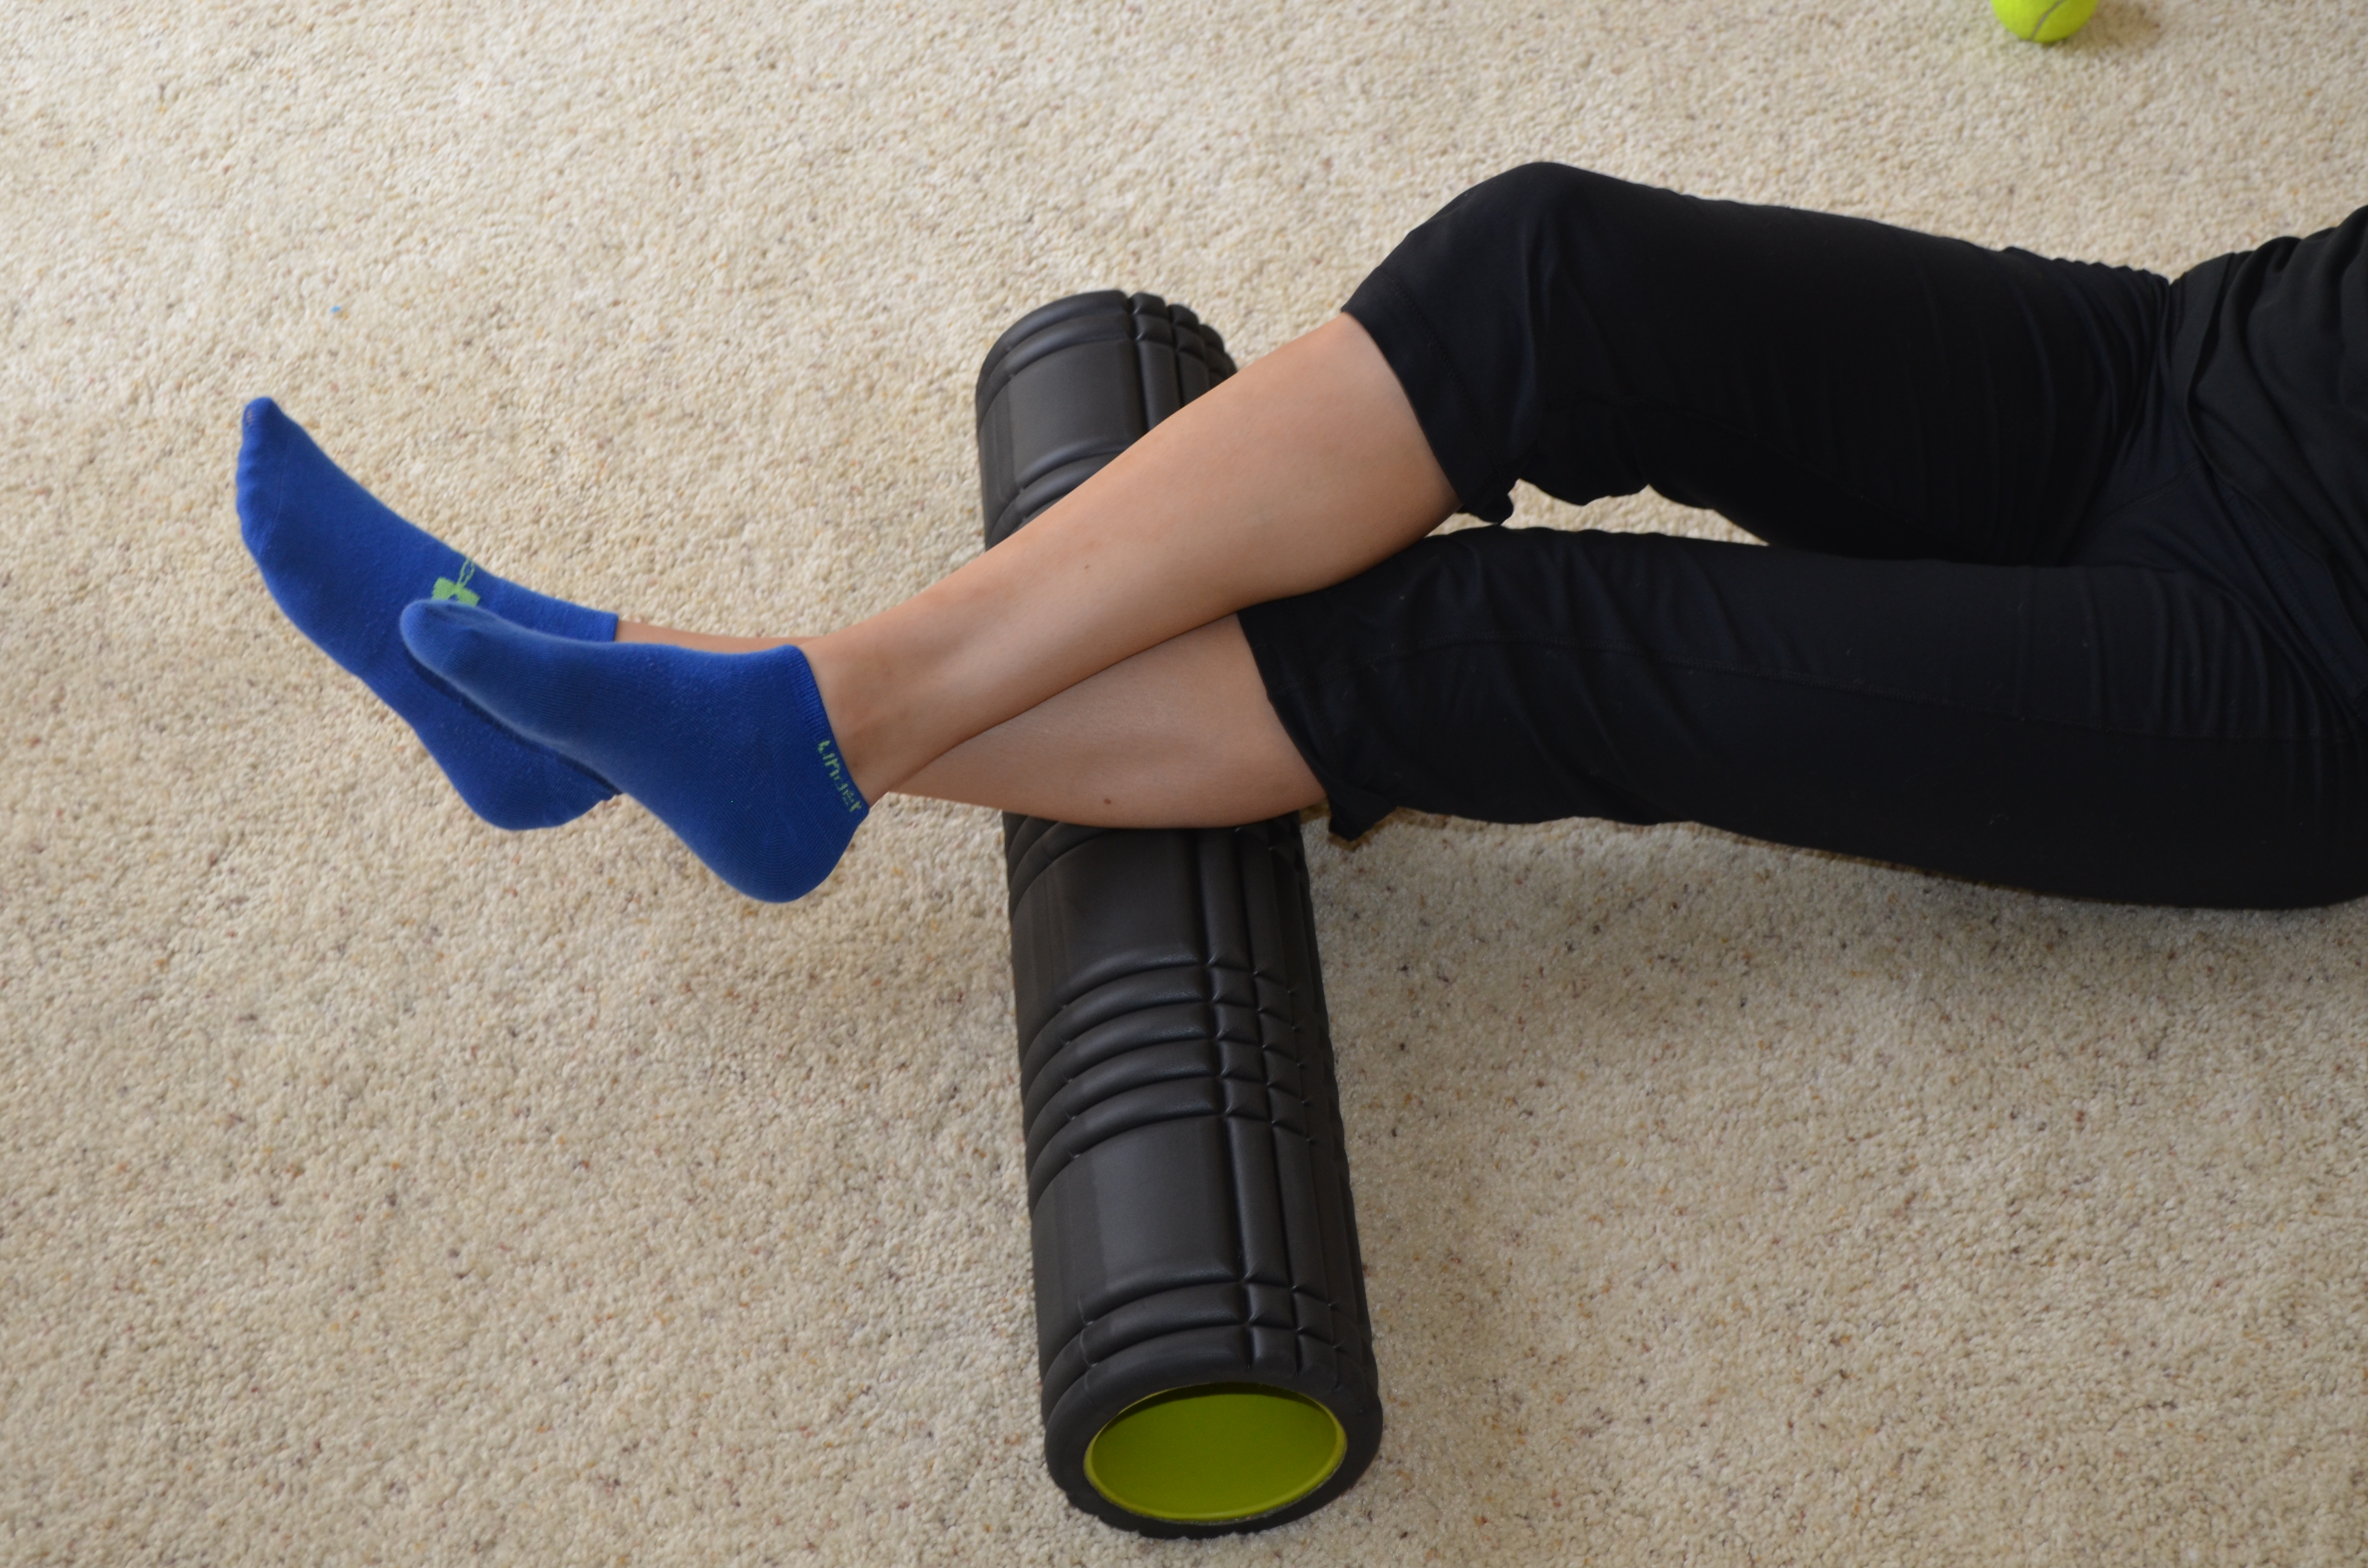
You can also use a roller or tennis ball to hit the outside of your shin. Place the roller or tennis ball on the side of your lower leg right above your ankle. Press your leg down into the roller and roll up toward your knee and then back down. Hold on any tight spots and rock your leg side to side to dig in deeper to those spots.
Here is a link to a full video library that includes a few different ways to roll out your shins and your entire lower leg.
STRETCHING
Stretching can also help alleviate the pain of shin splits by lengthening potentially overactive muscles.
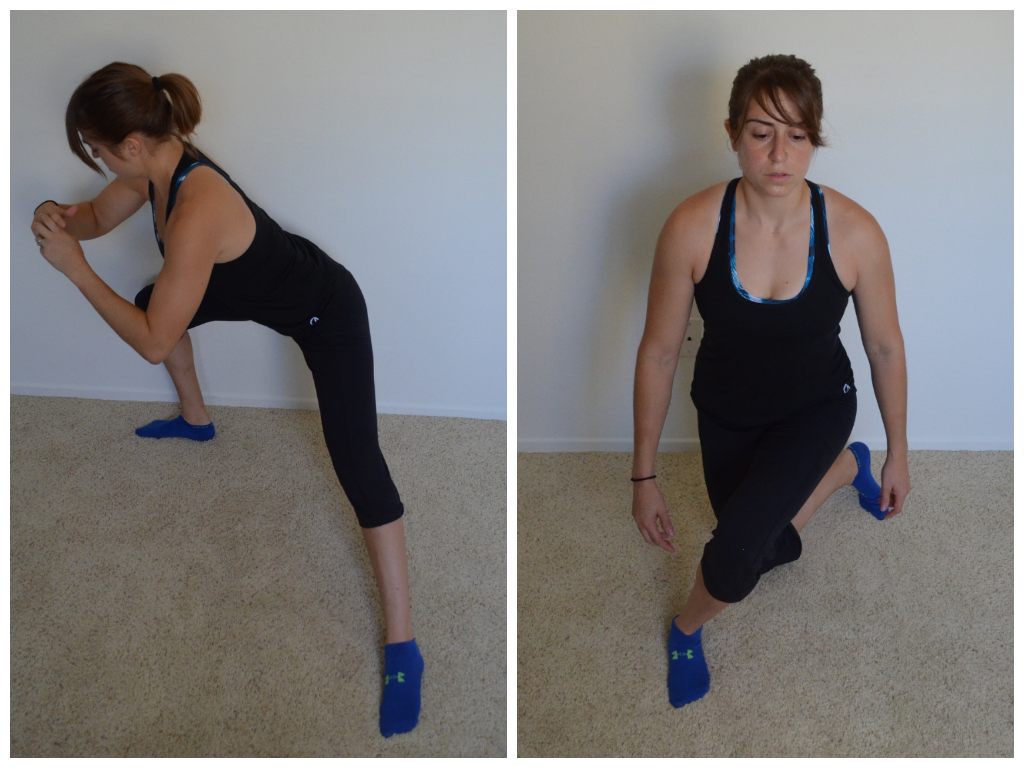
You can hit your shins from a couple of different angles using one basic stretch. Standing, point your toe. Place your big toe on the ground and let your foot fall forward, pressing the top of your foot toward the ground. You can change exactly what angle you hit based on how you point your toe. Your big toe can point straight ahead or out to the side or even inward.
You can also make circles with your foot in that position to loosen up your shin and improve ankle mobility.
You should also make sure to stretch your calves as they me tight and part of the problem!
STRENGTHENING
A good way to stretch and help strengthen is by doing heel walking. Flex your feet and walk around on your heels. This could be a great part of your pre-run warm up.
Also, ABCs are a great ankle mobility and lower leg muscle strengthening exercise. Sit or lie down and point your toe. Draw the alphabet with your big toe.
If you do have shin splints from overuse, make sure to also rest up and then start a rehab program.
If you have shin splints from over-pronation, you may also need to loosen up other muscles like your adductors while strengthening your glutes.
Ice and anti-inflammatories can also help alleviate pain BUT they will not “cure” the problem.
The best “rehab” program is a prehab one. If you know you are going to be upping your mileage and have suffered from shin splints in the fast, stop the problem before it happens. Foam roll before and after workouts and make sure to stretch and warm up properly. Work on your ankle mobility even if you aren’t having pain at the moment. Also include the proper strengthening exercises in your program.
Take care of your body BEFORE you have pain so that an injury doesn’t sideline you later!
Plantar Fasciitis
Plantar Fasciitis is pain on the bottom of your foot and can occur along with heel spurs or even because of heel bone spurs.
It is a common overuse injury in runners and has a lot to do with over-pronation and lack of calf flexibility. You are more at risk if you are overweight, have high arches, do repetitive high-impact activities or suddenly start or up your activity level.
Usually your plantar fasciitis feels the worst when you wake up or after you’ve been sitting for a while. It tends to feel better when you’ve warmed up.
The quickest way to get rid of plantar fasciitis is by rolling out all the tight muscles involved.
Roll out your calves with either a tennis ball or roller. Start at the base of your calf right above your ankle. Rock side to side and then move the roller or ball up higher on your calf. Hold on any tight spots.
You can also flex and relax your foot to dig in deeper to any trigger points. Or you can make small circles with your foot. Both help apply more pressure to the tight area.
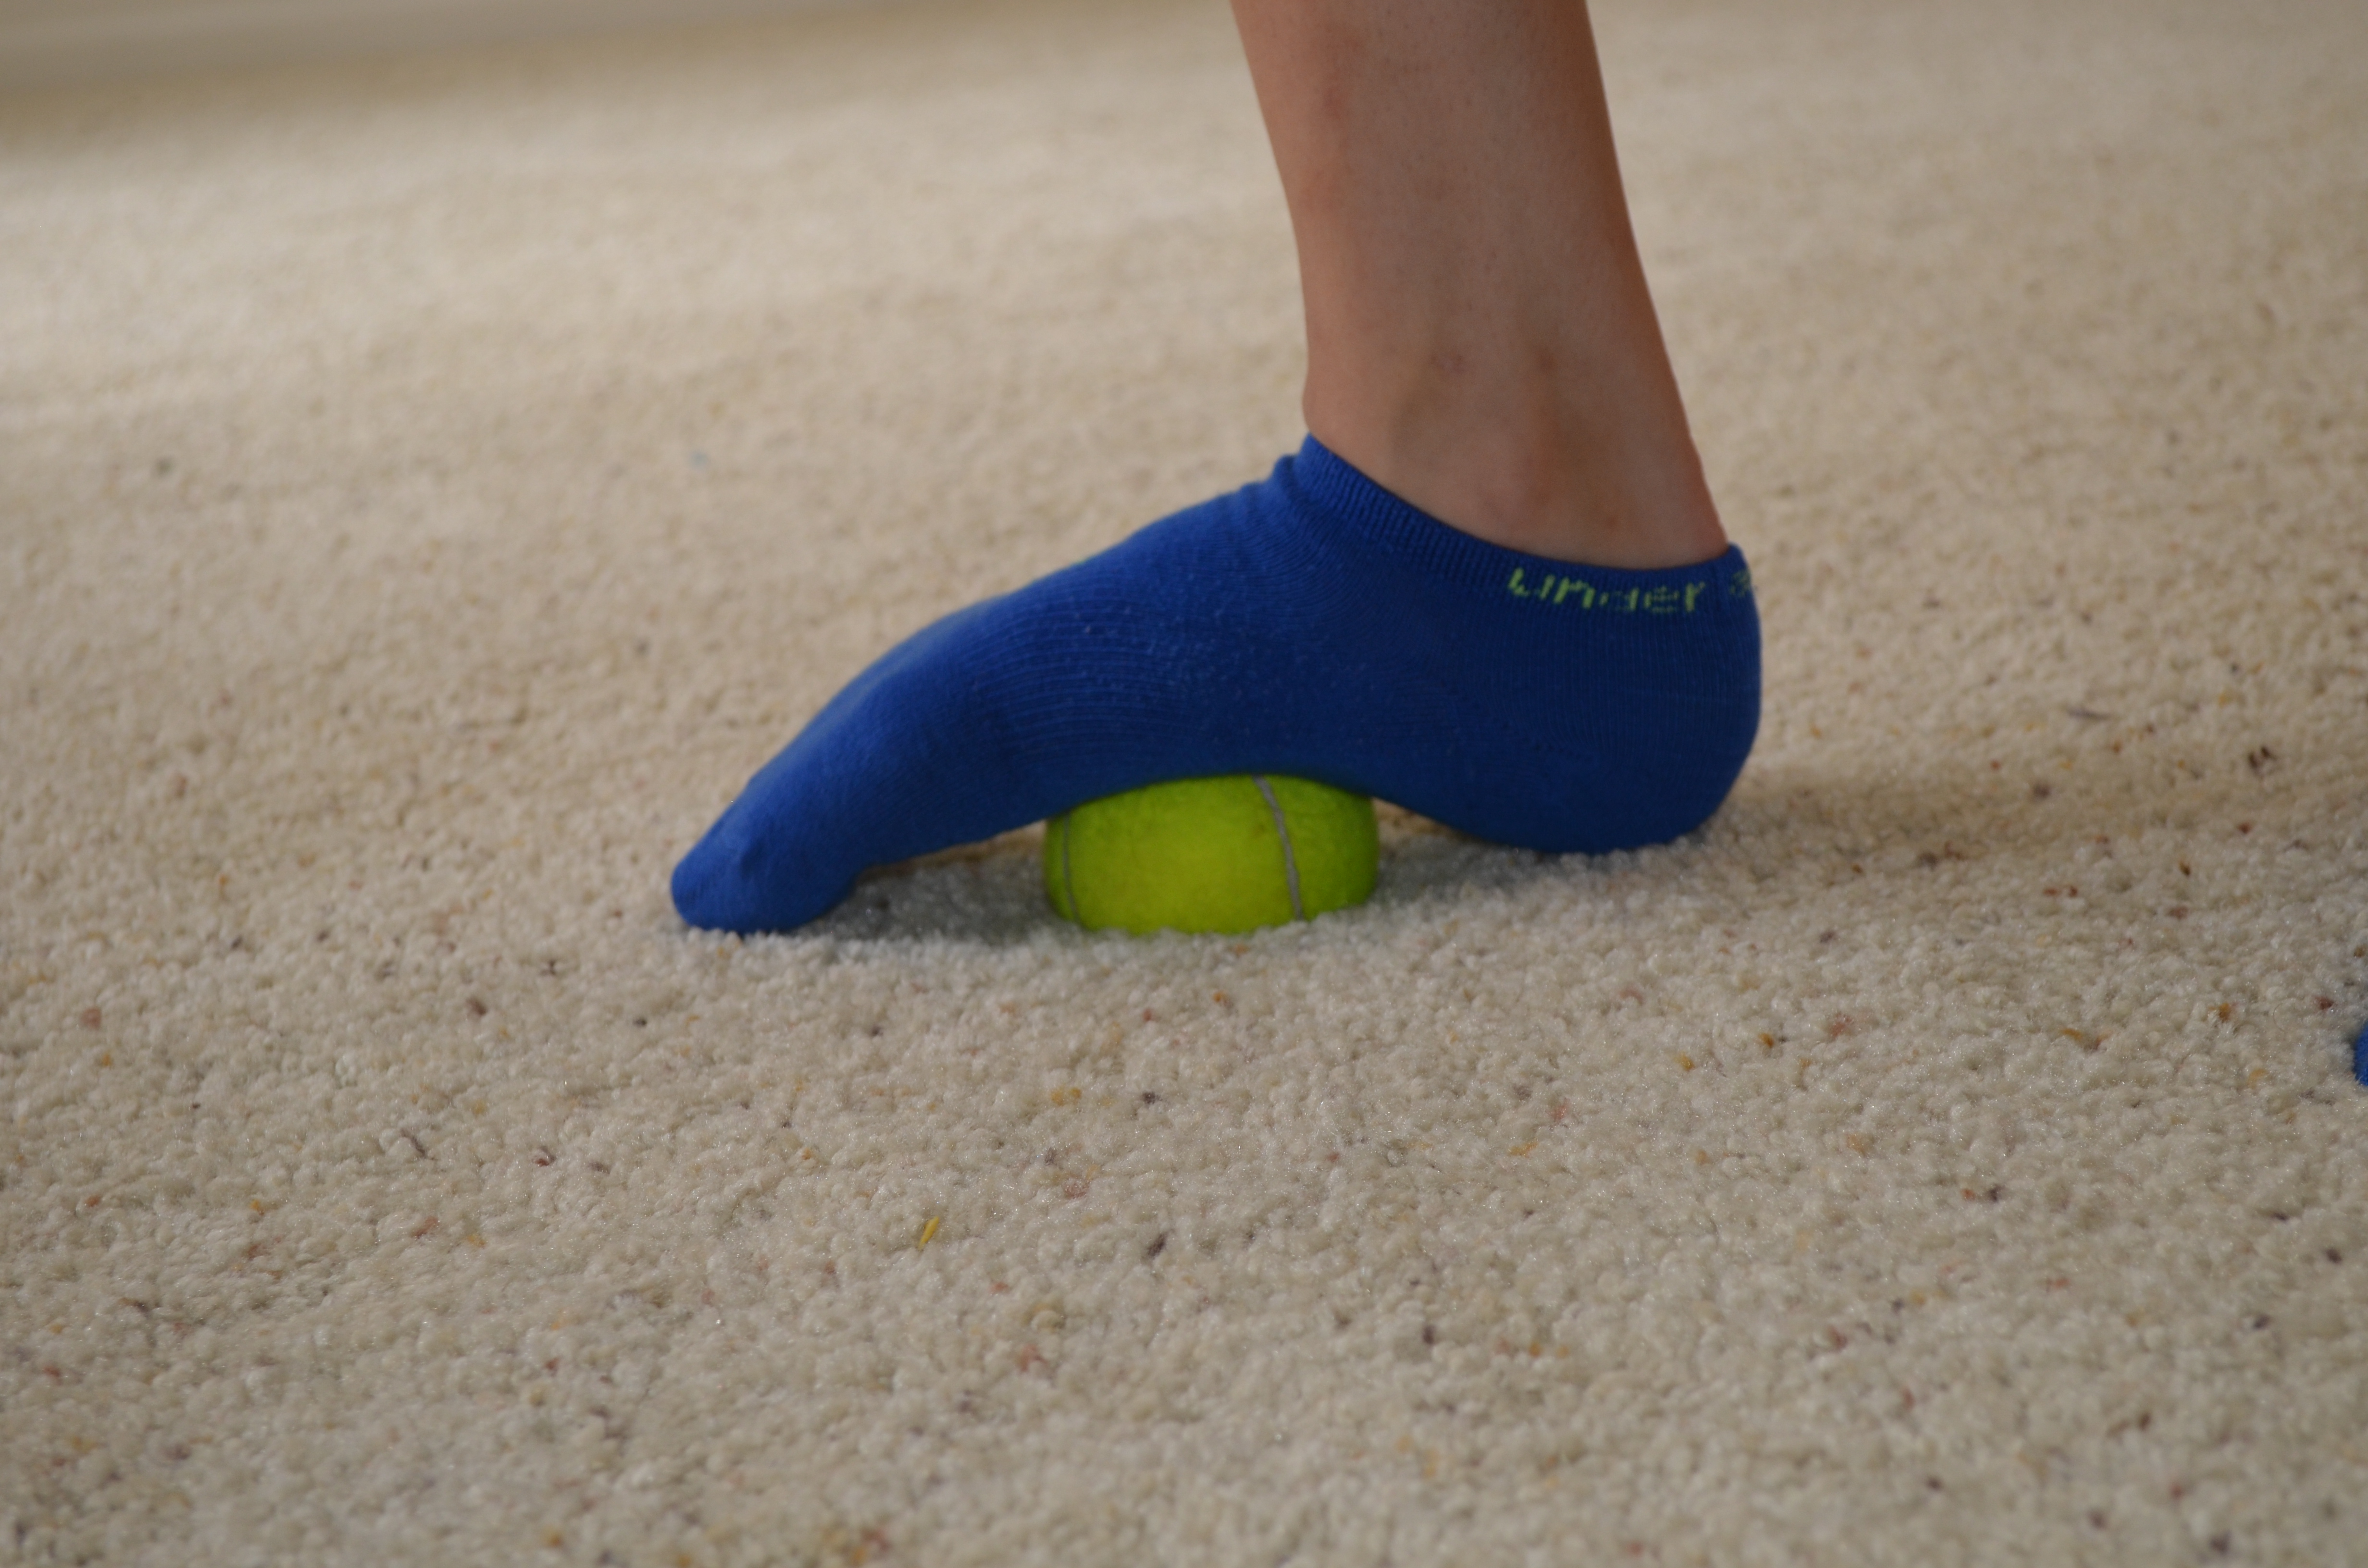
You also need to roll out the bottom of your foot no matter how much it hurts. The smaller and harder the ball you use, the more you dig in and the quicker you will get everything loose (AKA the quicker everything will feel better!).
Standing, place the ball under your arch. Press down into the ball and roll it all along the bottom of your foot. Hold on any tight areas. BONUS: Take a small water bottle in the refrigerator and freeze it. Then use the cold bottle to roll out your foot! The cold really helps alleviate the pain (both from the injury itself and the actual rolling out haha).
STRETCHING
You must stretch your calves AND the bottom of your foot.
To stretch your calves you can do Bear Squats or more traditional static calf stretches. To do a bear squat, start on your hands and knees. Then press back off your knees, driving your butt up to the ceiling and your heels down into the ground. Hold for a second and then relax back down to your hands and knees. Repeat for 10 to 20 reps. A great dynamic warm up stretch!
To stretch your feet, you can put your toes against a wall while keeping your heel on the ground. Lean forward into the wall.
Or you can flex your feet and sit back on your heels while kneeling on the ground. This stretch can even be added to the beginning of the bear squat so that you can stretch both your feet and your calves.
STRENGTHENING
A great foot strengthening exercise requires only a towel. Place a towel on the ground. Using your bare foot, scrunch the towel with your toes. You can also practice picking up the towel with your foot.
Doing these moves always remind me of the movie Die Hard….when the guy tells Bruce Willis to take off his shoes and makes fists with his toes. (Am I weird? Probably.)
For both of these injuries, you will want to use a lot of the stretches and mobility exercises outlined in the Ankle Mobility post (This post shows the stretches discussed here)! They will help you strengthen and stretch your feet and lower legs so you can move pain-free!
For more foam rolling techniques, check out this Trigger Point Video Library. And for a great recovery workout for runners, click here! This workout will help you prevent injuries and develop great strength to run further, faster.
NOTE: This post doesn’t include all of the prehab/rehab options out there. It also doesn’t address all the causes of these two injuries. See a PT if your pain is sever or persists without lessening while trying some of these easy home remedies.
It’s Never Too Late – Becoming a Beast at Any Age
I have many older adults that come to train with me who think that certain exercises, activities that they even used to do, are now out of reach….I find it is especially common among women.
But that simply isn’t the case.
Even as we age, our bodies are capable of so much more than we give them credit for.
Getting old doesn’t have to mean the end of being an athlete. It doesn’t have to mean accepting pain or not being able to do fun and crazy workout moves!
No matter your age, or even whether or not you were an athlete, you can become a beast. Yup…that’s right…you can become a beast at ANY AGE!
Really becoming a beast isn’t about developing more strength or even better movement patterns – it is about developing CONFIDENCE in yourself.
It is about not being intimidated and believing you CAN do it.
And for women, especially older women who may feel like there are things they can no longer do, the physical fitness realm can be intimidating, which doesn’t make becoming a beast very easy.
You hear fairly often how weight rooms are intimidating for many women. And honestly, for many they only become more intimidating with age.
Heck I’m sure many of you have experienced the dread and fear of walking into a busy weight room. I know I’ve seen it on many of the faces of women I train (before of course I win them over with my great sense of humor…just kidding…sort of…)
I mean…I get it.
Thinking about the gym I work in now, I could see how some of my older women are at first intimidated.
They walk in and there are professional MMA fighters and crazy people running around sweating and grunting. There are chains and tires and sledge hammers as well as other stuff that doesn’t even look like gym equipment lining the walls.
They see people doing handstands and swinging around gigantic kettlebells. And everyone is sweating profusely. (hey we don’t have air conditioning…there are very few people who don’t sweat even without air conditioning…I do know a few…but not many!)
Sometimes it just looks crazy. And there seems to be a lot of stuff going on that looks impossible to do. (And once the first shock is over, most of my older adults, especially the women, love the craziness, but that initial shock can truly intimidate.)
I mean…handstands at 60?
Heck many people aren’t doing handstands at 15 let alone 60!
But they aren’t impossible.
And the only reason I mention handstands is because that is one of those exercises that many women see and turn to me and say, “I can’t do that.”
I always respond the same thing, “Well have you tried to do one?”
The answer is always, without a doubt, “NO.”
Or better yet, “No. I’m too old!”
So they haven’t tried one, but there is no way they are going to be able to do one.
And somewhere along the line, they decided there is an age limit to handstands. (Even after all those videos of the 86-year-old gymnast!)
But doing a handstand, or any exercise like it, is truly all about confidence.
Yes, doing handstands requires strength.
But you would be amazed at the number of women who haven’t lifted that much and haven’t ever really done handstands that can do the second, or even third, level of the handstand progression on their first or second day.
And the best thing EVER is that look in their eyes when they are amazed at the fact that they can walk their feet up the wall and hold a true handstand.
It is all about confidence.
If we don’t believe we can do something, we aren’t ever going to attempt it.
We aren’t ever going to give ourselves a shot.
Yes, our bodies change as we age, but that doesn’t mean that all of a sudden we are restricted from doing a ton of things!
Aging doesn’t mean we have to accept immobility and pain. Aging can still mean running and playing! Heck, there are grandchildren to chase after!
There is no cap on improving your physical fitness. Aging doesn’t have to mean going downhill.
You can become a beast at any age and take on a ton of new physical challenges. I’ve seen it happen.
I have 60-year-old clients who have never been athletes, or really ever even worked out before, find joy in doing chain plank pulls (100 lbs chain plank pulls for that matter).

I bet you if you asked them if they’d ever be able to do something like that, they would have told you NO.
Or what about the woman who came in and lost over 50lbs and regained her ability to do cartwheels after not having done one since high school?
She wasn’t just always a super athlete.
Just because you aren’t a beast right now, doesn’t mean you can’t become one.
Give yourself a chance.
Tell yourself you CAN DO IT and start training today.
Age doesn’t have to mean we are limited! We can be beasts at any age!
If you have discovered your beastliness later in your life, share your story! Comment below and help inspire others to pursue their own “beastliness!”


