Blog Archives
A Full-Body Suspension Trainer Workout
The other day on Redefining Strength I wrote a post about 10 Great Suspension Trainer Exercises. Below is a full-body metabolic workout using some of those moves.
It just takes 30 minutes and will work your entire body! (Of course I recommend a good dynamic warm up with some foam rolling before hand (and after!) so maybe about 35-40 minutes…)

Full-Body Suspension Trainer Workout
WARM UP
Stretch and Foam Roll:
Calves/Shins
Quads
Hamstrings
Adductors
Glutes/Hips
Back/Lats
Chest/Shoulders
WORKOUT
Set a timer for 30 minutes and complete as many rounds of the circuit below as possible. Rest only as needed between exercises and rounds. Pick a variation of each exercise (and a rep number) that you can do without going to failure on any of the exercises. You want to be able to move from one exercise to another quickly. The point of this workout is constant movement.
CIRCUIT:
10-15 reps per side Balance Lunge
10-15 reps Inverted Row
10-15 reps Push Ups
10-15 reps per side Mt. Climbers
COOL DOWN
Stretch and Foam Roll:
Calves/Shins
Quads
Hamstrings
Adductors
Glutes/Hips
Back/Lats
Chest/Shoulders
How many rounds did you get in the 30 minutes? Record your number and try to beat it next week!
Note: Not sure how to do one of the moves above, check out these 10 Suspension Trainer Exercises for descriptions and pictures of each move!
Turkey Day Workout
I love doing a quick workout in the morning before all the celebrating begins.
It can be fun to be active with friends and family before you all sit down for a big meal.
It also just always makes me feel better to get moving on a day when I’m doing a lot of sitting and feasting.
So because I love a quick, fun and social workout on Turkey Day, here is a great cardio blast you can do anywhere.
Happy Turkey Day!

Turkey Day Workout
WARM UP
Stretch and Roll Out:
Calves
Hamstrings
Quads
Groin
Hips/Glutes
Back
Chest
WORKOUT
You will end up completing 10 rounds. Start with just the first exercise. Then repeat the first exercise and add in the second exercise. Then return to the beginning, doing the first, second and third exercise. After adding in a third exercise, return to the top and go down the list again adding in the fourth.
Each round, add another exercise until on the final round you do all 10 exercises.
CIRCUIT:
5 reps Super Crunch
10 reps Frog Hops
5 reps each side Sit Thrus
10 reps Burpees
5 reps Plank Jacks
10 reps each side Ski Hops
5 reps Dive-bomber Push Ups
10 reps each side Oblique V ups
5 reps each side T Push Ups
10 reps Tuck Jumps
COOL DOWN
Stretch and Roll Out:
Calves
Hamstrings
Quads
Groin
Hips/Glutes
Back
Chest
NOTES:
Take only as much rest is needed. Complete the 10 rounds as quickly as possible.
This is a great workout to make into a friendly competition. The first one to complete all the exercises wins. Of course that doesn’t mean sacrificing form to win!
EXERCISE DESCRIPTIONS:
Super Crunch – Lie on your back with your legs out straight. Crunch your upper body up as you draw your knees in. Come up so that you are sitting on your butt. Reach your hands to outside one knee. Then lie back down. Then crunch up and reach through your knees. Lie back down. Then crunch up and reach outside the other knee. Those 3 crunches equal one rep.

Frog Hops – Basically a squat jump except you are propelling yourself forward instead of up. So squat down and launch yourself forward, landing softly in a squat so you can repeat. Try not to rest when you land. Try to go right from one jump into another. If you don’t have room for these though, you can perform squat jumps instead.
Sit Thrus – Click the link for a description and pictures.
Burpees – You can do either modified burpees (aka no push up) or full burpees. If you do the push up, make sure it is a full good push up. Also only do the push up if you can continue to move quickly.
Plank Jacks – Start in a high plank on your hands and toes. Hands are under your shoulders and your feet should be together. Then jump your feet apart and then quickly back together. Repeat quickly until all reps are complete.
Ski Hops – Keep your feet together and squat down. Then with your feet together, jump side to side. Try to jump as far to each side as quickly as possible. Beginners may want to pause in a squat after each jump to balance.
Dive-bomber Push Ups – This move can be done from the knees by beginners or from the toes by more advanced exercisers.To do this from the knees, set up at the top of a push up with your hands outside your chest and your body in a straight line down to your knees. Sit back onto your heels as if doing a child’s pose stretch. Keep your hands in their original position. Then start to move forward back into the push up position, but keep your head and chest close to the ground as you go forward. Keep your upper body as close to the ground until your chest is in between your hands. Arch, opening your chest up toward the ceiling as if you are doing upward facing dog. Get a nice stretch at the top, making sure to press down through your palms and elongate your neck. Do not let your shoulders shrug up by your ears. Hold for a second and then sit back into the child’s pose stretch and repeat.

Modified Push Up
Oblique V ups – Lie on your side with your legs straight and together. Bring them to a slight angle in front of you. Lie with your bottom arm out in front of you at an angle. It will be under your body like you are going to prop yourself up on your side using it. Crunch up reaching your top hand toward your toes as your raise your legs up toward the ceiling. You will sort of prop yourself up on your arm on the ground to “v up.” Complete all reps on one side before switching to the other side.
T Push Ups – See link for description and pictures.

Tuck Jumps – Stand with your feet together. As you jump up, tuck your knees in toward your chest. Then shoot your legs back out to land softly on the ground. You are not squatting with this jump, simply tucking your knees.
Home Workouts – 15-Minute Lower Body Blast
Recently, I’ve been super into creating home workouts.
While I love going to the gym (heck I’m there almost every day anyway), there are just some days when even I don’t feel like making the special trip in if I’m not there to work.
But I don’t like skipping workouts.
And I really don’t think there is ever any reason to skip a workout other than your body truly needing a break because you’ve been pushing it hard. (Although hopefully you’ve scheduled in rest days so you aren’t technically “skipping” a workout when you take a day off since rest days are important to your success too!)
Actually the times when we want to skip our workouts the most, are the times when we need to do them the most – because workouts will improve our moods and release all that pent-up stress, frustration and even anger that we have.
Plus workouts can actually make us less fatigued and more focused.
But anyway, since one of the most common reasons, aka excuses, I hear for skipping a workout is that people don’t have time nor do they want to make a trip to the gym, I’ve created another quick home workout.
The other week I did one for the upper body and just this past week I did a home cardio workout.
Today is a great Home Lower Body Workout using only bodyweight exercises.
So if you are short on time and feel like skipping your workout, give this a try instead!
And “gasp” it only has two exercises in it! You don’t need to do 50 exercises to really work your body!
15-Minute Lower Body Blast
WARM UP (linked out to some stretches)
Stretch and Roll Out:
Calves
Quads
Hamstrings
Groin
IT Bands
Hips/Glutes (linked out to some great moves to loosen up the lower body and low back)
WORKOUT
Set a timer for 15 minutes. Complete as many rounds as possible in that time.
CIRCUIT:
5-10 reps per side Curtsy to Angled Front Lunge
8-12 reps per side Skater Hops
5-10 reps per side Standing Glute Stretch (or as needed)
COOL DOWN
Stretch and Roll Out:
Calves
Quads
Hamstrings
Groin
IT Bands
Hips/Glutes
EXERCISE DESCRIPTIONS:
Curtsy to Angled Front Lunge – Start standing tall with both toes pointing straight ahead to “12” on a clock. Start with your right foot. Cross your right foot back behind your left foot into a “curtsy” lunge. Your right foot will move back between “7” and “8” on a clock. Then beginners may need to come back to standing while more advanced exercisers will go straight from the curtsy lunge into the angled front lunge. So coming up out of the curtsy lunge bring the right foot forward and out into a front angled lunge. When you move into the front angled lunge, your foot will come to between “1” and “2” on the clock. Repeat the lunges, trying not to rest in the standing position. Complete all reps on one side before switching. One rep is both the curtsy AND the angled lunge.
While it may look like I’m lunging straight ahead, I’m stepping my right foot out between “1” and “2” on the clock.
Skater Hops – Start standing to one side. Hop laterally with one leg. Land and balance on that leg letting the other leg swing back behind. Try not to touch the other toe to the ground. Then jump back to the starting position. Try to jump as far as you can each way while still moving quickly. The faster and farther you jump, the harder the move will be. Beginners should start by jumping and balancing for a second before repeating.

Skater Hops
Standing Glute Stretch – Standing grab one of your lower legs with your knee bent to about 90. Pull from under you knee and foot/ankle. Pull your lower leg in toward your chest. Hold for a second and then repeat on the other side. You do not want to perform a static stretch. This move is meant as “active rest.” Perform only as many as needed to feel recovered enough to repeat the circuit. If none are needed, go right back into the Curtsy to Angled Front Lunges. You may also sub out this move to stretch out your groin or hip flexors if those are tight instead.
Home Cardio Workout
I’ve said before I hate cardio…But that really isn’t completely true.
I just hate long, slow cardio. SO BORING.
And it also kind of makes me mad that everyone thinks that they either need to go for a jog or hop on a piece of cardio equipment to get their cardio in.
Because you don’t.
You can easily do a super tough and fat burning cardio workout at home with very little space!
For example you can do the towel taz….
The other day I actually did one a great at home cardio workout although I didn’t do the towel taz.
I didn’t feel like going in to the gym, but I wanted to workout. I also didn’t feel like doing a long workout since I had a lot to do.
AND on top of those things, I didn’t have a lot of space to work with and had to do it outside the kitchen since Ryan was holed up in the office doing work.
And this is what I did:
Home Cardio Workout
Stretch and roll out all tight spots (hips, calves, quads, upper back, lats were my targets)
CIRCUIT #1:
3-5 rounds:
20 seconds each exercise
20 seconds rest between rounds (beginners may need more rest take up to 1 minute between rounds)
Burpees
Sit Thrus
Super Crunch
super crunch
2-3 minutes rest between circuits
CIRCUIT #2:
3-5 rounds:
20 seconds each exercise
20 seconds rest between rounds
Skater Hops
Mt. Climbers (can use a towel or sliders if you have them)
Cherry Bombs
2-3 minutes rest between circuits
CIRCUIT #3:
3-5 rounds:
20 seconds each exercise
20 seconds rest between rounds
Split Squat Jumps
Plank Hip Dips
Circle Crawls
split squat jumps
2-3 minutes rest between circuits
Stretch and roll out anything that is tight when done.
Now this is cardio I like.
What’s your favorite home cardio workout?
Bodyweight Workout Routine – Slowing Down The Tempo
Ok so I’m tired of people telling me that they don’t have time to go to the gym and, therefore, they don’t have time to go to the gym.
Here is a workout that DOESN’T require the gym…aka it doesn’t require ANY equipment. And it will challenge even the most advanced lifter!
I’ve mentioned before that there are a ton of ways to advance moves WITHOUT using weight. I’ve shown you more difficult variations of moves…like single limb moves. I’ve shown you how to challenge yourself using a towel.
And now I’m going to show you how to create a challenging workout by slowing down the tempo of your repetitions. Each exercise is done SUPER SLOW. While all the tempos are slow, the emphasis is put on different parts of the movement so pay attention to what the tempo says!
Total Body Bodyweight Workout!
WARM UP
Roll out any particularly tight spots and do dynamic stretches for calves, hamstrings, hips, core, chest, shoulders, and upper back.
STRENGTH
Perform 3-4 rounds of each superset. Complete all rounds before moving on to the next superset. Rest for 1-2 minutes between each superset.
Superset #1
TEMPO 5/0/1 8-12 reps each side Single Skater Lunge (5 count squat down toward ground, no pause at bottom and quick push back up. Like a single leg deadlift EXCEPT that as you lean forward and hinge toward the ground you are actually going to bend that standing leg as low as you can. So it is a combination deadlift and squat. The back leg doesn’t need to stay straight.)
TEMPO 1/5/1 8-12 reps Posterior Plank (Quick up, 5 count hold at top and quick back down. To do this move sit on the ground with your legs out straight and your hands behind you. Point your finger tips toward your butt. Lift up onto your heels and hands, keeping your legs straight and leaning your head back at the top. Get your hips up as high as possible. To even advance further, keep the tempo slow and perform a single leg plank.)
Superset #2
TEMPO 5/1/5/1/5/1 5-10 reps Push Ups (Hold 5 seconds at the top of the push up. Lower down to midway of the push up and hold 5 seconds. Lower down to the bottom and hold 5 seconds. Do not relax on the ground at the bottom. Push quickly back up to the top. You can do an incline push up or push up from your knees to regress. Choose a variation that you can do for at least 5 solid form push ups!)


TEMPO 5/1/5 Slow Skater Side Lunges (Sink down into a low side lunge. You are going to move slowly from side lunge to side lunge. Do not let your butt come up in the middle. The tempo will be a five count to move from one side to the other. Do not pause more than a second on each side.)
Superset #3
TEMPO 1/3/5 8-12 reps each side Single Leg Glute Bridge (Quick 1 second up, hold 3 seconds at the top and slow 5 count lower down to the ground. This move can be regressed to a two-leg bridge OR progressed to a bridge with your feet up on a table. Keep the tempo no matter which you do!)
TEMPO 1/5/1 8-12 reps Corner Row (Quick press out, hold 5 seconds in scapular hold and lower back down. This is basically a scapular hold with movement. Set up in a corner with an elbow on each wall as if you are going to do a scapular hold. Relax against the wall and then press up into a scapular hold on your elbows. Hold there in the scapular hold and then lower back down to the wall.)
COOLDOWN
Stretch out and roll out hamstrings, hips, glutes, chest, shoulders and upper back.
All of these moves are challenging…both physically and MENTALLY. It is always a mental challenge to force yourself to move slowly when your muscles are burning and you just want to get it over with!
Enjoy! And even try slowing down the tempo on some of your other favorite moves!
Mommy and Me Workout
Happy Friday!
Yesterday, one of my beautiful soon to be sister in laws, Jamie, and her baby, my nephew Cooper, came in to workout.
Cooper seriously loves the gym.
He sees it as one big playroom. He is obsessed with balls and we have balls in every shape, size and color all around the gym.
The last time Jamie brought him in when she worked out, I carried him around as I coached so that she could workout undistracted. (Actually I grabbed him up and ran off with him before Jamie even had a chance to put him down….)
Today though she joined me during my workout with a group so I didn’t really have the chance to watch him.
And, of course, she couldn’t just put him down and allow him to crawl around because then he wouldn’t literally get into everything. And trust me…he is one fast bear crawler!
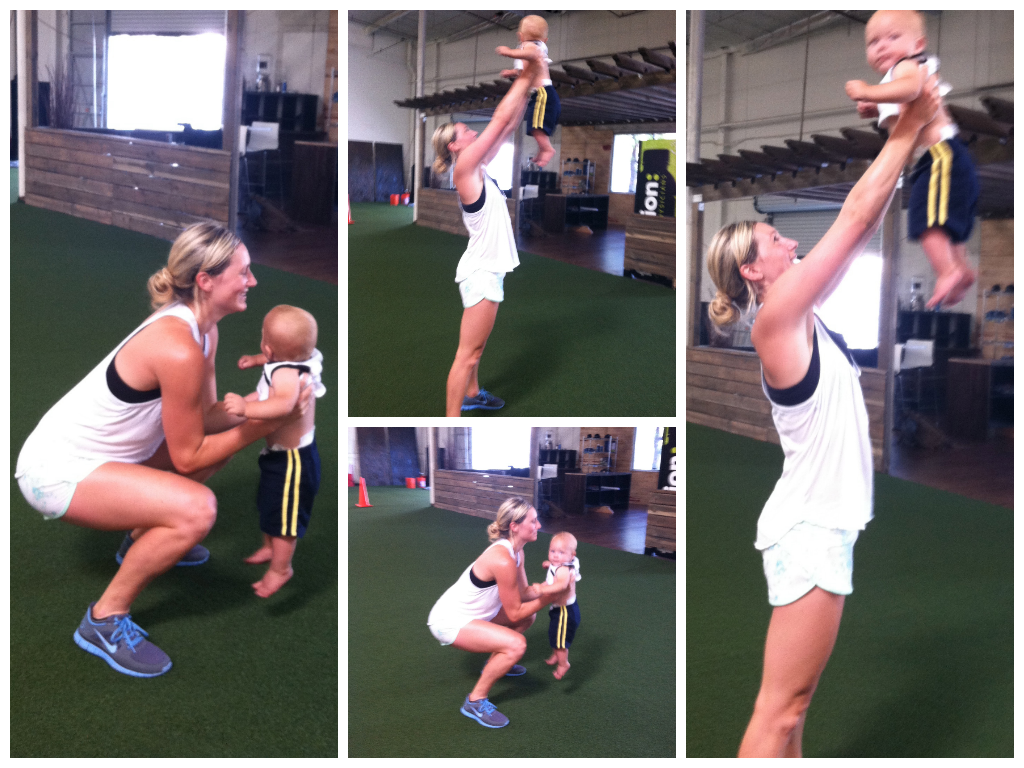
So because babies get into everything and Mommies need a chance to workout, here are some great Mommy and Me exercises demonstrated by the beautiful Jamie and Cooper! (I think Cooper had even more fun than Jamie did!)
Mommy and Me Workout:
Make sure to first roll out any tight areas and stretch and warm up. Then get ready to have some fun!
Strength:
3-5 Rounds:
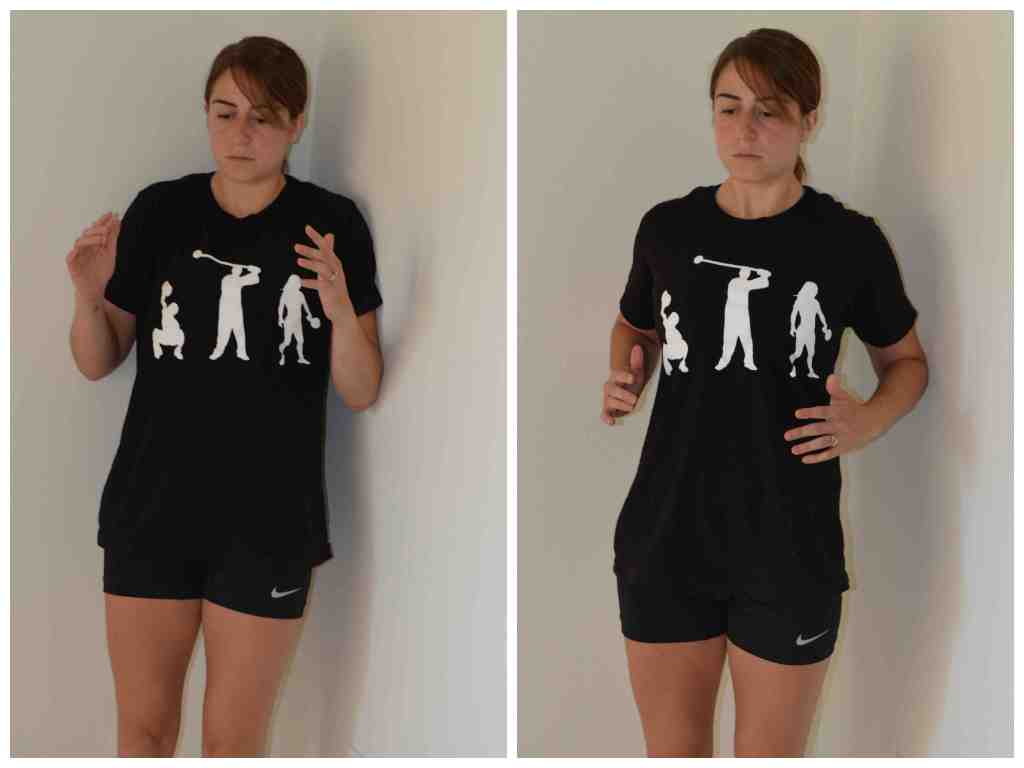
10 reps each side Baby-weight Step Ups

30 seconds Baby-weight Overhead Carry
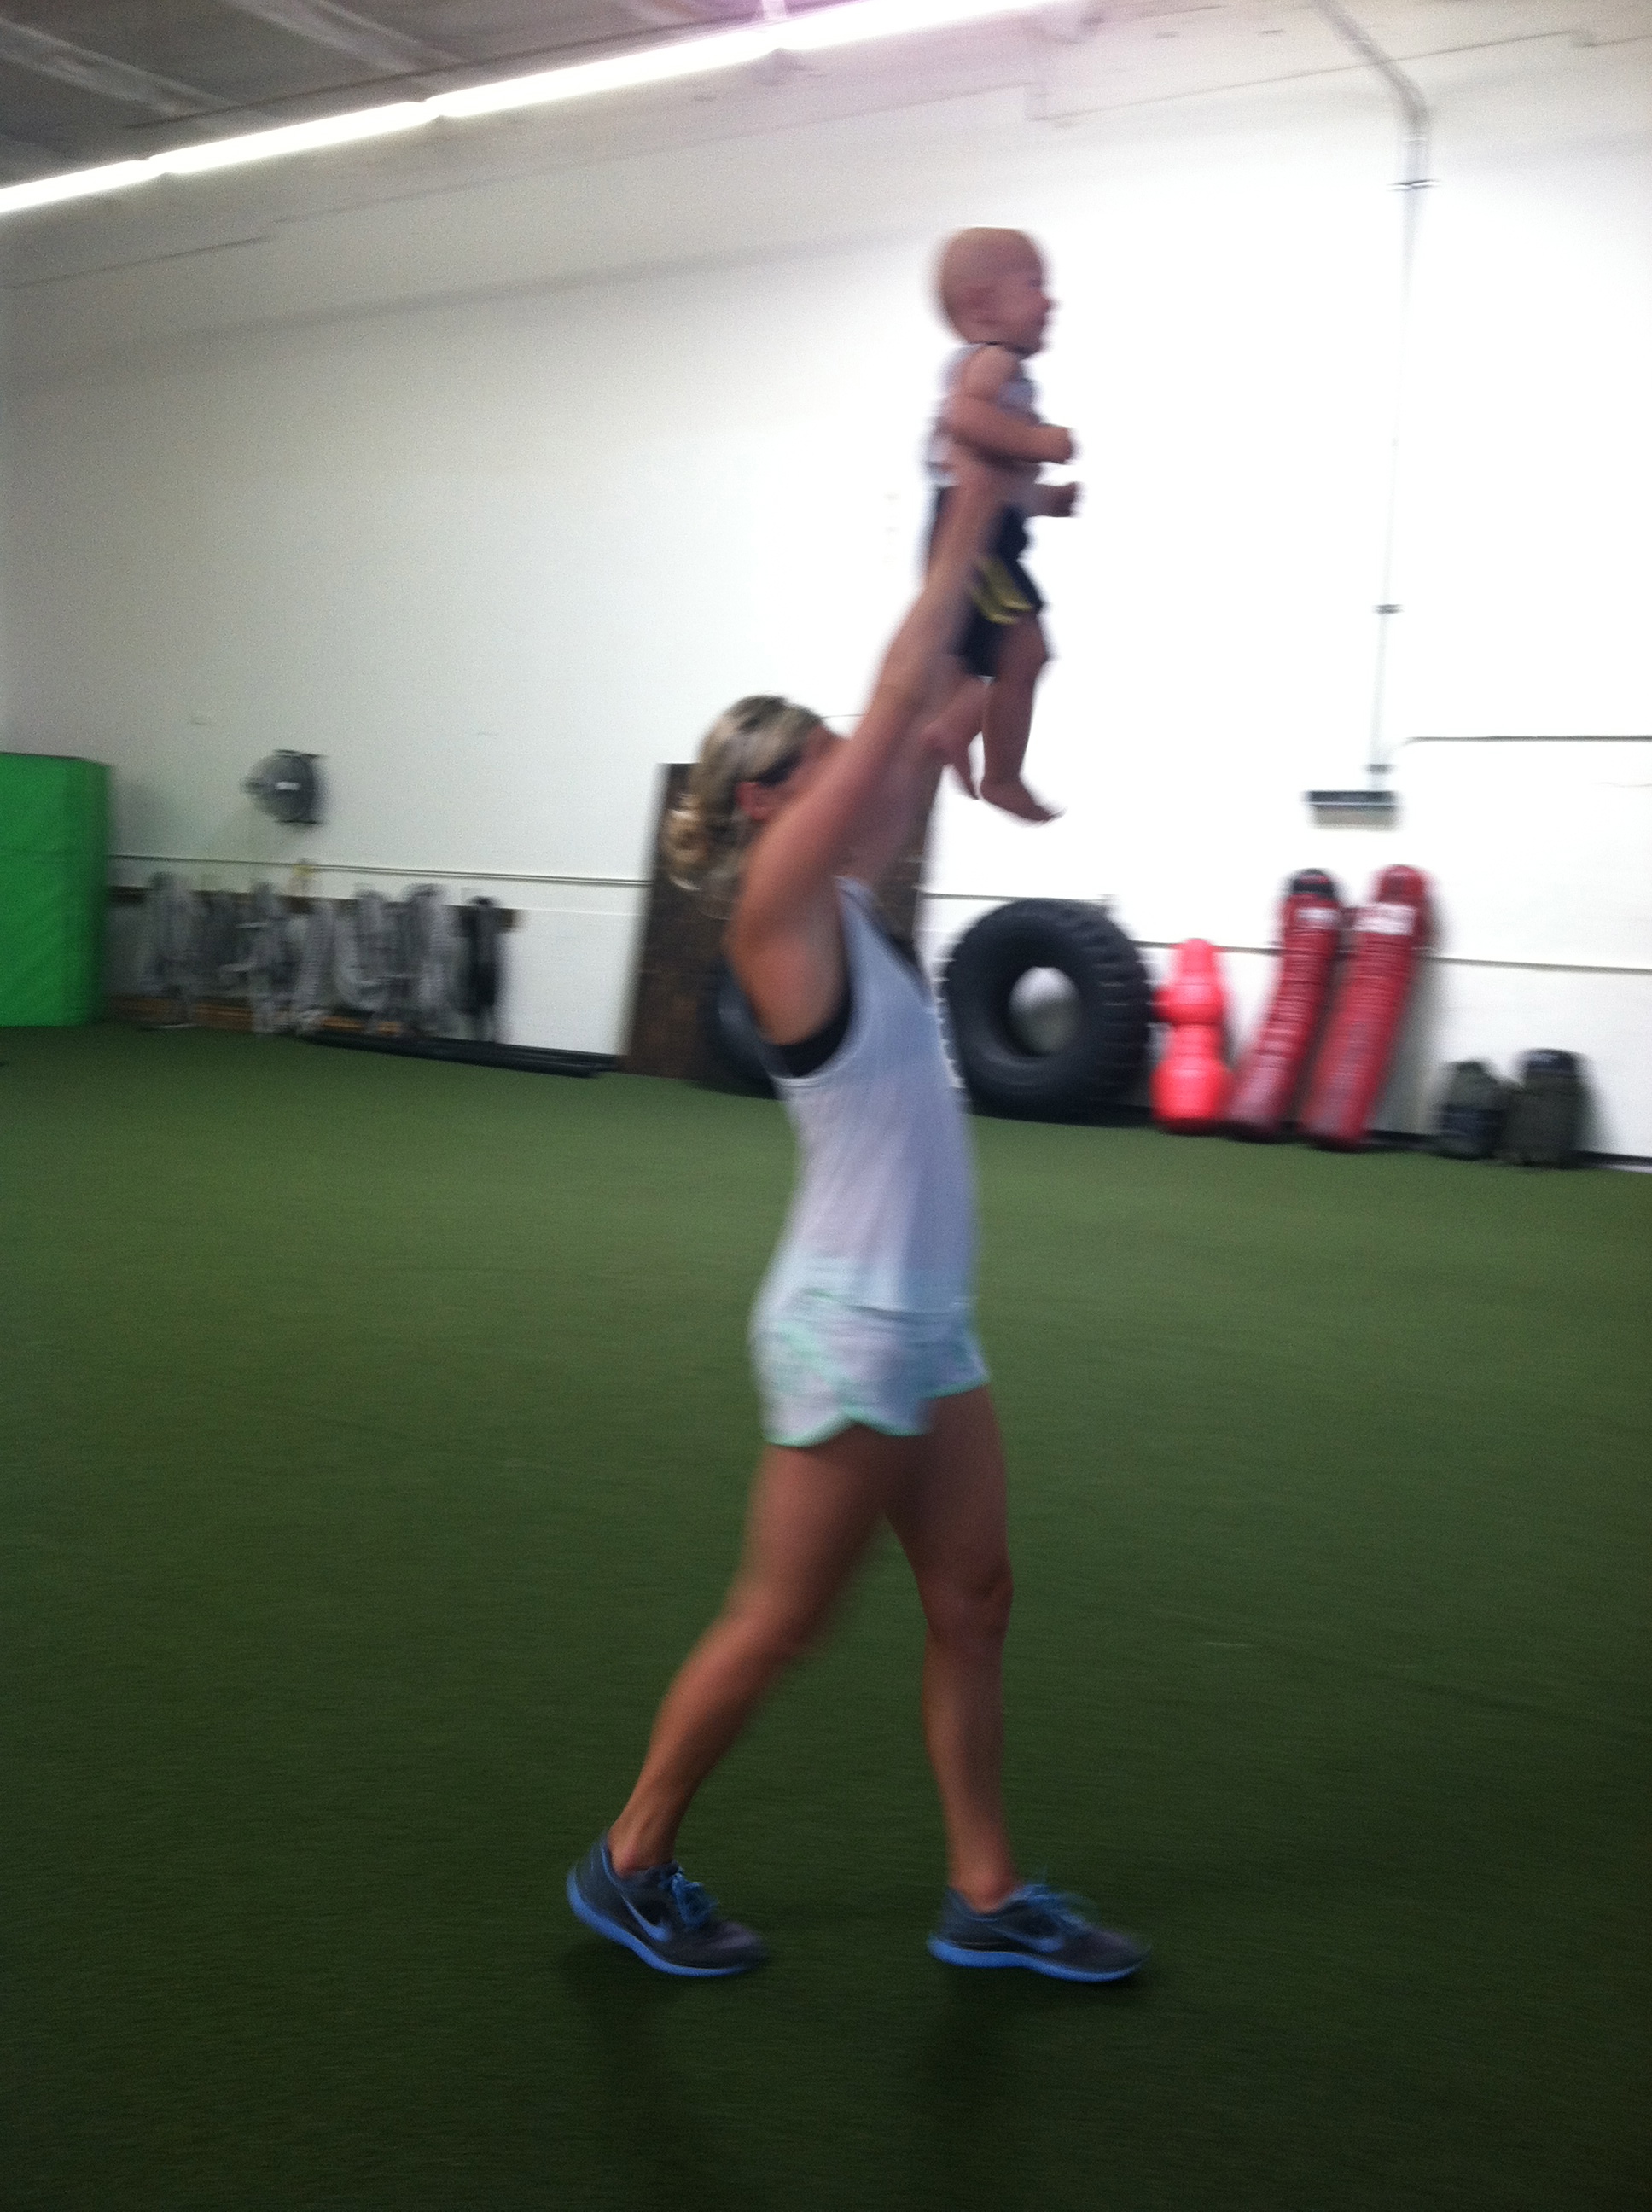
Walk and hold overhead
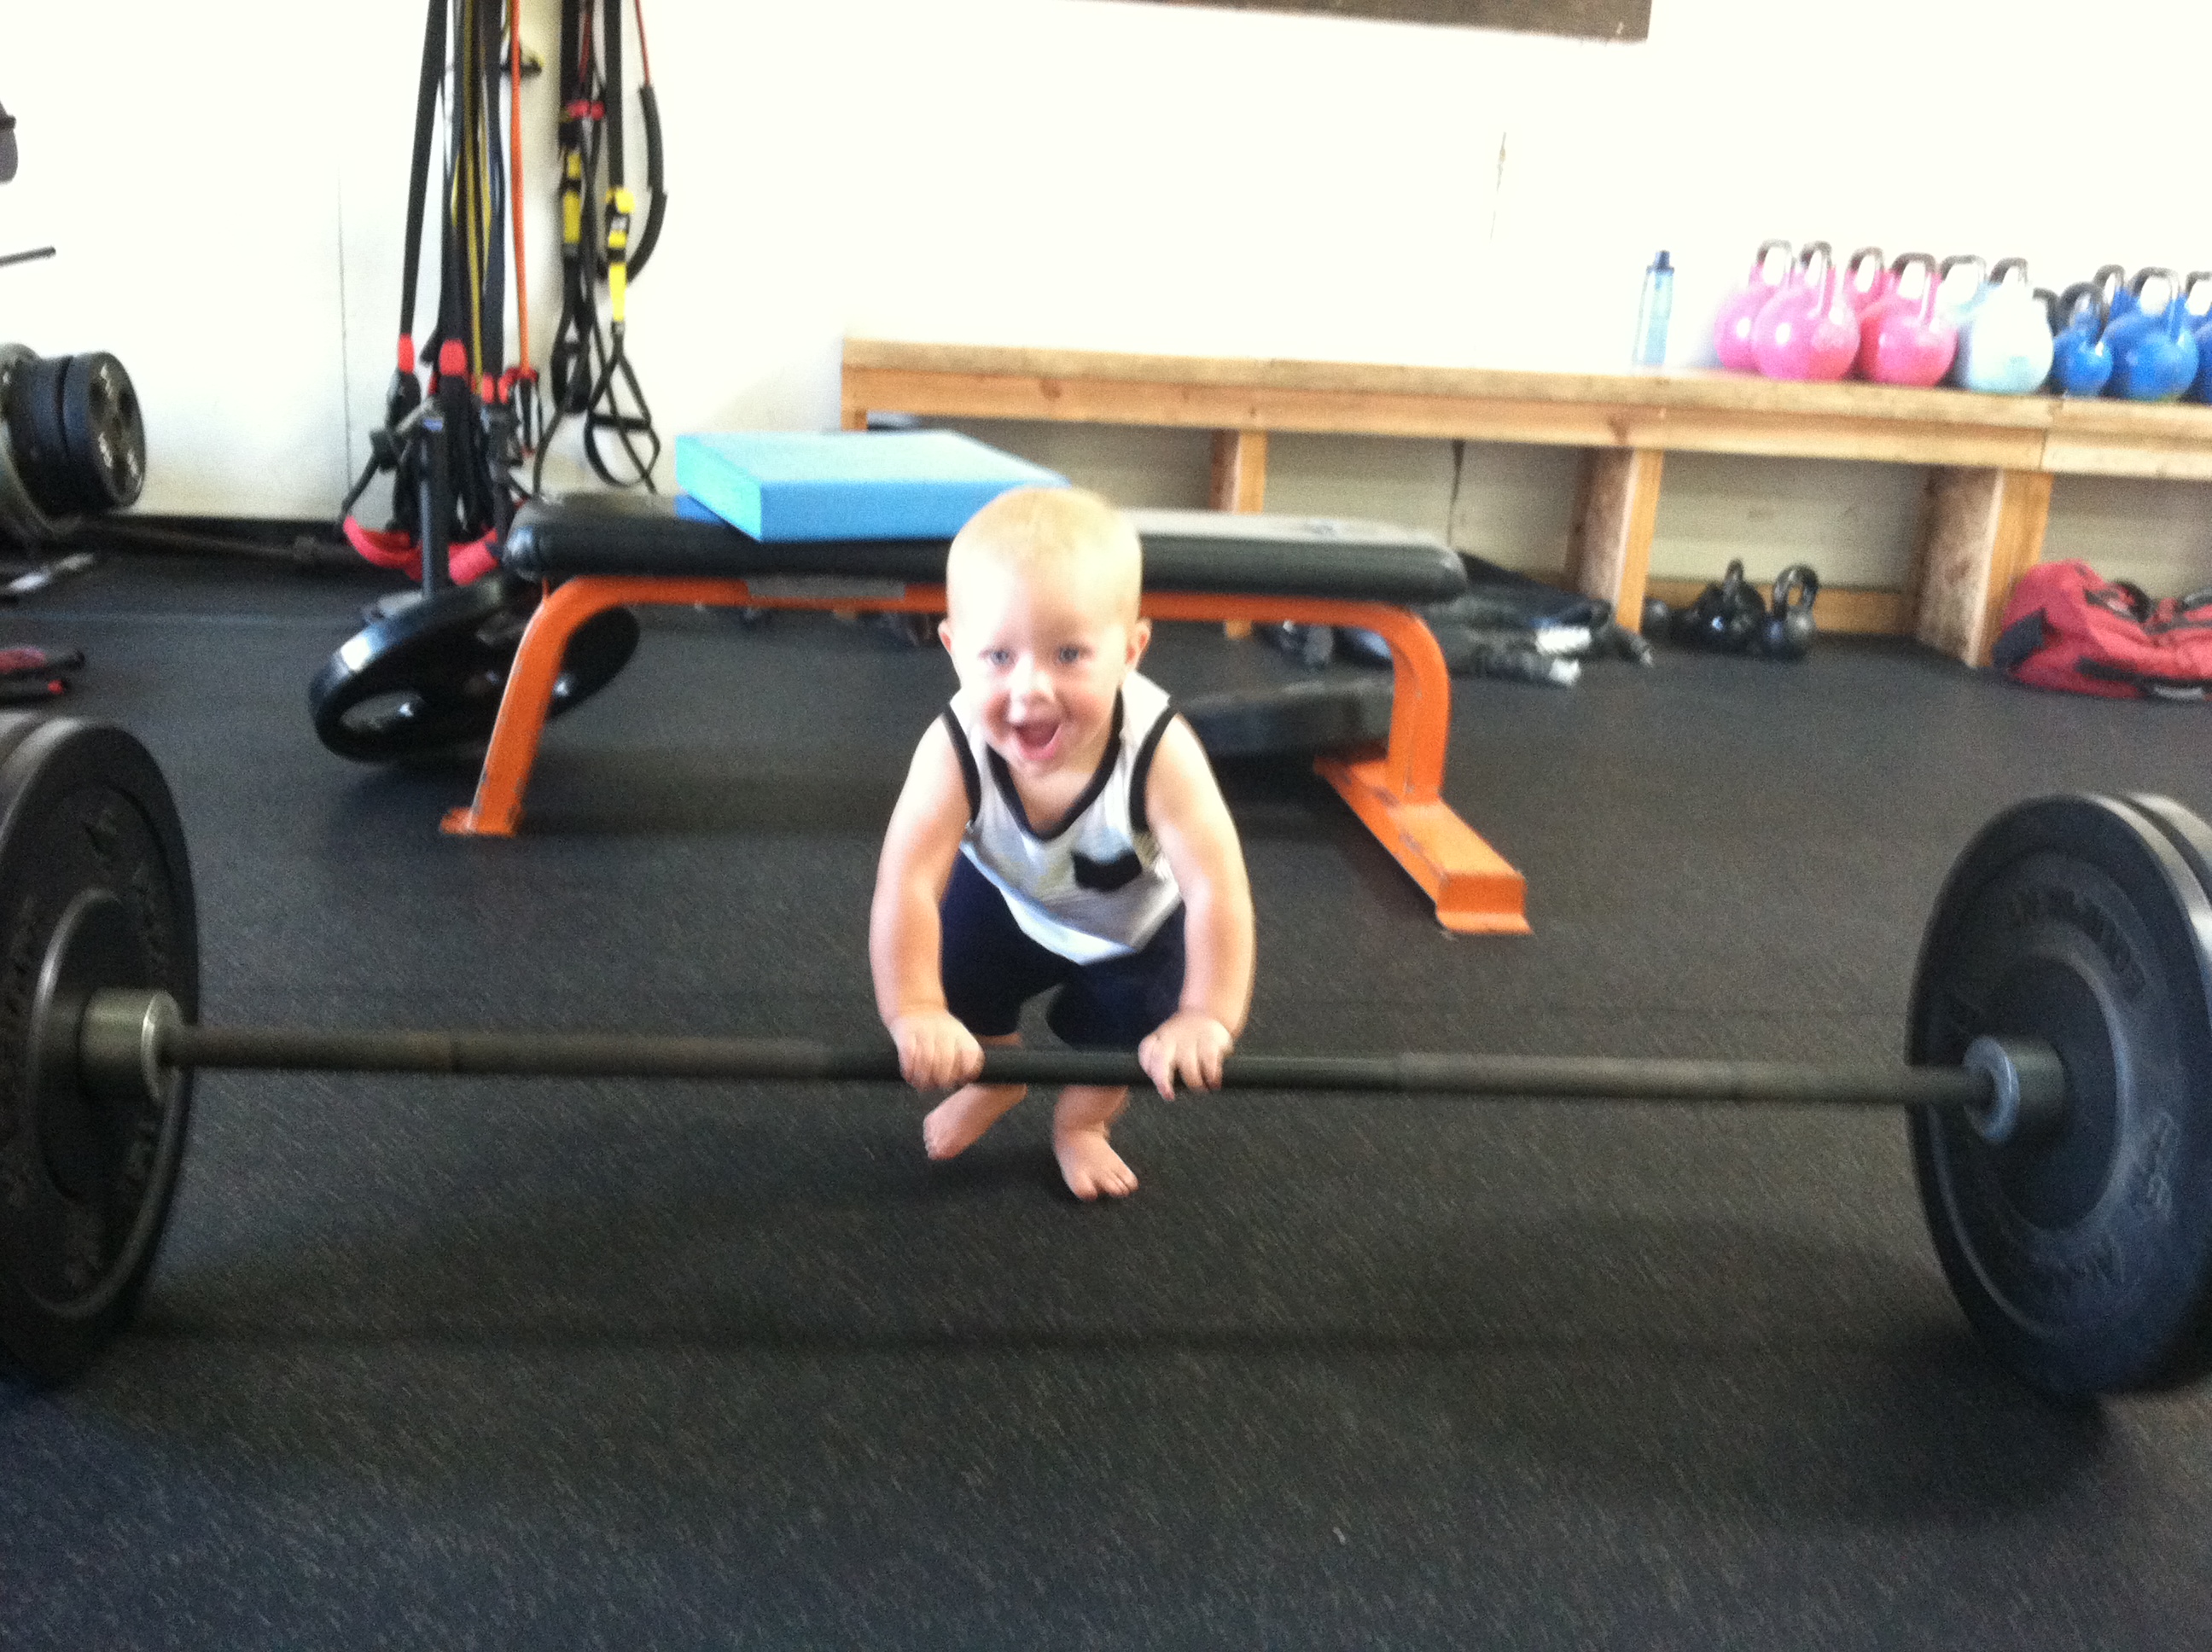
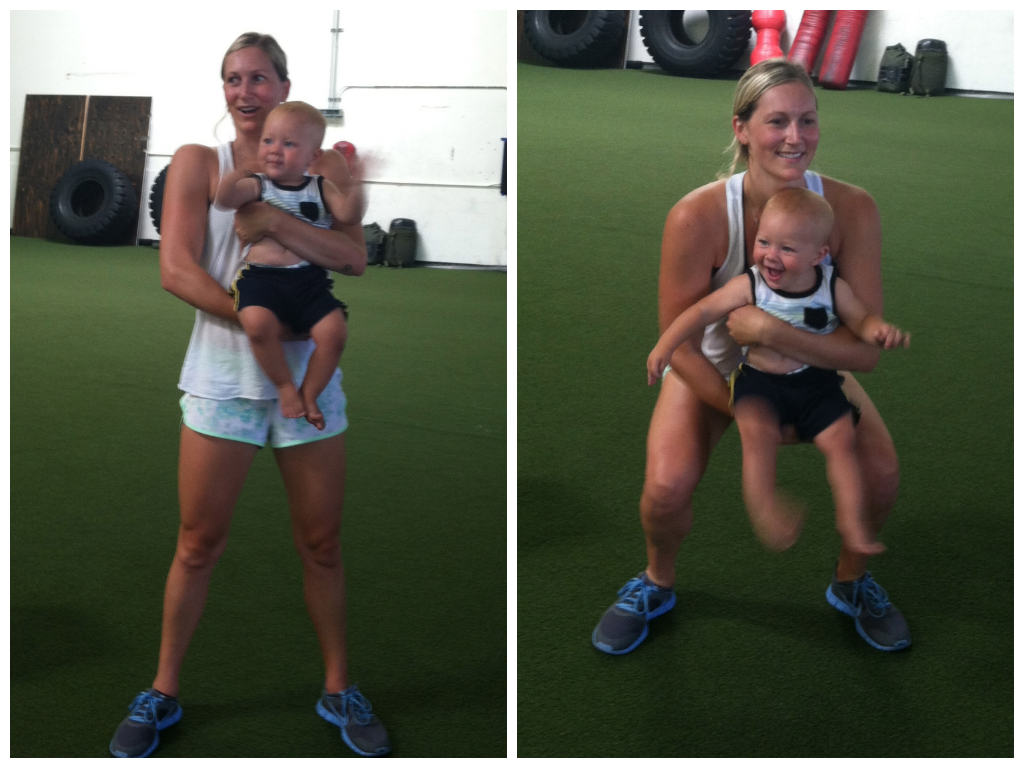
15 reps Baby Front Squats
15 reps Baby-weight Lying Chest Press

10 reps Baby-weight Squat to Press
10 reps each side Baby Russian Twists
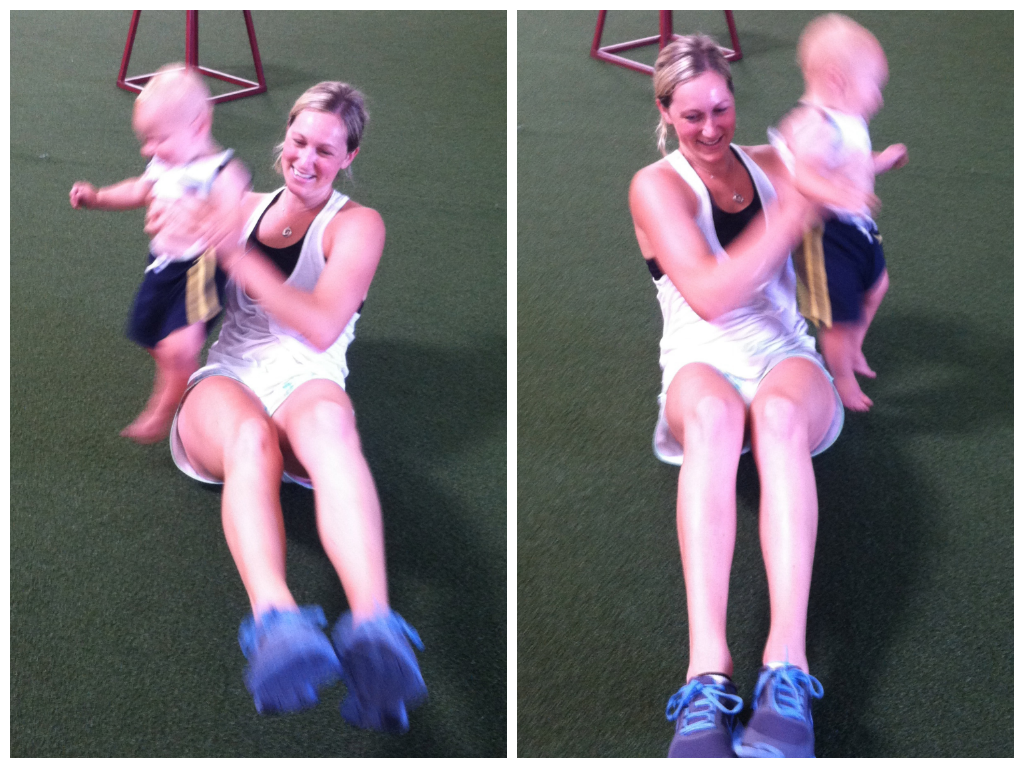
Conditioning:
3-5 Rounds:
20 seconds Bear Crawl Race
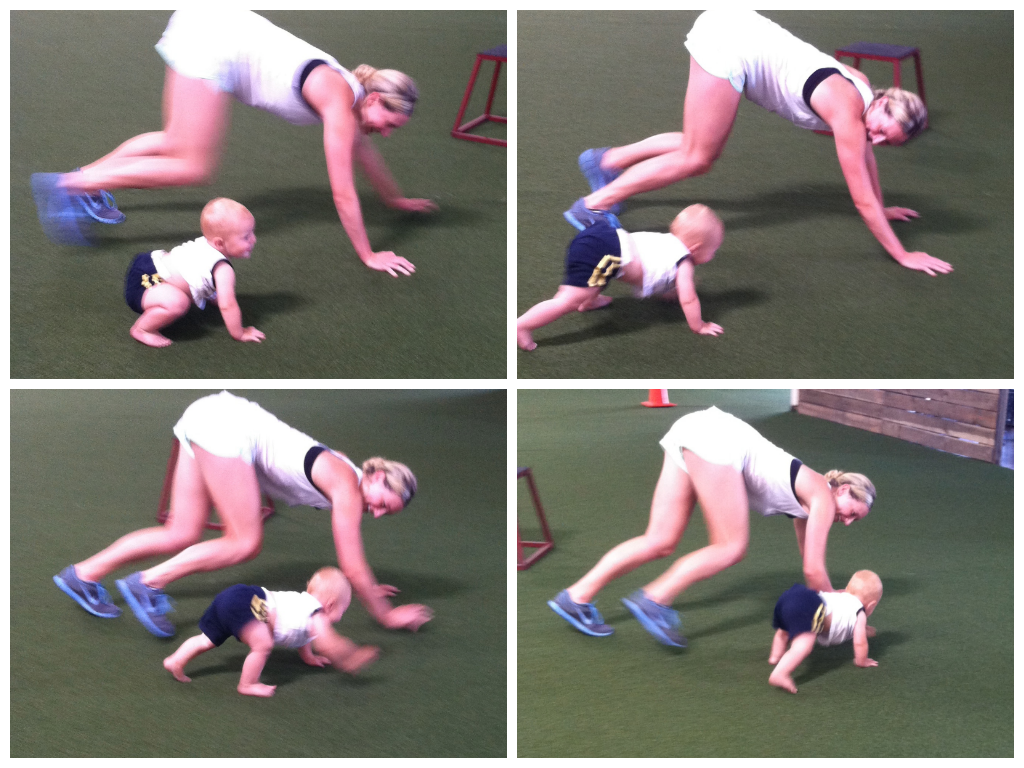
10 seconds rest
20 second Baby-weight KB Swings
10 seconds rest
A seriously fun workout. And probably the best part of all was that Cooper just learned how to clap so he kept cheering Jamie on!
Hotel Room Workout
Generally when I travel I don’t worry about workouts since I usually just plan out my progression so that my vacation is my recovery week.
I make sure I’m always active during vacation, taking casual walks or just goofing around, but I generally only workout if I really feel like it.
HOWEVER, I do have a number of clients who travel often and therefore like to do workouts on the road so that they stay in a routine.
And since hotel gyms are so hit or miss, I think it is best to always provide workout options that can be done with only the little space you have in your hotel room.
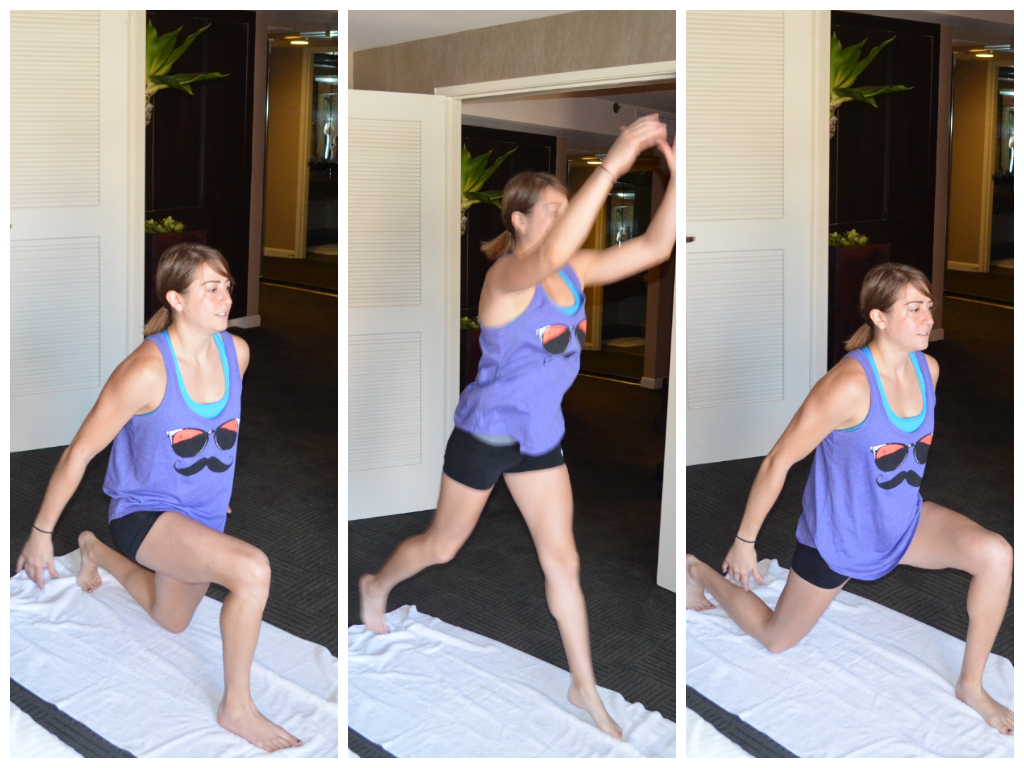
Here are 10 moves to use in your Hotel Room Workout! (I recommend putting down a towel instead of cuddling with the ground…just saying….) I used all of these in a great full body workout while staying in Palm Springs last week.
1 and 2. Split Squats (Stability, Strength and Power) – There are three great ways to use the split squat in your hotel room workout. You can do a split squat hold, a split squat with reps on each side or a split squat jump. Sometimes I even combine two into one, like I’ll do a 20 second hold followed by 10 reps on the same side. To do a split squat, step one foot forward into a wide lunge stance. Bend your knees as if you are kneeling onto the ground. Hold with your back knee just barely off the ground or perform reps, moving up and down. Do not step your feet back together. Keep the wide stance until all reps are completed. To do the split squat jumps, start in a lunge position and then jump up and switch to a lunge on the other side. Beginners may want to start with alternating step back lunges instead of split squat jumps to lower the intensity and take out some of the impact.

For the hold, you would hold at the bottom. For reps, go down and up.
3. Wall Sit – A very traditional bodyweight move, but also a super tough one. A great way to work your legs! You could even add some variety to this move by lifting one leg off the ground. Or if you wanted to add some weight, you could always hold your suitcase or something on your lap….I love to do this move followed by either bodyweight squats or even squat jumps. To do a wall sit, sink down so that your knees are bent to 90 degrees and your back is pressed solidly into the wall. Beginners may not want to sink as low or hold as long.

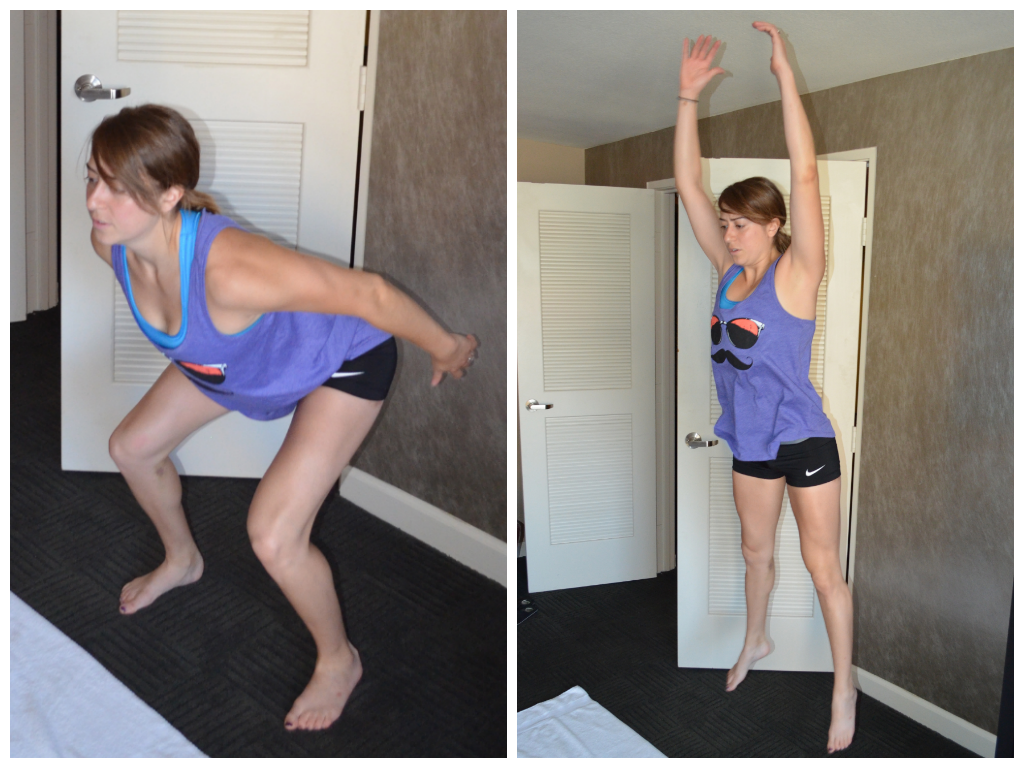
4. Squat Jumps – Another traditional cardio/leg move, but I love to pair it with a wall sit or even a bodyweight squat. The best way to turn your legs to jello without using any weight. While this move is a “squat” jump, you don’t want to squat too low when you prep for the jump. It really should be more of a combination hinge and squat then full on squat. If you squat to low, you will actually reduce the amount of power you can generate. Make sure that you are also driving up off your heels when you jump and not just staying on your toes. Also, focus on SOFT landings. Landing softly from toe to heel with knees bent is important to protect the knees. You shouldn’t ever land with your legs straight.
5. Planks (Side and Front) – I love using isometric moves in workouts especially when I don’t have a lot of space. Holding a plank is one of the best ways to work everything from your shoulders to your knees, especially if you really focus on keeping everything super tight. I like doing planks from my hands. You can do this move from your forearms and/or knees to make it easier. Feet should be together and you should squeeze your legs together. Your butt, quads and core should also be tight. Don’t let your shoulders get up by your ears. Retract your shoulder blades down and back. If you are contracting as hard as possible, you should be able to make yourself shake! Hold for 30 seconds to 1 minute. You can also do a side plank from your hands (an easier version would be from your knees or your forearms or both). To make the side plank harder, raise the top leg. Do not let your chest rotate toward the ground with the side plank. Also make sure to really keep the bottom hip up off the ground. A great way to isolate each side and work the obliques. Plus the leg raise really helps you work your glutes! (Sometimes I even like to hold the plank position and then do push ups….)
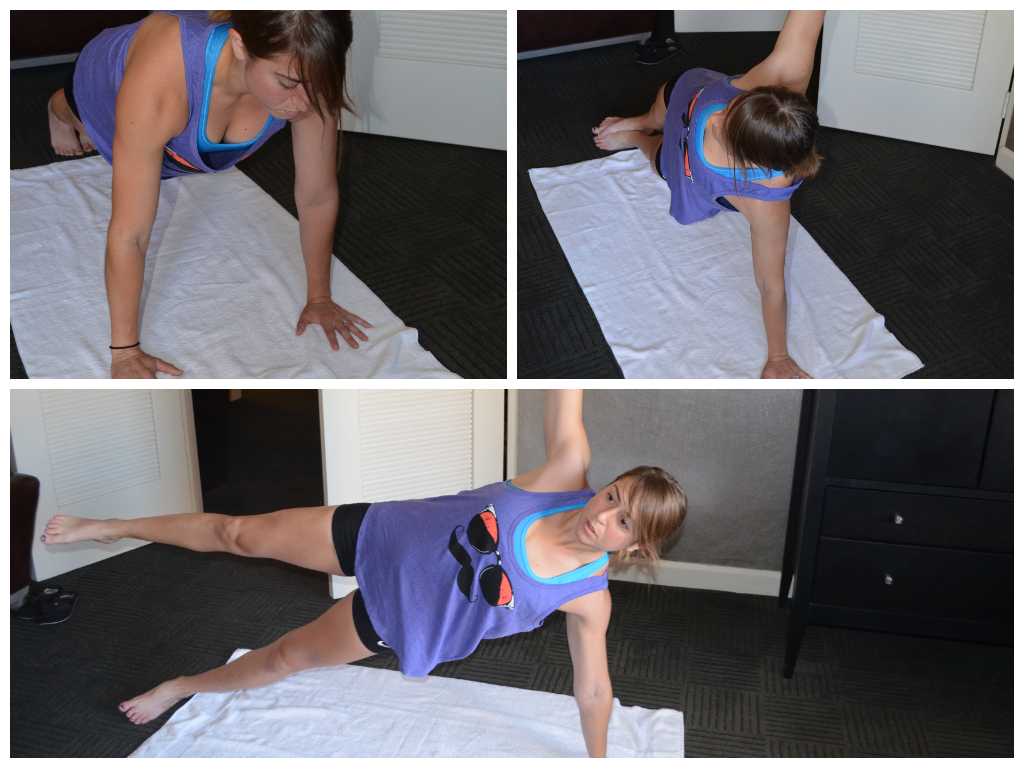
6. Plank with reach thru – A great core and shoulder stabilization move. Set up at the top of a push up from either your knees or toes. Reach one hand under the other armpit as if you are reaching toward something on the opposite wall. Then rotate open toward the ceiling in a side plank. Make sure to keep your hip down and really reach underneath and through. You aren’t simply patting yourself on the back…You are REACHING.

7. Plank with reach back and out – A great hip hinge and core move (Also deceptively tough). This move can be modified in a couple of different ways. Beginners will do this from their knees and reach back between their legs and then out. Intermediate exercisers may do this from their toes with no reach out. And advanced lifters will do the reach back and out from their hands and toes. To do this move, set up on your hands and toes. Reach one hand back toward the opposite ankle. Your butt should go up in the air. Then reach back forward, tightening your core as you drop your hips a bit and extend out. From your knees and hands, you will sit back as if doing child’s pose and reach between your knees. Then moving into a modified push up position, reach out with the hand that just reached back.

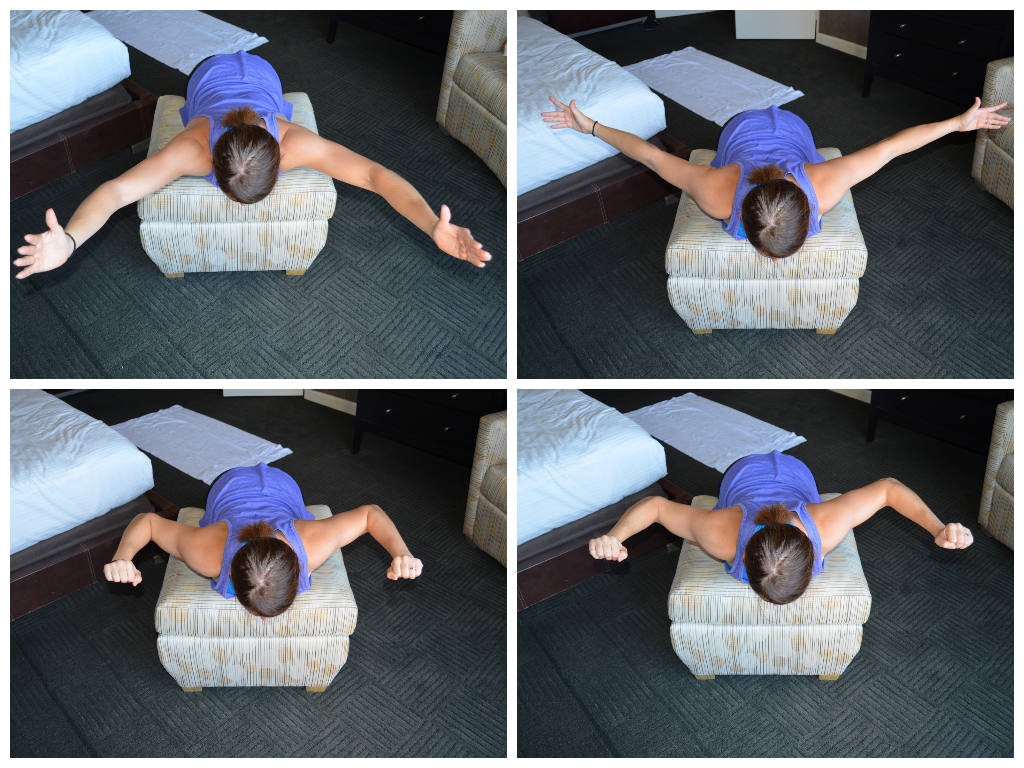
8. YTWLs – I show this move on a little foot stool, but it can be done on a bed or even from the ground if your room doesn’t have a foot stool. YTWLs are a great way to work your upper back and even strengthen your rotator cuff muscles. There are four different arm positions with this move. I complete all reps of one motion before moving on to the next. Lay on the ground or over a stool. Keep your low back relaxed. You want to feel this in your upper back behind your shoulders and in between your shoulder blades. None of these are really big movements. To do a Y, your thumbs should be pointing toward the ceiling and your arms should be above your head in the shape of a Y with your body. Lift up, using the muscles in your upper back. To do a T, have your thumbs pointing up toward the ceiling. Your arms should make a T with your body. If you are doing this on the ground, you are really only going to lift an inch or two off the ground. Over a bench or stool, you may be able to relax further down. To do a W, bend your elbows to create a W with your body. Your thumbs should be pointing in toward you. Lift and lower. The final move, the L, will be done two different ways depending on where you do it. If you are lying on the ground, you will set up with your elbows bent to 90 degrees and your elbows in line with your shoulders. Palms facing the ground, try to rotate the backs of your hands toward your toes. Then relax. If you are doing this from a stool or bench, you will actually start with your arms handing toward the ground. You will then lift your arms, bending your elbows to 90 degrees. Finally, keeping the elbows bent, you will rotate the backs of your palms toward the ceiling. None of these moves involve a big range of motion. Do not rush through the movements. (Unfortunately because of the angle, which I didn’t notice at the time, you can’t fully see the angle of my elbows especially during the Ls. Sorry!)
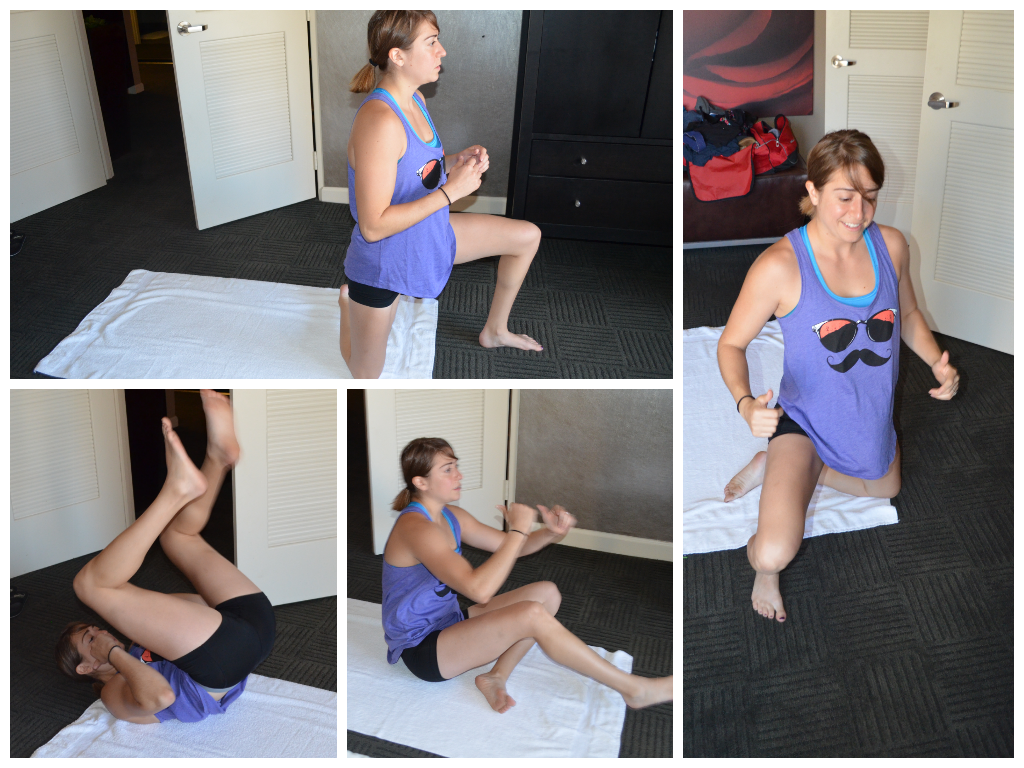
9. Rocking Chair Abs – A great core sequencing move and kind of fun. Start kneeling on one knee, squeezing your glute to press your hips forward. Then roll onto your back and switch the leg crossed underneath so that when you roll back up you can come to a kneeling position on the other side. This is a great move to weight down as you become stronger. Also, use your arms for momentum only if needed. Less arm swing makes the move tougher.
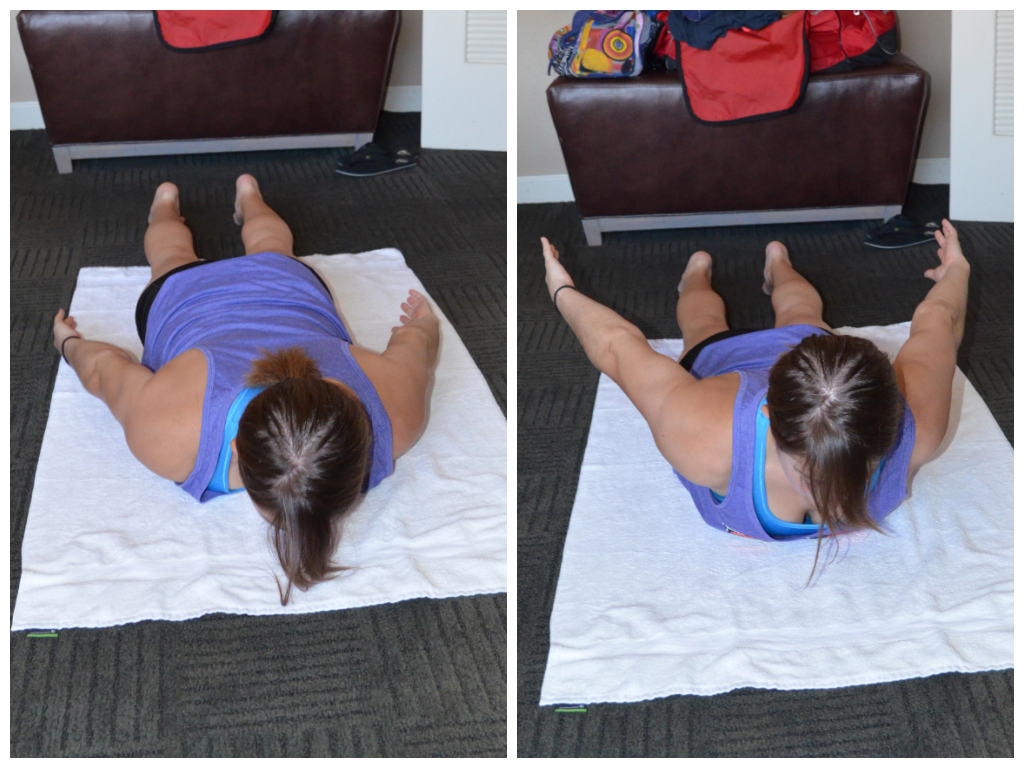
10. Cobra – A great total back move. Place your arms down by your sides and lie face down on the ground. Lift your chest up off the ground and pinch your shoulder blades back and down. You should feel this move in your low and upper back. Then lower back down and repeat. Make sure to hold for a second or two at the top.
Do you like to workout when you travel? What is your favorite workout? Do you love isometrics too!?!
P.S. Bonus move! Pull ups off the balcony…Just kidding…although tempting!
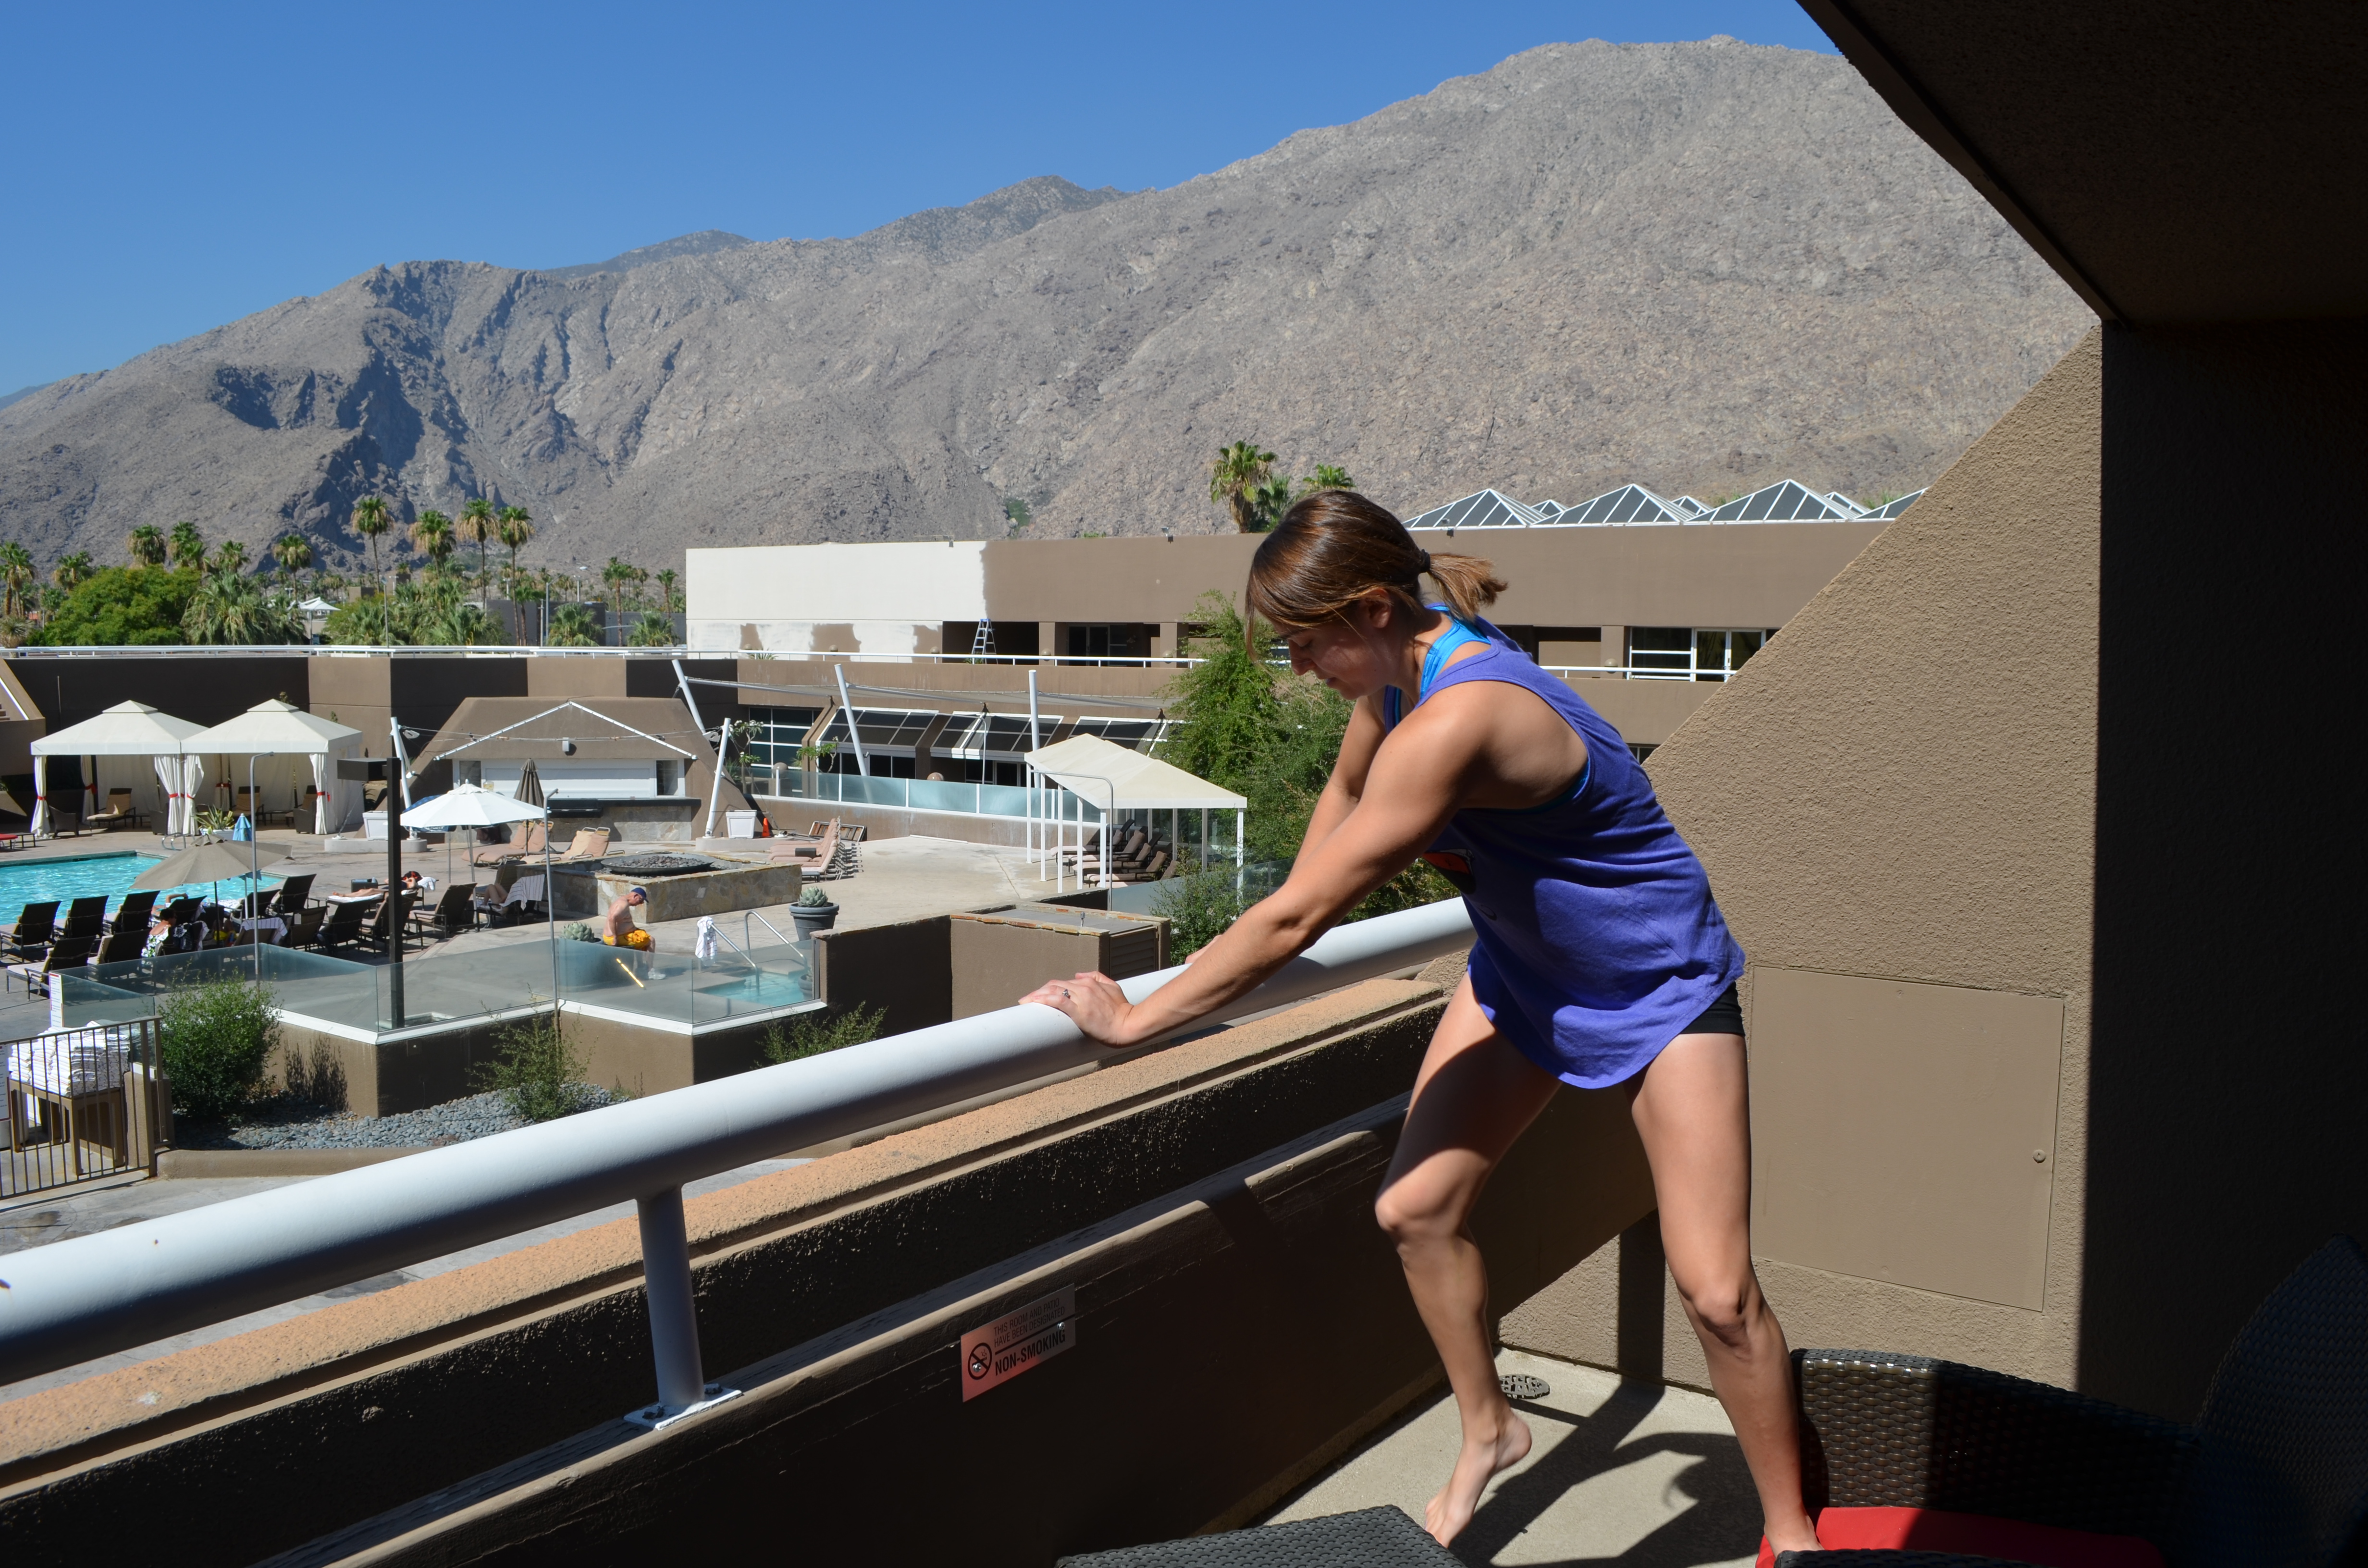
The question is…did I do it?
Home Workouts – 10 Moves You Can Do With An Ikea Table
So yesterday when Ryan and I were doing some foam rolling stuff, I used a table for a couple of the moves.
It was just our little $10 Ikea table, but it was amazingly sturdy considering I put it together…Although that may be better than if Ryan put it together…Sorry Ryan…But it’s true…
Anyway, when I used the table, Ryan said to me, “I wonder if you could do a full body workout with just that table?”
My answer, “You totally could!”
Here are 10 moves you can do with just a cheap little Ikea side table! Love you Ikea! 🙂 (The moves are in no particular order)
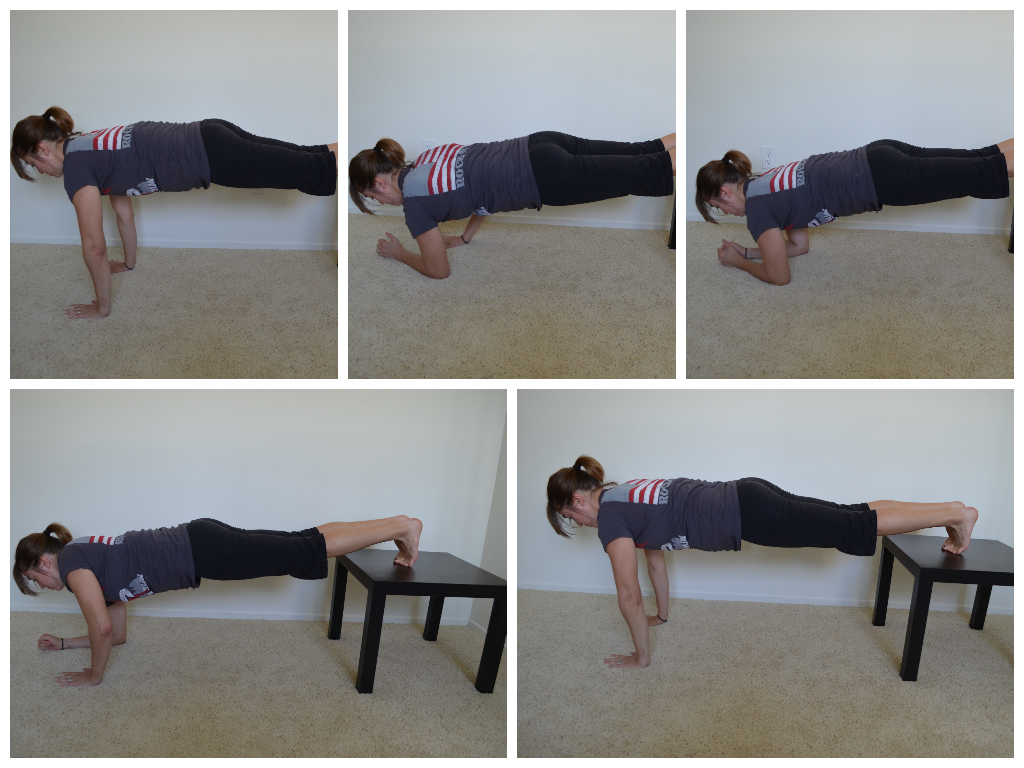
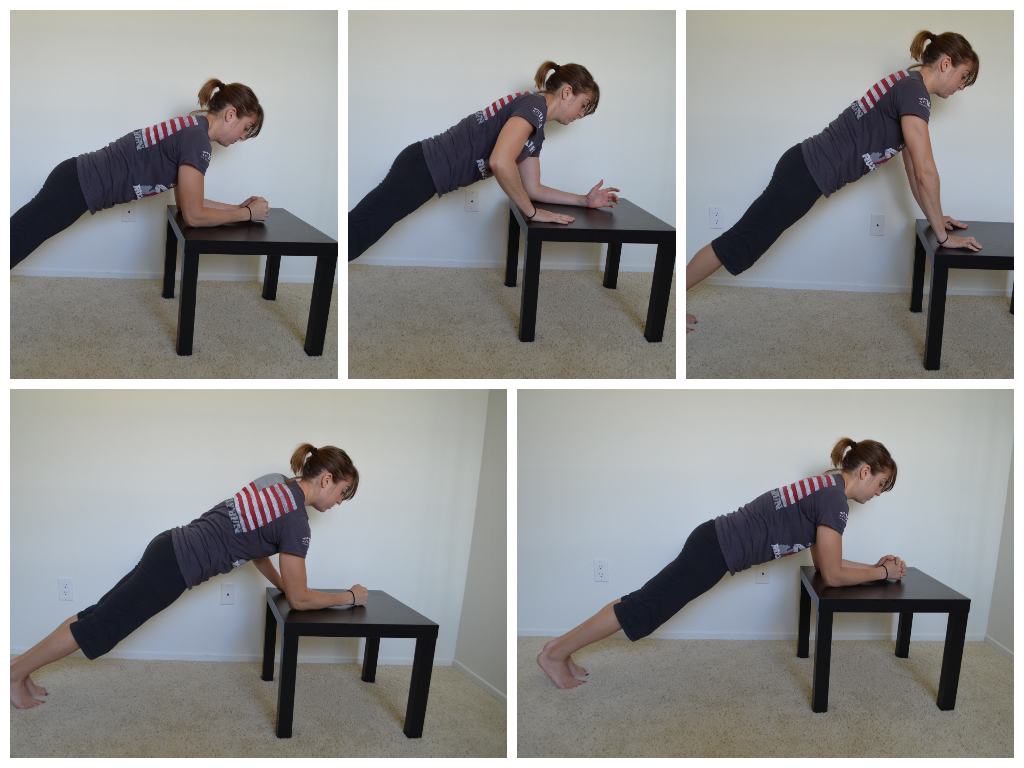
1. Decline or Incline Push ups – You can make the push up easier or more advanced using the table. To make the push up easier, put your hands on the table and then perform the push up from your knees or toes. Doing the push up from your knees will make it easier than from your toes. To advance the push up, put your toes on top of the table.
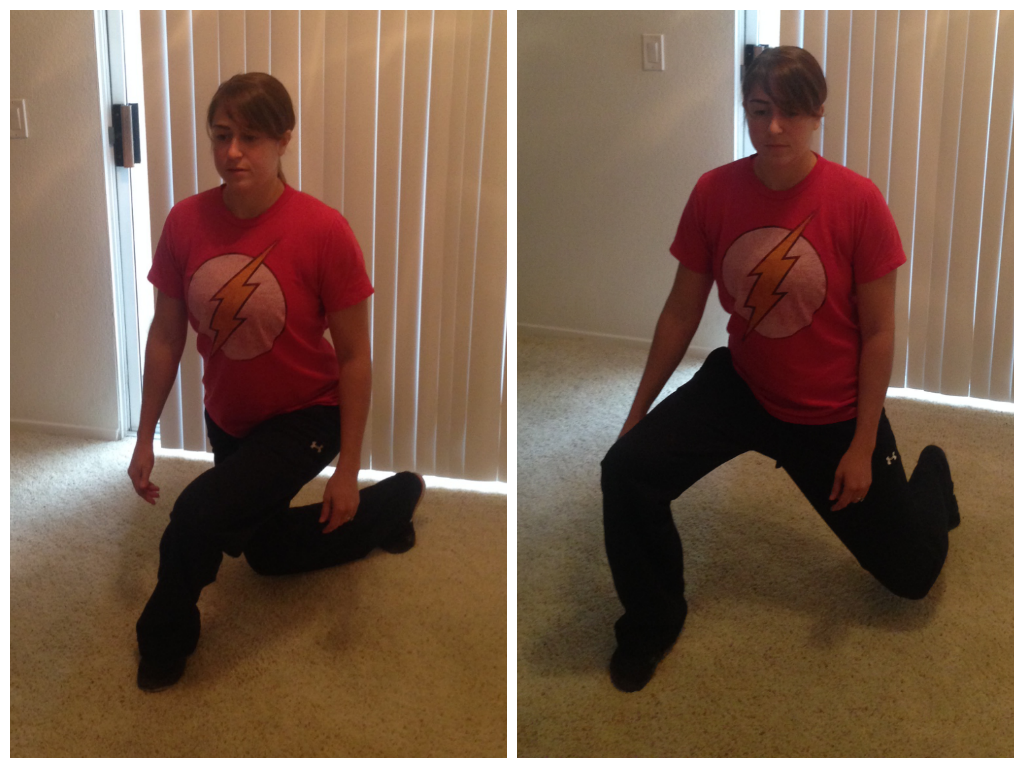
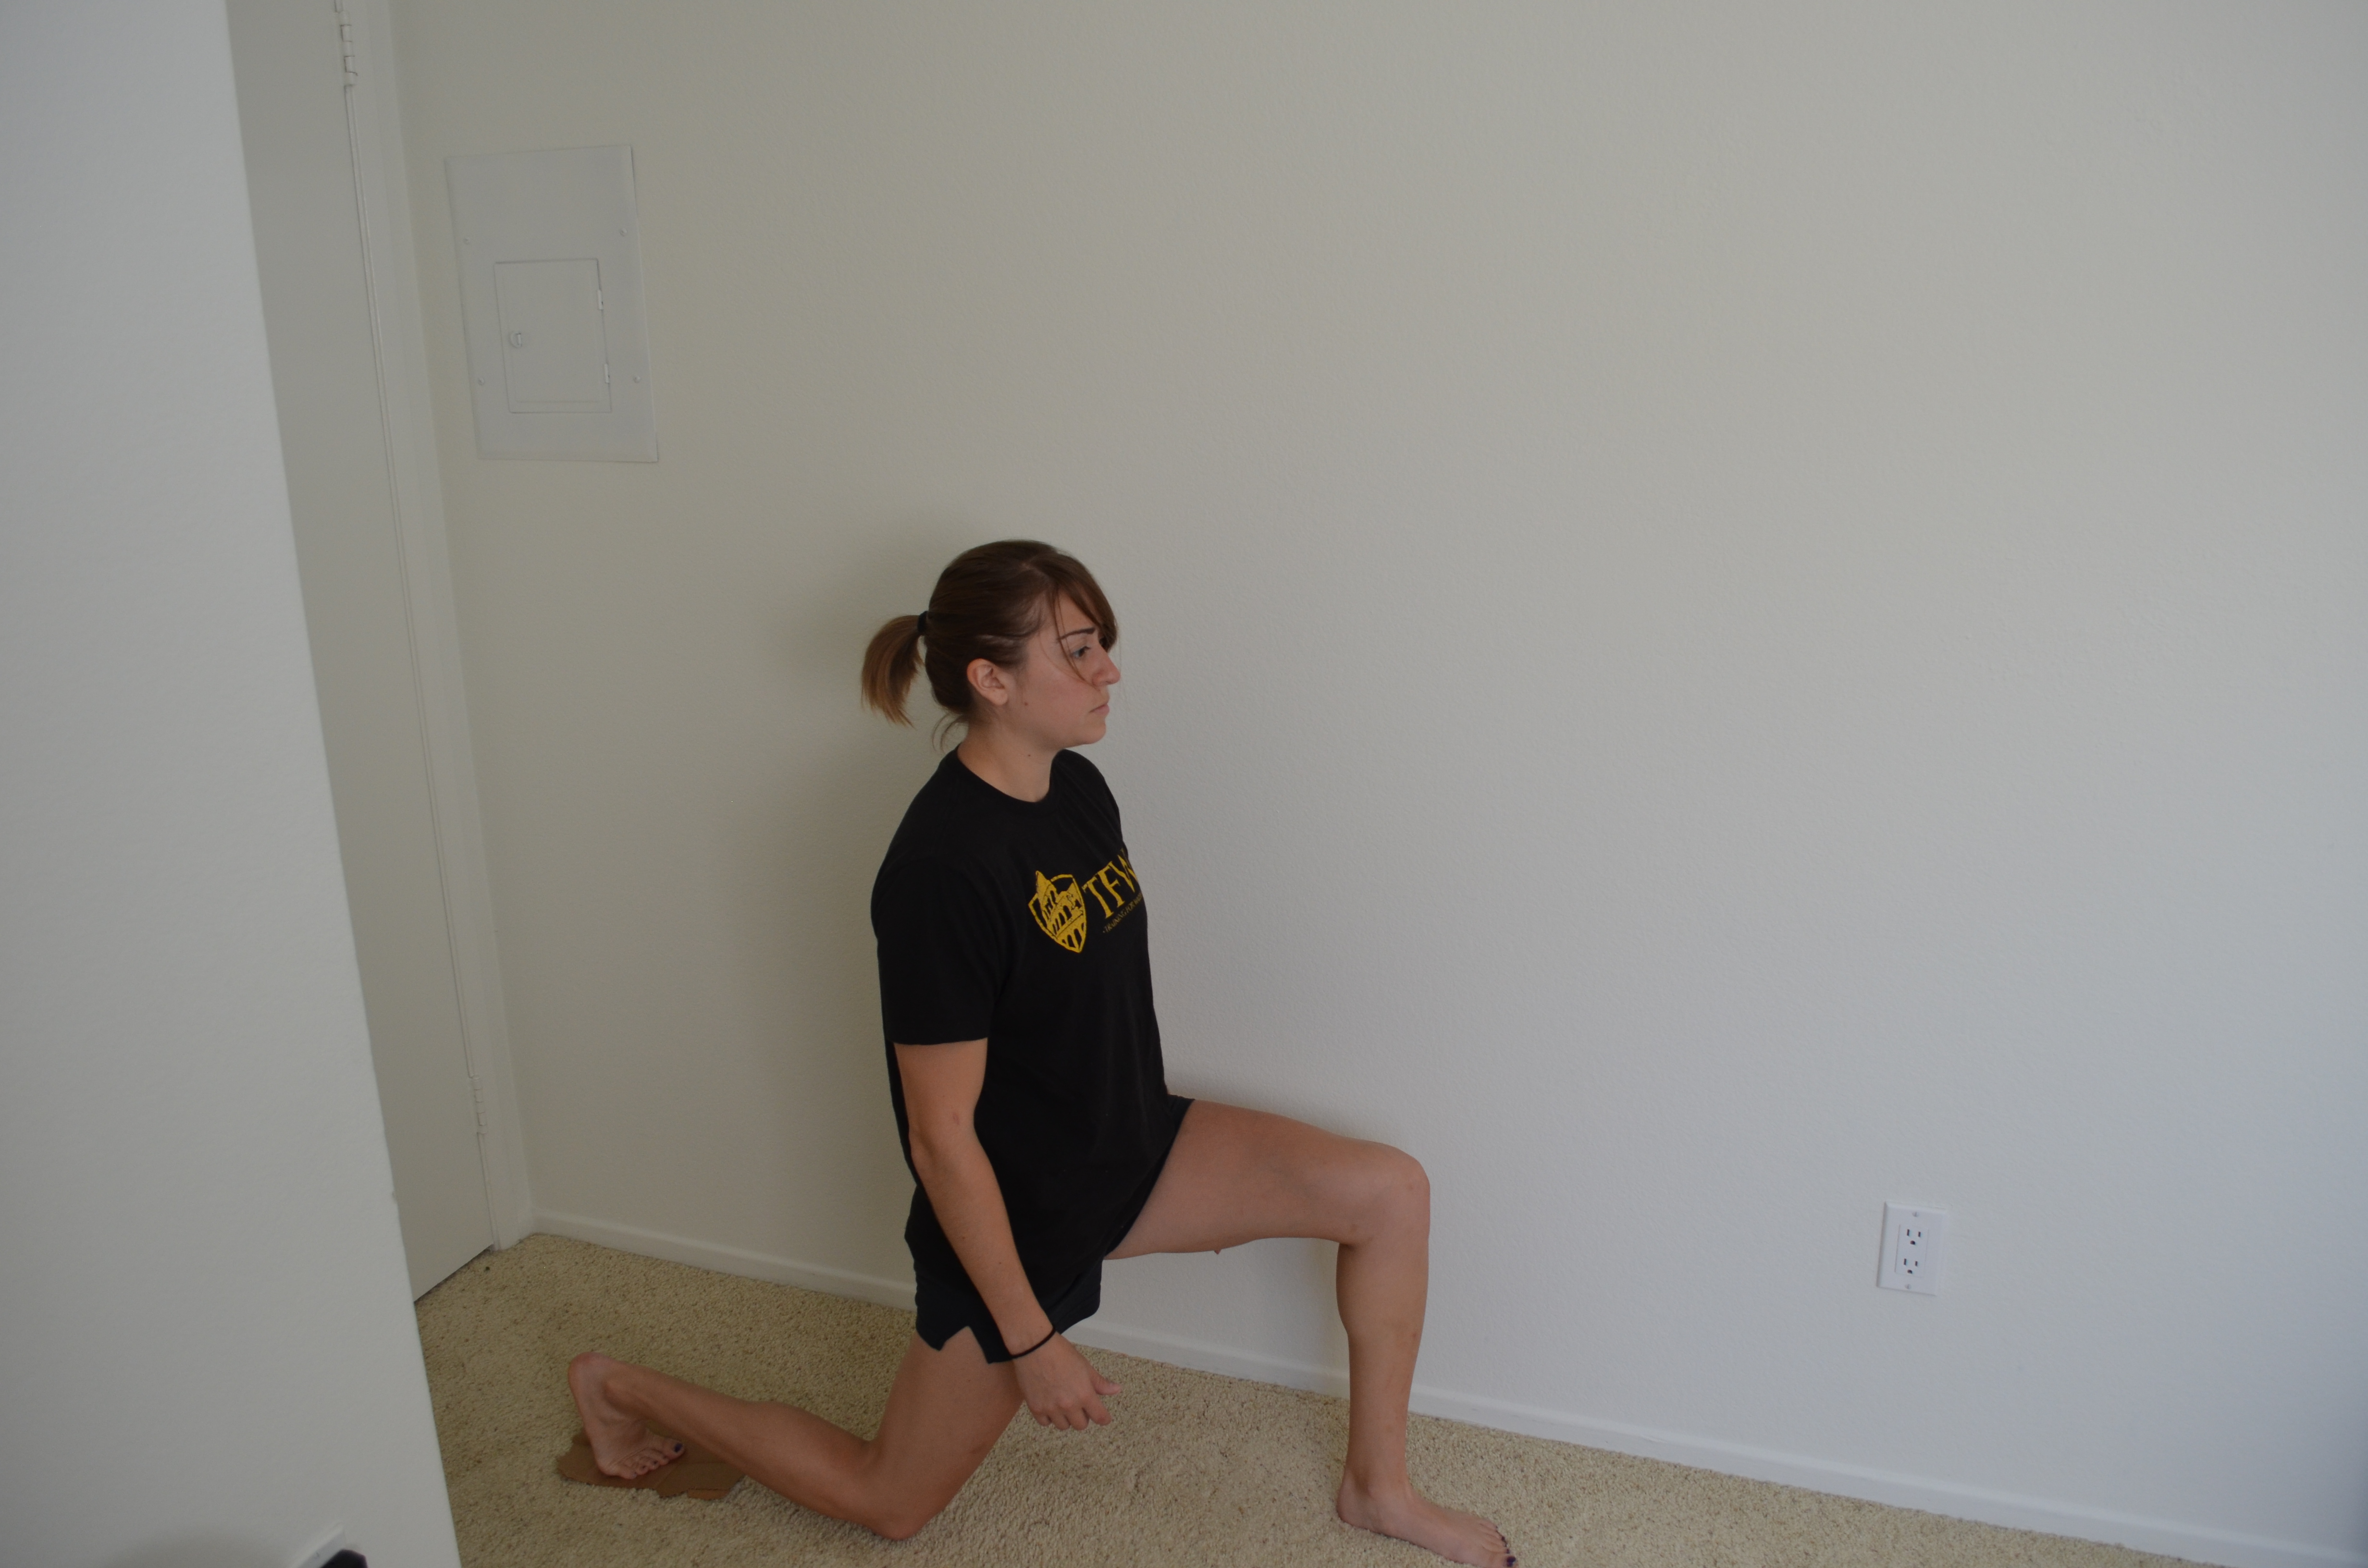
2. Balance Lunges – The balance lunge is a great leg move to do if you don’t have weights. Place your back foot up on the table and hop your front foot out so you are in a nice wide stance. Then lunge down, dropping your back knee toward the ground. Really sit back into the lunge. Make sure you aren’t going forward and that your front knee is not going past your toe. You should feel a nice stretch in the front of the leg that is back when doing this move.

3. Single Leg Squats – This table is a great way for beginners especially to start working on their pistol squats. It is also a great way to really correct imbalances since you are working legs individually. If the table is too low for you at the beginning, start with a two-leg squat to bench. Then progress to one leg. Beginners can completely sit down on the table. As you advance, try to only barely tap the table with your butt before standing up. Do not rely on sitting on the bench to stand back up.

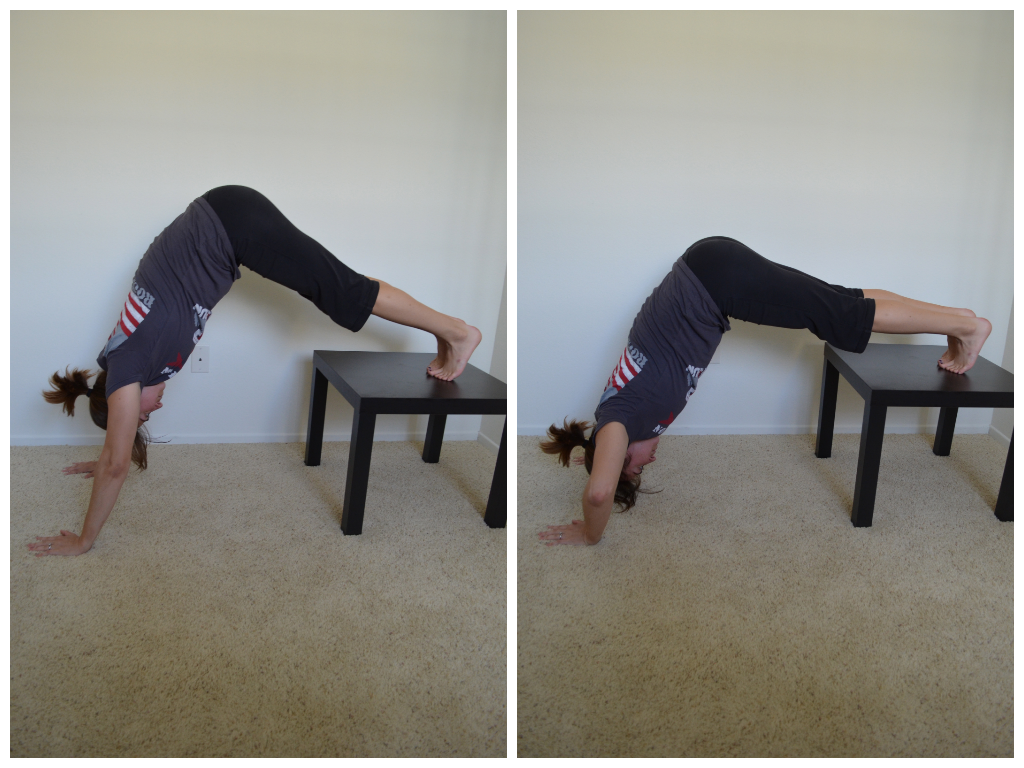
4. Incline or Decline Climbers – These aren’t mountain climbers. With climbers you are working your shoulders and triceps. Beginners should start in a plank position with their forearms on the table. Next climb up one hand at a time until you are at the top of a push up position. Then climb back down to complete the rep. Advanced exercisers should do this move with their feet elevated on the table instead.
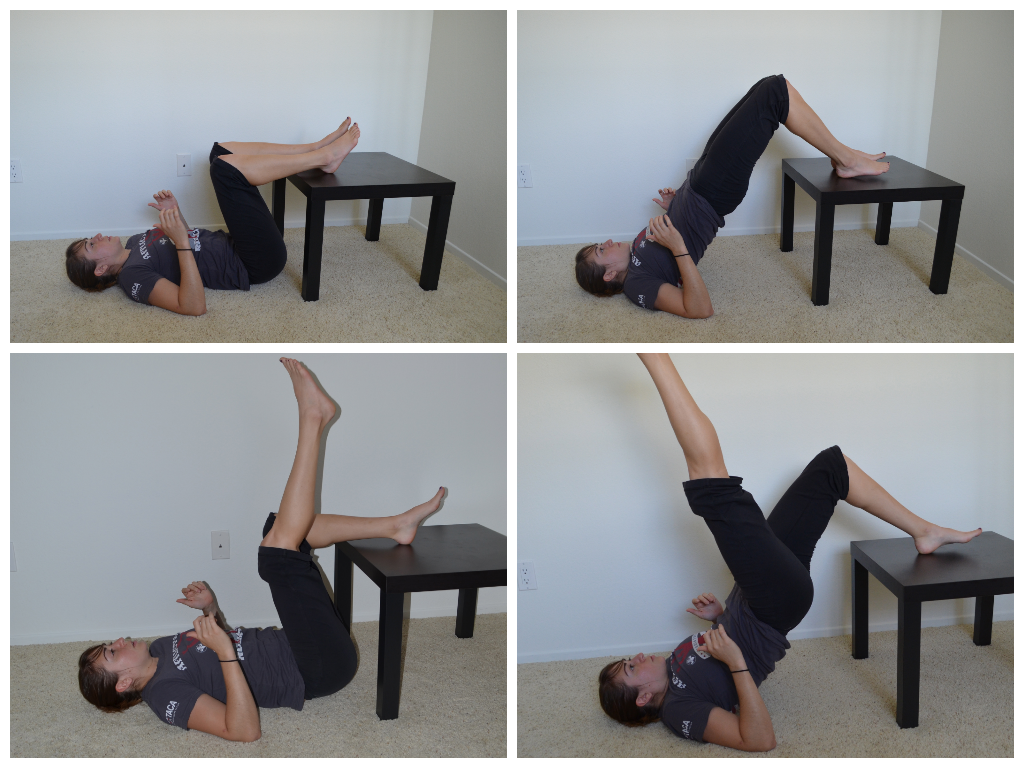
5. Glute Bridge off table – A great way to advance the glute bridge is by putting your feet up on the table. You can do either a double leg glute bridge, which is a bit easier, or a single leg bridge, which is a bit more difficult. Start by lying on the ground with your heels on the table. Your butt should be close to the table. Arms are bent to 90 with elbows driving into the ground. Squeeze the glutes and drive through the heels, lifting your hips as high as you can in the air. Keep your core tight and glutes squeezed. You should not feel this in your low back. To make the move even more beneficial, hold each rep at the top for 2-5 seconds.
6. Handstands – Handstands are a great upper body move. Using the table you can either do a beginner handstand hold or you can make the move more advanced by adding in a push up. To do the hold, place your feet on top of the table. Walk your hands back a bit and push your butt up towards the ceiling. Push off your toes to get as vertical as possible, creating a nice straight line from your hands, up your arms and core to your tailbone. If this is easy, add the push up in while holding this position. Drop your head down to the ground and then lift back up.
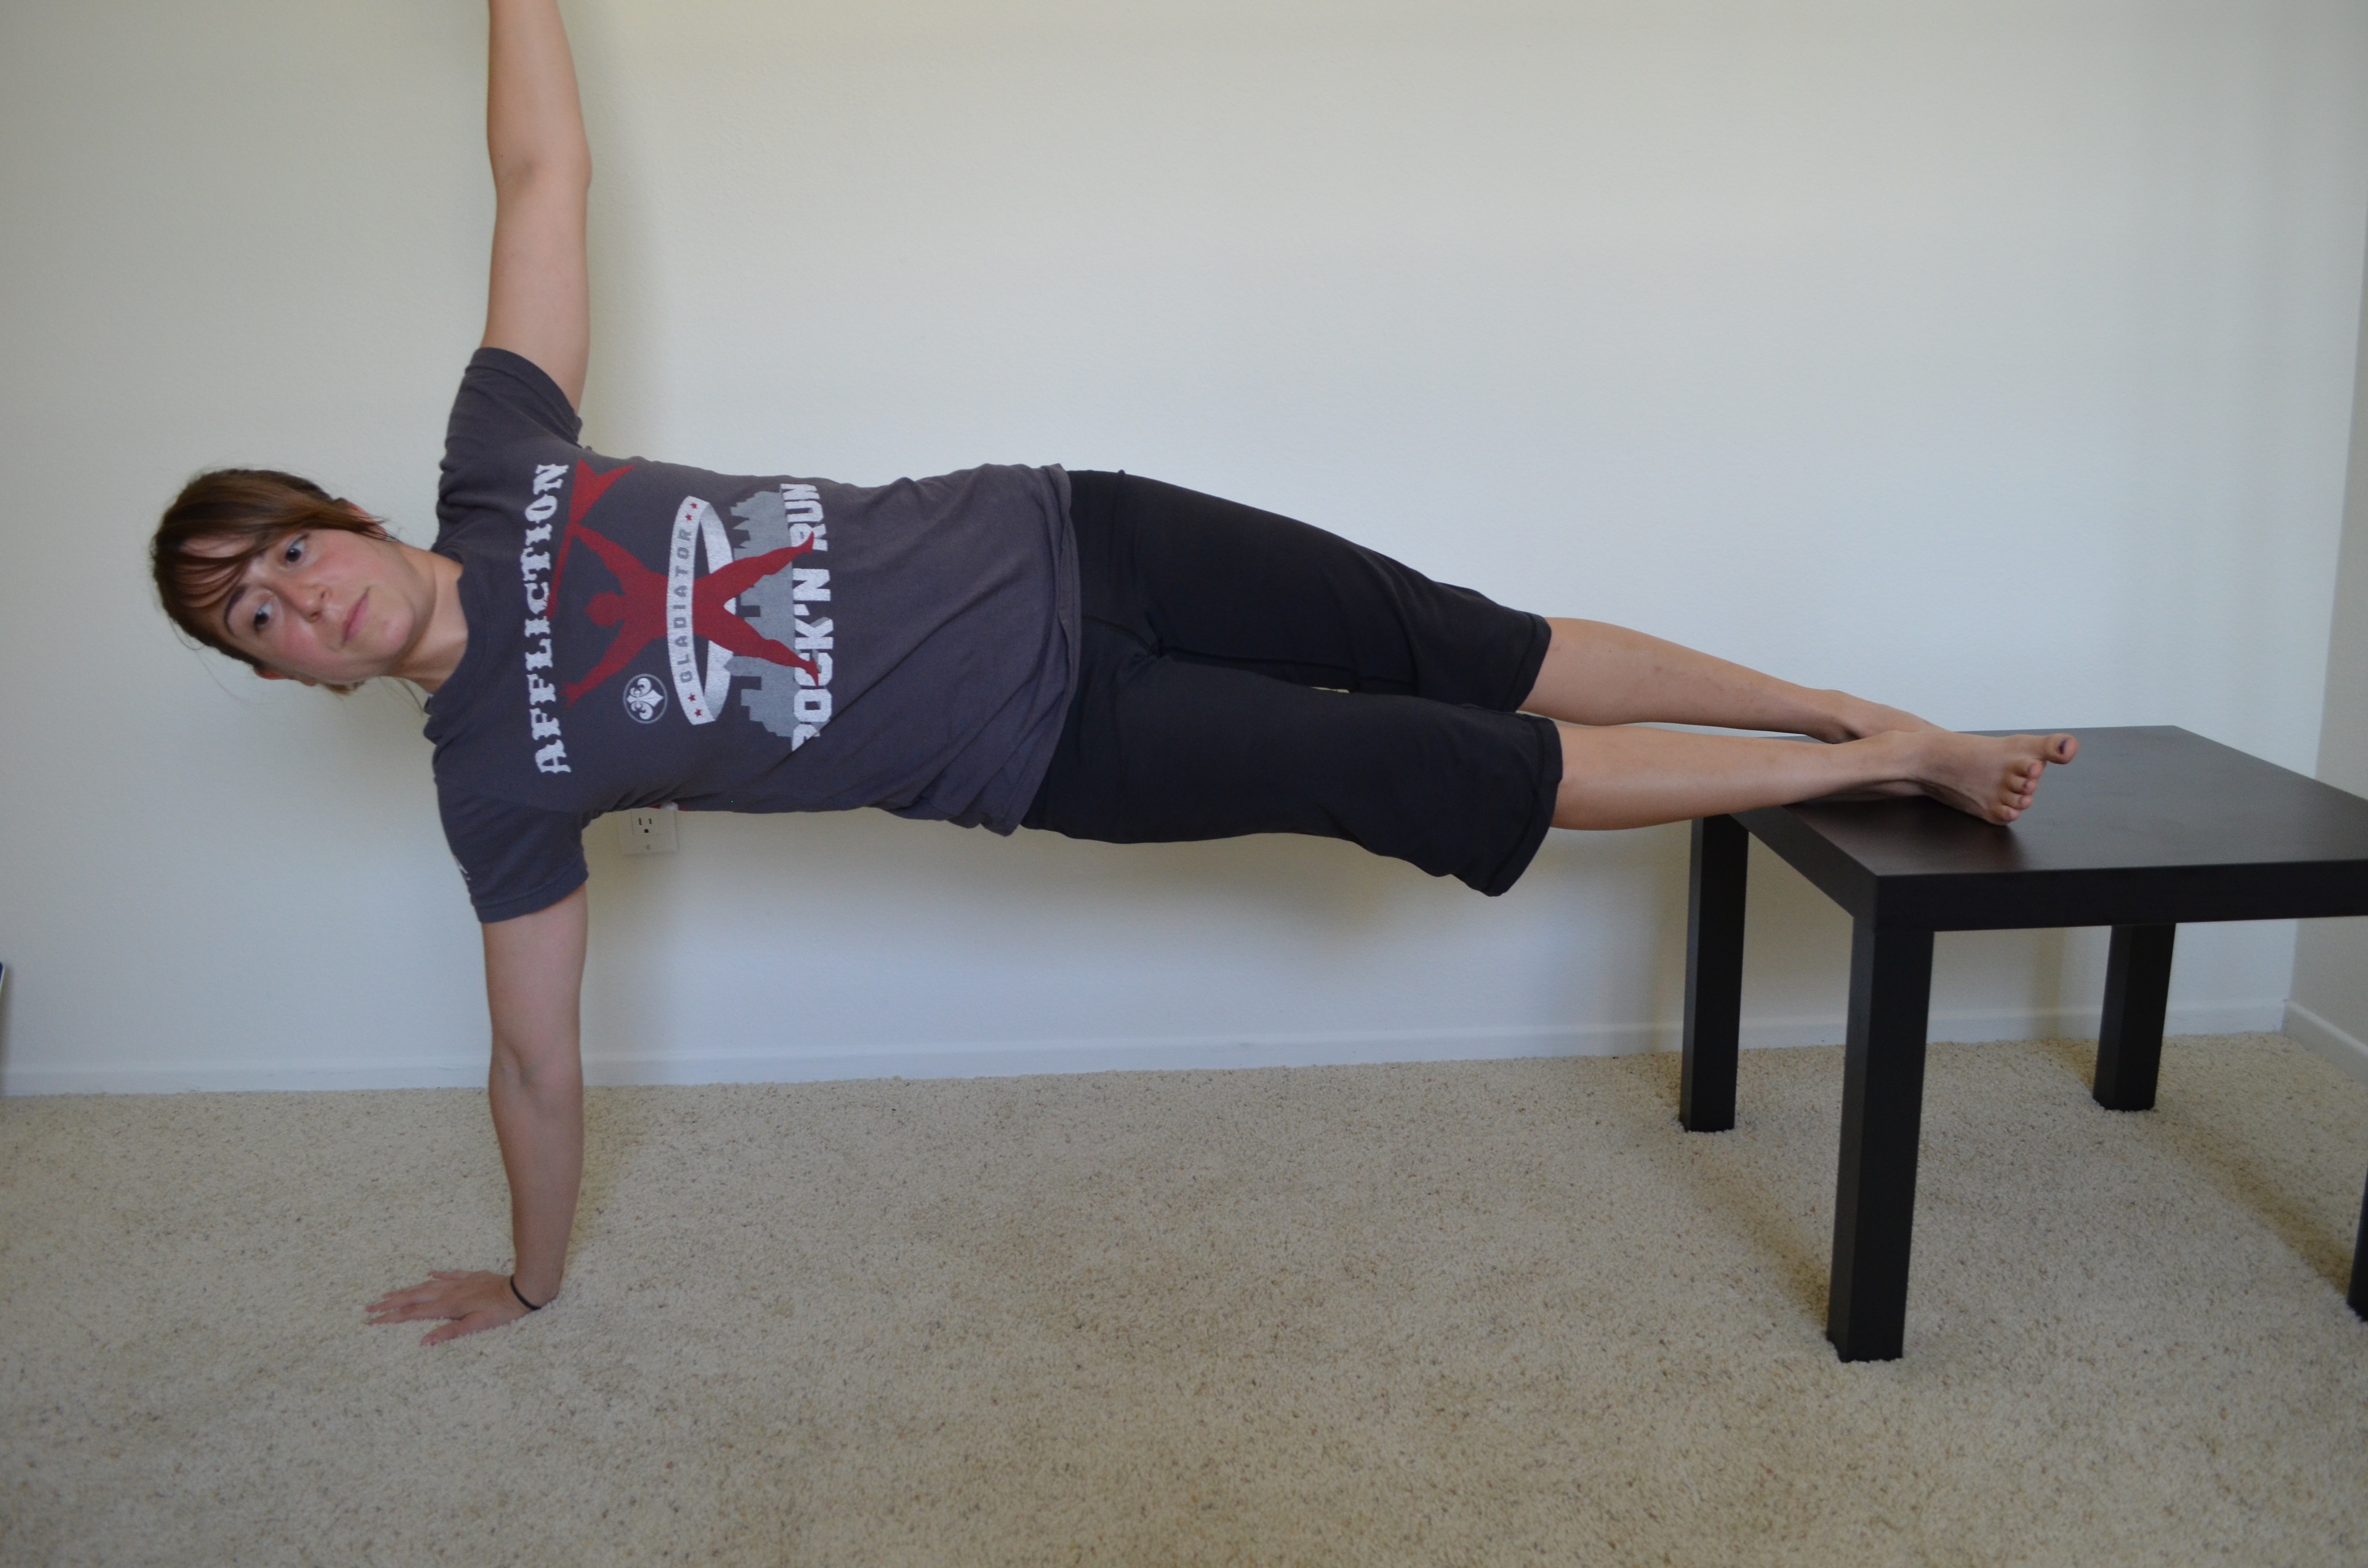
7. Plank Holds – Plank holds are a great overall core move and the table can be used to make the move easier and more difficult. Beginners can hold front and side planks with their hands on the table and feet on the ground while advanced lifters can have their feet on the table and hands on the ground.
8. Lying Bat Wings – One of my favorite moves is scapular wall holds. When playing with the table, I realized you could do the same hold while lying face down on the table. Lie down with your chest on the table. Bend your arms to 90 degrees and then pinch your shoulder blades down and back. Try to bring them together you are pinching back so hard. Hold that move. Beginners can hold for 30 seconds. Advanced can hold for up to a minute. If you want to make it even more challenging, you could add weight to each hand…even if it is just in the form of a book.

9. Reverse Hypers – A great move for the glutes and hamstrings and most easily done with a piece of equipment; HOWEVER, using a table is a PERFECT way to do reverse hypers at home. Lie face down on the table. Make sure your hips are right at the edge. Squeeze your legs together and lift your legs to basically parallel to the ground. Hold for 2-5 seconds and lower. You can do reverse hypers with either bent or straight legs. Both have their benefits. You should not feel either though in your low back. Keep the core tight and really squeeze the glutes.

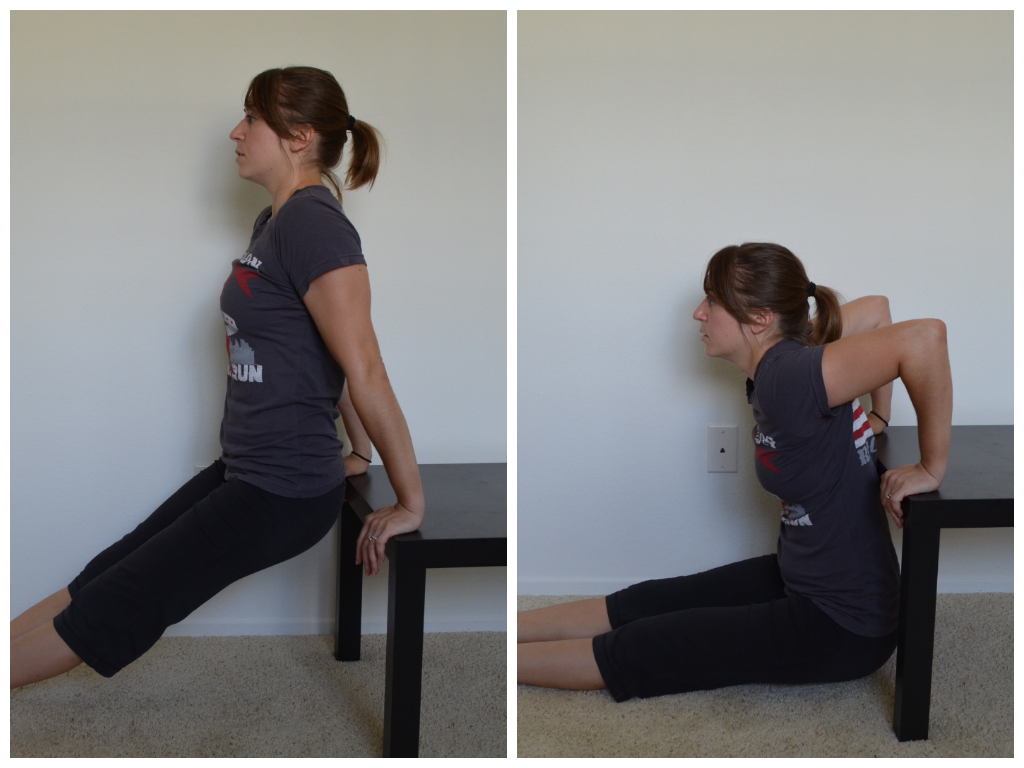
10. Dips – One of the most common home exercise moves, dips can’t be ignored. Place your hands behind you on the table with finger tips hanging over the side. Beginners can bend their legs while more advanced exercisers can keep their legs straight. Drop your butt as close to the ground as possible, bending your arms to 90 degrees and keeping your back and butt close to the table. You could even make the dips harder by doing two push ups followed by two dips for 3-5 rounds. Talk about a way to smoke your triceps….
If you like these moves and have enjoyed other Man Bicep posts, I suggest you head over to my new site Redefining Strength for a sneak peek and a few great workout freebies, including a COMPLETE FOAM ROLLING VIDEO LIBRARY!
P.S. Thank you Ryan for an amazing post idea!
Home Workouts
So I hear all the time that people don’t have the space OR the equipment to get in a great workout at home.
That is ABSOLUTELY ridiculous.
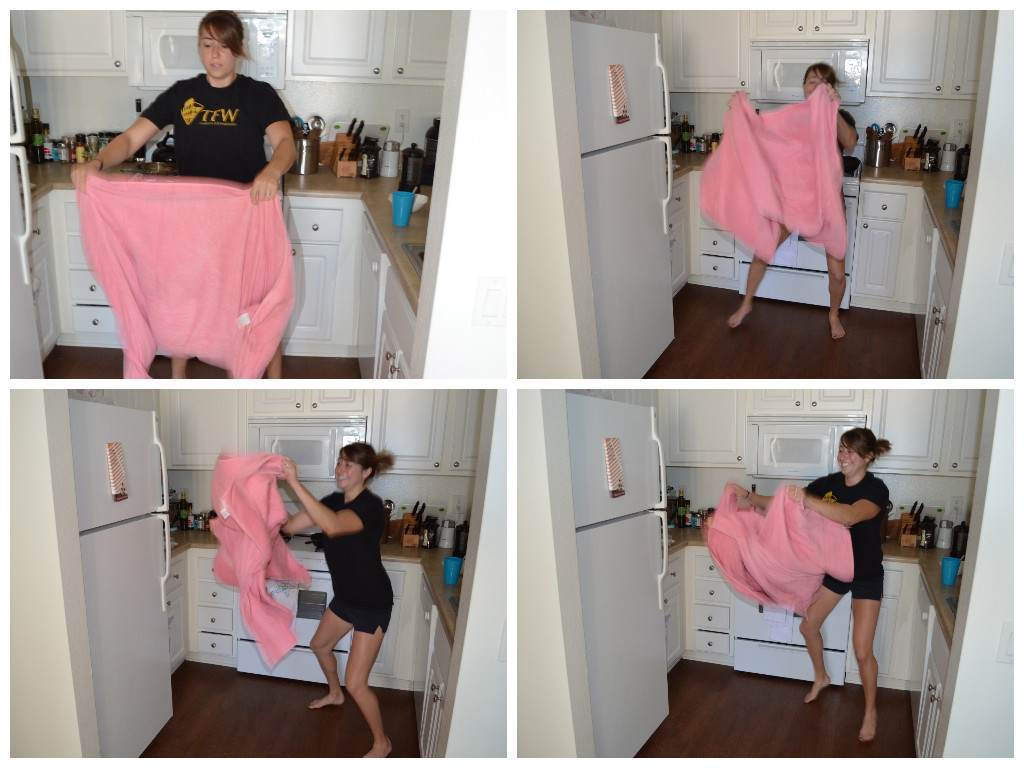
And I just did a workout in my kitchen to prove it….using just a little hand towel. (Which now is a bit dirty but at least I cleaned my floors!)
So here is my Small Space at Home Workout – 5 great moves you can do with just a hand/dish towel!
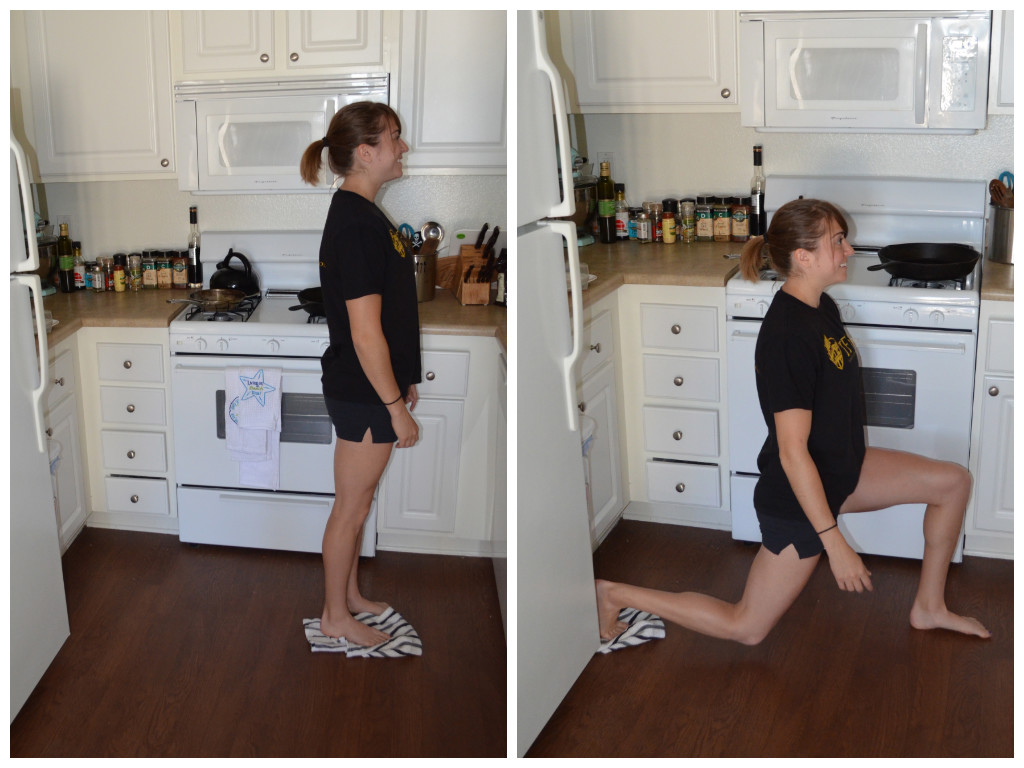
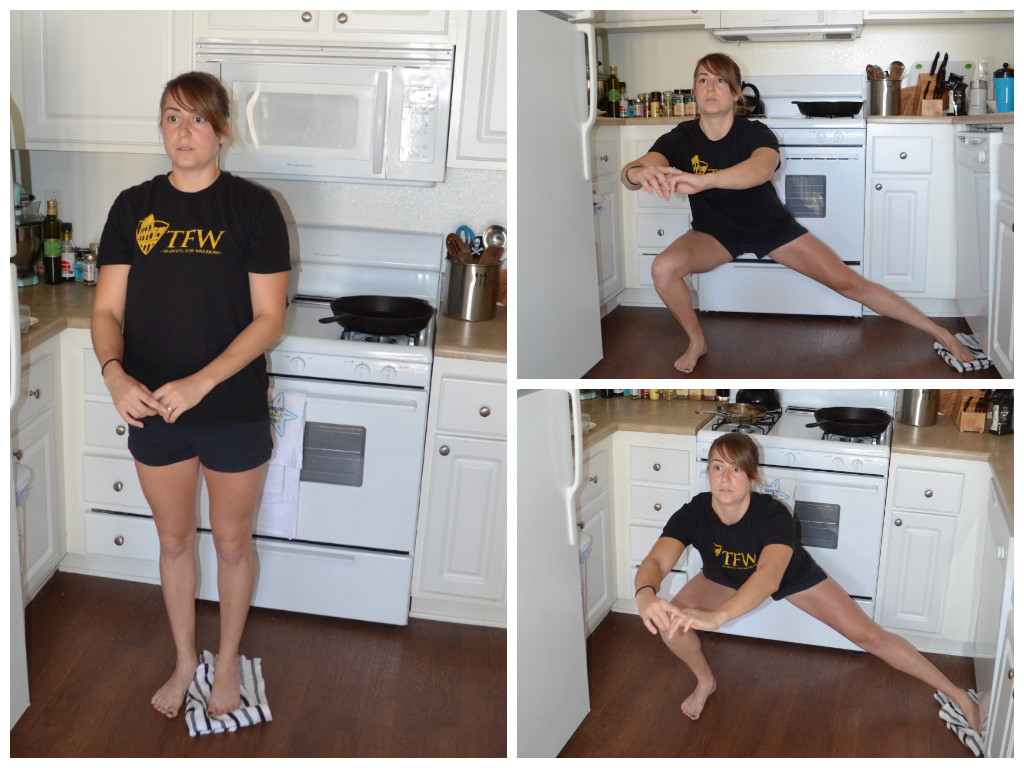
- Towel Backwards Lunge – The backwards lunge is a great move to work the glute and when you use a towel/slider, you increase the intensity AND engage the glute even more. Make sure to really squeeze the glutes as you come back to standing. To perform the move, place the towel under one foot and slide that foot back into as deep a lunge as you can handle. Make sure to really sit back on that front heel. Then driving through that front heel, come back to standing.

- Towel Side Lunge – This is a great move to work the glute and adductors. Please be careful the first time you try this lunge as it is easy to go too far out and not be able to get back up since there is no traction. To do this move, place the towel under one foot. Slide that foot out to the side, sitting back into the lunge. Then to stand back up, drive through the foot not on the towel. Do not allow yourself to go forward. Make sure to really sit back and then drive off the heel.

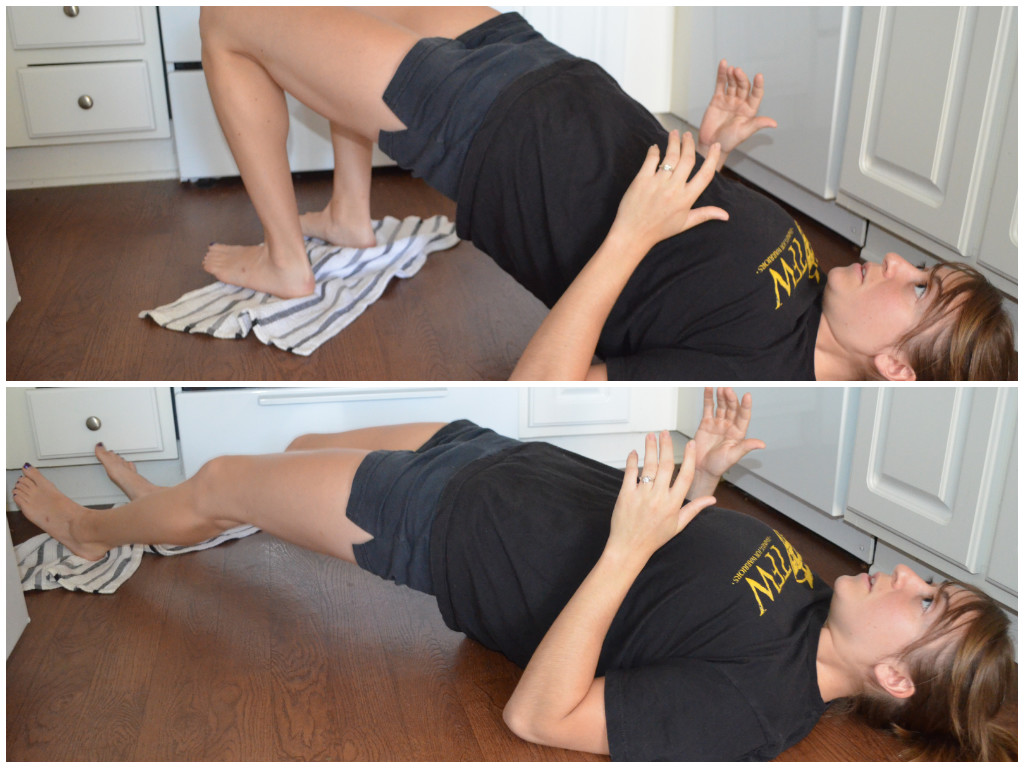
- Towel Bridge and Curl – This one is great although not a beginner move. A beginner may want to start with the towel under only one foot and slide out one leg at a time. To perform the two leg curl, place both feet on a towel about hip width apart. Start in the bridge position and slide your feet out. Keep your hips off the ground and your glutes engaged as you slide out. Then curl the heels back in, bringing the hips up again in a glute bridge.

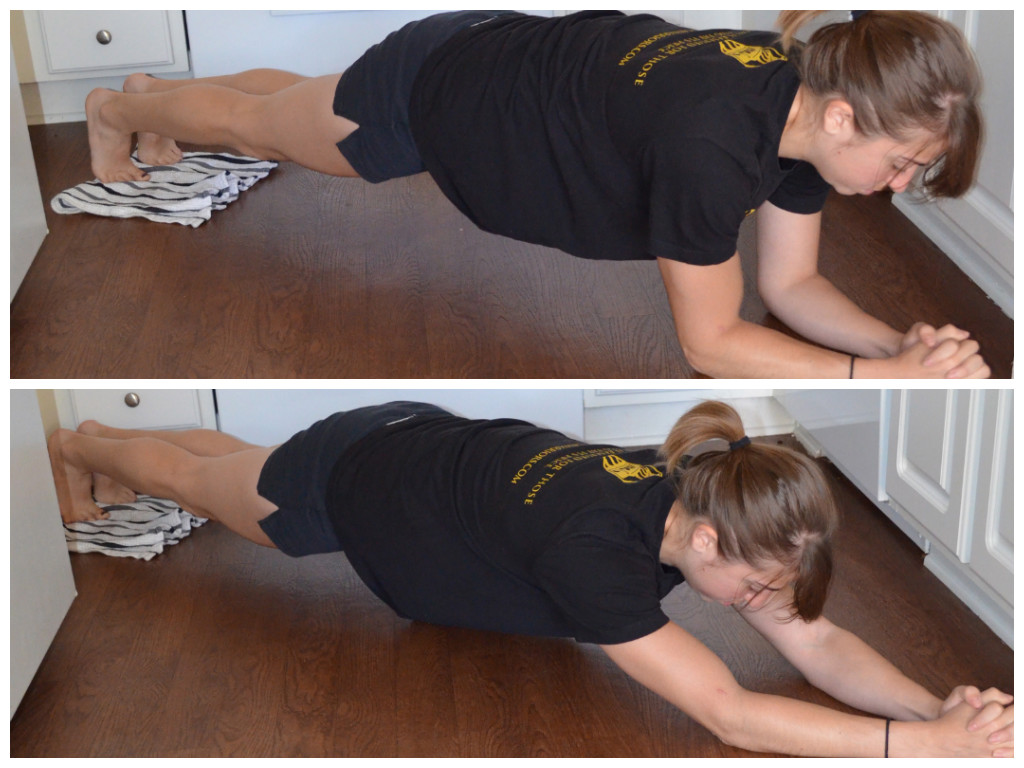
- Body Saw – This is another advanced move. To regress this, perform the move without the towel. Walk your feet backwards and then back in, elongating through your triceps and core. To do this with the towel, keep your body in a straight line with your belly button drawn in. Slide back on the towel, lengthening your body out as much as you can. Then pull straight back in to the plank position. Do not let your hips sag toward the ground or your butt go up in the air. You should not feel this in your low back.

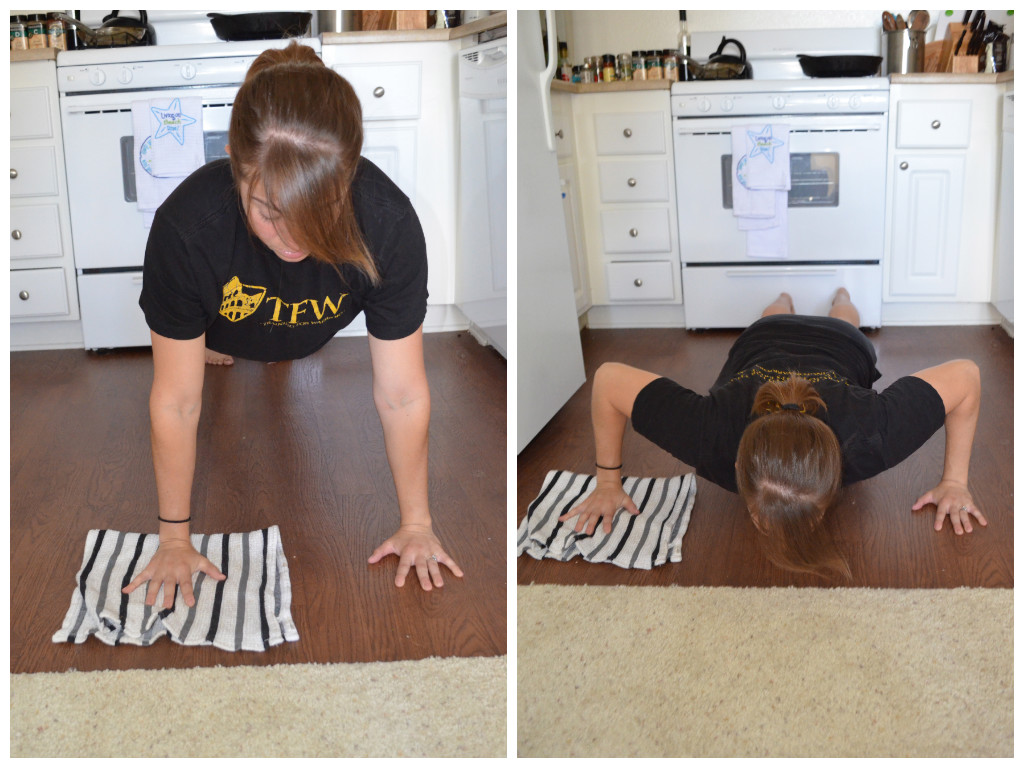
- Fly to Push Up – A great two in one chest exercise. This can be done from the knees or the toes. Start at the top of your push up with one hand on the towel. Then slide the hand out to the side and perform a push up. After the push up, slide the hand back into the starting position. Even though this is a wider push up, don’t let your elbows flare way out by your ears!

So there you have it. Five moves done with just a dish towel and space that I could barely lie down in.
Here are two other bonus moves…Since I think most people do have a bath towel and two dish/hand towels lying around somewhere!
- Towel Taz – So basically anyone at any level can do this. And while challenging, it is rather fun. Move around as quick as you can in every direction and shake the towel down and up and in and out.

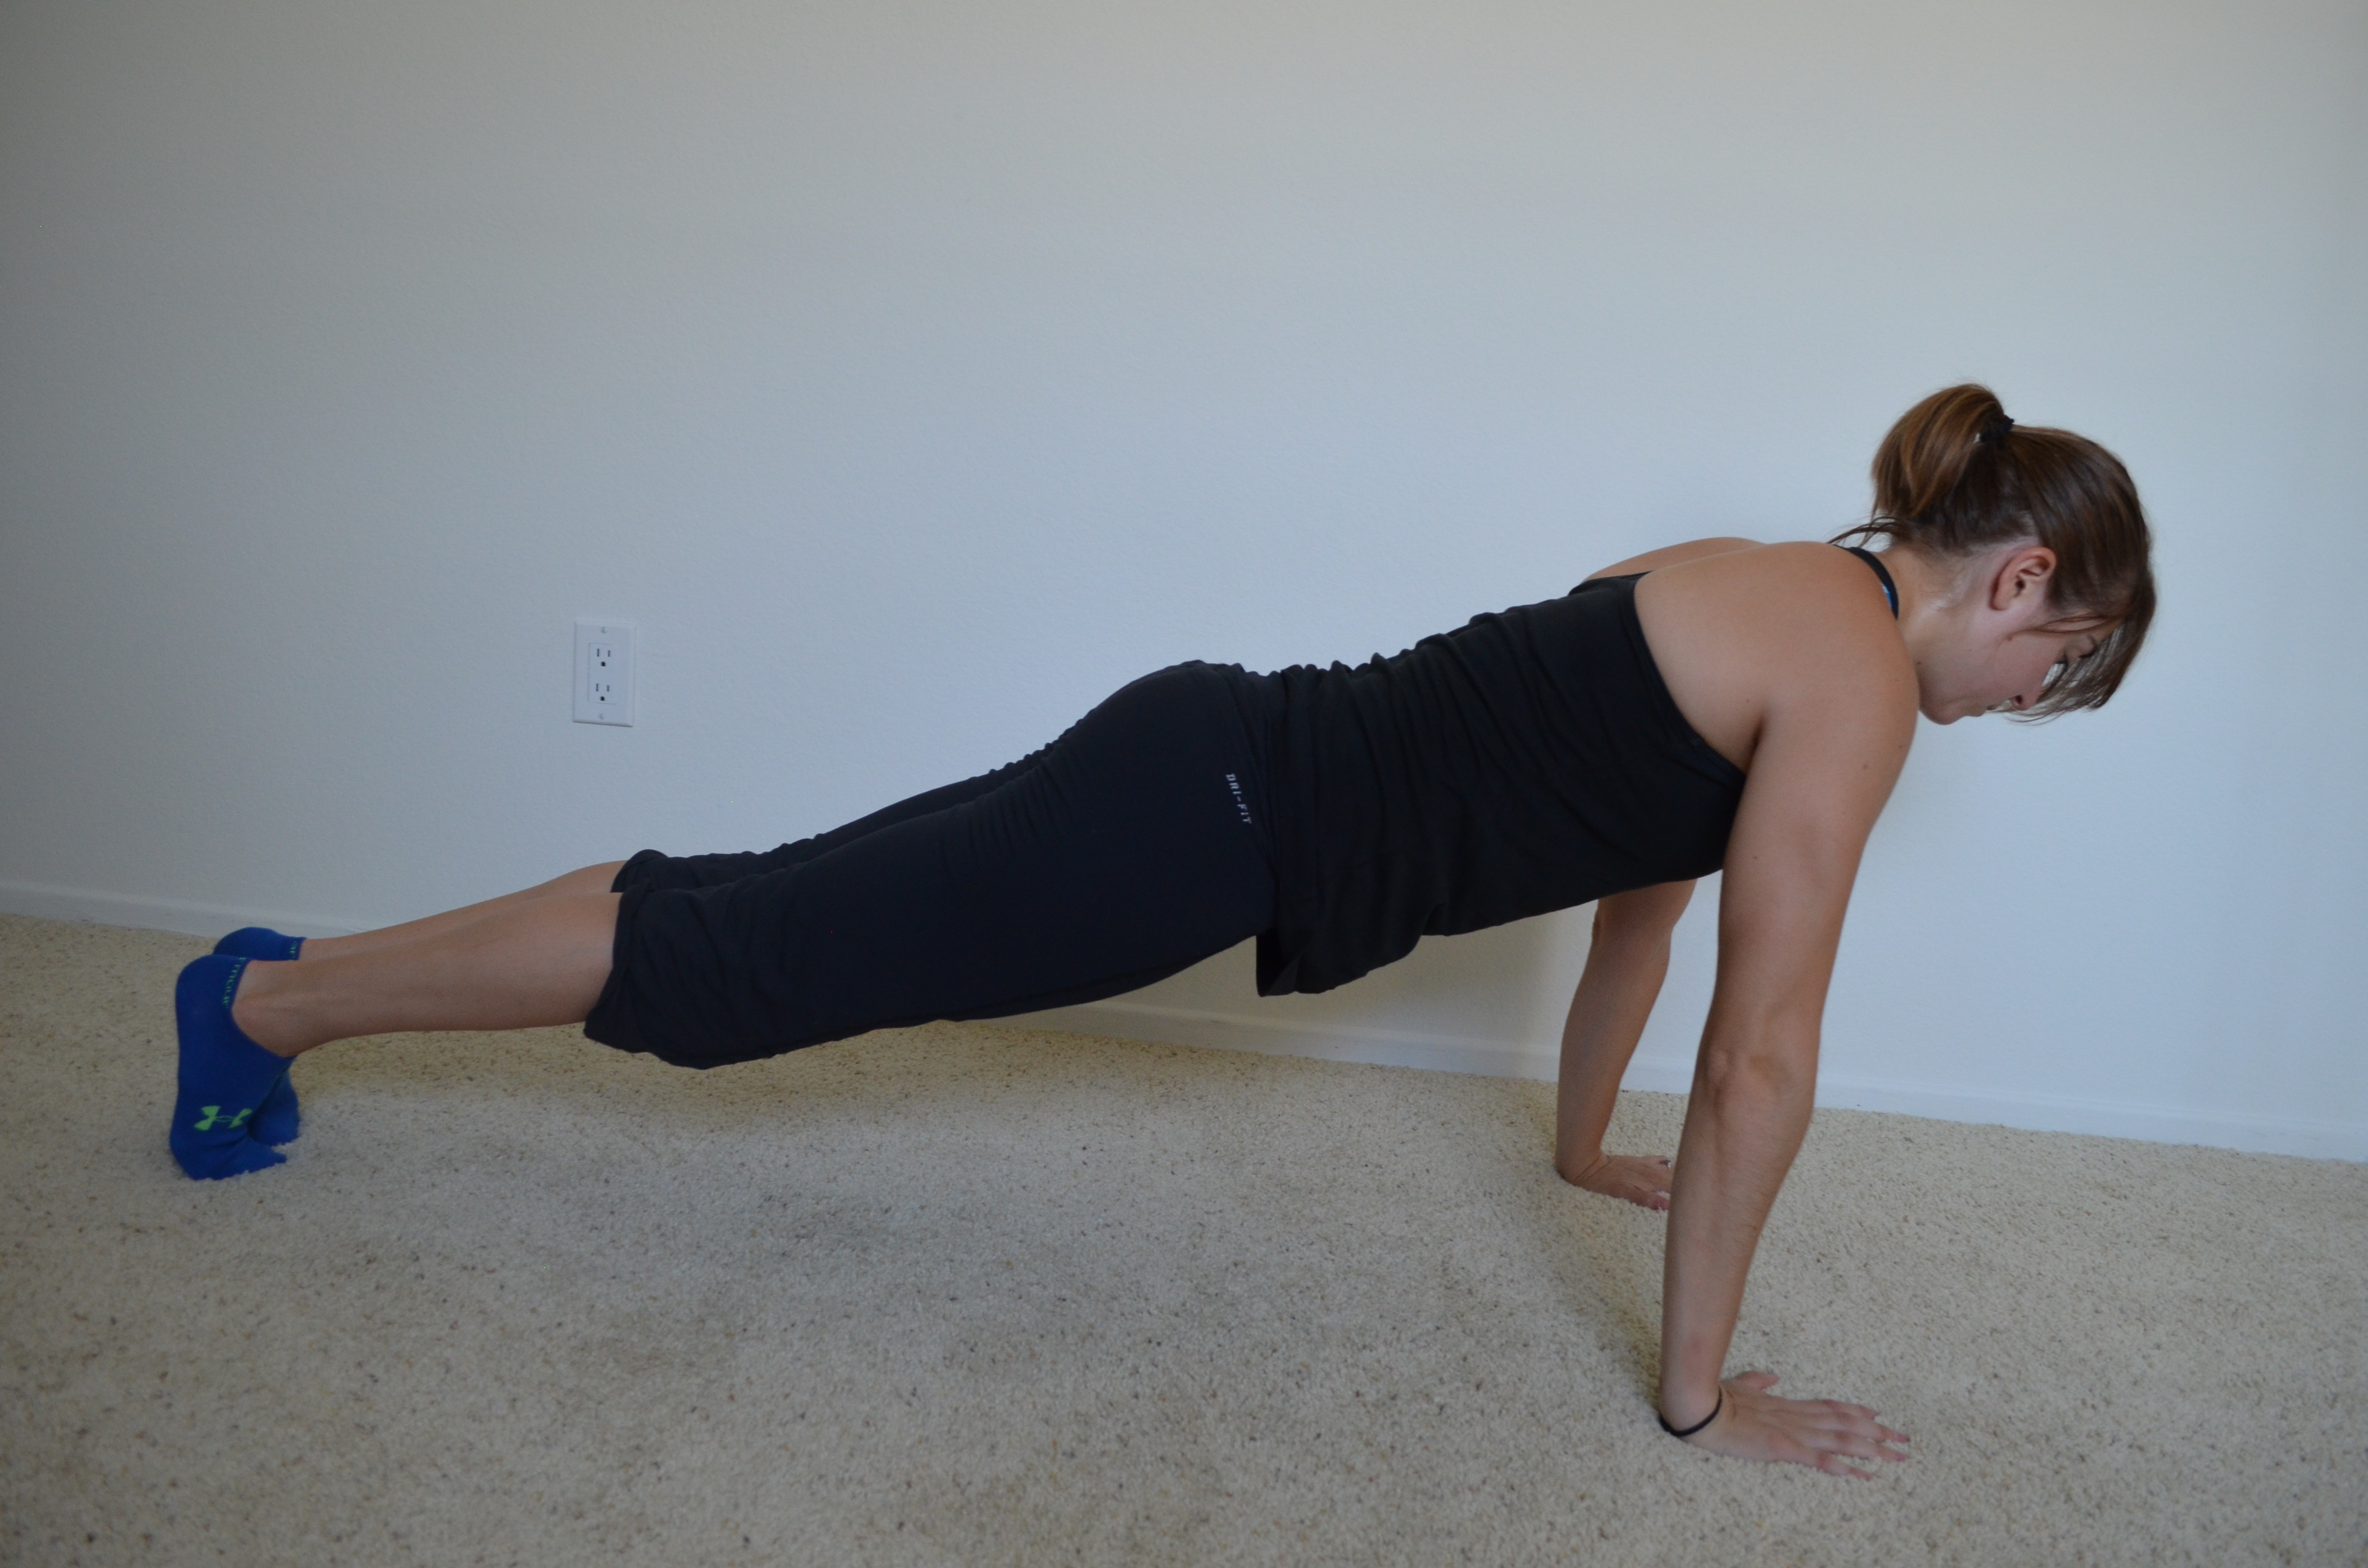
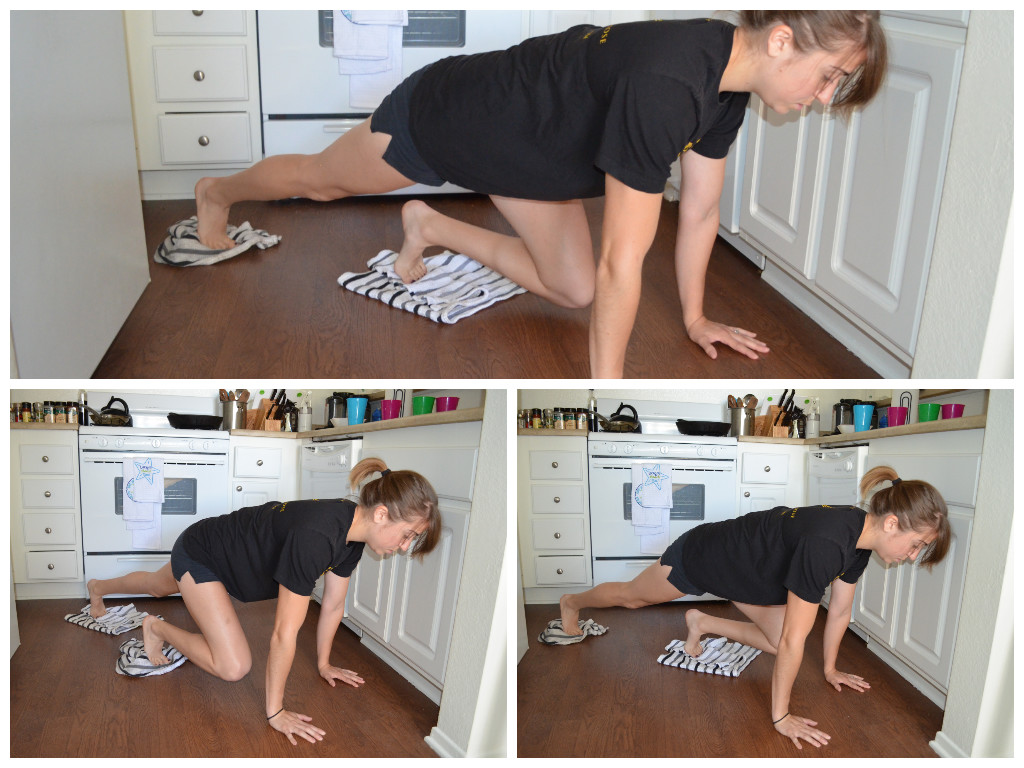
- Mountain Climbers – Place a towel under each foot and set up as if you are going to do a push up. Then, keeping your core tight, run your knees in toward your elbows, alternating legs.

AND if you are thinking…”Well my house is all carpet..”
Mine basically is too! To do all hand towel moves on carpet, all you need is a piece of cardboard…(I tore mine off of a box we used recently to move!)
What moves do you love that require no space and use things you just have lying around the house?


