Conditioning – What energy system are you working?
So as you all know…I don’t like cardio very much.
Yea….yea…I know I’ve told you this a bazillion times before.
However, cardio conditioning IS an ESSENTIAL part of your workout program.
Put that doesn’t mean you should just throw in some jogging for a few minutes before or after your strength.
It doesn’t mean you should go out and run a bazillion sprints.
It doesn’t mean you should spend hours on the treadmill!
It means you should lay out a plan and make sure that you properly progress yourself through all three energy systems. (Starting to see a theme here?…Maybe a PLANNING or PROGRESSION theme!?!)
You may now be asking yourself…”Three energy systems?”
YEP! There are three different energy systems that you want to work when you do cardio conditioning and each has a separate, but equally valuable, part to play.
By varying which energy zone you use during your conditioning, you can vary the intensity of your workouts to prevent yourself from overtraining.
Ok…so to start, let’s discuss all three energy zones – the aerobic, lactic anaerobic and alactic anaerobic.
The zone all beginners need to start in and the zone that all athletes need to return to keep from overtraining and to keep their base strong is the aerobic zone.
The aerobic zone is our more steady state cardio conditioning (consistent activity for about 2 minutes +). When working in this energy zone, your heart rate should be between about 65%-75% of your max heart rate.
In this zone, you work on improving the strength of your heart and your body’s oxygen delivery systems so that your cells can work to their full capacity.
You don’t need to run for hours to improve your aerobic conditioning.
For example, at the end of your workout, you could do two minutes of battling ropes with less than two minutes of rest between rounds for 5 rounds.
You could do constant locomotion (jogging, shuffling, high knees, skipping) for five minutes. (Trust me your heart rate gets up.)
Or if you do want to dedicate a whole day to conditioning, maybe you do jog, bike or walk slowly for 30 minutes to one hour. It can even be a leisure activity that you use as active rest.
However you decide though to get in your aerobic conditioning make sure that you do in fact do it. Too often people skip this step and go straight to the sprints.
And while I personally prefer sprints and such to longer bouts of cardio, those longer bouts of cardio ARE super important for athletes at all levels.
The next energy system is where we encounter the lactic threshold and start to tap into our anaerobic energy systems. It is called the lactic anaerobic.
Anaerobic energy systems supply us with energy for only short bouts of high intensity activity. Our anaerobic systems supply us with energy through chemical reactions that don’t require oxygen whereas the aerobic system does require oxygen.
This energy system, in which our heart rate is between 80-85% of our max, is best worked when we do a more intense bout of cardio for about 30 seconds to 90 seconds.
It is believed that if you have a higher lactic threshold, you can continue at a higher intensity for longer before tiring, which can be super important for athletes in high intensity endurance sports.
But even if you aren’t an athlete, it is important to include conditioning for this system because it improves our work capacity. The harder and longer we can work before enough lactic acid builds up to fatigue our muscles the more we can get out of some of our very intense workouts!
The third system, the alactic system, is also an anaerobic system.
When working our alactic system our heart rate should be between 86-90% of our max heart rate. To work this system it is best to do any activity that is high intensity and can fatigue you in about 8-12 seconds.
We use tsunamis, sprints and Versa Climber a lot when doing conditioning for this energy zone.
The key here is to pick something that truly fatigues you in 8-12 seconds.
And this zone…well you need to EARN this zone. If you are a beginner, don’t start with this.
Beginners or even athletes who have taken time off may want to spend at least a month doing only aerobic conditioning on top of their strength training.
Once you’ve built up your aerobic base, then move into some lactic anaerobic conditioning. After a few weeks to even a couple of months of training in both, then add in alactic training.
You need to make yourself EARN the next stage of training. You also need to make sure that all systems are strong. If you only do 30-90 second conditioning, you really aren’t making yourself as fit or as strong as you could be.
You need to do all three levels of conditioning if you want to reach your full potential.
NEXT you need to figure in on which days you are going to include what type of training. If you train only three times a week, at the end of your strength training you may want to add one day of level one or aerobic conditioning, one day at level 2 (lactic) and one day at level 3 (alactic).
If you train five days a week, you don’t want to include more than two days of level 3 conditioning and you want to make sure to vary the days so that after a hard day of conditioning you get an easier day of conditioning.
Don’t make yourself train at the same intensity day in and day out! It won’t get you near the results that fluctuations in training intensities will!
And on top of planning out on which days you are going to do what level of conditioning, you must also consider REST intervals.
Each energy system’s requirements are slightly different, but to simplify….
Aerobic – Beginners can have about equal rest to work. Advanced try to make there be as little rest as possible
Anaerobic Systems (lactic and alactic) – Beginners can have about 3 to 5 times rest to work. So if you are a beginner and work for one minute (lactic), you will need between 3-5 minutes of rest. You want to try to be close to fully recovered when you go again. As you become more advanced you can cut your rest down. You may do something like 10 seconds of work (alactic), 20 seconds of rest as you become more advanced.
Make sure that you plan out how much rest you are giving yourself because rest can be a great way to PROGRESS yourself. It is another option not as frequently used as upping the number of rounds that you do. (But it actually may be even MORE beneficial in many cases!)
So even though I don’t love cardio, I do in fact include conditioning in my workouts and I DO make sure to work all three systems.
Now the question is…Do you? What do you consider when planning out your cardio conditioning?
Vitamin D – Is a Supplement Enough?
Vitamin D has gotten a lot more publicity in recent years as a MUST TAKE supplement.
It is key for mineral absorption, especially the absorption of Calcium, which means strong bones!
Research has also shown that Vitamin D may help protect us against osteoporosis, high blood pressure, cancer and a few autoimmune diseases.
The vitamin plays a huge role in cell growth, neuromuscular and immune function and the reduction of inflammation (which means less risk for disease and better overall health!).
So because we’ve discovered how incredibly important Vitamin D is to our health (and the fact that most of the population is DEFICIENT in it), everyone and their mother’s uncle recommends that you take a supplement to get enough.
But is that supplement really as good as natural sources?

Even the bottle boosts its health benefits.
Yes and no….boy I bet you love that answer!
Yes because it is Vitamin D that our body can use. It is the vitamin that we need and we can get it in the doses that we need. And the supplement does work as well as the natural source.
But a slightly bigger NO not because of the supplement itself, but because of what it means if you actually NEED the supplement.
We should get Vitamin D from foods, such as fish and eggs, and from sunlight.
We should be eating enough whole natural foods and getting in enough outdoors time that we get plenty of sun (it really only takes 20-30 minutes).
For many of us though this isn’t as easy as it would seem. So we turn to a supplement.
Which if we are trying to eat well and be active, isn’t necessarily a bad thing. I know in Boston it was SUPER HARD to get in a proper allotment of sun each day. BUT I still ate super clean and did what I could do get outside when I could.
So to make sure I got enough Vitamin D, I took a supplement.
BUT I didn’t use a supplement to excuse a bad diet and inactivity.
Let’s face it…If you eat crap, don’t go outside and have fun and be active, then you aren’t going to be healthy no matter how many supplements you take.
So yes…a supplement can be great if you have a healthy base and really try to get as much natural Vitamin D as you can, BUT no it isn’t good if you supplement while still living the same crappy lifestyle.
Because honestly….there is so much more than Vitamin D that you are missing out on if you eat crap, are inactive and never go outside and play!
I mean think about it…If you are eating crap food, not only are you not getting enough Vitamin D, as well as other essential vitamins and minerals, but you are also getting a TON of bad for you, inflammation causing crap like vegetable oils and added sugars.
And if you aren’t going out in the sun every day not only aren’t you getting Vitamin D, but you aren’t getting a lot of the benefits that usually go along with an active outdoor lifestyle.
Let’s face it…people who usually get out in the sun every day are the same people who are more active and an active lifestyle has health benefits like improving your cardiovascular health and bone density.
On top of that, being out in the sun can really really improve your mood.
Stressed? In a bad mood?
Maybe getting a bit more outdoor time is the answer.
So to sum all of this up…YES a supplement can be a very good way to help you get adequate amounts of Vitamin D, but NO it is not a magic pill.
If you want to be truly healthy, you need to do all that you can to get Vitamin D from natural sources – healthy food and sunlight.
Vitamin D supplementation is something that you turn to only when you can’t hit the required amount while doing your best to live a healthy lifestyle.
Part 4: Bootilicious – The Glute Bridge
So the glute bridge is one of my favorite moves. It can be a good part of any warm up or a great strength exercise by itself.
It is also a great way to mix up your hip hinge workouts from vertical to horizontal! It is also incredibly hard for many people to keep their core tight enough so that they don’t feel this in their low backs, but instead feel it in their butts.
Really really focus on drawing your belly button in toward your spine when doing this move so you DON’T feel it in your low back!
So the basic glute bridge is done on the ground. You should place your feet about hip width apart and bend your knees bringing your heels in close enough that you can touch them with your finger tips.
You then squeeze your butt cheeks and raise your hips as high up as you can. You should basically be on your shoulders and heels when you drive up. You should actively squeeze your belly button in toward your spine and squeeze your glutes.
Make sure that you aren’t just simply pushing back into your shoulders off of your heels. You actually want to drive straight up and while you are pushing through your heels you want to actually think about driving your shins forward.
You should feel this move in your glutes and a bit in your hamstrings NOT in your low back.

You can also do this move with one leg raised. I like to do it with one leg off the ground with the knee bent to 90 degrees and the foot flexed. I focus on getting my hips up just as high as they were with two legs. Try to also not let your hips rotate!
Another variation that I like of the basic glute bridge is the bridge on the power wheel.

Basically the same as the glute bridge on the ground EXCEPT you have to really drive your feet straight down into the ground and squeeze your butt and core or you are going to wobble over or the wheel will run off.
Many people also feel this move a lot more in their hamstrings.
This variation is a great way to advance the traditional glute bridge and make it into a great part of your workout.
To make this move harder, you can actually roll the wheel out and then back in toward your butt. The key though is to NOT drop your hips even as your roll out.
A great intermediate move if the power wheel is just a bit too hard especially moving it in and out is the glute bridge on the sliders.
Put your heels on the sliders and raise up into a glute bridge. Just like with the power wheel, straighten the legs out keeping the hips high and then bring the heels back in so that you are in the basic glute bridge position. Repeat slowly and make sure to keep your core tight so that your low back doesn’t feel this move.
The last glute bridge variation that I really like to use is a great strength move. A beginner can do this with only their back on the bench and feet on the ground. To make it more advanced, you can do it with your back on a bench and your feet up on a bench as well (or your back on the ground and feet up). To make that harder, do it with only one leg.
The hardest variation actually returns you to the position with your back on the bench and feet on the ground. You can add weight to this position by laying a barbell across your hips.

(I will take a picture but didn’t have time today to set up everything)
Actually you can almost weight down any position to make it harder EXCEPT the power wheel. If you advance from this move, you could weight down the one-leg variation.
But make sure that when you weight down the glute bridge, YOU DON’T FEEL IT IN YOUR LOW BACK.
Focus on really keeping the core tight by “drawing in” your belly button toward your spine!
So if you want a bootilicious (aka perky, toned) butt, try some of these moves. They will also really help up your deadlift numbers if you are looking to get your lift numbers higher!
What’s your favorite glute bridge variation?
NOW NOW NOW
When we get it into our head that we want something, we usually want it NOW!
Not in two weeks, two months or two years…NOW!
It’s like we become a child again and our head is screaming “NOW!” “NOW!” “NOW!”….”I WANT IT NOW!”
Sorry….But you CAN’T HAVE IT NOW!
Success takes time. And sometimes pushing harder, faster WON’T get you there any quicker.
Sometimes pushing harder, faster actually hinders your progress.
At the same time, you can’t just sit back and wait for things to happen.
If you want to get stronger, perform better, lose weight, tone up or rehab an injury, you’ve got to give it your all WITHOUT becoming impatient (AKA pushing too hard too fast).
Two things I’ve found that have help me become more patient about accomplishing fitness goals are setting up a timeline and setting short-term goals.
When I say “setting up timelines” I mean that I outline how long it will realistically take to accomplish my goal and then I outline how much time I will spend potentially “testing” out ways to get there.
Let’s face it, if you want to lift a ton more weight or even lose a ton of weight, it isn’t going to take a month…it may even take a year. You’ve got to figure out a realistic timeframe in which to accomplish your goal.
And realistic means looking at what obstacles are in the way that may slow things down – it means planning out your timeframe based on the fact that there may be unforeseen plateaus!
Granted you can’t account for all setbacks, but the more you plan in a little extra time to deal with them, the more likely you will be to hit your goal on time if not early (which will make you very very happy…trust me!).
And setbacks can come in all forms. Unless you’ve had to work toward your specific goal before and already have a program in place, you are probably going to have to experiment a bit even if your friend/coach gives you a program that has worked for them and people they’ve known before.
Let’s face the facts…just because a program has worked for someone else, doesn’t mean it will work for you. So how long do you potentially “waste” on a program that doesn’t work before switching (especially if you have a deadline to hit!)?
My rule of thumb is…”Give it 30 days.”
You’ve got to give a program just a bit of time. I know 30 days seems like an eternity when you want something NOW, but one week, or even two weeks, doesn’t really give you enough proof as to whether or not something really works.
Give it 30 days and then assess. Did you make any progress? What seemed to help? What didn’t?
THEN make changes!
If you learned something from that 30 days, then it isn’t really wasted time now is it!?!
NOPE!
Because if you learn more about what works for you to accomplish your goal, then you will always have that knowledge if you need to get back there or even build further!
If you never experiment and…for example…just starve yourself to lose the weight, you didn’t really learn about what it takes to truly lose the weight and keep it off (and you definitely aren’t any healthier!).
Anyway, the point is you have to figure that a goal you’ve never set out to accomplish before is going to take some extra time because first you have to establish a program!
So if you’ve set a realistic timeframe, you must have accounted for a bit of experimentation on top of setbacks such as unforeseen cheat days or sickness.
But by setting a realistic timeframe you won’t stress out about having to be at your goal NOW because you know exactly when it SHOULD be achieved! (Not to mention having a timeframe will help keep you on track when you want to cheat because you know you have a deadline.)
But once you have that timeline, the best way to keep yourself to that goal is to set short-term goals within that timeframe.
When we want something NOW, we usually overlook all the progress we are making because all we can focus on is the end goal, which in terms makes us upset and sometimes even depressed about the fact that we aren’t there yet.
So how do you get yourself to stay positive and not overwhelmed by the fact that you aren’t there yet?
You set shorter goals that allow you to see all the progress you are making toward you goal!
Having something to accomplish each week, each month, will keep you on track and even positive about your progress to a goal that will take you maybe even a year or longer to accomplish.
These goals can range from weekly weigh ins or performance measures to simply sticking to a meal plan or workout assigned for that day.
The point is that when you accomplish them they make you feel like you are getting closer to your goal. Accomplishing these short-term goals should provide you with confidence and keep you positive and motivated.
If you are confident, positive, motivated and feel like you are moving forward, even if it is small steps, you are going to be WAY more likely to stay the course no matter how long it takes.
So if you’ve been struggling to stay positive and accomplish your big goal, take time today to figure out what is a realistic timeframe to accomplish it. Then set out some mini goals that will keep you accountable each day, each week, each month…whatever works for you!
NOTE: You will also have to outline a clear program with a progression toward you goal based on your timeframe, but that is a different post!
Would you rather….
So yesterday at work one of the other trainers asked me a few “would you rather…” questions.
One was about which piece of equipment I would choose from the gym as a weapon if a zombie apocalypse happened…
And the other was about which I would rather give up, nuts or dairy.
Which got me to thinking, isn’t a healthy lifestyle really all about “would you rather?”
I mean think about it…If you could eat whatever your favorite food is every day and look and feel great and be healthy, wouldn’t you? Would you really eat vegetables or cut out gluten and processed foods if you didn’t have to?
Probably not.
BUT that isn’t reality.
The reality of it is you are always playing a sort of “would you rather” game. Would you rather eat that pint of ice cream and feel crappy later or eat a natural, whole foods meal and feel energized and good later?
Would you rather eat pizza and chips and not perform well or eat a burger without a bun and a salad and get in a great workout?
I personally would rather eat well and feel great, be healthy and perform well. That is why I eat well most of the time. Plus I do find that I enjoy all of the whole natural foods that I eat. I love grass-fed beef and fish and fruits and veggies (especially cauliflower for some reason haha).
BUT there are those cheat days when I WOULD RATHER indulge and even risk feeling super crappy the next day than eat healthy.
Eating well is a choice and sometimes it isn’t always an easy choice. When you are stressed or pressed for time or put into situations where the EASIEST thing to do is cheat, you are more tempted to just give in without really thinking about the consequences of your choices (and how you will feel tomorrow about them).
Eating well and working out isn’t easy (yes it is easier for some people than for others), but it is a choice.
So think about it…What would you rather do?
Single leg/arm/limb work
How often do you do single leg exercises? Or single arm exercises for that matter.
Like single leg deadlifts…or single leg squats…or single arm rows…or single arm presses…
Never? Every once in awhile?
Most people don’t include that many single leg or single arm exercises, but they are incredibly important to mix in.
When you do single limb movements, you are forced to engage your core more AND you isolate the working limb so that a dominate side can’t take over for a weaker side!
By doing single limb movements we can correct any imbalances between sides and improve our balance and proprioception, all of which can help prevent injury.
And the cool part about the single limb movements is that we can use little to no weight and get in a killer workout. You can build great strength with single limb movements, which can make them a great option for at home workouts if you don’t have heavy weights available!
Plus if you do work up to heavy weights on single limb movements just think about how much stronger you will be when you do your traditional deadlift, squat or bench press. A LOT STRONGER! You will have better balance, more core engagement, and each side will be equally as strong. Plus single limb movements are a great time to really focus on posture and form so that when you return to the heavy lifts you will be even stronger with even less risk of injury.
Here are some great single limb moves that you should be adding into your workouts!
- Single Leg Deadlift – Can you tell this is one of my new favorite moves!?! The single leg deadlift, is one of the best ways to wake up your glutes and work on your core strength and balance. You can also really build strength with this move. I love to use a kettlebell, but a dumbbell, sandbag or barbell would also work. Even just starting with bodyweight but taking your time to really use perfect form will blast your booty the first workout or so!
- Single Leg Squat – Can you do a pistol squat? For me that is the epitome of strength. There are some great variations you can do to work up to the full pistol squat. You can do a single leg squat to bench or use a TRX for just a little stability. Once you get up to a decent range of motion, you can simply use a little weight for counter balance. To do that, just hold a plate weight out in front and squat down. Whichever move you do, trust me…your legs will feel it and so will your core!
- Single Leg Glute Bridge – A great move to do to activate those butt cheeks! This can be a great move to add to your warm up or a part of your strength training program for the day. If you can get your hips super high when doing the move from the ground, try it with your feet elevated. A super simple, but great way to tone those butt cheeks!
- Skater Hops – If you want to get a bit of cardio and work in a plane other than the sagittal one, skater hops are a great move. They work your legs from a different angle than the moves above and require you to stabilize in a different plane. If you aren’t ready for this jumping move, start with side lunges. While not perfectly a one leg move, you can really isolate one side and make it work, by stepping out to the side and then by making that same leg push you back center.
- Step Ups – It’s crazy how many people have trouble going up the stairs as they get older. This move is a great way to prevent that from happening! You can do these in all three planes if you want to add a bit of variety to your workout and hit your glutes from all angles. Start with a low box. As you can easily step up, driving through the heel without leaning forward or using the other foot, up the height of the box you are stepping on to. Then add weight. You can make this more about strength by adding weight or you can make it a bit more cardio by challenging yourself to go faster or do explosive step ups! Either way, it isolates each leg and really makes them both work!
- Single Arm OH Press – You can use dumbbells or kettlebells but this move is a great way to isolate each arm. You can stay on one side or do alternating arm presses. You can make this a strict press or even work a bit on your jerk. You can even do some isometric holds at the top! Make sure though that you have the mobility to do this move. Too much overhead pressing and a lack of mobility can lead to serious injury.
- Single Arm Chest Press (anti-rotational) – So there are two basic chest movements that I like to do. One is anti-rotational. What that means is that I use a bad or a dumbbell and perform a chest press without allowing my upper body to rotate. Your core really has to work to prevent any rotation from occurring. I love doing this standing with a super heavy band that makes me want to rotate especially since I’m only pressing on one side. (This can also be a great move to help you work toward a one arm push up….in case you are interested in doing one!)
- Single Arm Chest Press (rotational) – This is the second type of chest press that I like to do…the rotational. When I do this standing with a band, it is almost like throwing a punch with the hand holding the band. This move also works your core, but is focused more on the global musculature and not as much on the stabilizing muscles unlike the anti-rotational move. This move also seems incredibly functional to me, which probably is why I like it so much!
- Single Arm Row (anti-rotational) – So I love doing a single arm inverted row and forcing myself NOT to rotate. It is really hard to keep your shoulders level without holding onto the other strap! I also like doing an inch worm with rows. Anytime you do a plank with row and force yourself not to rotate the hips, you really make your core work! And you are still isolating each side while you are performing a row so each side has to do a full workload.
- Single Arm Row (rotational) – While the anti-rotational row is great, so are moves like the “lawn mower row” (where you reach down toward your foot and then row up a little past your side just like starting a lawn mower…if anyone actually remembers having to do that…). Working on the muscles that support rotation are super important since, let’s face it, we usually aren’t in perfect position when we do things in everyday life. NOPE! Usually we are rotating and pulling and pushing at slightly odd angles. So doing a single arm inverted row with rotation CAN be a good thing! It works everything from a different angle!
So looking at this list…How many of these moves have you ever done? How often do you isolate each side to correct imbalances?
And if you have considered some of these moves, have you done some of the rotational or anti-rotational variations? It all goes back to my post from the other day…Are you working in all the different planes?
P.S. I will hopefully have a few picture shortly to help illustrate some of these things!
Recovery
The more intensely you work out, the more attention you must pay to your recovery.
Our bodies can get run down by daily life especially when we are working out hard on top of everything else. If we don’t take care of our bodies, then we won’t reap the rewards of all of our workout, and even dieting, efforts!
But recovery doesn’t simply mean taking time off and laying on the couch doing nothing.
Recovery can be active and includes more than just sleep and relaxing. Recovery means stretching and SMR. Recovery means eating correctly and staying hydrated. It can mean contrast showers and icing or applying heat.
It means taking care of any places that need extra TLC.
And it doesn’t mean five seconds of stretching or rolling out. If you actually have areas that feel worn out from the week or bug you from time to time, you have to take care of them.
Ice, stretch, roll out. Do all three and not just every once in a while. Do them every day, numerous times a day to help the problem correct itself more quickly.
More isn’t always better but not enough won’t get you anywhere. If you are a tight person, or have imbalances, rolling out the few times a week you go to the gym (for like a minute before you workout), isn’t going to be enough.
You need to spend time correcting the imbalances. You need to create a program and probably spend time every day for at least a few weeks to help correct the problem.
That can mean activation exercises for the muscles that are underactive. It can mean stretching tight muscles and rolling out knots. It can mean icing muscles that are particularly worn out or areas that get inflamed from lots of use.
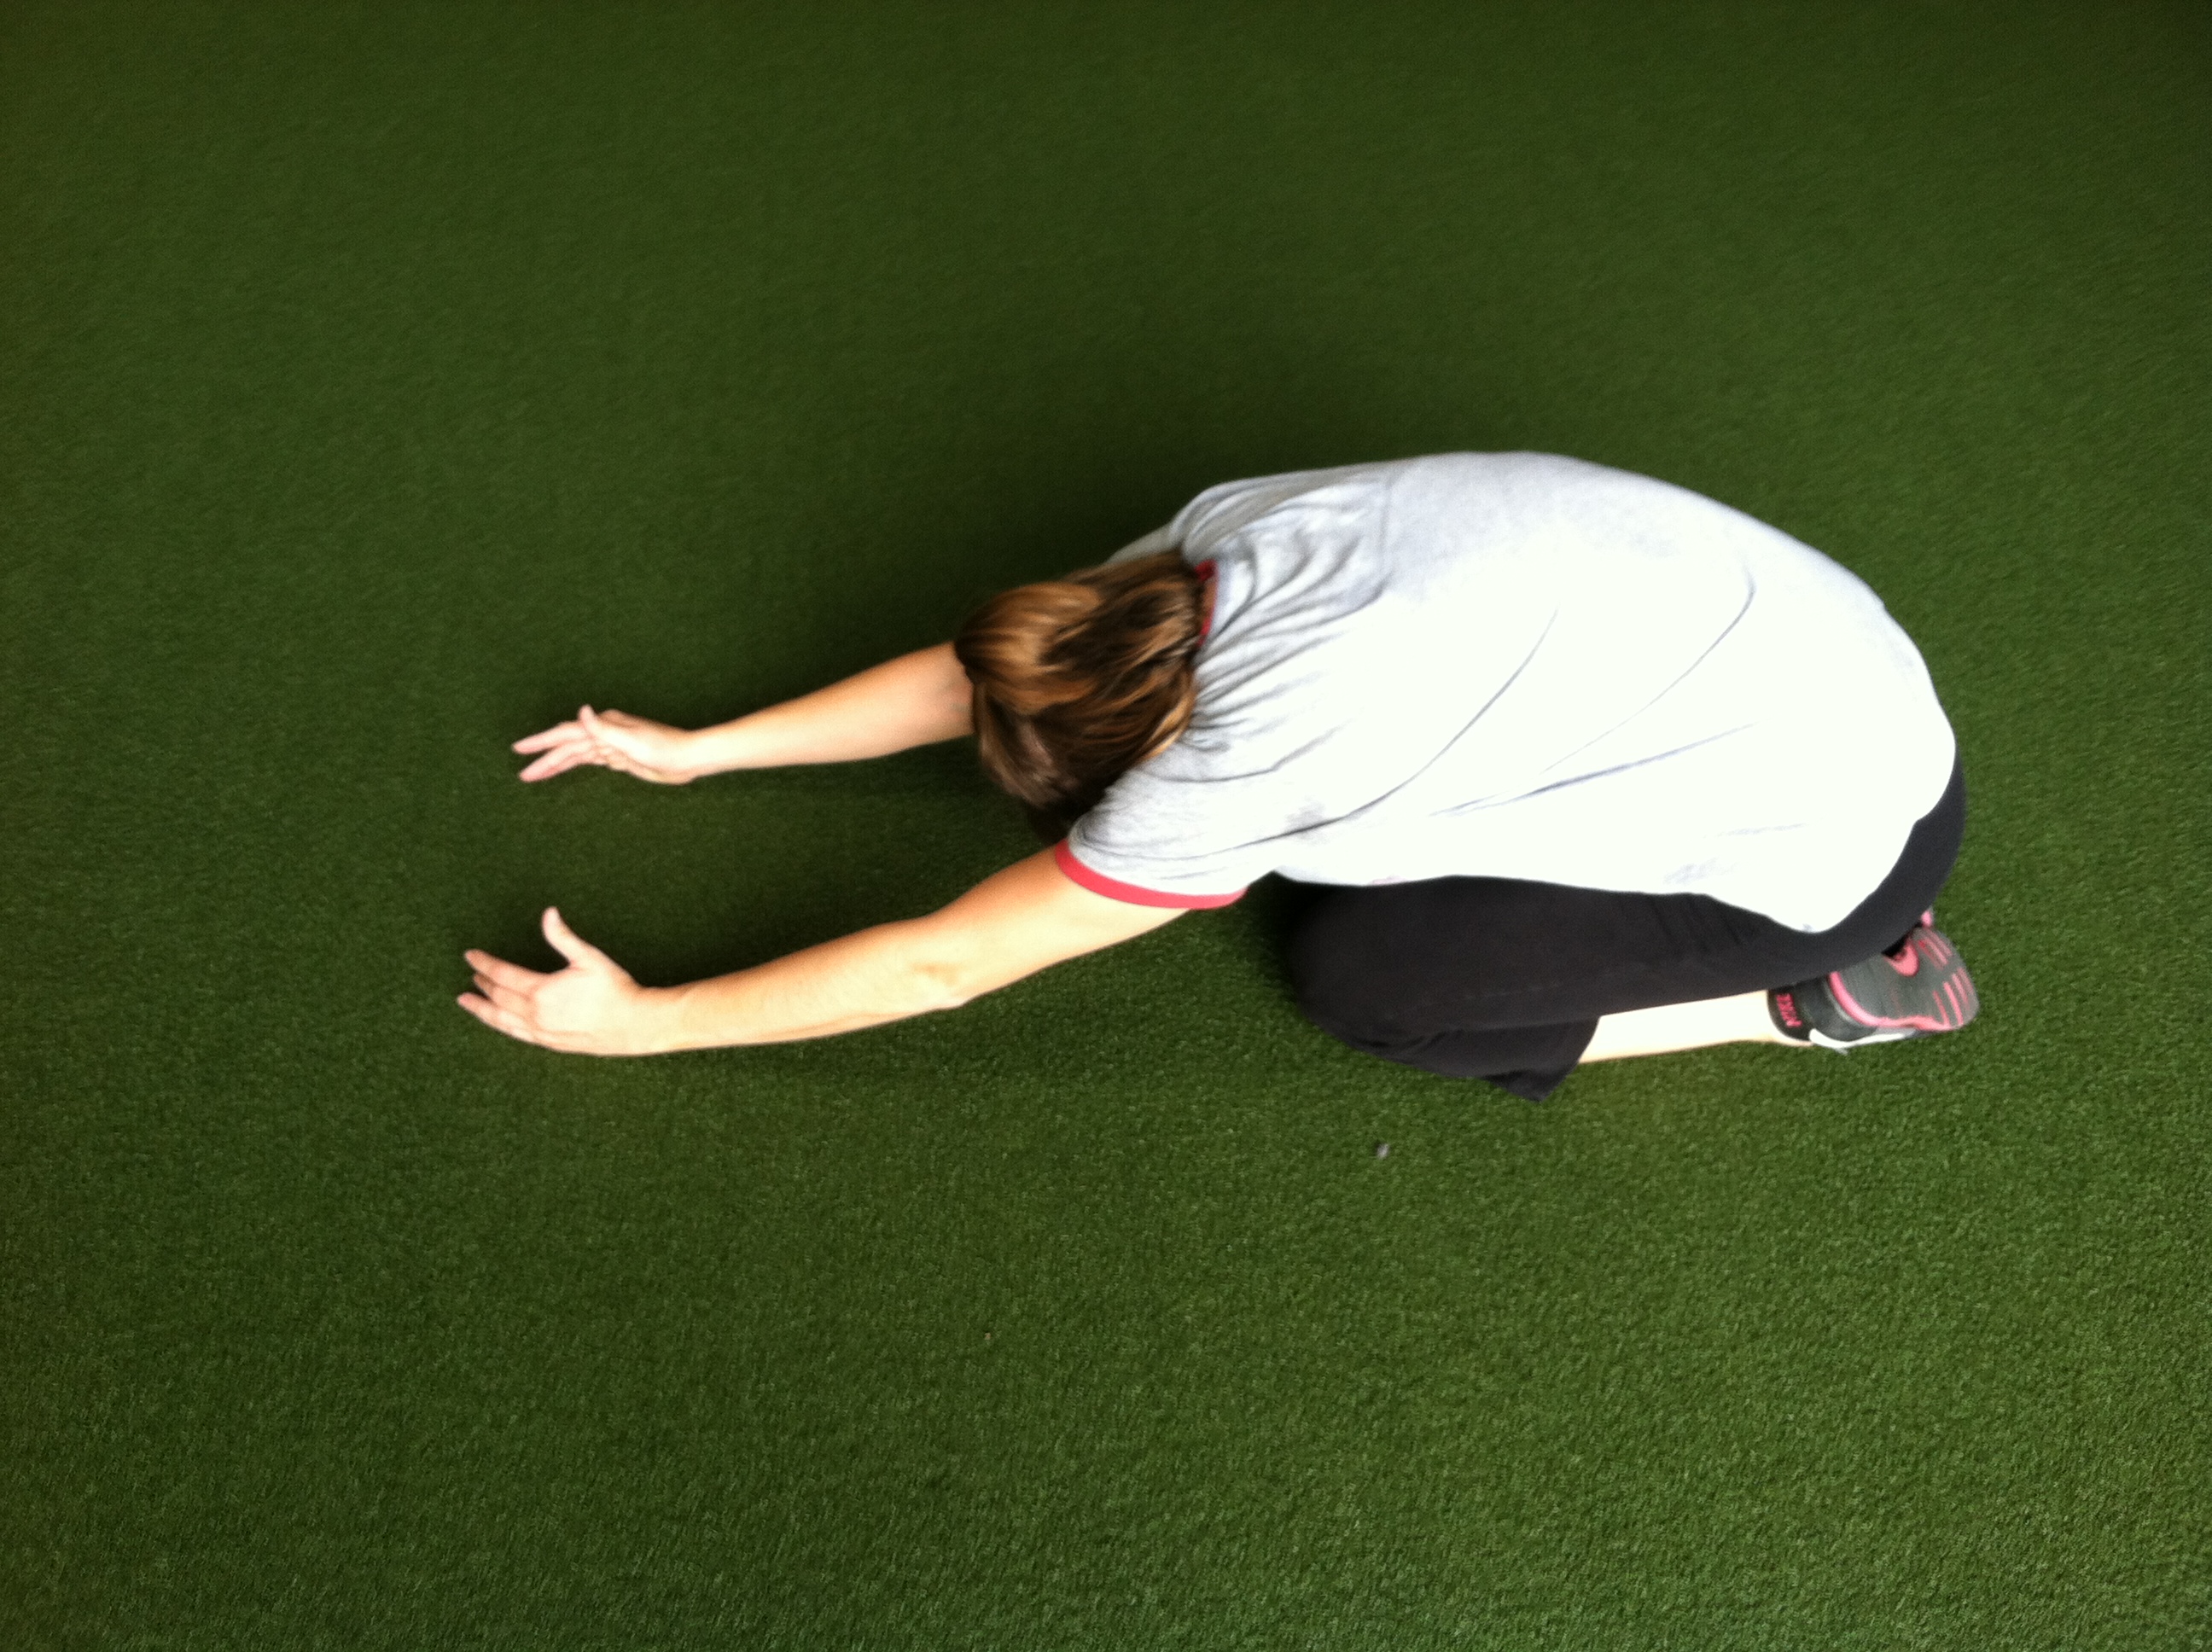
One of my favorite recovery moves….child’s pose with attention on the lat stretch!
It doesn’t mean ignoring the issue or just dealing with the pain. It also doesn’t mean not going to the doctor if your pain is severe or chronic.
BUT it does mean taking care of yourself so that some pain doesn’t become an injury – so that a little tightness or soreness doesn’t turn into an overuse injury or strain.
Even injuries you supposedly “rehabbed” can have long-term consequences if you don’t take care and make sure they are truly recovered. An ankle injury years ago could be the reason why you are now having knee pain, especially if you don’t take care to make sure everything has been rehabbed.
The best recovery program is the one that does something BEFORE you actually have issues!
The better your recovery program, the quicker you will heal from any injuries (or even prevent them from happening in the first place) and the more ready your body will be each week to handle the challenges you throw at it.
So what areas are tight on you? Where do you get knots and soreness? How is your posture? And remember, just because you have low back pain doesn’t mean your low back is tight…it could be a trigger point somewhere else around the area causing the pain!
Which Plane Do You Move In!?!
So a client at the gym got involved in a discussion with a friend who doesn’t work out at our gym about exercises and moving in different planes.
He was asking her about her workout routine and definitely didn’t approve of the things she was doing…but that is another conversation.
However, what I do want to discuss is one specific question he asked her…
He asked her…”What planes of motion do your workouts emphasize? The sagittal (forward, backward, up and down), the frontal (lateral movements) and/or the transverse (rotational)?
It’s a really really good question. And I guarantee that if you really start to think about your workouts, 90% of your movements are in the sagittal plane, which honestly isn’t very functional or representative of the way you move in everyday life.
It also doesn’t make you as strong or fit as you could be…especially if you are getting in shape for a sport.
If you truly want to get into shape, you need to move in all three planes.
So right now ask yourself…Does my workout include moves in all three planes of motion or is it all just sagittal (aka squats, forward and backward lunges, cleans, snatches, push presses, push ups, pull ups….)?
I’m betting once you assess, you will realize that you aren’t utilizing the other two planes nearly often enough! I know that our client’s friend didn’t.
And you know what her response was when she realized she was basically only moving in the sagittal plane?
She said that nearly 100% of her workouts are in the sagittal plane and that she rarely works lateral. She said she couldn’t even think of any rotational movement that she does.
She then said that it seems to her that lateral and transverse movements would cause the most injury.
AH!
UHM…NOPE!
Just because we love our workouts or our trainer that doesn’t mean that what they are doing is the BEST way.
Sorry, but it doesn’t.
It doesn’t mean that we shouldn’t do our own research and continue learning.
Working ONLY in the sagittal plane is what causes us to GET INJURED.
The transverse and frontal planes are NOT more dangerous!
They are actually essential if you DON’T want to get injured.
I mean think about it….do you really just move forward or backwards…up or down in real life?
Do you not twist and shuffle and rotate and throw and swing and spin?
YEP YOU DO!
So why wouldn’t you be doing that in your workouts!?!
Why wouldn’t you do rotational medball passes? Why wouldn’t you do side lunges and curtsy lunges and lunges at an angle. Why wouldn’t you shuffle and crawl laterally? Why wouldn’t you press with rotation and jump at different angles?
Why would you only workout moving forward and back and up and down if you don’t move only those ways in everyday life!?!

Even playing games…like fake knife fighting, we don’t just simply move forward and back or up and down. If we did, we wouldn’t “live” long!
Burn off what you eat
So in college I had a couple of teammates who definitely lived by the philosophy of eat what you want and burn it off…aka exercise so you can eat badly.
I even know a ton of people now that have that do the same thing…
“I workout so I can eat what I want. And when I eat badly, I just go workout to burn it off!”
But that is probably the worst mentality you could have.
Working out doesn’t excuse the CRAP calories you are putting into your body. Exercise doesn’t truly cancel out the bad food.
You may not necessarily gain weight on the scale because you burned off the calories you consumed, BUT you definitely aren’t being healthy and I guarantee you would see your workouts paying off way more if they weren’t simply a way to allow you to eat badly!
For one, you aren’t fueling correctly to really get the most out of your workouts. And your body composition is probably not improving.
Actually it is probably getting worse.
And two, you are probably going to at some point really start overtraining. I know a ton of girls that would lift and then even run just to make sure they “burned off” the food.
Let’s just say this is DEFINITELY not a healthy attitude.
Actually I HATE the attitude….So when I saw a restaurant in London that now allows people to eat and WORK OFF the food, I of course had to write a rant about it.
The restaurant is called Steam. And while I like the idea of a restaurant serving whole, natural foods or even healthy meals, I HATE the idea of a restaurant promoting workouts to work off the meal.

AH!
I like the fact that you can play games and have a place to eat and be active, but the whole philosophy of working off what you eat is what kills me. And honestly, maybe it is just the way the restaurant is promote that really bothers me.
I don’t mind offering people a place to be active and healthy while enjoying a healthy meal, but I don’t like when you offer exercise and activities just to burn calories so that you can eat without guilt.
And vibrating chairs to burn calories!?!
AH!
I mean…yea promoting eating well and working out is great…but not if you are promoting working out to BURN OFF what you eat! This restaurant is just seems to promote the disordered eating mentality that so many people already have!
AH!
You DON’T workout to burn off what you eat people! You workout to be healthy and strong and happy!
Elementary School Moves
So when writing up some new workouts, I began to think about all of the games we played in gym class…dodgeball, crab crawl soccer, scooter ball…just to name a few.
And I thought…why not include some of those moves!?! Remember when you used to swing from the monkey bar or do wheelbarrow races? Remember when you’d have to crab crawl around the gym and you considered it to be a GAME!?!
Those moves while super fun in elementary school were actually super good for you!
So now each of our workouts includes some element of elementary school play. And while it might not be as easy as it once was…it is still ridiculously “fun!”
So next time you want to work on shoulder strength, consider a wheelbarrow crawl. Or next time you work your core and upper back, consider a skin the cat.
Or what about climbing a rope? Remember when you used to climb up those poles on the playground?!? Not as easy as you remember it I’m sure!
There are so many great moves that we did as kids, but somewhere along the line we stop. And instead we start doing bicep curls and tricep extensions, which honestly aren’t near as good for us or even half as functional.
So below is a great workout with some simple elementary school moves. Try it…it might be fun! (If you don’t have some of the stuff or understand what it is, feel free to email me at manbiceps@gmail.com and I can either explain it or give you some substitutions!)
Workout
Warm up (make sure to get shoulders, glutes, back and core warm)
3 rounds (Rest in between each round or do with a partner for a relay):
Rope run and drag and then plank hinge and pull (Run down about 50ft and drag a 1.5 inch rope behind you until it is stretched out along the ground. Then go into a plank/table top crawl position facing the same way as the way you ran. Reach back between your legs and grab the rope. Sit your butt back to really get a good reach and then pull the rope through as far as you can, extending your hips as you pull. So you will go from about a plank position on the hands to almost a child’s pose still on the hands to really get a reach back and through. Pull the rope until it is completely piled in front of you and run it back.)
5 rounds:
Rope Climbs (can sub in inverted rows if you don’t have a rope…5 reps if you do it on a rope and 10 reps slowly if you do rows)
Crab Crawl 50ft forward and 50ft back (Crab crawl is with your hips facing the ceiling)
Crab crawls!
Skin the Cat (This is the move where you hold a pull up bar or monkey bar and swing your feet through over your head between your hands and all the way down toward the ground behind you. If this is too tough, simplify it by just first tucking the knees to the elbows and then next by doing a straight leg lift up to the bar) 8-12 reps
Rest and repeat for all rounds!
For our conditioning we actually played tug of war with a few stipulations to prevent injury.
You may be thinking…”Oh that isn’t a workout!”
But trust me….it really really was!


