Blog Archives
Recovery Workout
Often when I say a day is a “recovery” day, they think it means easy and worthless.
But recovery doesn’t mean easy and it is ABSOLUTELY NECESSARY! And it doesn’t even mean simply taking the day off.
Recovery can be active!
No recovery workouts may not be the most challenging thing you’ve ever done and no it won’t make you want to pass out and puke, but it may be even more important to your progress than any of your super challenging workouts.
Recovery workouts improve your mobility and stability to help you build a strong base so that you can lift more and work harder during your intense training sessions.
Below is one of our Recovery Workouts to make your body feel better and move better!
Recovery Workout

WARM UP:
Roll out and stretch.
Here are some of our favorite stretches.
WORKOUT
Do both circuits below.
Set a timer for 5 minutes for the first circuit. Work at 60-75% of your maximum effort.
CIRCUIT #1:
Locomotion – Jog, shuffle, carioca, skip, backpedal, butt kickers, crawl…Move around at a steady, consistent pace.
Then grab some water and move on to Circuit #2.
Complete 3-5 rounds of the circuit below. Hold each pose for 30-45 seconds. Rest as needed between rounds.
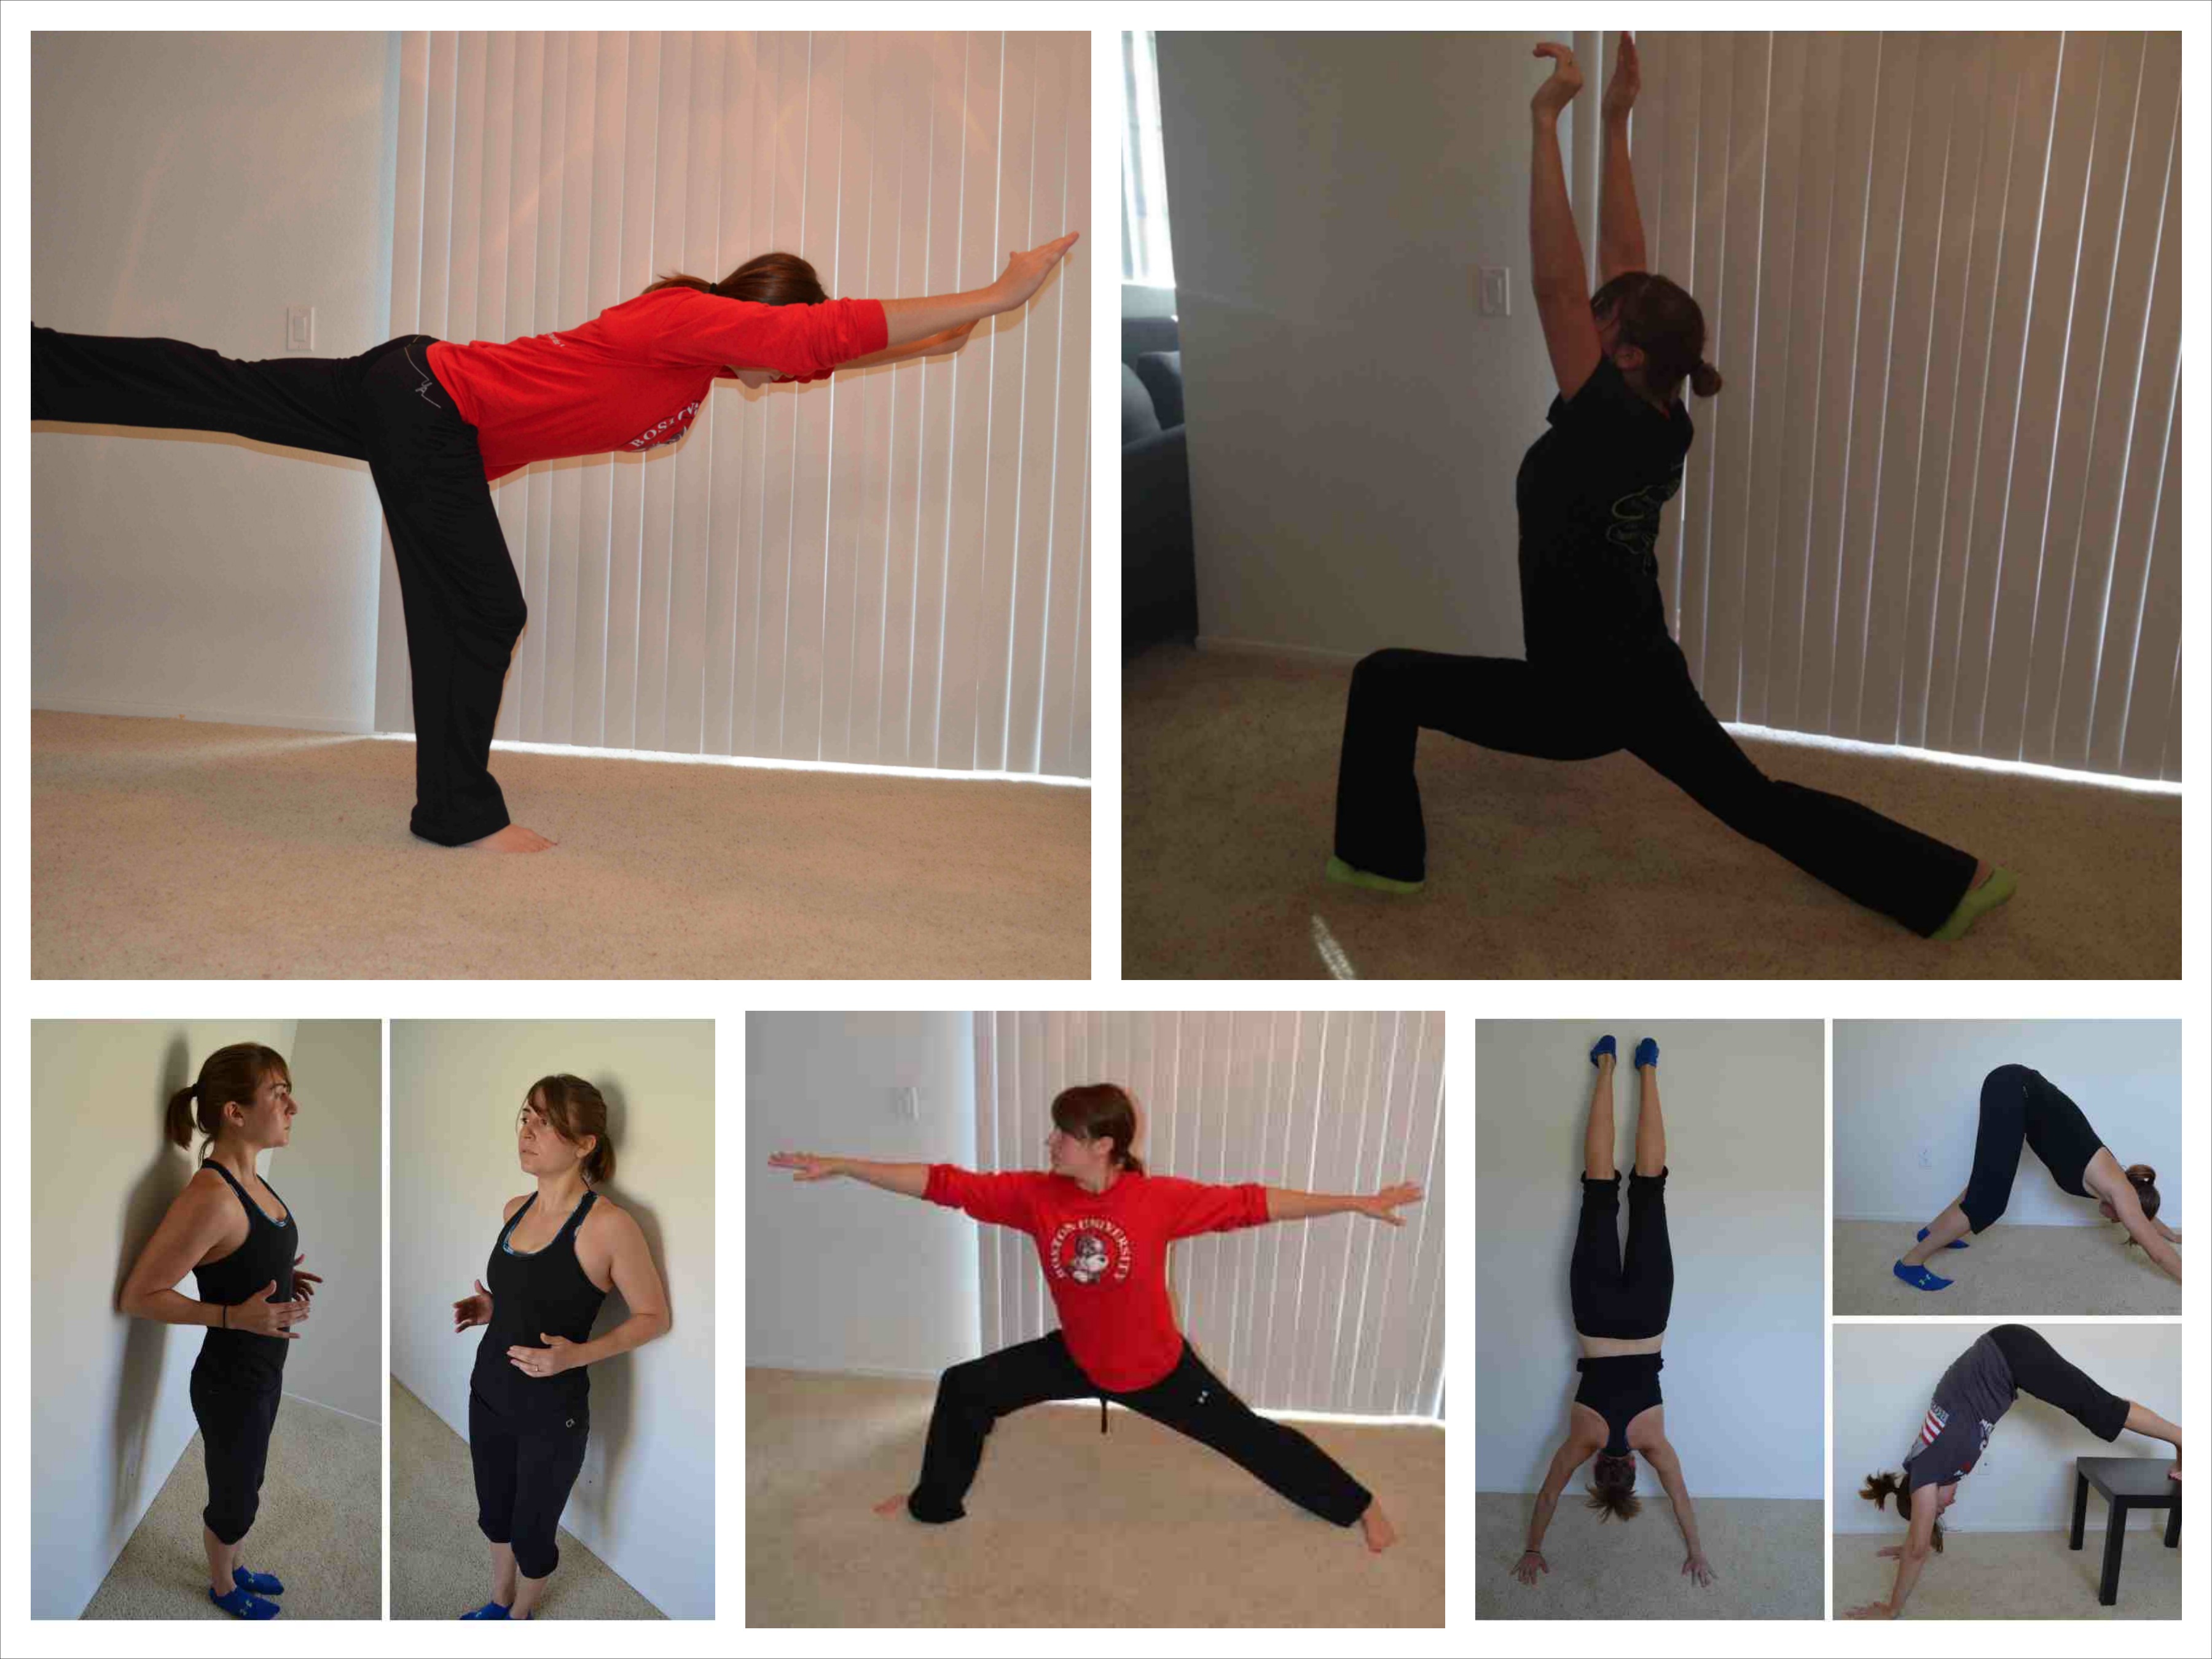
CIRCUIT:
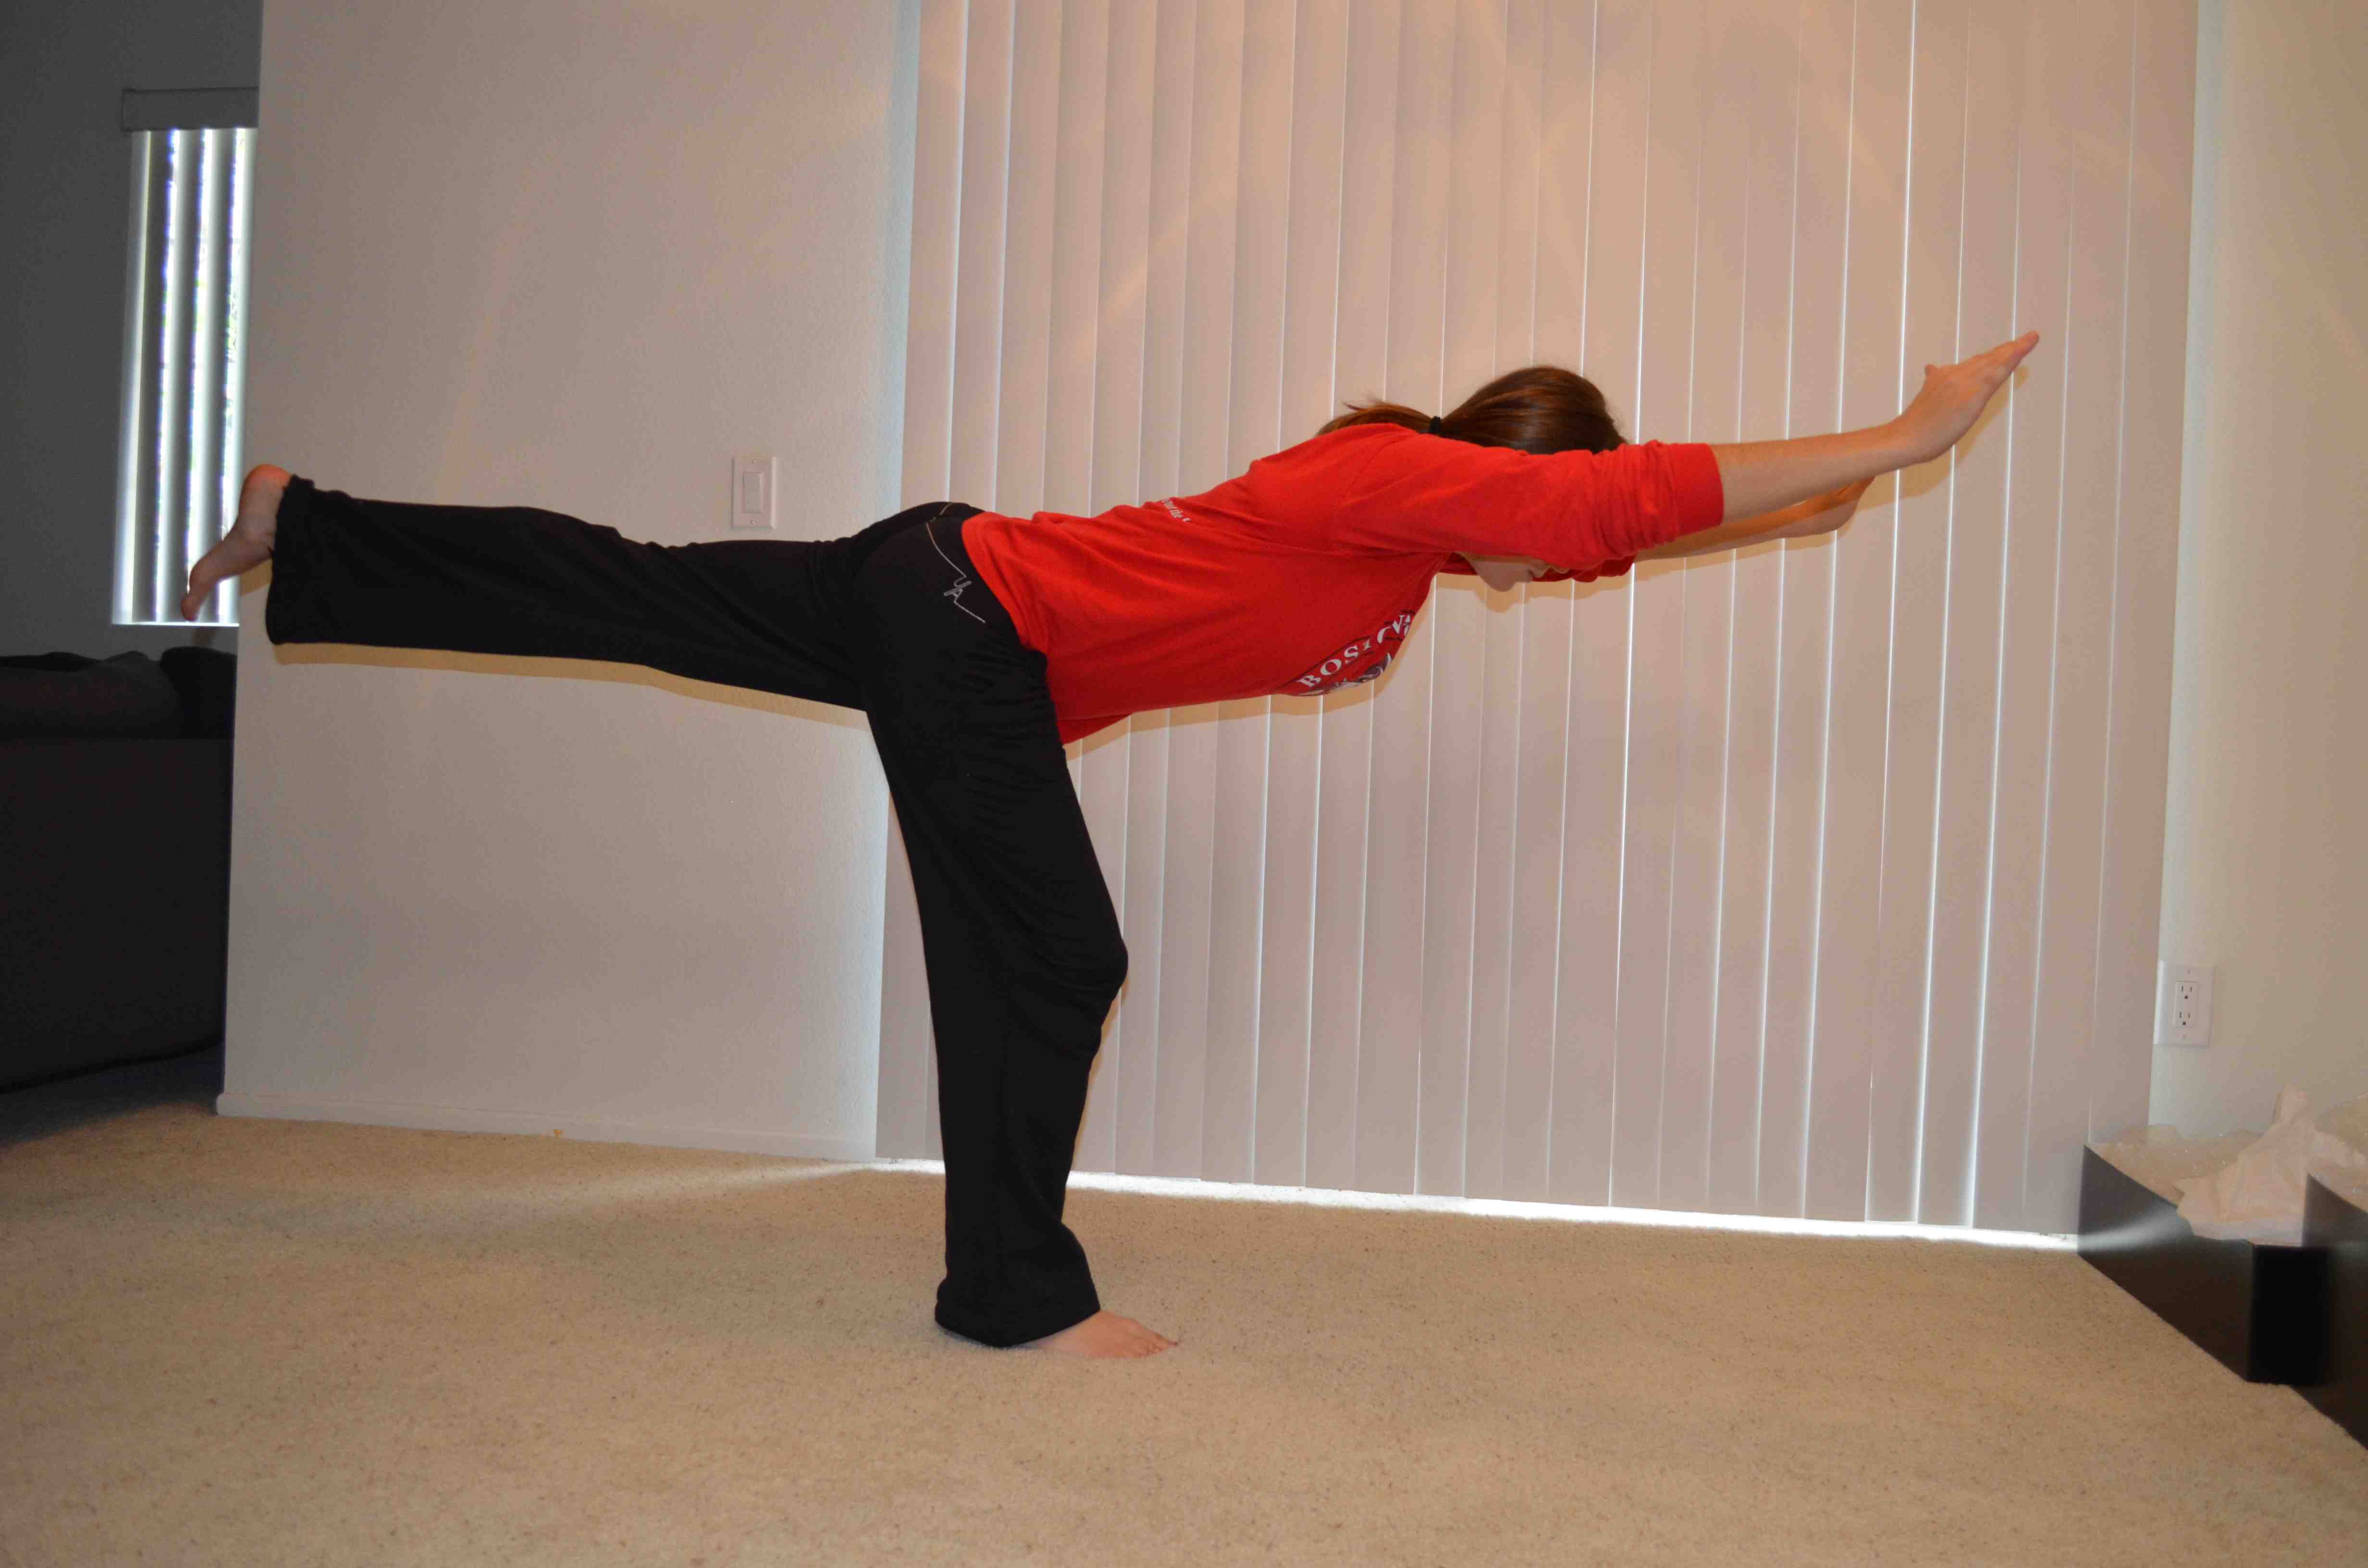
Warrior III
Scapular Wall Hold
Handstand Hold
Crescent Pose
Table Top Bridge
COOL DOWN:
Roll out and stretch.
Here are our favorite foam rolling moves…Especially if you have a desk job!
What is your favorite active recovery workout? How do you keep your body mobile and healthy?
SIDE NOTE: We love our barrels! Here are some great exercises you can do with this random awkward piece of equipment!
It All Starts With The Mind-Body Connection
Want to run faster? Be more agile? Have better coordination? Be stronger?
Then you need to simplify things and work on your mind-body connection.
Balance work, agility ladder and drills, core sequencing exercises, activation exercises…These all need to be done so that you have control over your body and can activate the correct muscles when needed.
Speed, agility, quickness, coordination and frankly even strength don’t just simply come from lifting more or moving faster.
They come from your mind and body being able to communicate more quickly, which comes from everything being in balance.
Hmmm….maybe all those isometric workouts and moves I’ve been posting have even more benefit than simply recovery.
Many of those isometric moves work on your balance. And they correct imbalances as well.

Don’t think this requires a lot of balance and a great mind-body connection? HA!
If you have an injury, the communication between that area of your body and your mind has probably been interrupted. And depending on how good your recovery is, the injury may cause or have caused pain and problems higher up or lower down on your, meaning you may have many areas that aren’t connecting as well with your brain as you should.
Isometric moves work on repairing and correcting those imbalances. They work on mobility. They build stability in the muscles. They make sure the correct muscles are activated.
Isometric moves improve your mind-body connection. They make you focus and THINK about the muscles that should be activated.
Here is a great Isometric Workout to reduce pain and start working on your mind-body connection. It is a basic full body workout to correct many of those imbalances we have from sitting all day.
But isometric moves won’t do it alone. You must also do agility drills.
Many people think agility drills are just for athletes, but they are just as important for the average person especially as we age.
The agility ladder is a great tool, especially for us all to work on our coordination. HOWEVER, often people try to go as fast as possible without focusing on form.
If you want to get the most out of the agility ladder, you need to focus first on getting the move down and THEN on going as fast as possible. And you also need to mix it up. You need to go forward and backward. You need to go sideways and work each side.
Pay attention to which side feels more coordinated and don’t let your dominate side always lead!
Here are a few agility ladder drills to get you started. (I’ll be posting a video soon with my favorites.)
But the agility ladder isn’t the only agility drill you can do. You can set up cones or even use a few basic playing cards and set up points you shuffle, sprint, back pedal and carioca to (or any other locomotion move you want). Move quickly and make the distances super short so it is more about being quick and changing directions than getting up to speed.
Reaction drills are also great to improve the speed at which your mind and body communicate. Instead of using cones, have a friend tell you to shuffle to the left. Then whenever they want they can tell you to sprint forward then shuffle to the right. They can mix it up so you never know what is coming.
They can also do the drill with you and make you “shadow” them. LOVE shadow drills. They make you really focus and have to react.
You can also improve your coordination to get stronger, faster and fitter by doing core sequencing moves. These are moves that get the muscles of your core to work together as they should.
The Turkish Get Up, or its modified variation the Baby Get Up, is a great exercise to get your core to work together.

Here is a great workout to teach you the Turkish Get Up and help you strengthen each part of the lift.
What are you doing to improve your coordination and your mind-body connection? Simply lifting heavier weights and/or running faster aren’t going to be enough!
Isometric Moves – Include Them In Your Workout
I’ve written before about how much I love isometric moves.
Holding an exercise is not only a great way to develop physical stability and strength but also a great way to develop mental toughness.
They can be a great workout on their own or they can be used to help you warm everything up and get the correct muscles activated.
Isometric moves are essential for everyone from the elite athlete to the person stuck at their desk for nine hours a day.
They help create stability and get the correct muscles activated. They can also help us create mobility and flexibility all while making us stronger.
For some great isometric moves and some workouts do to with them, check out the two links below:
10 Isometric Moves and a great Isometric Workout
Also, if you caught my post on Thursday about stretches to alleviate desk job aches and pains, you may also want to check out my post on Redefining Strength about ESSENTIAL isometric moves for anyone with a desk job!
Isometric Moves You NEED To Do If You Have A Desk Job
Isometric moves are also a great way to get in a workout over the holidays if you don’t have any equipment and very little space to work with!
10 Isometric Exercises – Why You Need To Include Them
At least once a week, as part of the warm up, I would do isometrics with my volleyball girls. (I also use them with my clients.)
But they are an especially important tool to use with young athletes because they work not only on physical strength but also on MENTAL TOUGHNESS.
Isometric exercises are any exercise you HOLD under tension.
And holding a move when your muscles are shaking and your brain starts to say, “QUIT!”…well there is nothing mentally more challenging. There is no movement to make it better. No place to escape the pain.
You’ve just got to sit, stand or lie there and hold it through the pain. (They sound really great right now…huh?!?)
You can use isometrics as part of a warm up, to get muscles activated and working together. You can also use them as a workout by themselves by doing only holds or by pairing the isometric exercises with strength or power repetitions.
Here is a list of a few of my favorite Isometric Exercises.
1. Toes (Single or Double) – This move works on your balance and warms up your feet, ankles, knees, hips and core. It is also a great calf and core strengthener. To do this move, stand on both feet and go up as high on your toes as you can. Hold that position for 30 seconds to 1 minute. To make this move harder, do single leg balancing on your toe.
2. Squat Hold (Wall Sit) – The squat hold can be done as a wall sit or as a free-standing squat and hold. Place your feet between hip-width and shoulder-width apart. Sink down until your thighs are parallel to the ground. To make it easier, do not sink as low. Keep your core engaged and your chest up. Do not lean forward too much. Make sure to sit back on your heels when you squat. You should not be on your toes at all. Do not sink below 90 degrees with this move as that actually makes it easier. And do not let your knees collapse inward. Hold for 30 seconds to 1 minute. If you want to make this move harder, you could hold a weight at chest height or even on your lap while doing a wall sit. Or you can even do a single leg wall sit!

3. Warrior Pose – Many yoga classes use isometric moves. Any time you hold one of the warrior poses, you are performing an isometric exercise. I call this move the “warrior pose” (although I know there are a few different warrior poses in yoga). To do this move, set up in a wide stance for a lunge. Turn your back foot so that the toe is pointing away from you. Your back foot will be perpendicular to your front foot, which will be pointing straight ahead. Do not let your front knee collapse in as you sink down in the lunge. Keeping the back leg straight, sink down as low as you can. Shoot for the front knee to be at 90 degrees. Make sure your front foot is firmly planted on the ground at that your knee stays about over your ankle. If you want to add a bit of shoulder work in, bring your arms up to shoulder height. Reach one forward and one backward toward opposite walls. If you want to make this move easier, don’t sink as low. Hold 30 seconds to 1 minute.
4. Split Squat – Set up in a wide stance with one foot forward and one foot back. Both toes are pointing straight ahead. Sink down until your back knee is almost touching the ground. Make sure you are not leaning forward. Your front knee should be over your ankle. If you want to make this move easier, don’t go as low. Hold for 30 seconds to 1 minute.

5. Scapular Wall Hold (Could also be a row up and hold) – THE BEST MOVE FOR POSTURE AND PULL UPS! Bend your elbows to 90 degrees. Lean back into a wall with only your elbows touching. Press your chest out and your shoulder blades down and back. Walk your feet away from the wall only as much as needed to feel the muscles behind your shoulder blades working. Do not let your shoulders shrug up by your ears. The bigger the incline from the wall, the harder the move will be. Make sure to keep your body in a nice straight line. Keep your core tight and squeeze your quads and glutes. You could also sub out the scapular wall hold for an inverted row to hold. You could row up on either a TRX or barbell and hold at the top of the row. Hold for 30 seconds to 1 minute.
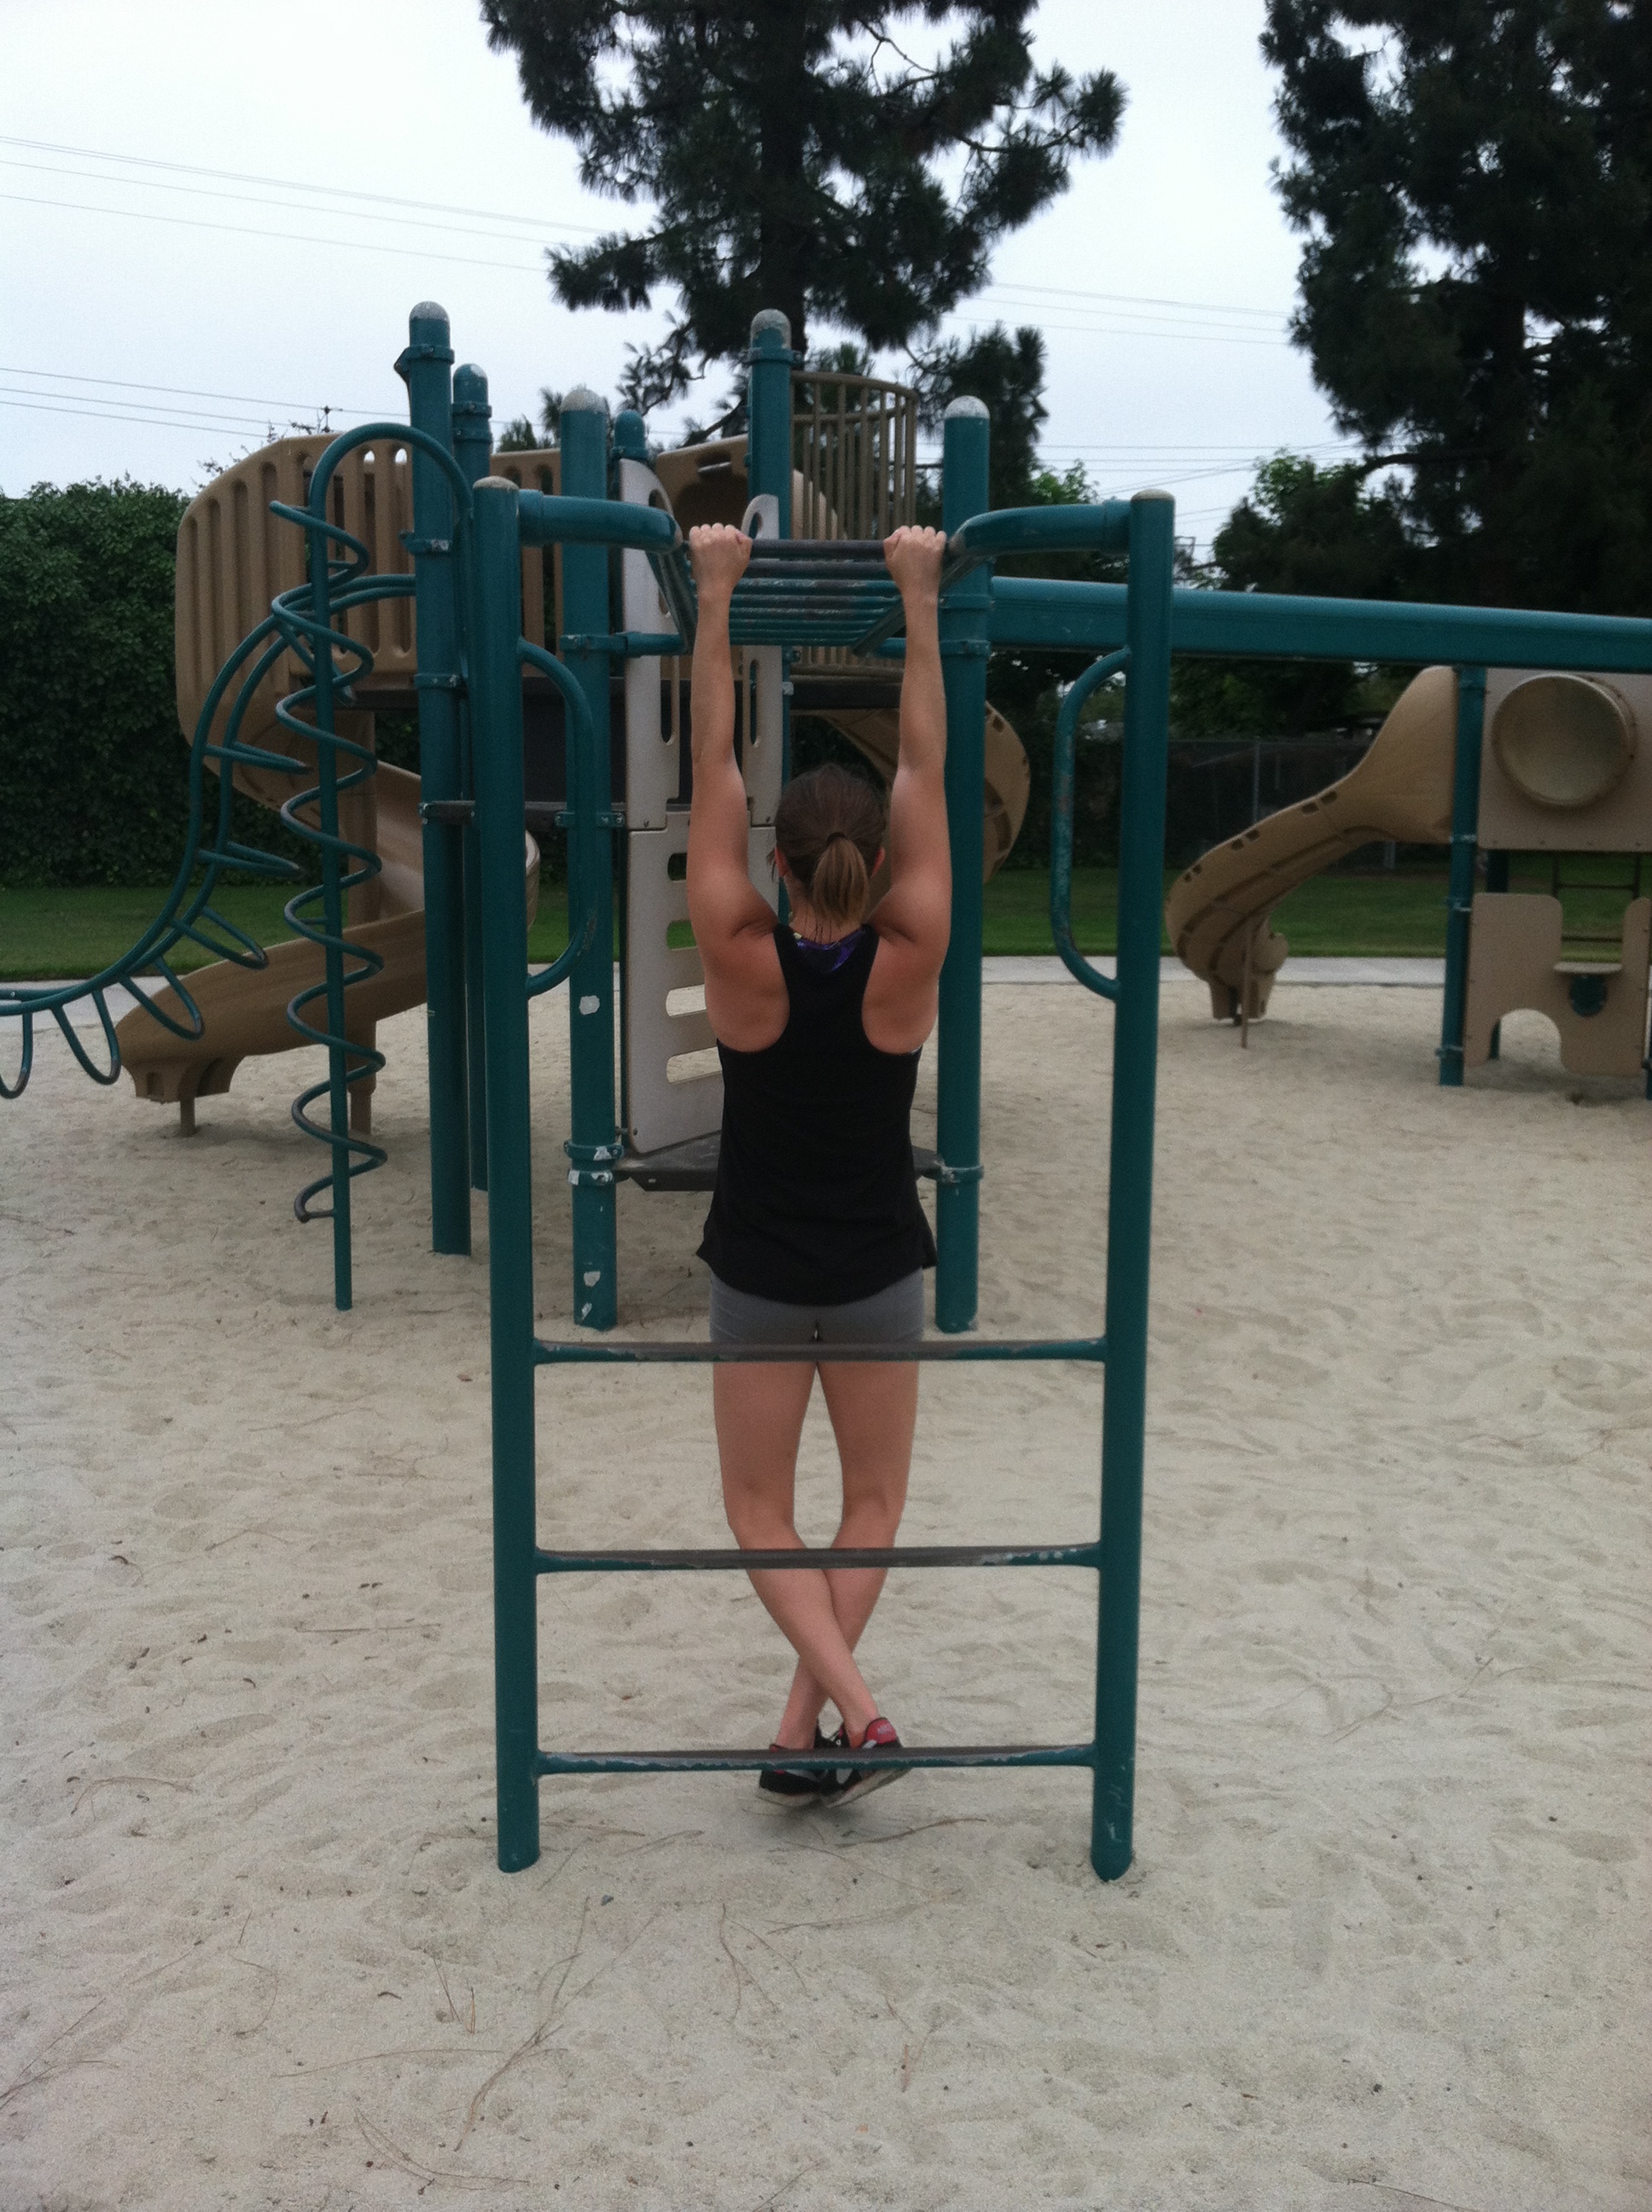
6. Dead Hang (Pull up and Hold) – You can hold at the bottom, middle or top of the pull up and each will have its benefits. My two favorite are the dead hang (holding at the bottom and just pinching your shoulder blades down and back) and the pull up to hold (holding at the top). With the dead hang, grab the pull up bar and pinch your shoulder blades down and back. You want to press your chest out and tighten your core as if you are going to pull up. To make this move easier, hold for a shorter time OR add some assistance by either keeping your feet on the ground so you are pulling less weight or by using a band around your knee. To do the pull up and hold, hold at the top of the pull up. Your shoulder blades should be down and back and your legs should be straight. Do not tuck your knees. To make this move easier, use a band or place one foot on the ground for assistance. Hold 30 seconds to 1 minute. (Below are the dead hang and the assisted hold at the top.)

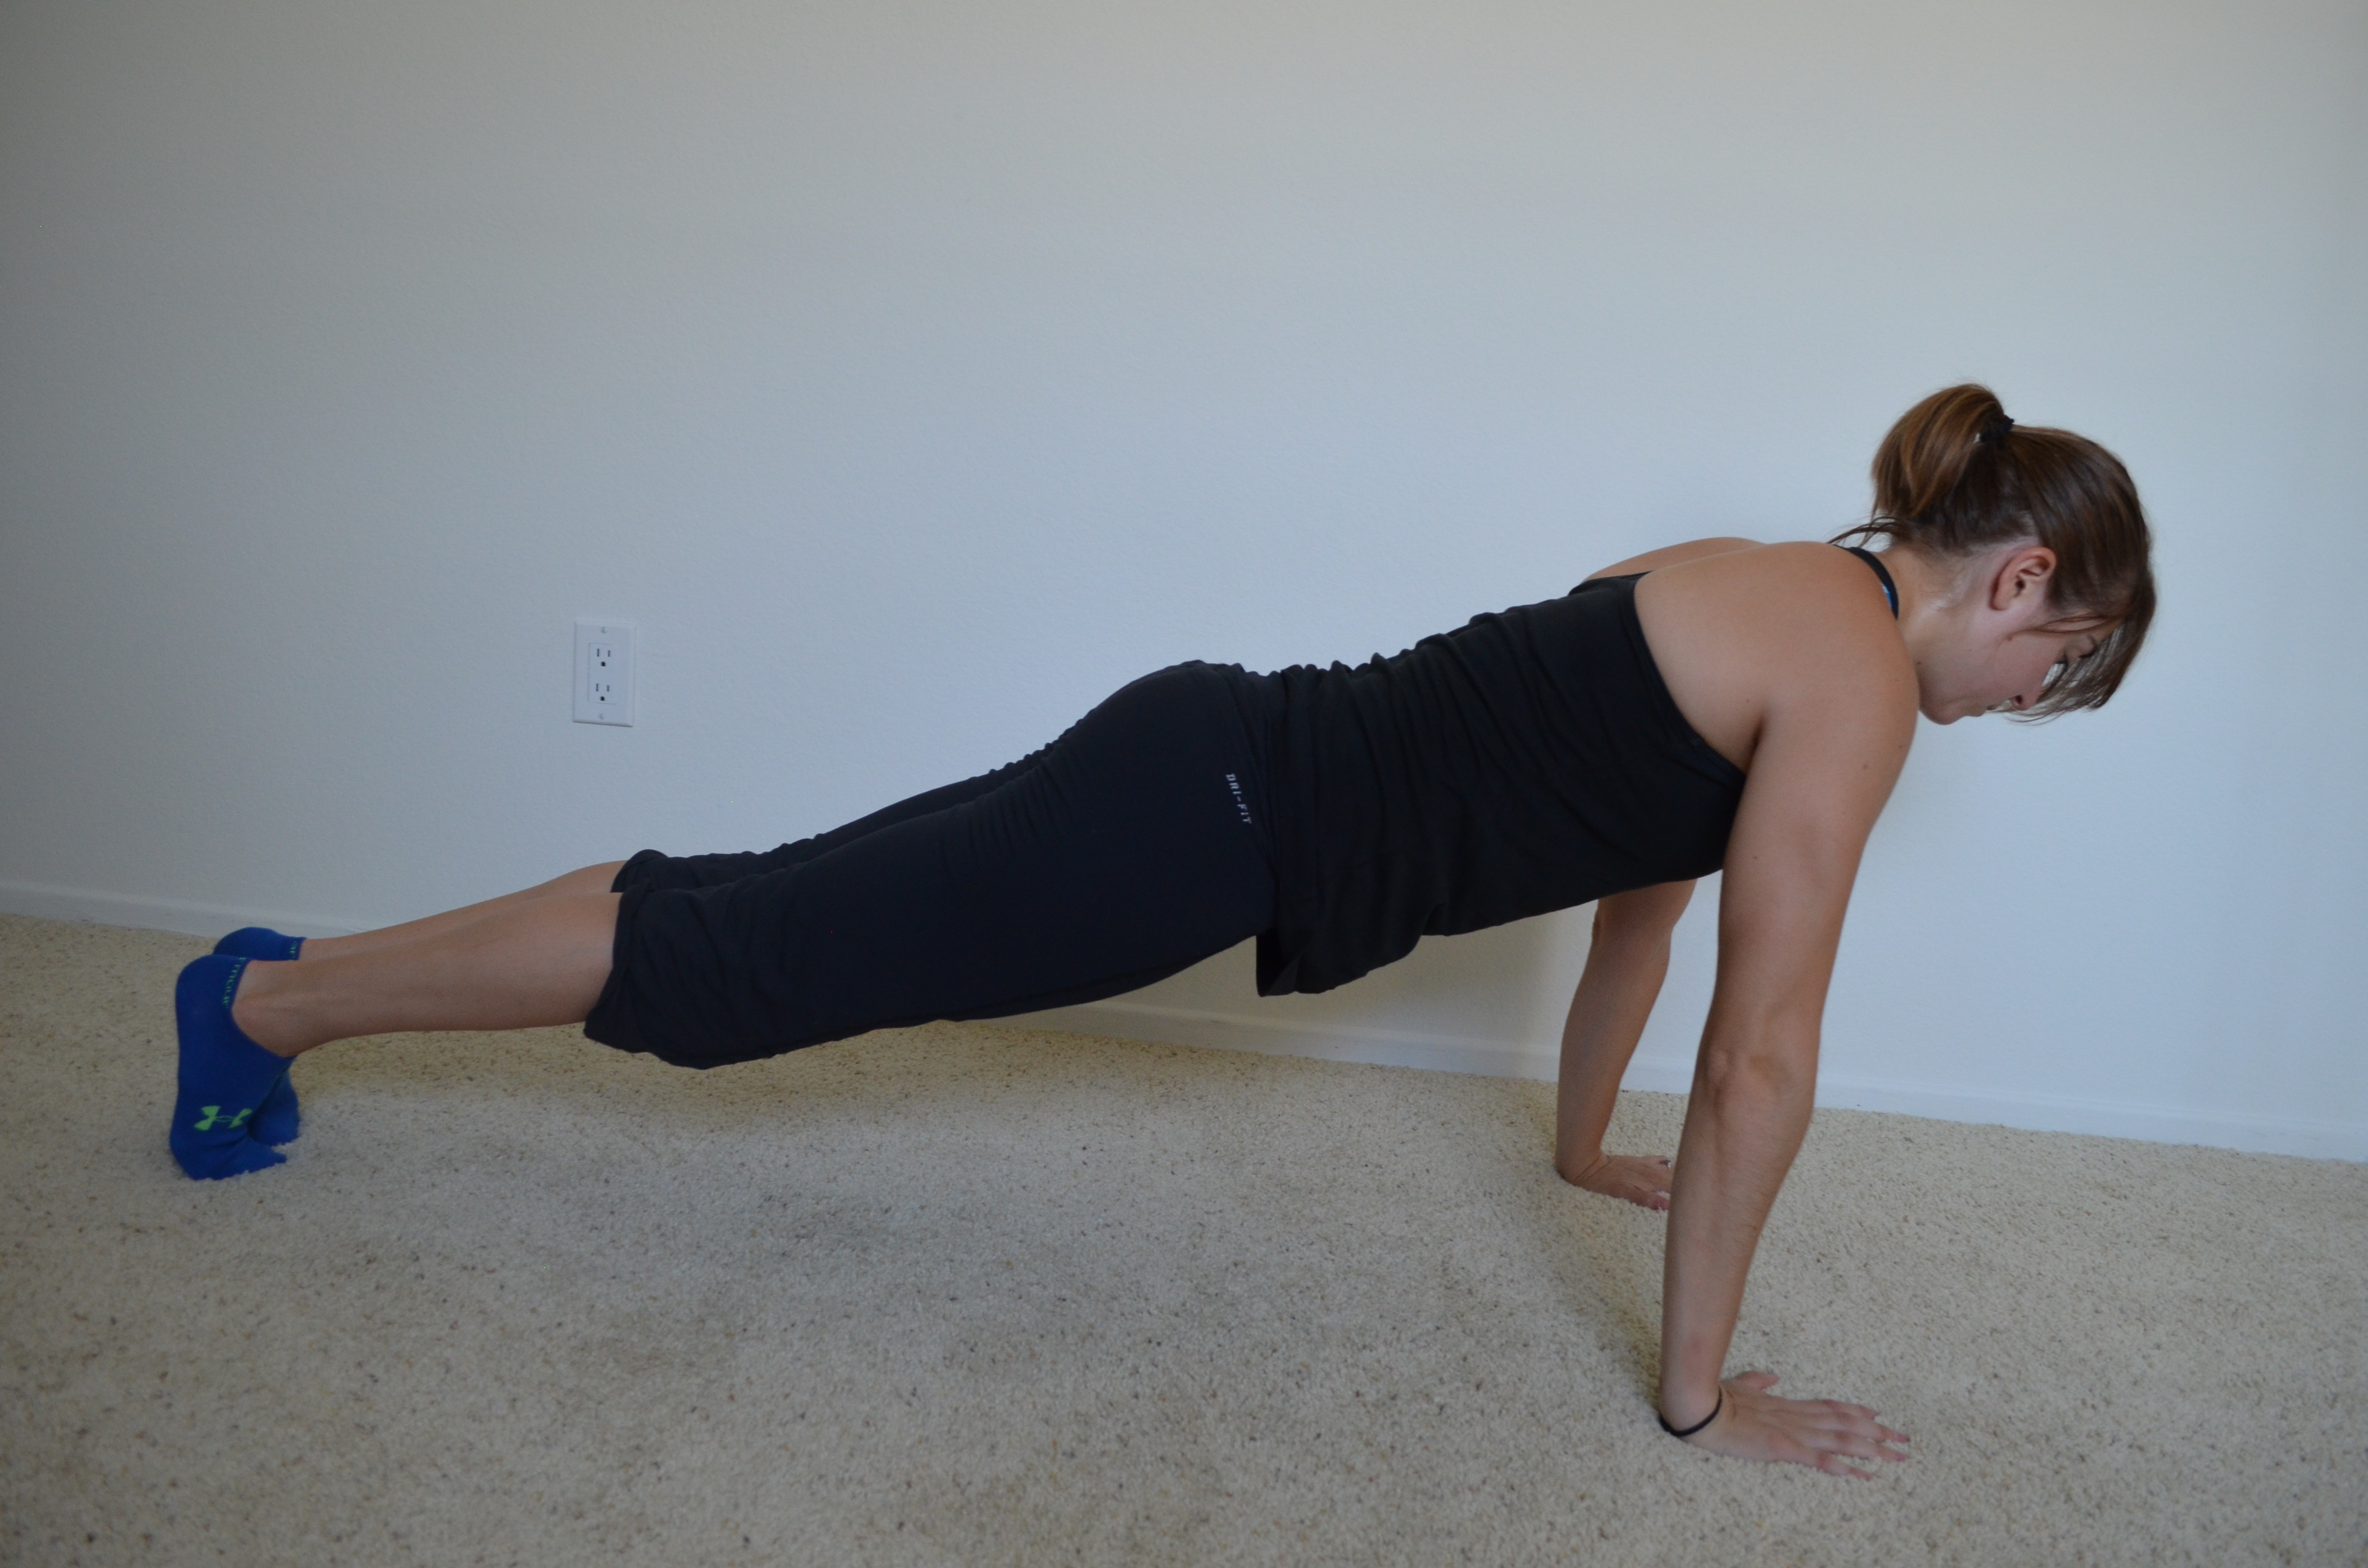
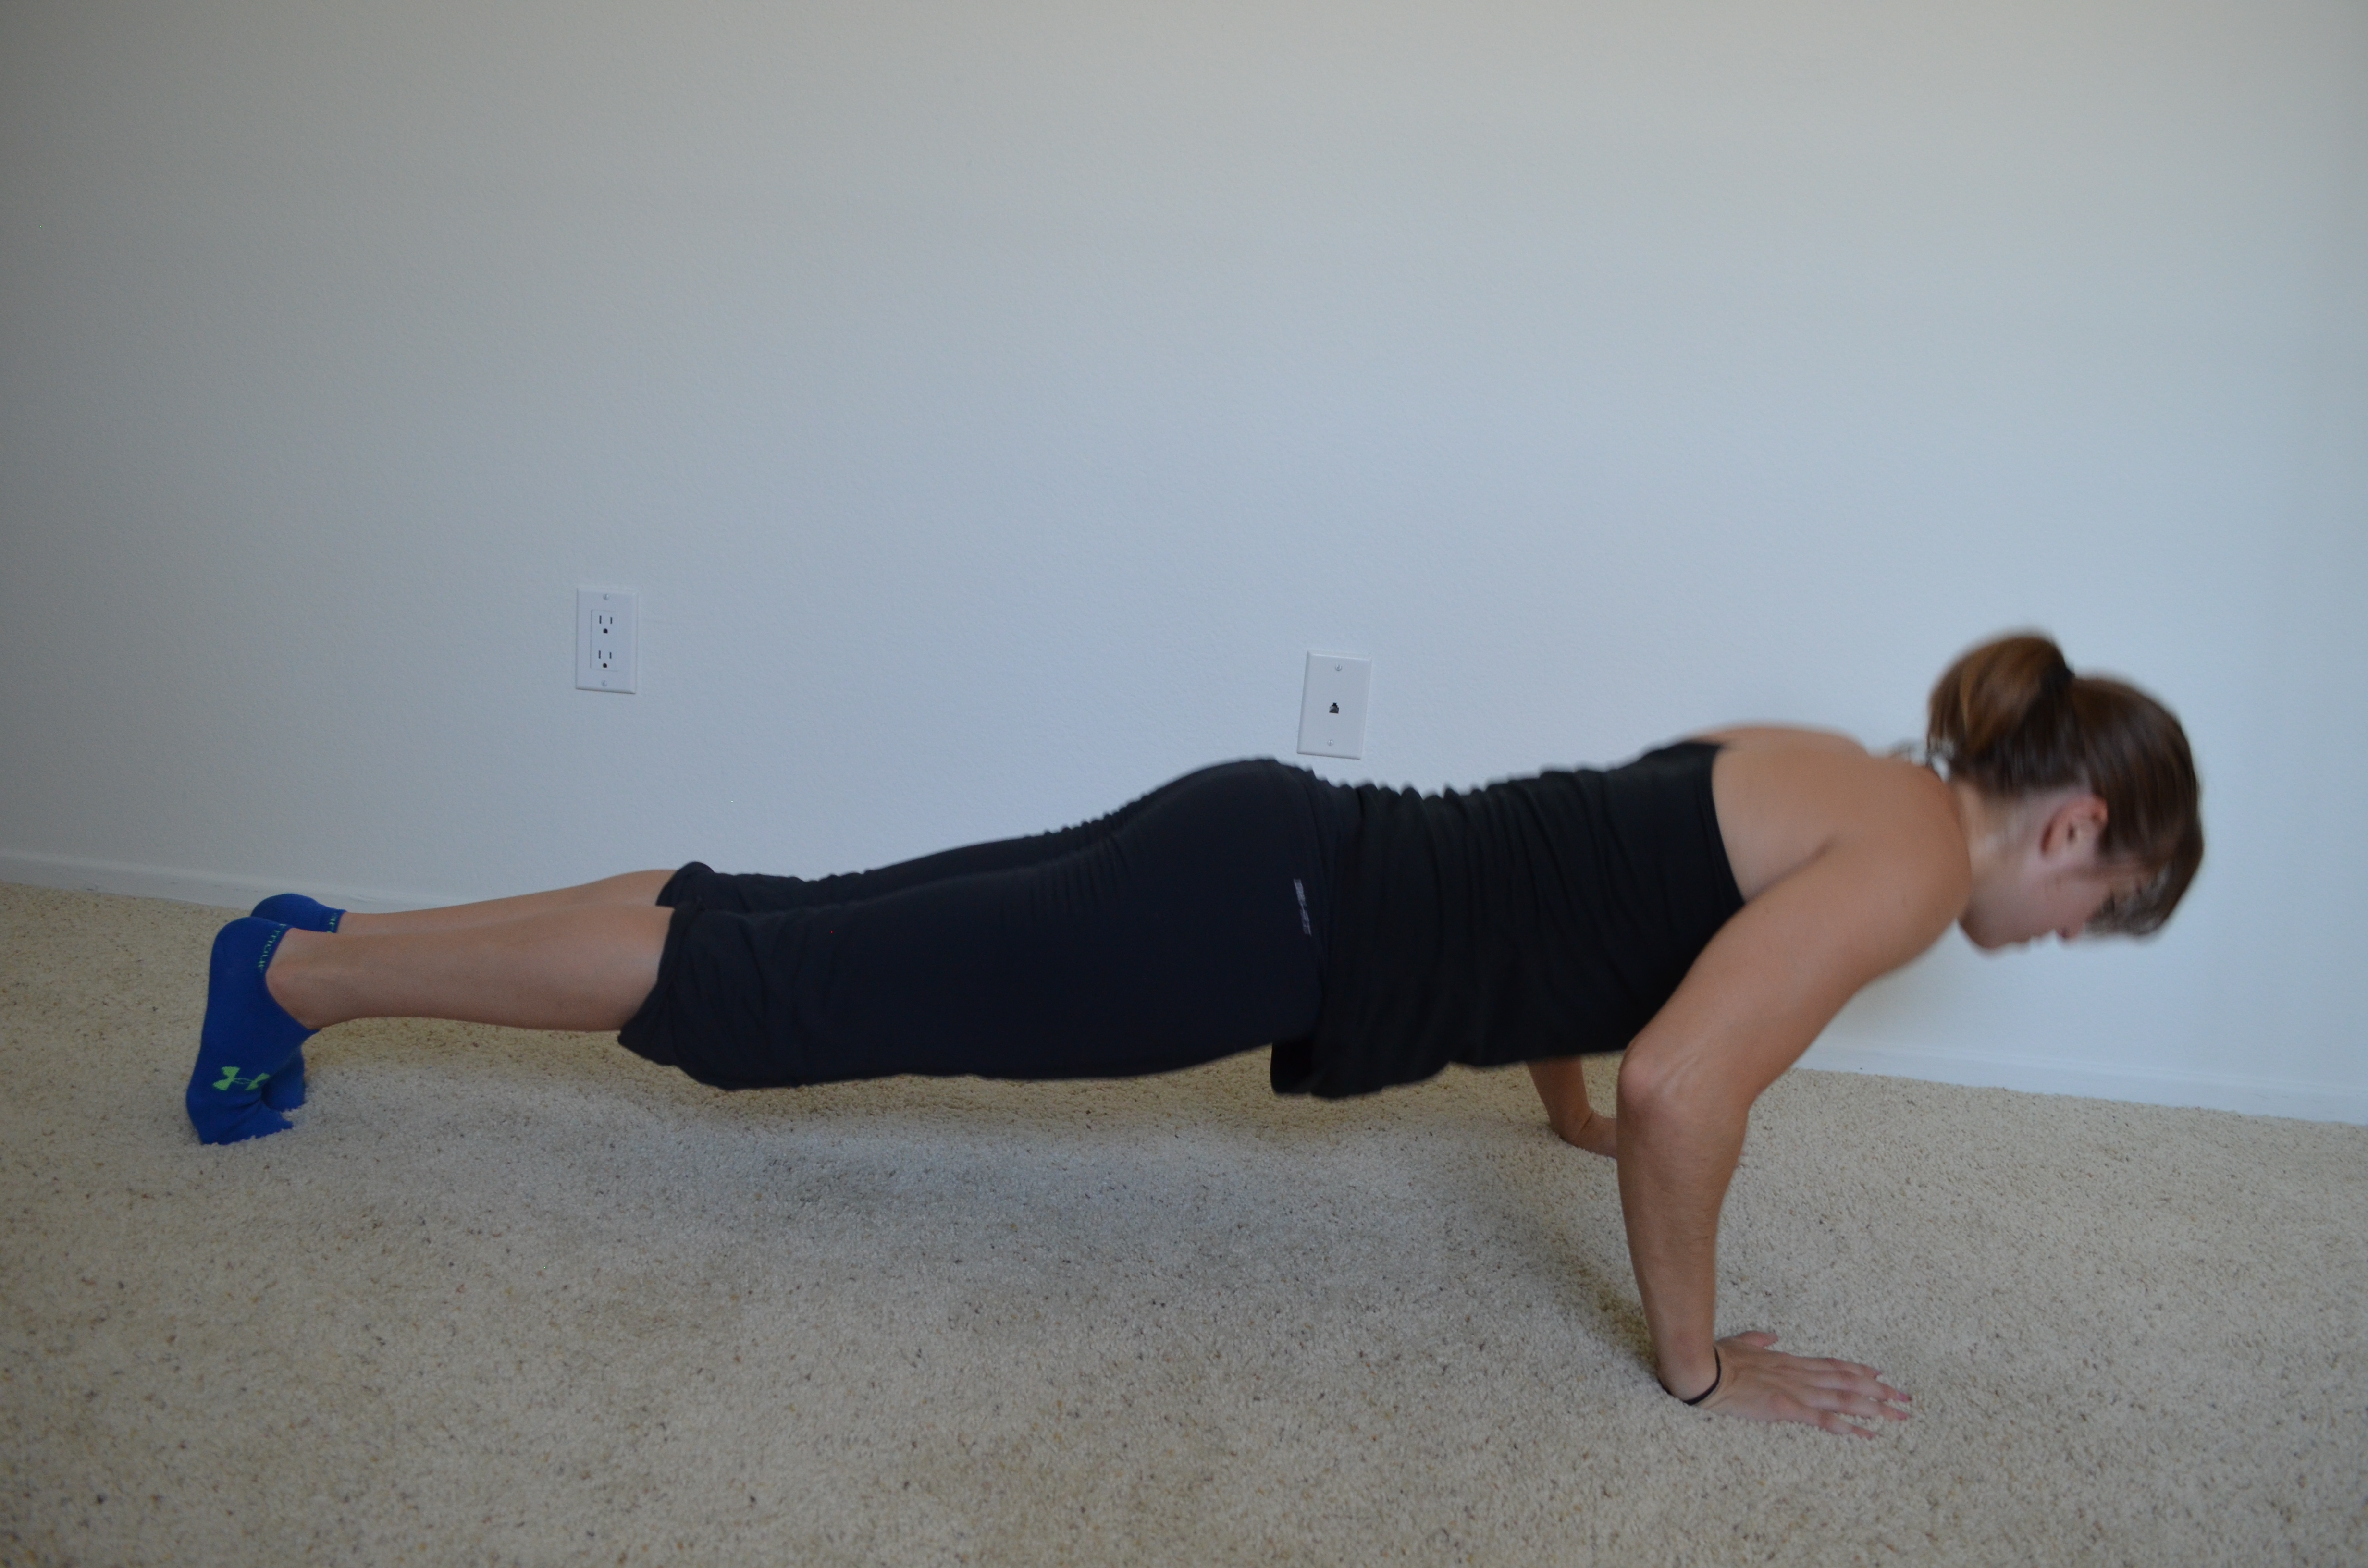
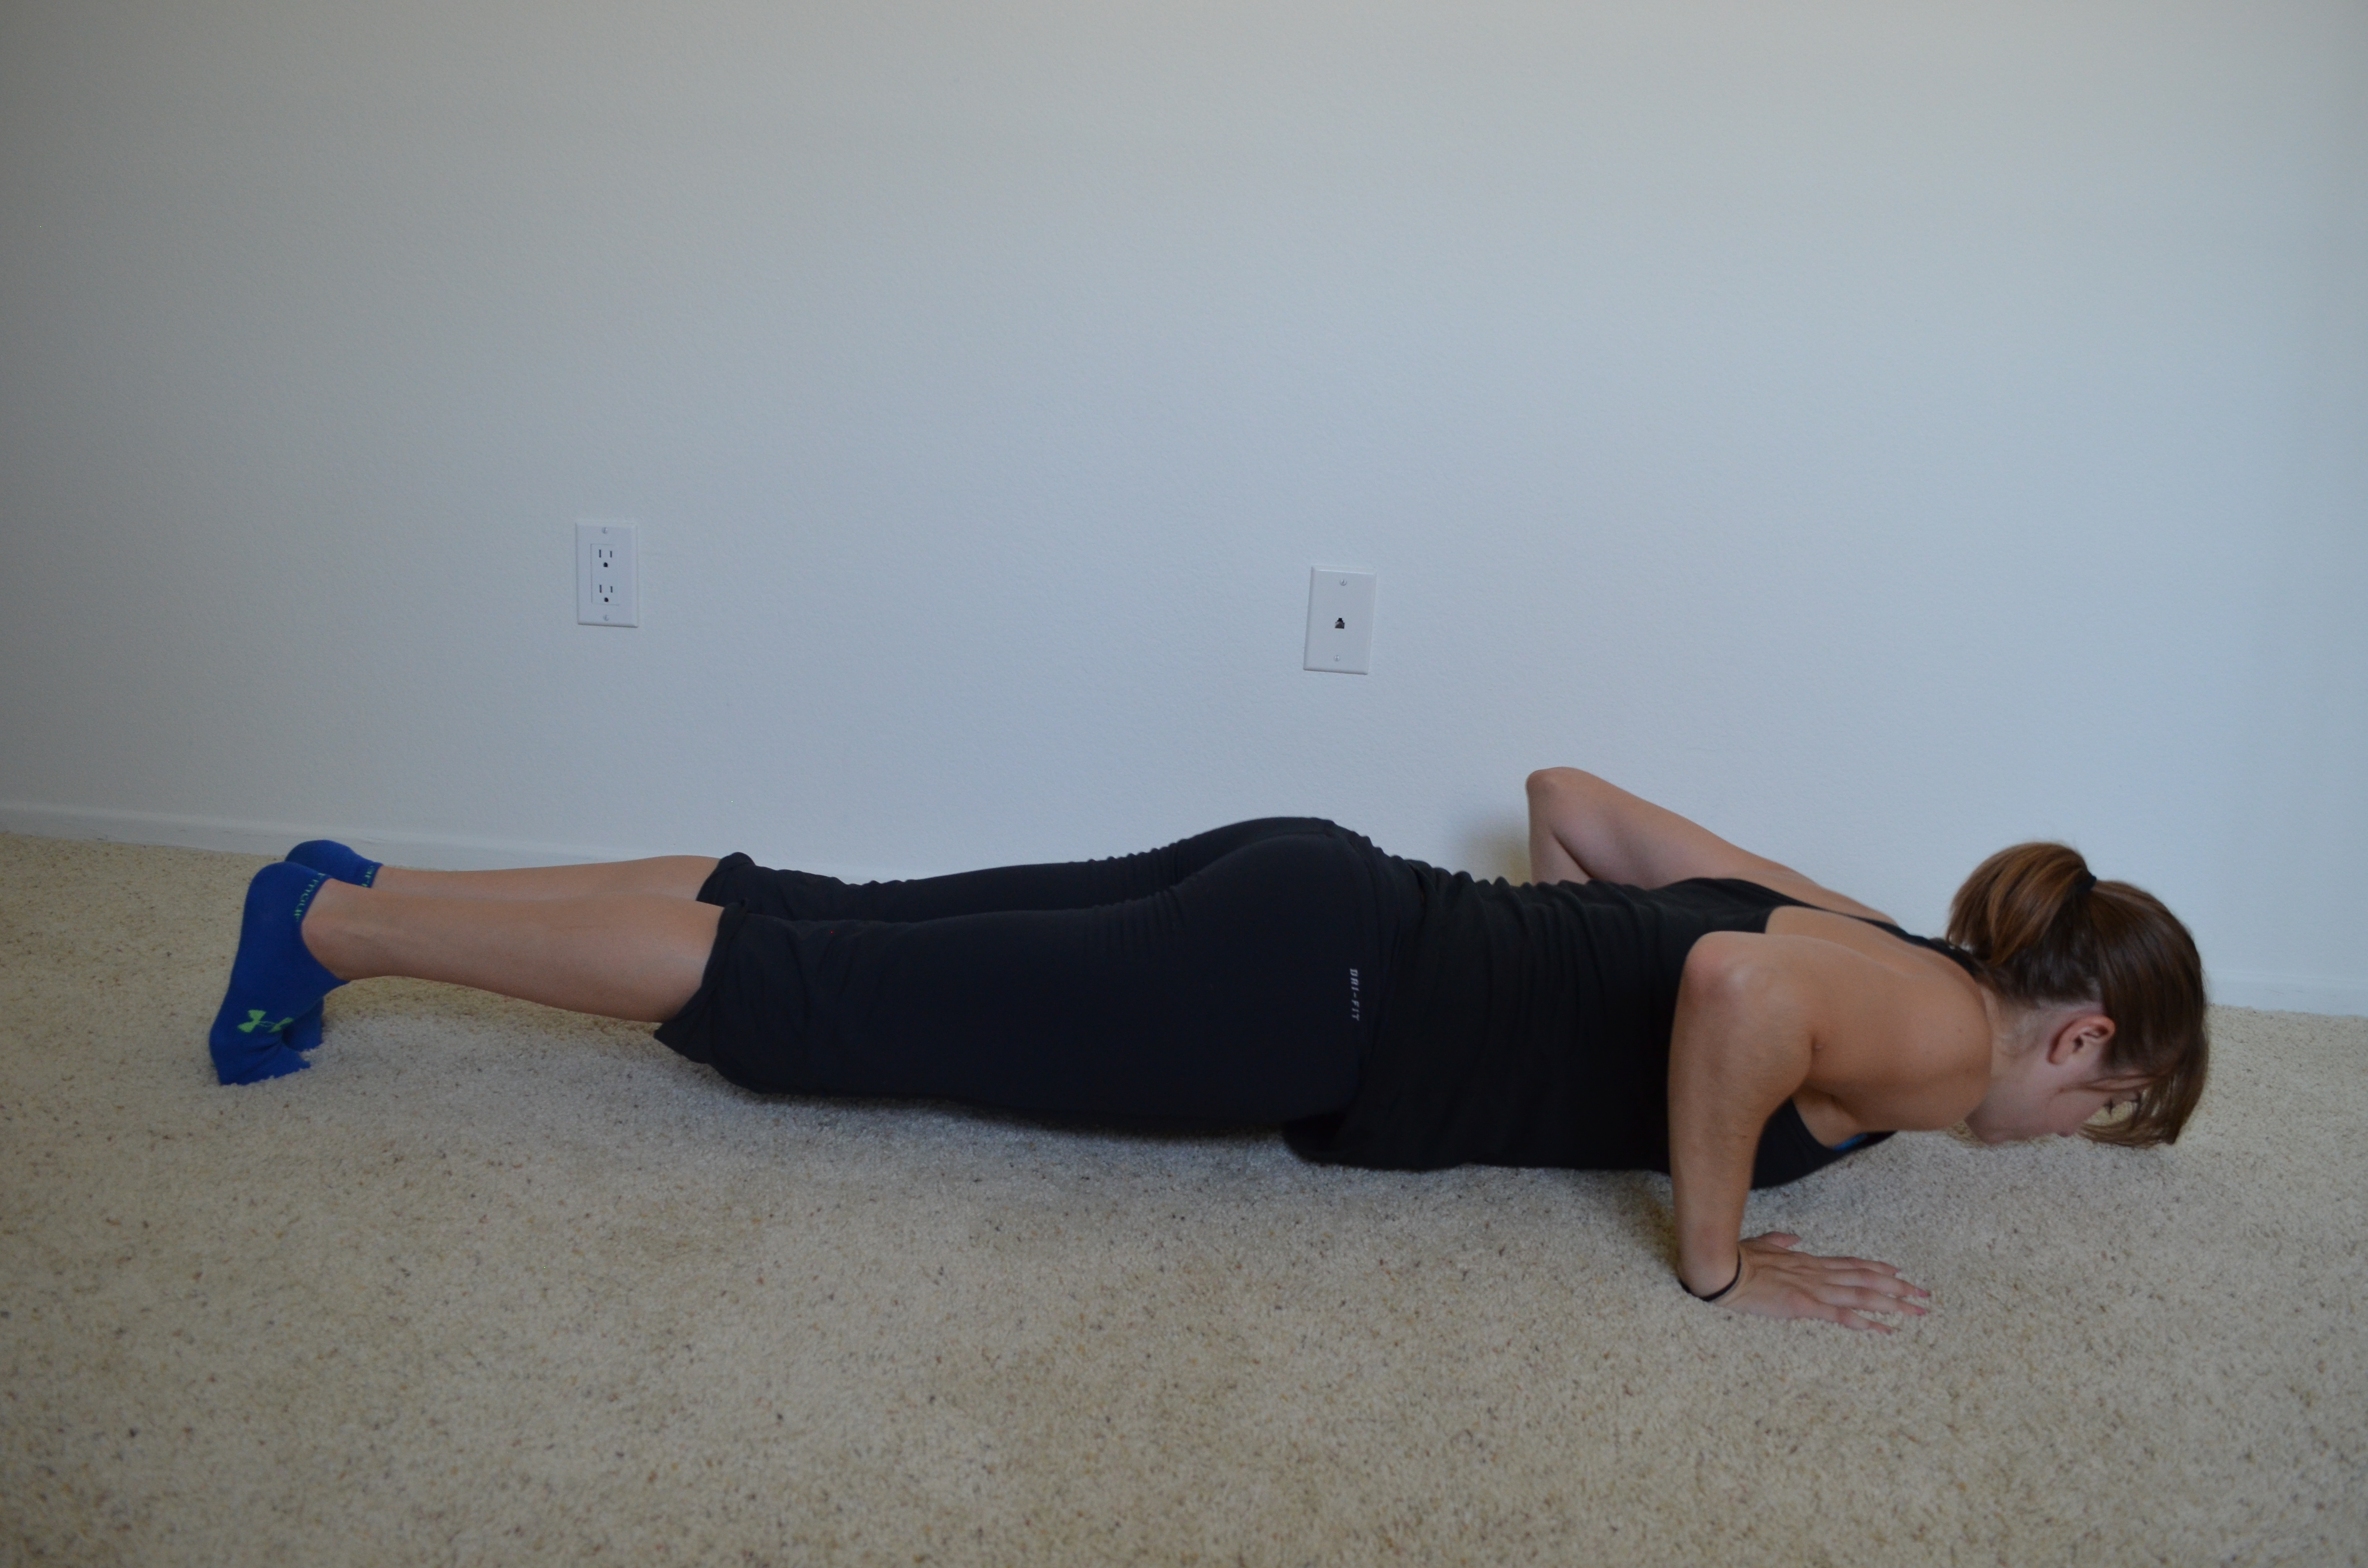
7. Push Up Hold (Hold top, bottom or middle) – I most often hold this move from the top of the push up. So set up on your hands and toes. Feet are together and hands are underneath your shoulders. Draw your belly button into your spine and squeeze your quads, glutes and adductors. Your shoulder blades should be down and back and your shoulders shouldn’t be up by your ears. Keep your head in line with your spine. Hold for 30 seconds to 1 minute. When I do isometric holds at either the middle or bottom of the push up, it is usually for only 3-5 seconds. When I do those holds, I’ll hold at the top for 5 seconds, middle 5 seconds and then bottom for 5 seconds before pushing back up to the top. I’ll usually do anywhere from 5-15 reps like that. (Below are holds at the top, middle and bottom.)
8. Side Planks – You can do these from your hands and toes or knees and forearms. Going down to your knees or forearms will make the move easier. Place your hand underneath your shoulder. Rest on the side of your feet. Stack one foot on top of the other or place one foot in front of the other. Raise up on your hand and the side of your foot. Do not let your hip sag toward the ground. Keep your chest open. Do not let it rotate toward the ground. Hold in a nice straight line, squeezing your core, quads and glutes. Hold 30 seconds to 1 minute each side.
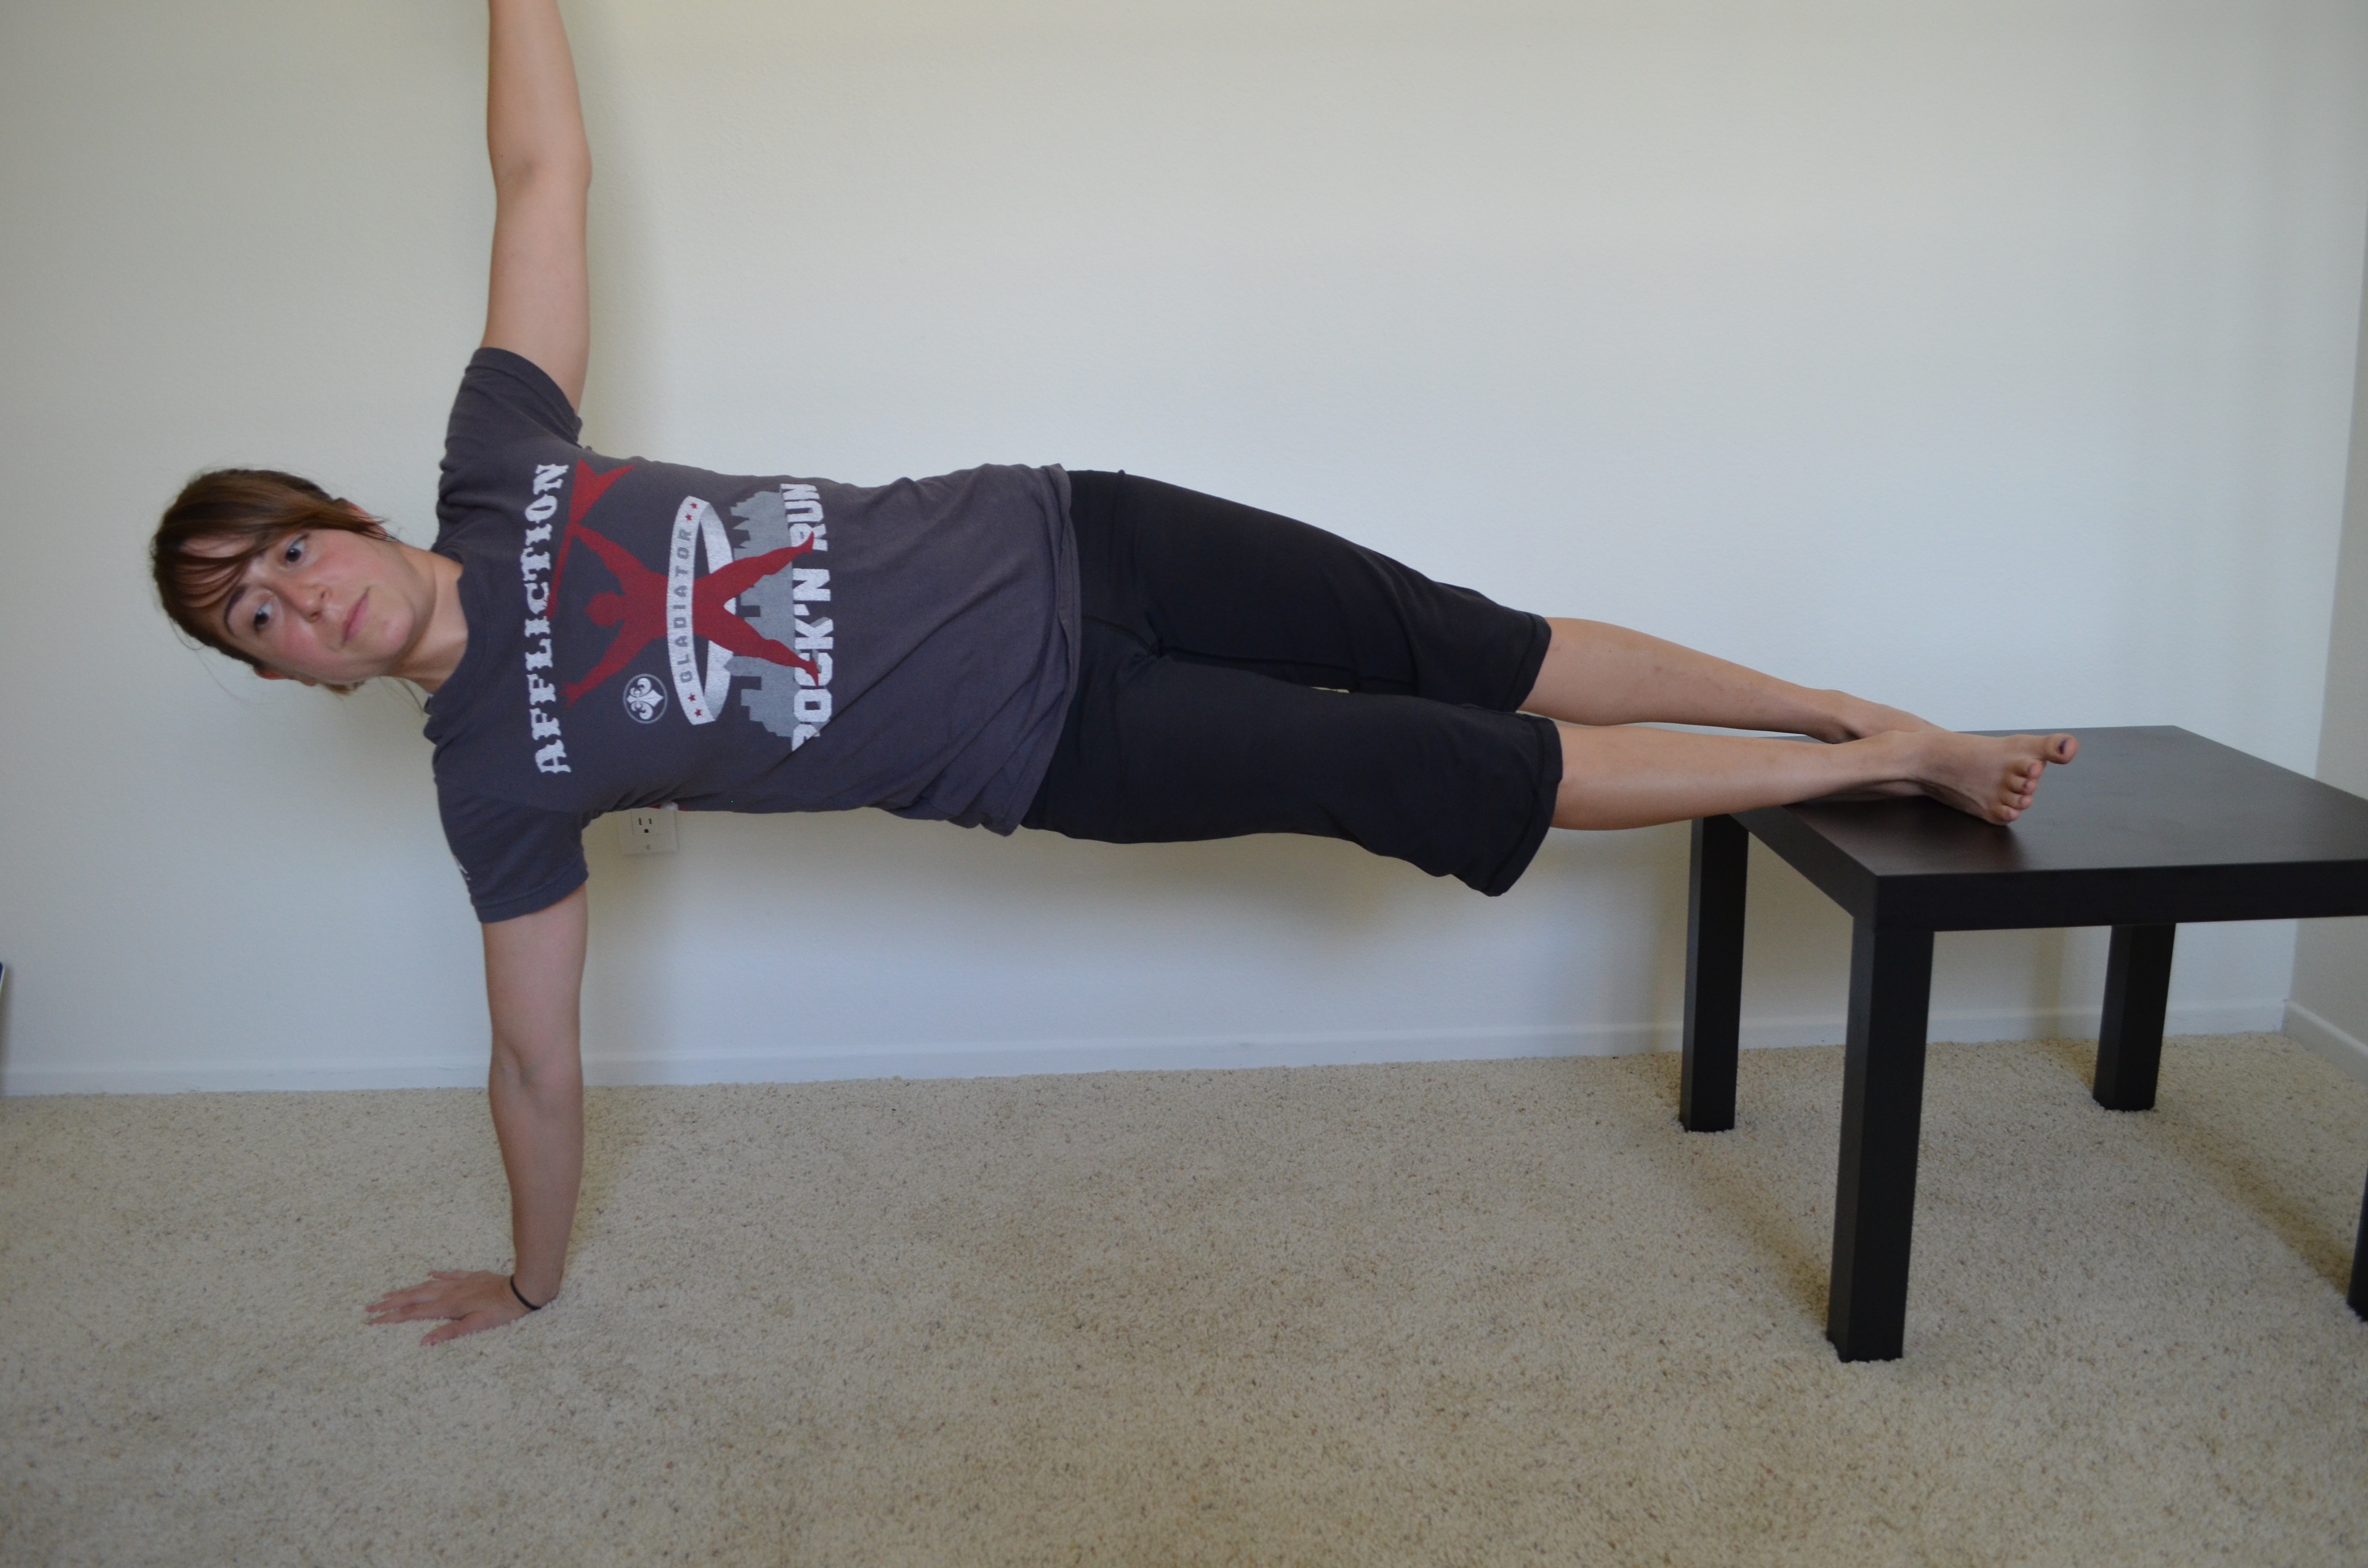
Can make the side plank harder by putting your feet up or raising the top leg.
9. Glute Bridge – Lie on your back. Bend your knees and place your feet flat on the ground. You should be able to graze your heels with your finger tips. Squeeze your glutes and raise your hips off the ground. Keep your core tight and drive up as high as you can. Your weight should be in your heels. Do not go up on your toes. To make this move harder, do a single leg hold. Hold 30 seconds to 1 minute.

You can make the bridge harder by holding on a power wheel.
10. Bull Dog – Start on your hands and knees. Knees should be under hips and hands underneath shoulders. Tuck your toes under and raise up onto your toes and hands. Hold with your knees just an inch or so off the ground. Do not let your low back arch. Keep your core tight. You will feel this a lot in your quads too. If you don’t, make sure your knees are under your hips. Hold 30 seconds to 1 minute. To make this easier, raise up a bit higher or walk your feet back a bit. You can also perform a shorter hold.
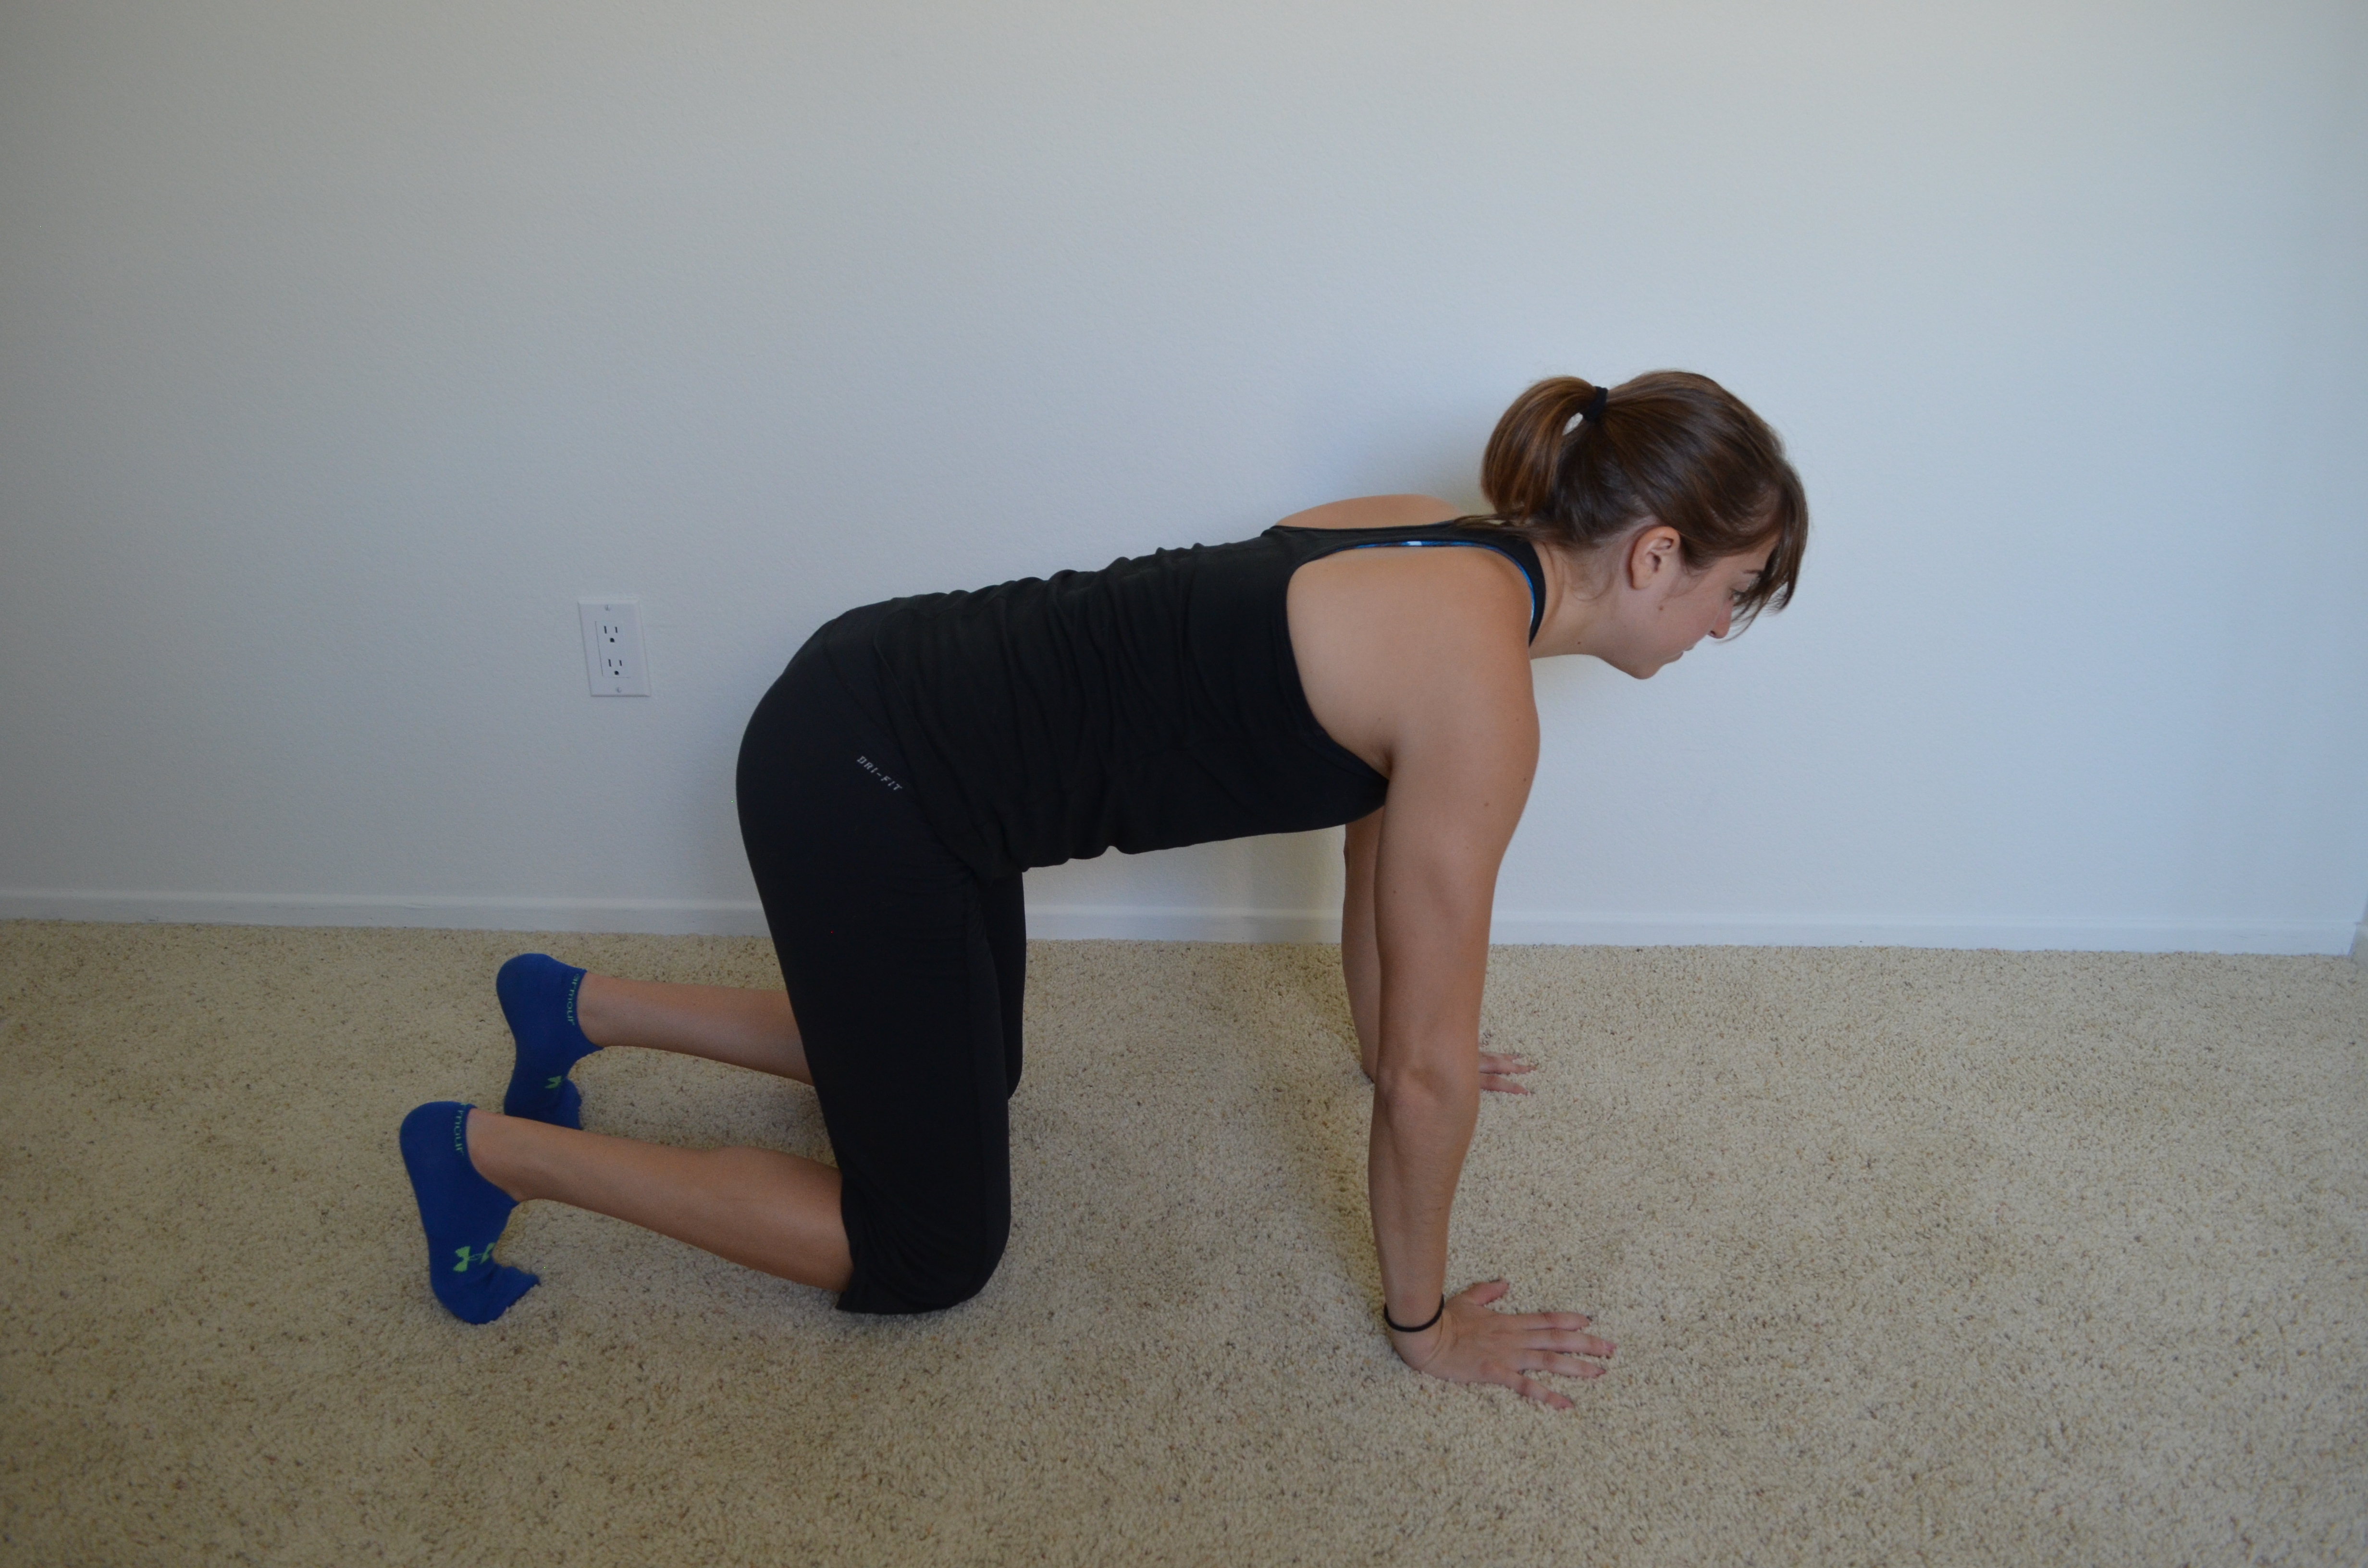
While it is hard to tell, my knees are hovering about an inch off the ground.
And in case you aren’t completely sure how to combine the moves above, below are two workouts you can start with!
Isometric Holds (can be shortened to a warm up)
3-5 rounds of 30 second to 1 minute holds:
Toes
Squat Hold
Scapular Wall Hold
Bull Dog
Side Planks
Isometric Holds and Repetitions
3-5 rounds of the following:
Toes 30 seconds to 1 minute
Jump Rope 25 reps
Split Squat Hold 30 seconds to 1 minute
Split Squat Jumps 10 each side
Scapular Wall Hold 30 seconds to 1 minute
Inverted Row 10 reps
Push Up Hold 30 seconds to 1 minute
Push Ups 10 reps
Glute Bridge Hold 30 seconds to 1 minute
Single Leg Glute Bridge 10 reps each side
Rest 1 minute between rounds.
For more isometric moves, check out these Isometric Moves To Alleviate Desk Job Aches and Pains!
And if you are a runner, here is a Runner’s Recovery Workout using isometric moves.
NOTE: Handstand holds are also a great isometric move that I didn’t include but wanted to make note of because I love them!


