Progressions – Should You Repeat Workouts?

We love variety. We love coming in and doing something new each and every day.
But if you have specific goals, like doing an unassisted pull up, you can’t simply do something new each and every day.
Actually if you want to reach your goals, you need to repeat workouts…over…and over…and over again.
And then you need to progress your current workouts.
You are not reinventing the wheel each and every workout, each and every week.
You are simply constantly building on your past and current routines to progress and get stronger to reach your goal.
How can you progress your workouts if they are constantly changing?
The simple answer is…You can’t.
You can’t easily track whether or not you are moving forward. And whether or not you are getting results, you won’t know what is and isn’t working.
And if you don’t know what is and isn’t working, you don’t know what to change when you plateau or your results slow.
So how often do you change up your workouts? And how do you build from progression to progression?
Below are some great tips and guidelines to help you create a great progression.
1. Change up your workouts every 3-6 weeks. You need to spend at least 3 weeks on a progression to get results from the workouts. The first week you will learn the moves and become comfortable with them. The next week you will add weight and the third week you will be able to really push yourself to the max with them. You may find that you can get just a little more out of them if you do a fourth and final week or you may be ready for a recovery week. I’ve found that the maximum amount of time you can repeat the same workouts without plateauing is 6 weeks. Longer than that and you start to get bored or overtrain or plateau. Go no longer than 6 weeks without a recovery week and changing up your workouts.
2. Progress the exercises and weights. There are progressions/regressions for every exercise. Think about the push up for instance. Never been able to do one? Start against the wall. Then do one from a lower incline with your hands up on a bench…maybe even on your knees. Then maybe a super low incline from your toes. Then maybe from your knees on the ground. And finally from your toes on the ground. You can even progress the move further and do a decline push up. The point is, you start with one move, master it and then move on to the next level the next progression. You can also make moves more challenging by adding weights. Heavier weights make moves harder. But going heavier or lighter isn’t the only way to use weights to change up the exercise. You can also vary exercises by where you hold the weight and the type of weight you use. A kettlebell deadlift is different that a barbell deadlift or a suitcase deadlift. A front squat is different than a sandbag shouldered squat or a barbell back squat. They all challenge the body in different ways because of where you hold the weight and the type of weight used.
3. Change up your workout design. You can change up the number of reps and sets you do to challenge your body in a new way. Working toward a one rep max? Then slowly lower your weights down as you progress. Looking to get stronger, feel better and create some body composition changes? You may want to mix up your workouts and add in some density sets. You can vary the reps and sets to help you achieve different results. If you are working on maximal strength, your workouts shouldn’t look exactly the same as someone focused on weight loss. If you are focused on doing an unassisted pull up, your workouts won’t look the same as someone working on a pistol squat or training for a race. You workout design should match your goals.
4. Change your supplemental lifts to address your weak points. As you progress, you will find that different body parts are the weakest links. Address those weak links with supplemental exercises. If you want to do more push ups and your triceps are weak, add in some dips or some close grip push ups. Shoulders weak? Then add in some overhead presses and maybe some handstand holds. Make sure to add in lifts to help you progress toward your goal and address your weakest links. Those supplemental lifts should change even if your goal stays the same for a progression or two. These different lifts will help work those weak links in different ways to make them stronger and can address any new areas of weakness.
5. Consider what your week looks like OUTSIDE of working out and plan around it. If you plan out your workouts ahead of time, you can plan certain workouts to go on certain days. Know you are alway busy Monday and really only have 30 minutes to workout? Plan your short workout for that day. Know that you hate going to the gym on the weekends when you are home but want to get in a workout? Plan a home recovery workout for that day or any other workout you can do from home. Consider your schedule and match your workouts to your schedule. It will make your workouts easier to stick to and therefore keep you more consistent. A huge part of progressing is consistency!
6. Focus on one goal each progression. Often we have lots of different goals we want to accomplish, but we can’t address all of them at once. Sometimes we can address two at once if they somewhat overlap (like doing more push ups or pull ups can easily be compatible with the goal of losing weight). However, you must stay FOCUSED on one or two things with each progression. Focus your progression with only a goal or two in mind so that everything you are doing will benefit those goals. When you spread yourself to thin and try to do too many things at once, nothing will end up getting accomplished.
7. Address injuries first. Know your injuries and address when and how you are going to rehab them. This may mean focusing on a different goal and only doing rehab for the injured area during a progression. It may mean adding in rehab/prehab to workouts as part of the warm up. Or it may mean setting aside stretching/trigger point days to address your imbalances. If you don’t address injuries first, you aren’t going to get stronger and you may cause issues in other parts of your body. If you don’t address an ankle injury and just keep pushing through your knee, hip, back may all end up with issues. Your progression should go mobility, stability THEN strength/cardio. If you aren’t mobile and have a good base, you aren’t really going to get the most out of your workouts!
8. Vary the intensity of your workouts. Each and every workout shouldn’t be the hardest thing you’ve ever done. With pre-planning your progression, you are able to plan so that you aren’t destroying the same muscles over and over again and pushing your body toward injury. You can plan so that your body has ample time to recover before those muscles are worked again. If you do a hinge day and a squat day, make sure that your body has time to rest in between. Don’t put those workouts back to back. And make sure your legs are worked in different ways during each workout. Also add in a super intense metabolic workout and maybe one where you work at 70%. Make one upper body day killer and maybe the other is more stability and mobility focused. Varying the intensity and having some “easier” days can actually help you get closer to your goal than 5-6 days of super intense workouts.
9. Consider the space and equipment available. This one seems obvious but often we actually forget about all the tools we have at hand…like our own bodyweight, which is super important to remember if we want to work out 4 times a week, but just can’t make it to the gym more than 2. Once you look at your schedule, you can plan out when and WHERE you will do the workouts. Maybe you can only get to the gym twice a week, but you find you can workout two times at home. Then consider all the tools you have at home. Utilize the space and equipment you have and don’t be afraid to mix it up. Not all workouts have to occur in the gym with machines or free weights or barbells.
10. Track what you do and progress each week. A progression helps you succeed because it is pre-planned but more importantly because it allows you to easily track your progress. Write down your weights, reps, sets. Track every variable that isn’t set in stone. Say you state you are going to do 8-12 reps. Track the weight you use for those reps and how many you manage to do with that weight. Then the next week work to beat that. Tracking allows us to know EXACTLY where we are so we know EXACTLY what we have to do to progress the workout the next week!
Do you repeat workouts? Do you make them up when you get to the gym or do you have a pre-planned progression?
How long before you change up your routine?
Metabolic Workouts – Some are Sprints, Others are more like a Jog
Metabolic workouts are the only sort of cardio I enjoy (ok…I do like sprints as well). I hate long distance running or any steady-state cardio for that matter.
Maybe I love them because metabolic workouts come in all shapes and sizes so you can work all the energy systems. Maybe I just love them because they contain a ton of variety and keep me interested…Who knows…
But they are a version of cardio that I love.
And I don’t just love them because I feel utterly destroyed after each one. Because, in fact, I don’t.
Not every metabolic workout should smash you.
While workouts like the 20/20/20 are great and even essential to your workout routine, so are metabolic workouts where you never redline, where you never feel completely smashed.
It is like the difference between sprints and a long jog. After sprints you may feel exhausted because each one is an all out effort and you need to rest in between. Whereas with the jog, you should feel like you can keep going at the same pace the entire time because you never give an all out effort.
Some metabolic workouts need to be like that. Some metabolic workouts should have you working at 70% of your max output instead of going all out.
Below is a great aerobic metabolic workout. Make sure during it that you never redline. You want to keep moving at about 70% of your maximal output for the entire time.
10 Minute Metabolic Circuits

WARM UP
Stretch and Roll Out:
Calves
Quads
Hamstrings
Groin
Hips/Glutes
Chest/Shoulders
Back/Lats/Traps
WORKOUT
Set a timer for 10 minutes. Work at 70% and keep moving the entire 10 minutes. Rest a couple of minutes between circuits. This is a great workout to do with a friend or two.
CIRCUIT #1:
Agility Ladder (Mix up the drills and go forward, backward and sideways. Keep going through then walking back and repeating.)
CIRCUIT #2:
Med Ball Throws (Rotational throws, side throws, overhead passes, chest passes, throws for height, mix them up and throw against a wall, slam it into the ground, throw it for height or work with a partner. Keep moving, but never redline.)
CIRCUIT #3:
Crawling and/or Locomotion (Jog, back pedal, high knees, skips, butt kickers, side shuffle, bear crawl, crab crawl, gorilla crawl, keep moving and mix up the drills. Move forward, backward and sideways.)
COOL DOWN
Stretch and Roll Out:
Calves
Quads
Hamstrings
Groin
Hips/Glutes
Chest/Shoulders
Back/Lats/Traps
For more metabolic workouts, check out the Workout Library.
What are some of your favorite cardio workouts?
The Workout Warm Up Guidelines
I get a lot of questions from people about warming up. How long? What should they include? Do you need to foam roll? Stretch? Walk on a treadmill?

Isometric Holds are a great way to warm up the body. They can stretch and activate the muscles to make them ready to move.
And while there is no one right answer, I like to follow these Warm Up Guidelines:
- Focus on warming up the specific muscles used. Walking on a treadmill isn’t really a great warm up for an upper body strength day. Foam roll those muscles than do a stretch or two to loosen them up. Use stretches that hit more than one area at a time to make your warm up more time efficient.
- Before a workout all muscles must be warmed up that are going to be used so that you are ready to go when you start your workout. By rolling out and stretching the muscles that are going to be used, you will get more out of your workout because your body is ready to move. You will also prevent injuries from occurring. Focus on the tightest spots. If you find a knot, roll it out. If there is no knot, move on.
- Do dynamic stretches to loosen up all muscles and MOVEMENTS that you are going to use during the workout. If you are going to move laterally, warm up so that your body is ready to move laterally. Spend more time and do more stretches for tight areas and fewer for areas that feel loose.
- Any day you have time, you should focus on areas you know are tight or painful to roll out even if you aren’t necessarily using them . These tight, knotted areas need extra attention as often as you can. If you aren’t using these areas, don’t spend a lot of time on them but do touch on them. The more often you can do proper mobility/flexibility work for them, the quicker they will get better.
- Do activation exercises for the muscles you want to work that day especially if they are traditionally underactive. If you sit at a desk all day, you will most definitely can’t skip mid/lower trap activation exercises as well as glute activation exercises if you are doing a back or butt day. These activation exercises will help you avoid injury and even alleviate minor aches and pains you may already have.
- Especially if you are doing a metabolic day, you want to get your heart rate up a bit and the sweat flowing. You want to feel warm when you start your workout. Getting a little out of breath in the warm up isn’t a bad thing. Even getting a little fatigued in a warm up isn’t a bad thing.
- The more muscles you plan to work and the higher the intensity of your workout, the more you may find you need to warm up. Same goes for if you are working out first thing in the morning. Your body may need a bit more time to really wake up and get warm enough to work hard and handle the intensity.
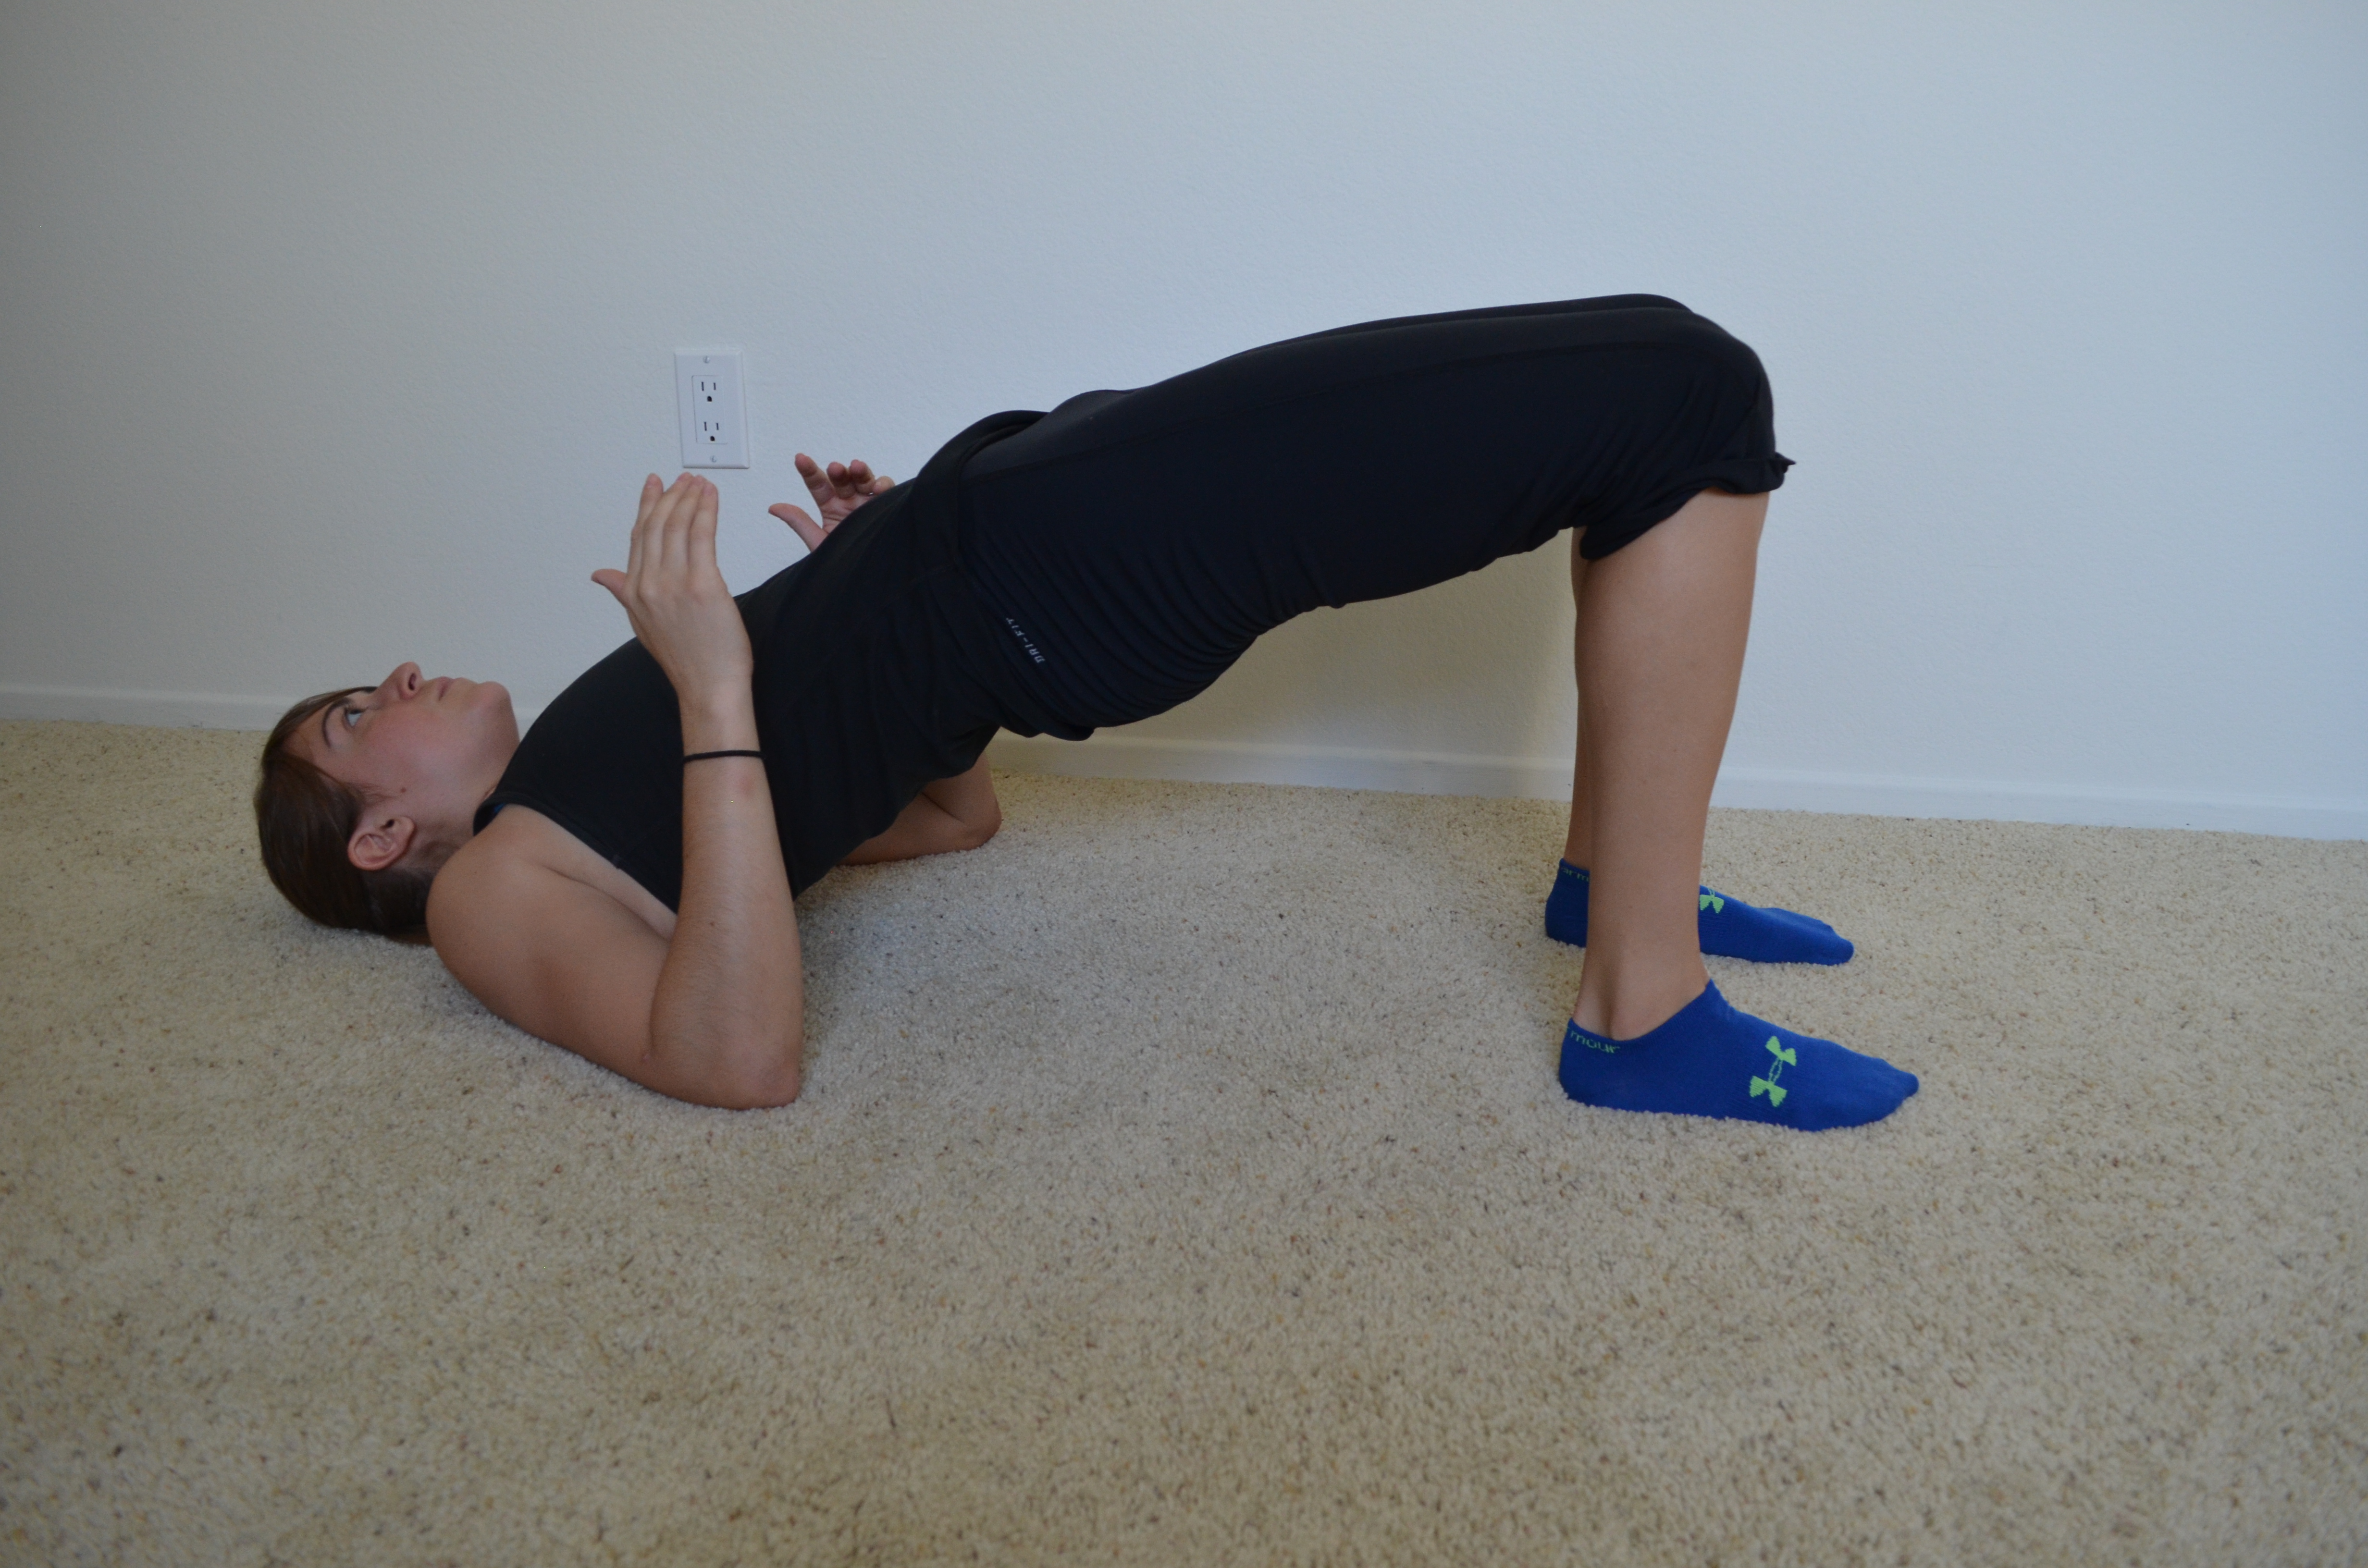
- Always include something to really get the muscles working, be it activation, isometrics, locomotion or crawling. Use exercises that, while they may stretch, also make the muscles begin to work to stabilize the body. Use exercises that wake everything up. For example, a glute bridge hold will activate the butt and get the muscles working while also stretching your hips. Or a plank reach out and back…It will warm up the core while stretching the hips and activating the glutes. The important part really is to get everything WOKEN UP.
- Don’t make it too long! Too often we skip the warm up to make the workout shorter, when in fact, it doesn’t have to be very long at all. Even the longest, most thorough warm up, including foam rolling, shouldn’t last more than 15 minutes. And, unless you are doing a full-body, super intense workout, it probably doesn’t even need to last longer than 5-8 minutes. Even when I rounded up for my full body warm up, it was still only 11 minutes….And I definitely rounded up. So while you want to get things moving and even a little sweat going, you don’t want to sap your body of too much energy.
Here is one of my favorite warm ups for a full body or leg day. There is also a great warm up for cyclists and one for runners in the Elite Library….Yes that’s right, you really should warm up before you ride or run!
Here are also some great dynamic stretches to include in your warm up.
What do your warm ups look like?
Ground Beef Sweet Potato Hash
After a hard push up/pull up workout yesterday morning, we were craving a few carbs.
So Ryan, like he always does, came up with a great new breakfast.
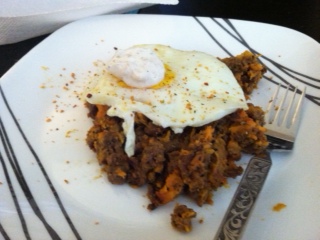
The Ground Beef Sweet Potato Hash with an Egg Sunny-Side Up
Ingredients:
1/2 Grass-fed Ground Beef
1 Large Sweet Potato
Sprinkle of Cumin, Pepper, Salt, Mustard, Coriander and Chipotle
2-4 Eggs (Depending on how many you want with your hash)
Heat a skillet and cook the ground beef. Then cut up the cooked sweet potato into chunks and add it to the ground beef with the spices. Stir and lower the heat.
Cook until ground beef is fully cooked and everything has mixed together.
In a separate pan, cook 2-4 eggs until sunny-side up (or to your liking).
Place the eggs on top of the hash and serve. We also added a dollop of sour cream mixed with Cajun seasonings to the top.
Super simple and quick to make especially if you have some leftover sweet potatoes from your weekend meal prep! (If you don’t have any sweet potatoes ready, you can chop one up and cook it in the skillet and then add the ground beef. Or you can cook it in the oven for about 30-45 minutes.)
The recipe above serves two people.
Anyone else love hashes? Ever made one with sweet potatoes before? What’s your favorite!?!
And The Winners Are….
A big THANK YOU to everyone that has shared, commented, liked and been a huge support in the launch of Redefining Strength.
And now to announce our winners of the Redefining Strength Launch Contest!!

Winning 4 FREE Weeks of Online Trainings is…..Jodi.
Winning $100 Off Online Training (or Redefining Strength Products) is….Kim.
Winning $50 Off Online Training (or Redefining Strength Products) is….Jess.
I will email you three today and we can discuss further your goals and current program to draft up some great workouts for you!
For anyone else interested in Online Training, E-books or The Redefining Strength Elite Workout Library, we are offering some great deals during the rest of January.
For the rest of January, the Elite Workout Library is just $25 and with the code: RSLAUNCH, you can get 25% off of Online Training and/or any E-Books in the Shop.
Thank you all for your support! And Congrats to our winners!
Get ready for a great breakfast hash recipe tomorrow!
AND if you want to be able to do more push ups and missed it on Social Media yesterday…Check Out my post “Do you want to be able to do more push ups!?!”
The 30-Day Home Bodyweight Challenge
Yesterday I mentioned that the easier we make healthy changes, the more likely they are to stick.
And for some people, getting to the gym on a regular basis just isn’t easy. Yes it is an excuse, but it is an excuse that causes many people to fail at reaching their goals.
Which is why I’ve become big into posting home workouts you can do with just bodyweight.
Because I also love butt workouts, today I’m posting a great bodyweight glute workout.
For more workouts like this one, check out The 30-Day Fitness Challenge.
The Home Bodyweight Glute Workout
WARM UP
Stretch and Roll Out:
Calves
Hips
Quads
Hamstrings
Groin
ACTIVATION
Complete 2 rounds of the circuit below. Hold each move for 2-5 seconds at the top so you really feel the muscle begin to work.
CIRCUIT:
12 reps each side Donkey Kicks
12 reps each side Clams
WORKOUT
Do both exercises back to back then rest up to 1 minute between rounds. Between supersets, rest up to 2 minutes.
SUPERSET #1:
10-20 reps each side 3 Count Single Leg Deadlift
10-20 each side Single Leg Glute Bridge (Hold 2-5 seconds at the top.)
SUPERSET #2:
10-15 reps each side Diagonal Lunges (Curtsy to Front Angled. Both lunges equal one rep.)
15-20 reps Reverse Hyper (Hold 2-5 seconds at the top.)
SUPERSET #3:
10-20 reps each side Backward Lunge
10-15 reps each side Fire hydrants (Hold 2-5 seconds at the top.)
COOL DOWN
Stretch and Roll Out:
Calves
Hips
Quads
Hamstrings
Groin
NOTES:
If you have weights at home, you can definitely use them. But slowing down the tempo of each move, or adding in a towel for the back lunge, can also advance the exercise.
EXERCISE DESCRIPTIONS:
Donkey Kicks – Start on your hands and knees with your hands under your shoulders and your knees under your hips. Flex your feet. Drive one foot back and up toward the ceiling, keeping the knee bent to 90 degrees. Make sure to drive the heel up and back. Do not arch the low back. Squeeze the glute as hard as you can at the top of the lift. You should not feel this in your low back at all if you are squeezing your glute and not arching to get the leg higher. Do not let the knee rotate in or out. Hold at the top and then lower the knee down. Repeat all reps on one side before switching. Do not bend your arms as you perform the movement.

Clams – Lie on your side, propping yourself up on your forearm. Place both legs together, one directly on top of the other. Keep your feet together and bend your knees in a bit. To perform the move, lift the top leg open like a clam opening up. Keep the feet together as you open and don’t allow yourself to rock backward. You want to press your hips forward and squeeze your glutes as you open that top leg. When you first do this move, it can be good to do it against a wall so that you don’t rock backward. To apply some resistance, press down on the top leg with your hand or place a mini band around both legs below your knees. Perform all reps on one side before moving to the other side. Below is a picture with the band.

3 Count Single Leg Deadlift – Stand on one foot with the knee of that standing leg slightly bent. Hinge over at your hips, sweeping the other leg back toward the wall behind you. Take 3 seconds to hinge over. Pretend you are driving the heel of that foot straight into the wall behind you. Lean forward with your upper body as you hinge forward, keeping the back nice and flat. Make sure that as you hinge, you are sitting into the heel of your standing leg. Do not lean forward and come up onto the toes of your standing leg. Remember to lower down for a 3 count. To stand back up, drive through the heel of your standing leg and squeeze your glute at the top. Come up quickly. Try not to tap the other foot down at all or at least not till you are fulling standing. Then slowly lower back down, taking 3 seconds to hinge over. Complete all reps on one side before switching to the other leg. You can slow it down to a 5 count if the 3 count becomes easy or you can hold weights in each hand.

Single Leg Glute Bridge (Hold 2-5 seconds at the top.) – Lie on your back with your knees bent. Your feet should be flat on the ground. Try to bring your heels back close enough to your butt that you can just graze your heels with your finger tips. Lift one leg up and bend the knee to 90 degrees. Drive up through your heel on the ground, lifting your hips as high as you can. Keep your core engaged and squeeze your glutes so you don’t feel the move in your low back. Do not let your knees fall together. Your feet should be about hip-width apart. At the top of your glute bridge, you should be driving through your heel and your upper back. Hold at the top of each lift for 2-5s. To advance this move, place your foot up on a table or chair. To regress the move, do a two leg glute bridge from the ground.

Advanced variations
Diagonal Lunges (Curtsy to Front Angled. Both lunges equal one rep.) – Start standing tall with your feet together. Then, starting with the right foot moving, step the right foot across and behind the left leg. Step back toward about “7″ or “8″ on the clock. Do not step too close to the left so that you have space to sink down into a deep lunge. Drop the back knee toward the ground, keeping the front heel on the ground. You should feel the lunge in the outside of your front butt cheek. Then bring the right foot back forward and stand up nice and tall. Beginners will want to pause here while more advanced exercisers will want to go right from the curtsy lunge to the angled front lunge. Step the right foot forward out of the curtsy lunge into a front angled lunge. Move the right foot forward and out to about “1″ on the clock. Both toes should be pointing straight ahead as you bend both knees and sink down toward the ground. Keep your front heel down as you lunge down. Then drive off the front heel to come back to standing. Then go right from the angled lunge back into the curtsy lunge. Repeat until all reps are complete on that side and then switch.

Reverse Hyper (Hold 2-5 seconds at the top.) – Lie face down on a table or bed with your legs hanging off. Make sure your hips are right at the edge. Hold on to something in front of you if you want. Keep your upper body relaxed. Squeeze your legs together and point your toes out. Lift your legs to basically parallel to the ground, keeping your legs straight. Do not hyperextend your back and lift way higher than parallel. You do not want to feel this in your low back. Keep your core tight and really squeeze your glutes as you lift. You can also do this on the ground although it doesn’t give you as big a range of motion.
Backward Lunge – Start standing with your feet together. Step one foot back into as deep a lunge as you can handle, bending the back knee and dropping it toward the ground. Your front knee should bend as well, but your knee shouldn’t go forward over your toe. Make sure to really sit back on that front heel and keep your chest up nice and tall. Then, driving through that front heel, come back to standing. Step that back foot back forward. To make the move harder, place a towel or slider under the foot moving back. Instead of stepping, you will slide the foot back into a deep lunge.

The towel backward lunge variation.
Fire hydrants (Hold 2-5 seconds at the top.) – Start on your hands and knees with your hands under your shoulders and your knees under your hips. Both feet are flexed. Keeping the knee bent to 90, lift the leg straight out to the side like a dog peeing on a fire hydrant. Make sure to keep the knee and ankle at the same height. Your foot shouldn’t be way up in the air and your knee shouldn’t be way above your foot. Your lower leg should be in a nice parallel line from the ground. Do not bend your arms to raise your leg higher off the ground. Also try not to lean into the standing leg. Squeeze the glute and hold at the top, keeping the foot flexed. Then lower down and repeat.

Planning for Success – Making Things Easy
For the first few days after you set a New Years Resolution, you are generally pretty motivated to accomplish it.
But as early as a week later, that initial motivation has already dwindled.
And things that seemed easy to do, like cook meals and eat clean, stop seeming as easy because you aren’t as motivated to do them.
If you don’t have a solid plan in place and haven’t done the proper preparation, you are going to slip back into old habits.
We will find any excuse to not make changes.
Therefore we have to make things as simple, and as idiot proof, as possible for ourselves.
So if you want to make some healthy changes to your diet this New Year, how are you going to make your plan excuse proof?
These tips below may just help….These tips are meant to help us create healthy habits so that we don’t have to think or use as much self-control to stick with the new program.
Because our self-control gets depleted as the day goes on, especially if we’ve had a stressful day. And the more things are in place so that we don’t have to use self-control, the more likely we are to stick with our plan and accomplish our goals!
5 Tips To Make Changing Easier
1. Meal Prep (Make Lots of Leftovers and Cook When You Have Time) – The easiest way to change-up your eating habits is to have healthy foods already cooked when you get home tired from work. The last thing most of us want to do when we are tired and hungry is spend even 10 minutes making food. That is why meal prep is so important. Pick a day when you are around the house anyway. It can even be a day when you are around the house RELAXING because if you pick a few recipes for the oven or crockpot, you don’t even have to stand around and stir them or anything. Find a few recipes that allow you to make meals for a couple of days. For instance, bake a chicken or some chicken breasts. You can simple throw them in the oven and go do something else while they cook. Or make a chili in a crockpot. You can throw in all the ingredients and even go out and do whatever you want all day. You will come back and have numerous meals! Eating clean really doesn’t have to be a horrible chore. Make it easy and make it work for you.
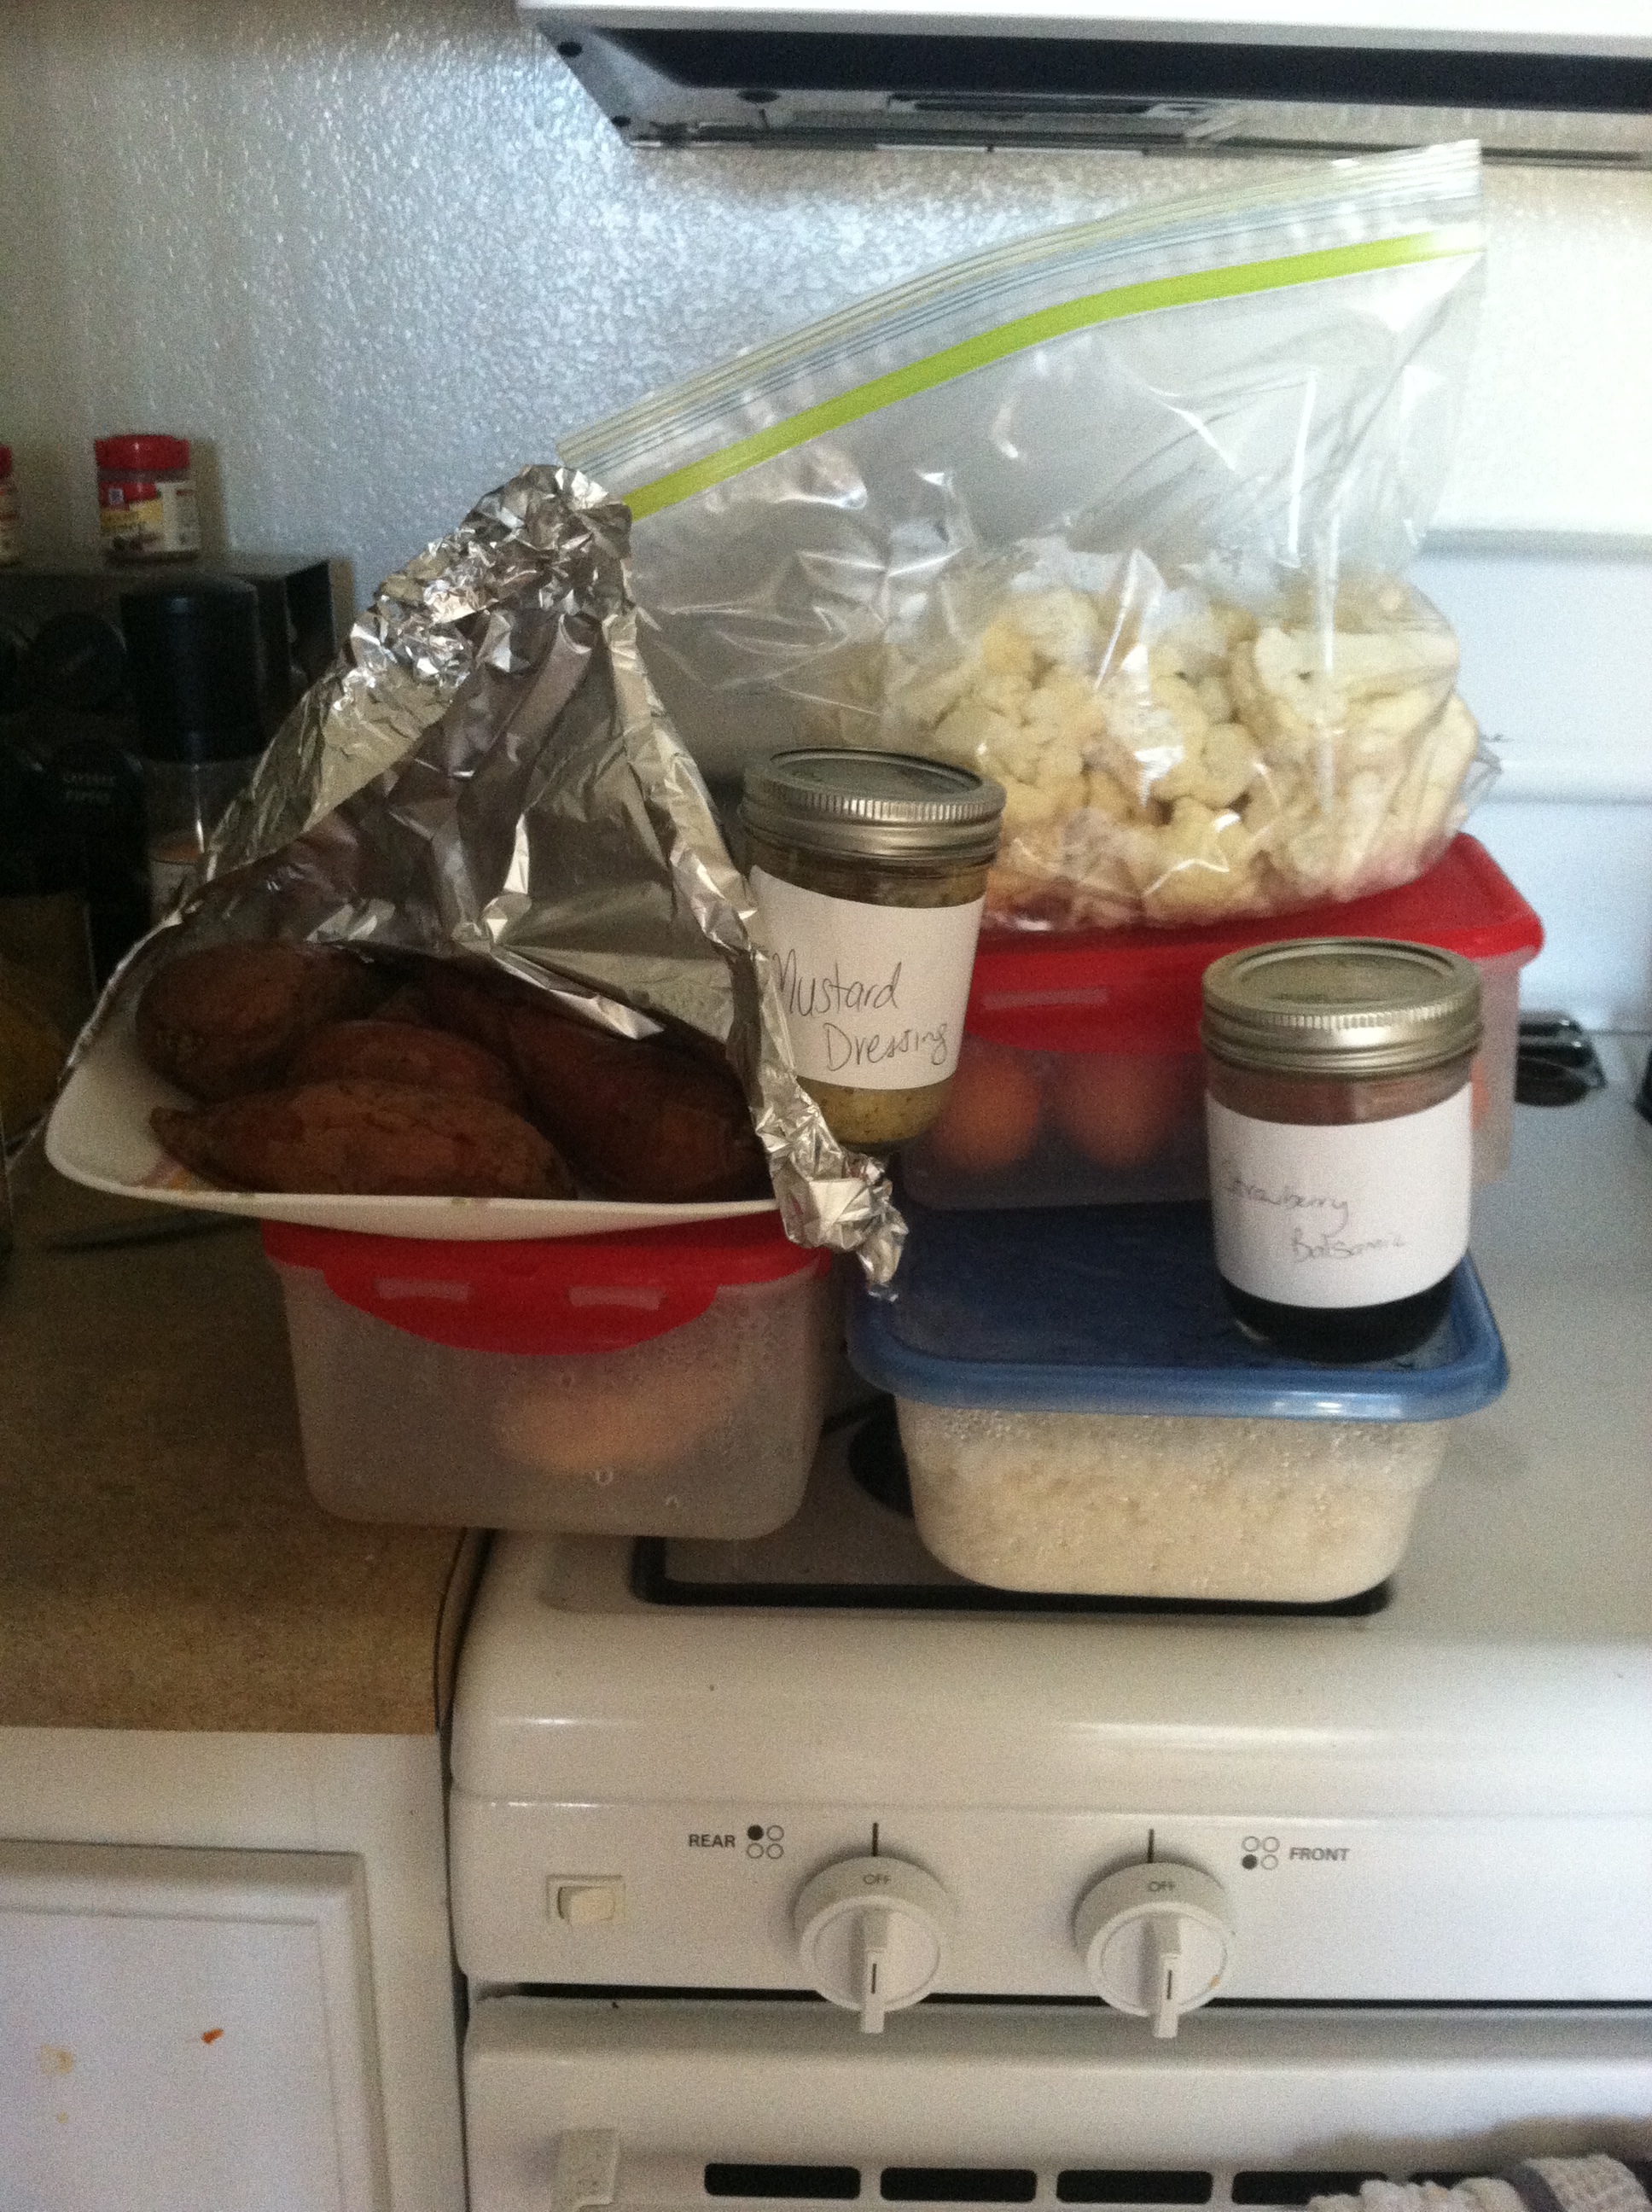
Cooked chicken, eggs, rice, sweet potatoes, dressing and cut up veggies for the next couple of days to make cooking quicker and easier!
2. Don’t Keep Temptations In The House – When we get stressed or upset, we are going to reach for comfort. And if we have those old comfort foods around, we are going to reach for them EVEN if we can resist on a normal day. When you are trying to create new habits, don’t keep things around that may derail those habits. Out of sight, out of mind. Very rarely will you make an effort to go get those unhealthy foods when emotional. And if you do, then accept it and move on. Just make yourself have to really work for it in hopes that it will give you time to reconsider. (Because more often than not, you will simply do what is easy and stick with the clean food you have around.)
3. Don’t Wait Till You Are Starving To Eat – While I do believe in intermittent fasting and that you don’t need to eat a certain amount of meals everyday, you also don’t want to just starve yourself to lose weight or wait to eat till you are super hungry. We tend to make horrible decisions when we get super hungry. We tend to not care what we eat and we tend to eat too much. Listen to your body and recognize when you are getting hungry. Then eat!
4. Always Have Healthy Snacks Around – For one, like I said above, you don’t want to get to the point of starving so that you seek out ANYTHING to eat. Plan and have snacks around for those times when you may need a quick little bit. Also, many people are emotional eaters or eat when they get bored. Most of us are guilty of it at some point at least. And while that is an issue we do need to deal with, a great way to prevent our emotions or boredom from derailing our new healthy habits is to have healthy snacks around so that we don’t munch on something worse. At least then we are reaching for something healthy and not something that may make us feel even worse, which could lead to the binge eating cycle.
5. Know Your Restaurant Options – While yes, often the healthiest option is to eat something homemade, that isn’t always an option. Plan for having to go out. Know the restaurants near your home and work so that if you do WANT to go out or get asked to eat out, you know the healthy options. Prepare yourself with go-to eating out options so you aren’t taken off guard or persuaded to eat something that derails your progress when you don’t want to cheat. I have a few restaurants that are my go-to when I want to eat cleaner but either have to go out to meet people or my meal prep wasn’t perfect and I need a meal in between. (Note: You can also choose not to eat out at all. While often this isn’t something we want to do, you can give yourself permission to join people out and then go back and eat the meal you planned to eat. It is just good to recognize this is an option even if people may make you feel guilty for wanting to stick with your plan.)
BONUS:
SET AN END DATE! I’ve been harping on this a lot with people lately, but even when you are trying to create habits for a healthy lifestyle, you need to set an end date. We don’t mentally do very well with FOREVER. So maybe set up a reward at the end of each month. Maybe you go shopping or do something special with friends and family. Or maybe you simply switch up the recipes you use every 4 weeks. Whatever it is, make there some sort of “end date.” Some time where you can pat yourself on the back for completing what you set out to do. And then at that time, you can adjust your plan a bit for the next month or so to keep you moving forward!
Once healthy habits are in place, you may find you don’t need to be as diligent with these tips because the ideals are engrained. Till then though, make it as easy as possible for yourself to stick to your new habits.
The more you prepare against the excuses, the more likely you are to create habits that LAST!
Training For A Race? You’ve got to do more than just run!
If you want to run faster, you would think you simply need to practice running more. If you want to be able to run for longer, you would think you just need to push yourself to run further.
But gaining speed and endurance requires that you do more than just run. Staying healthy for your race requires that your training regime isn’t just running.
You must do the proper recovery and strength training as well.
Many people worry that strength training will interfere with their running.
But in reality, a proper strength training regime will actually make their running stronger and keep their body healthy for their training.
No you don’t want to work on your 1 rep max while training for a race, but you do want to lift weights.
And you want to stretch and foam roll.
But you definitely want to lift weights and make your muscles stronger so you can run faster and last longer!
Below are key muscles for runners to roll out and stretch. There are also some great activation moves and then finally, links to workouts I’ve developed for runners.
You can help prevent (or at least alleviate some of the pain of) common running injuries such as plantar fasciitis, shin splints, knee pain, hip pain and even low back pain by using the techniques and exercises below.
TRIGGER POINT RELEASE
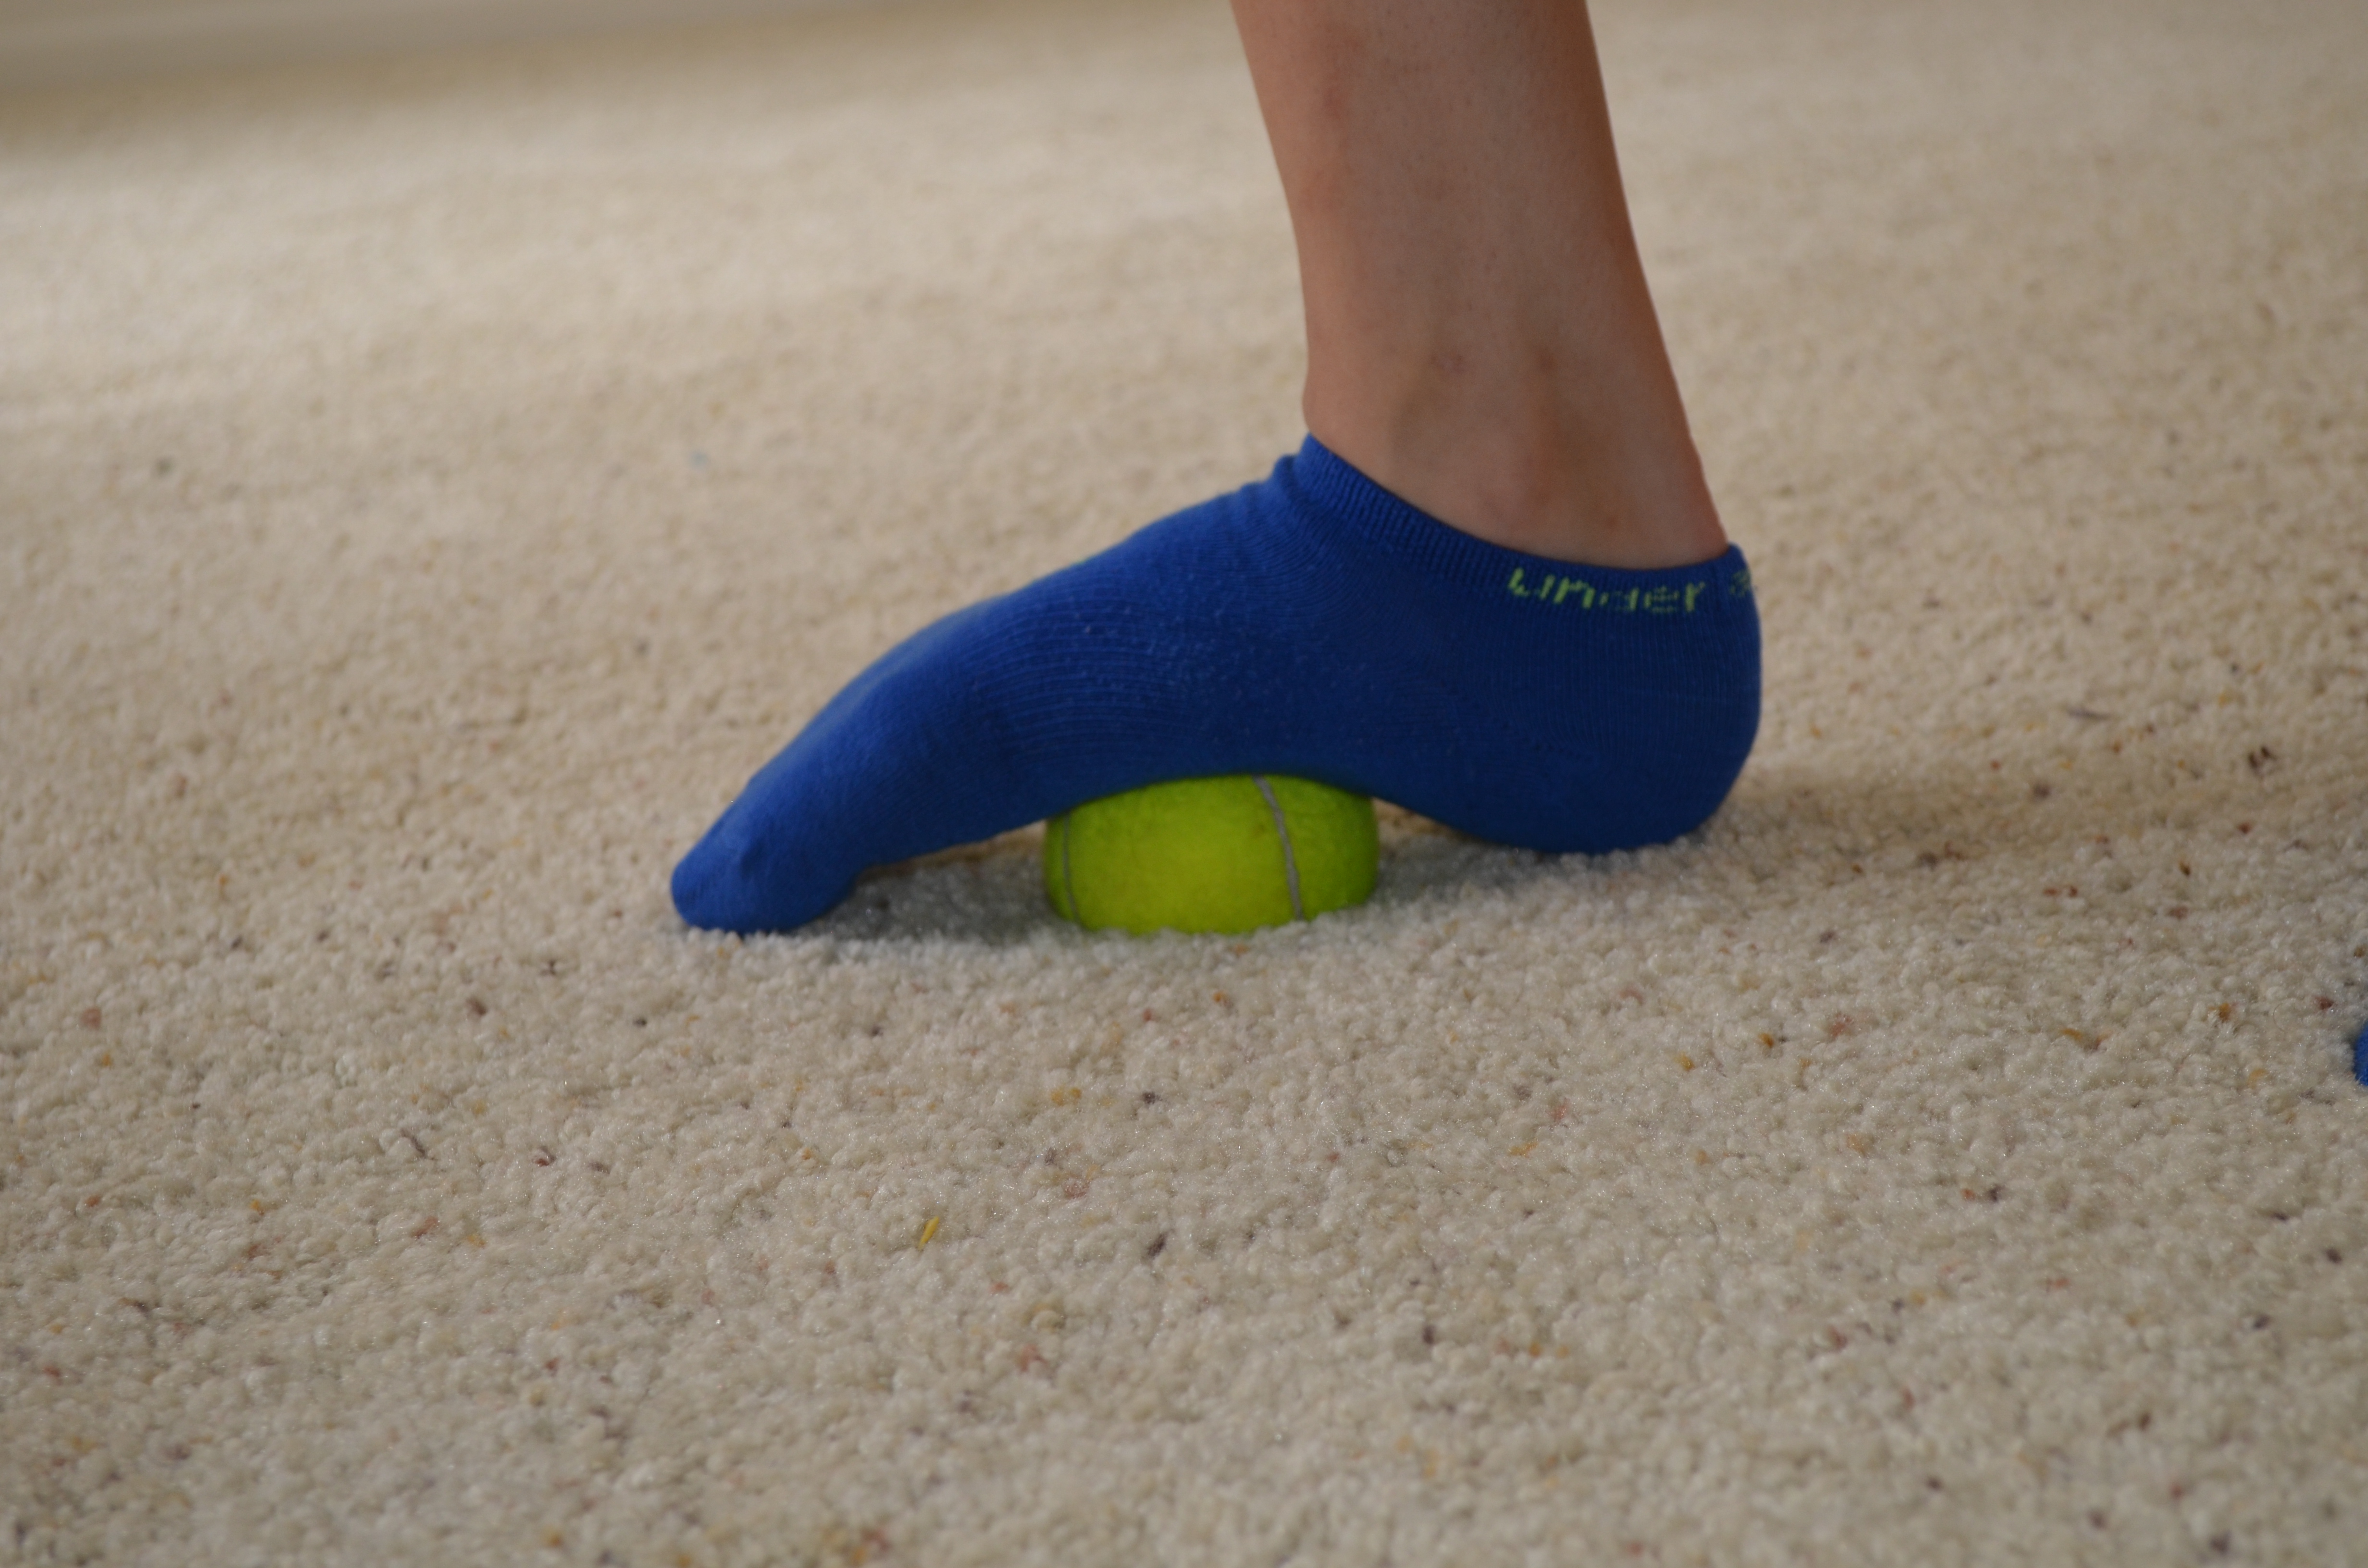
1. Feet – Take a ball, the smaller and harder the ball, the more it will dig in, and place it on the ground. Then, standing, place your foot on top of the ball. Push down into the ball and roll it around under your foot, holding on any tight spots.
2. Shins – Sit on the ground with one knee bent toward the ceiling and the foot flat on the ground. Take a ball in both hands, and press it into the outside of the shin bone. Push the ball into your shin with both hands, making small circles. Then move the ball up or done and repeat, making small circles. Work all the way from your ankle to right below your knee. Hit the front of your shin, not the bone, all the way around the outside and back toward your calf. Make small circles with the ball, pressing it in as hard as you can.
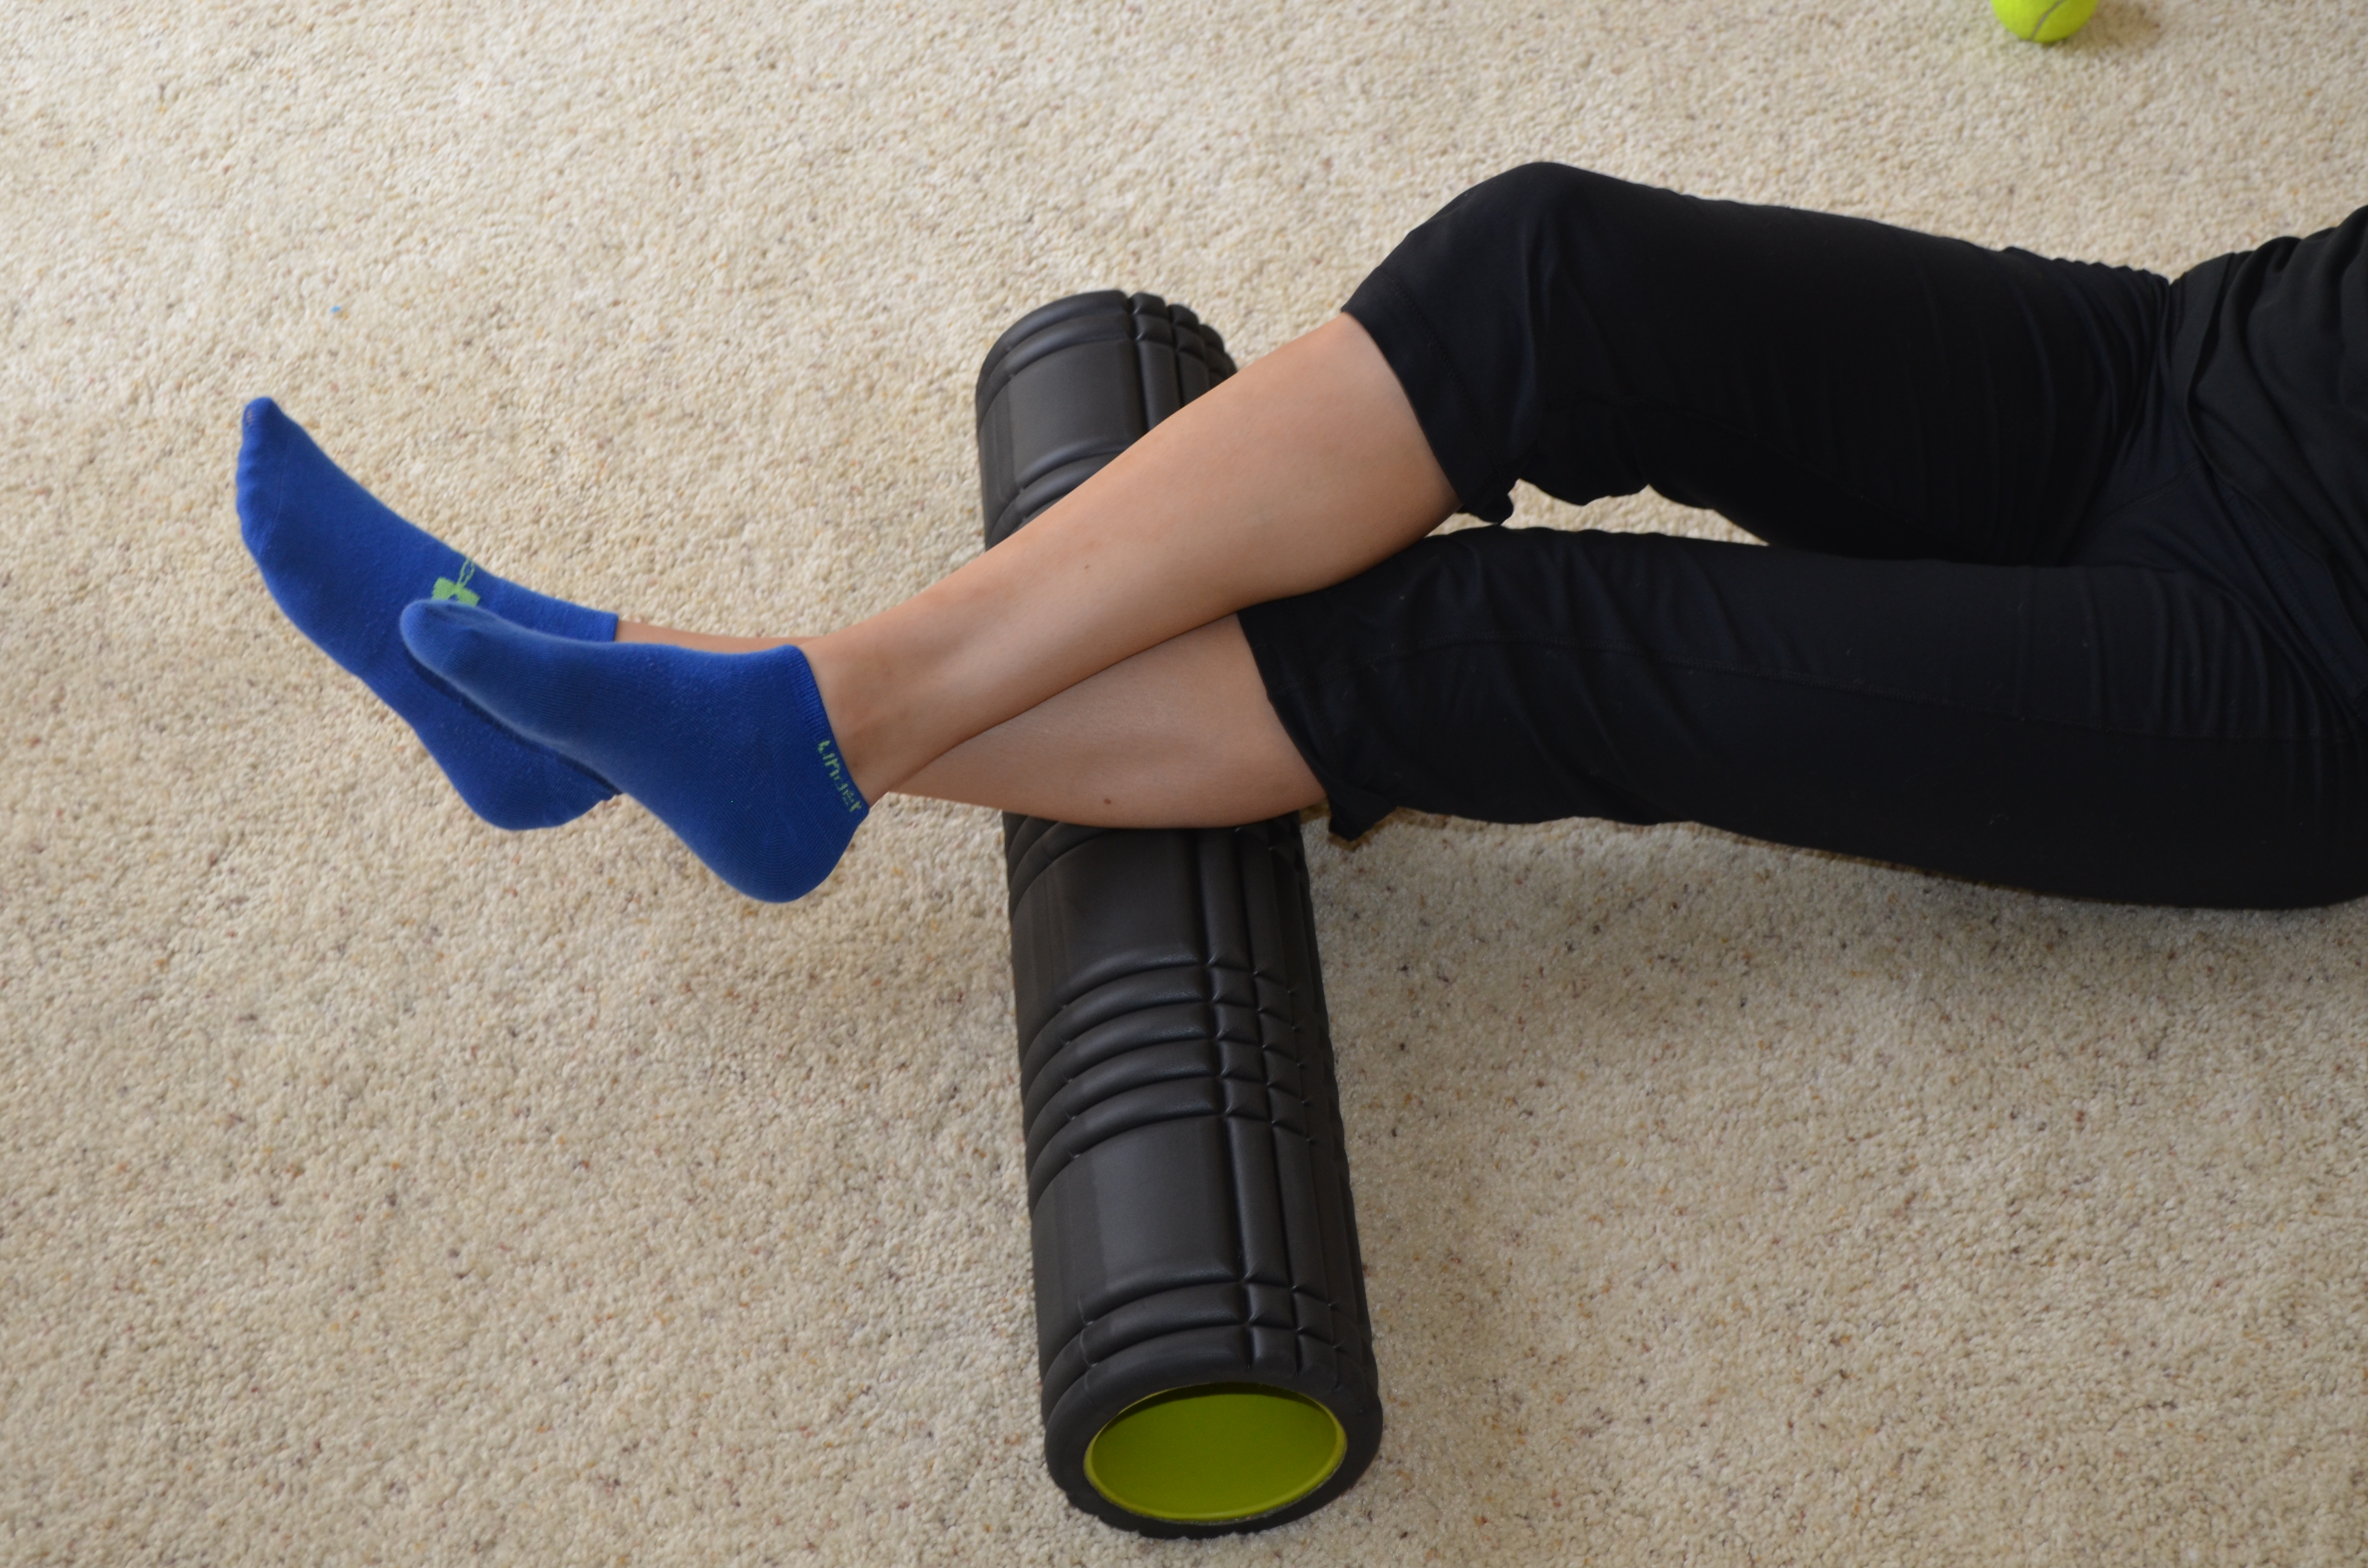
3. Calves – Sit on the ground with one leg out straight. Take a roller or a ball on a book or block and place it under the calf of the leg out straight. Cross the other leg over the top. Rock the leg on the ball side to side. Then move the ball up or down your calf. Again rock the leg side to side. You can also flex and relax your foot or make small circles with your ankle to dig in deeper to any tight spots you find. Work all the way up and down the back of your lower leg.
4. Quads – Take a roller and set up with your with it under the front of your legs. You will be lying face down on the ground with your body supported on your forearms and your legs on the roller. Rock side to side on the roller then move it down or up on your quad and again rock side to side. Work all the way from your hips to the top of your knees. Around the top of your knees and right around your hips, you can also use a ball to dig out the muscles. Around your knees, start the ball on the inside of your leg right above your knee. Work your way across the top of your knee to the outside of your leg. Hold on any tight spots. You can do the same all along your groin and hip.

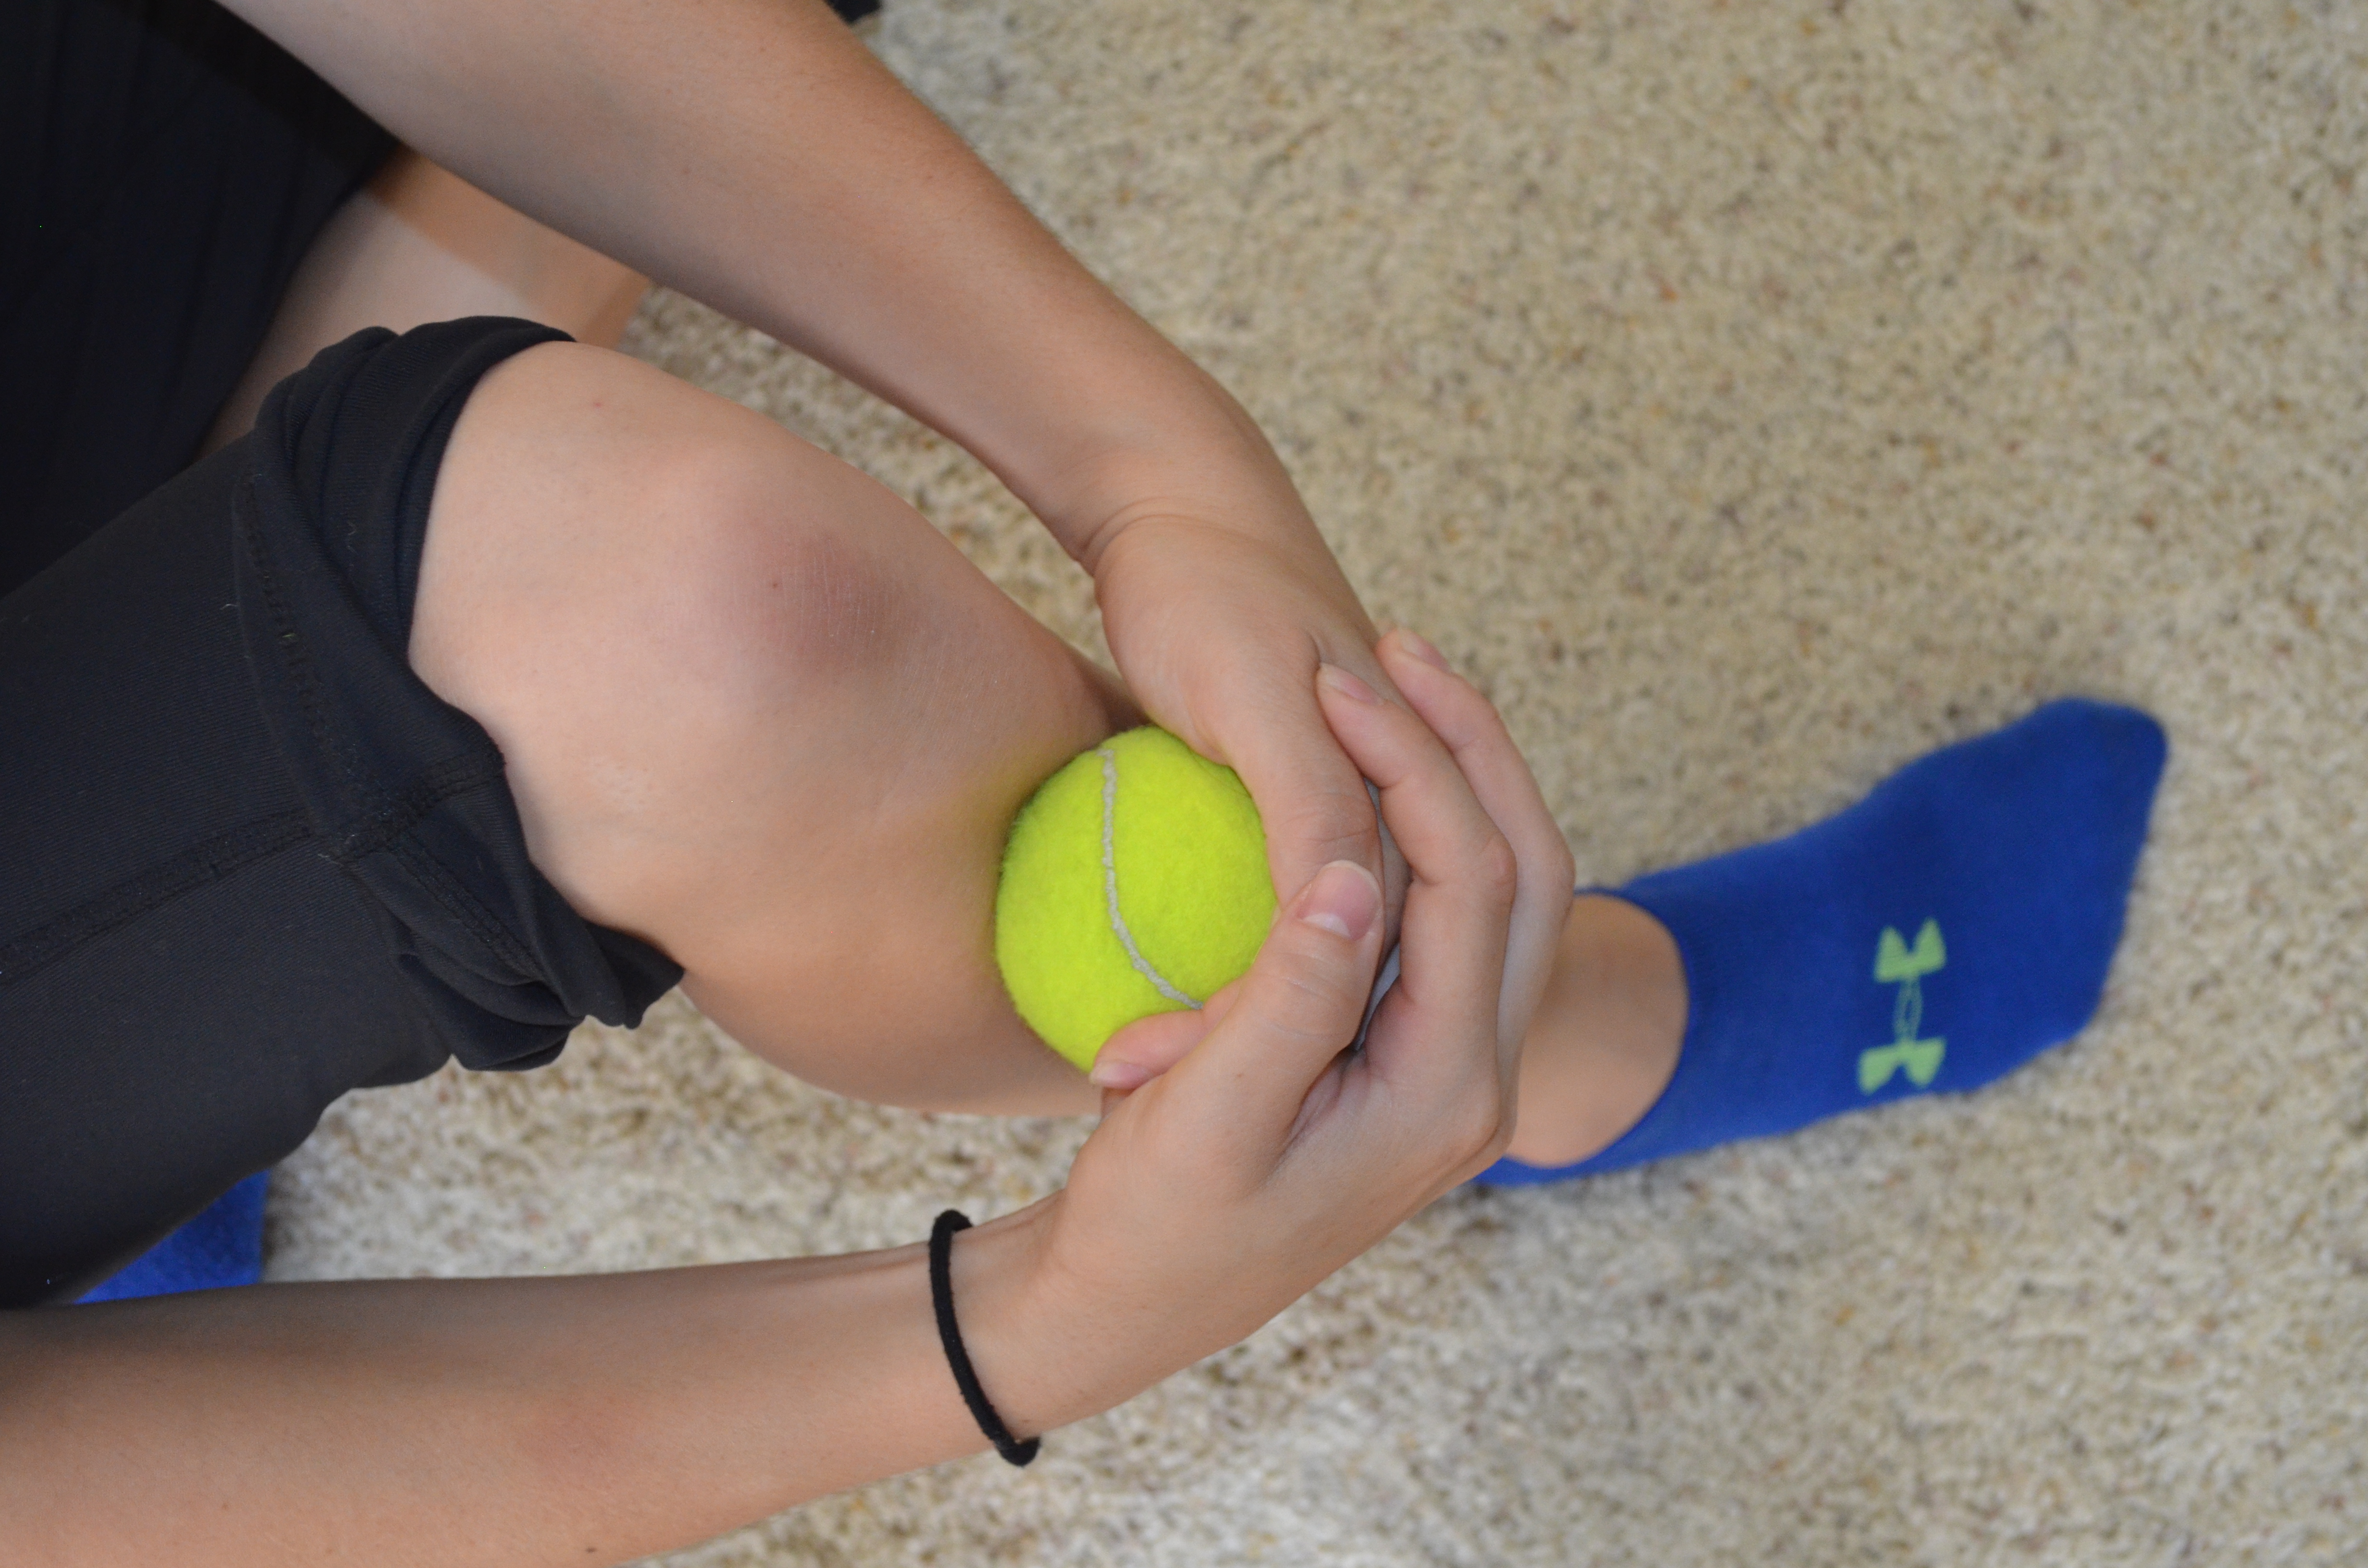
5. Hamstrings – A tennis ball is a great option to really dig out your hamstring, especially the top of your hamstrings right under your butt and the bottom right above your knee. To use a ball, sit on a chair or box. Place the ball under your leg on the box or chair. Roll it side to side and up and down. Hold on any tight spots. Use a box that allows you to really sit all of your weight down onto the ball. You can also do this on a roller on the ground but you won’t be able to dig in as much.

6. Adductors – You can roll out the inside of your leg using a ball or roller. Lie face down with one knee bent out to the side. Place a roller or ball under that leg right above your knee. Rock the leg forward and backward a bit then roll the roller up toward your crotch. Hold on any tight spots as you roll from your knee up toward your groin. Rock toward the front and back of your leg as you move up and down.

7. IT Band – Set up on your side with the roller just under the outside of your hip. You can stack your legs to apply more pressure or bend the top leg in front of you and use it to push off. Rock forward and backward as you move the roller down the outside of your leg. You can work from your hip down to just outside your knee. You can rock slightly forward to work into the front of your leg a bit especially around your hip. This way you can also hit your TFL.

8. Hips/Glutes – Use a ball to roll out your hips and glutes. The smaller and harder the ball, the more you will be able to dig in. Place the ball under one butt cheek. Roll it around your butt from the bottom near your hamstring up to your low back. While you roll under the fleshy part of your butt, you can also lift and lower your leg as well as draw the knee in toward your chest and straighten the leg back out. By moving the leg, you will dig in more with the ball. You can also roll the ball under your hip and around to the front to dig in to your TFL and hip flexors.

STRETCH
1. Feet, Calves – Bear Squat with Foot Stretch – To do this move, start on your hands and knees as if you were about to crawl. Then drive up off your knees onto your toes and hands. Drive your heels as close to the ground as possible and then return back to kneeling. Then lift your hands and sit back onto your heels. Make sure your feet are flexed when you sit back so you feel a nice stretch down the bottom of your feet into your toes. Then place your hands back down on the ground and repeat the stretch, driving your butt up into the air and heels down into the ground.

2. Shins – Standing 3 Way Shin Stretch – Stand facing the wall with one foot forward and the other leg back. Point your toe and rock onto the top of your foot so that the top of your back foot is facing the ground and you are on the front of your toes. Then bend the back knee and rock forward, feeling a nice stretch up the front of your lower leg. Keep the back toe pointing straight back for 10 reps then point it in and then out for 10 more reps in each spot. Do not worry about the front leg during all of this. Focus on stretching the shin of the back leg.
3. Hips, Hamstrings, Back – World’s Greatest Stretch with Hamstring – Start in a high plank position with your hands under your shoulders and feet together. Your body should start in a nice straight line. Step your right foot outside your right hand. Try to get it right outside your hand with the foot flat on the ground. Drop the right elbow down into the instep of your right foot, keeping the foot down. Then rotate open facing your right leg, stretching your right arm up toward the ceiling. Bring the right hand back down to the ground. Sit back on your left heel and straighten your right leg out in front of you. Feel a stretch down your hamstring.You can even hinge over the right leg a bit. Then bend the right leg and move back into the plank position with the foot outside the hand. Again drop the elbow and repeat the move on your right side. Complete all reps and then switch and do the stretch on the other side.

4. Hips/Quads – Kneeling Dynamic Quad Stretch – Set up kneeling on one knee facing a wall or something else you can place your hands on for balance. Make sure your front knee is a few inches away from the wall so you can rock forward. Grab your back foot with the hand on the same side. Pull your heel in toward your butt. Then rock forward, feeling a greater stretch down the front of your back leg. Relax back and repeat.

5. IT Band/Hamstrings – Standing IT Band Stretch – Standing tall, cross one foot over in front of the other. PUsh the front foot back enough though that the toes of both feet are even and your back leg is pushed straight. Clasp your hands together and reach up toward the ceiling. Stretch up nice and tall. Then reach your hands down toward the instep of the foot in back. Press your hip out to the side as you reach and keep your legs straight. Then reach back up and uncross your feet. Cross the other foot over and repeat. Keep alternating sides until all reps are complete.

If you reach more straight on like the bottom left picture, you will hit your hamstring more than your IT band. The bottom right shows the IT Band stretch.
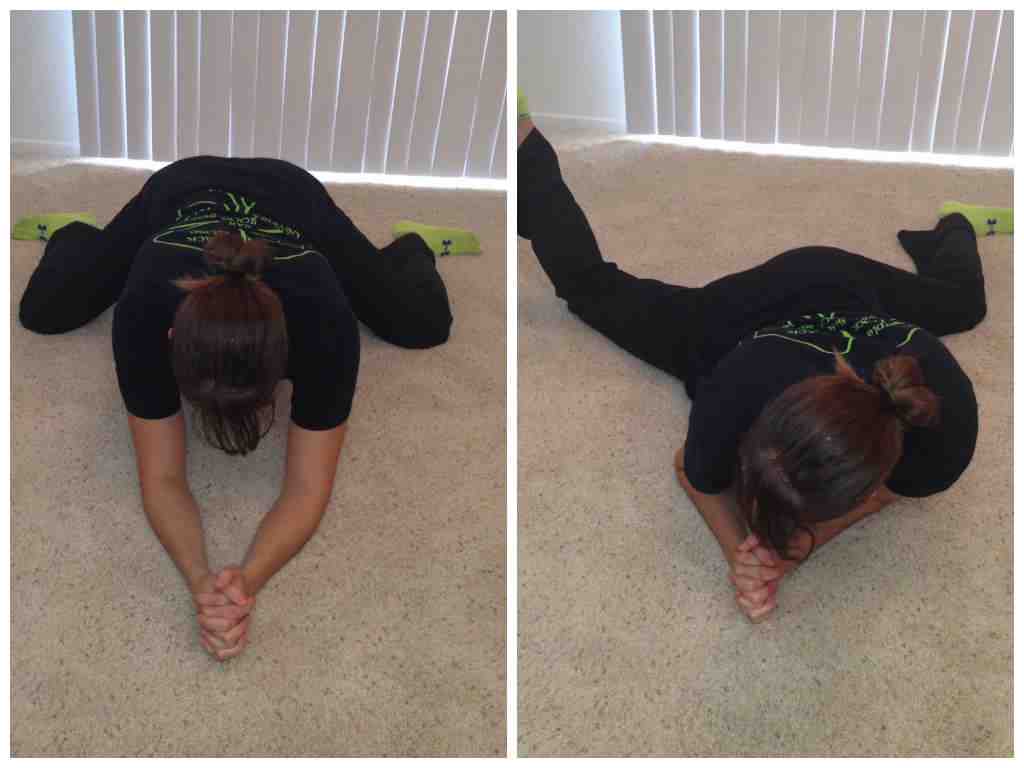
6. Hips/Adductors – Frog Stretch with Rotation – Kneel on the ground and spread your knees as wide as possible. Lower yourself down to your forearms. Keep your feet in line with your lower leg and knees. Do not let your feet come together behind your butt and let them relax so the insides of your feet are flat against the ground. Sit your butt back between your knees as much as possible. Then come forward out of the stretch. As you come back forward, lower your body down to the ground and rotate your lower leg up and forward. Sit back again and then pivot the other hip. Keep alternating sides until all reps are complete.
ACTIVATION
1. Fire Hydrants – Set up on your hands and knees with your hands under your shoulders and your knees under your hips. Flex your feet. Keeping your right knee bent to 90 and your foot flexed as you lift the leg out to the side. Squeeze your butt as you lift. Do not bend your arms or lean to the side as you lift. Hold for a second or two at the top and then lower down and repeat.

2. Posterior Plank – Start seated on the ground with your legs out straight and your hands on the ground behind your butt. Your finger tips should be pointing toward your butt. Drive through your hands and heels and raise your hips up off the ground toward the ceiling. Keep your legs straight as you lift. Press your chest up and out as you raise your hips. Relax your head back. Your body should be in a nice straight line at the top. Beginners may need to bend their legs a bit to hold the bridge at the top. Advanced exercisers can do a one leg bridge. Hold at the top for a second or two and then lower down and repeat.

3. Hip Circles – Set up on your hands and knees with your knees under your hips and your hands under your shoulders. Flex your foot and keeping the knee bent, drive it straight back and up. Drive the heel toward the ceiling. Keep your core tight and squeeze your glutes. Do not hyperextend your low back. Hold for a second or two and then bring the leg out to the side as if doing the fire hydrant. Do not set the leg down in between. Hold for a second or two and then drive the knee forward into your elbow. Squeeze your core as you drive the knee forward. Keep the foot off the ground. Then set the knee back down and repeat.
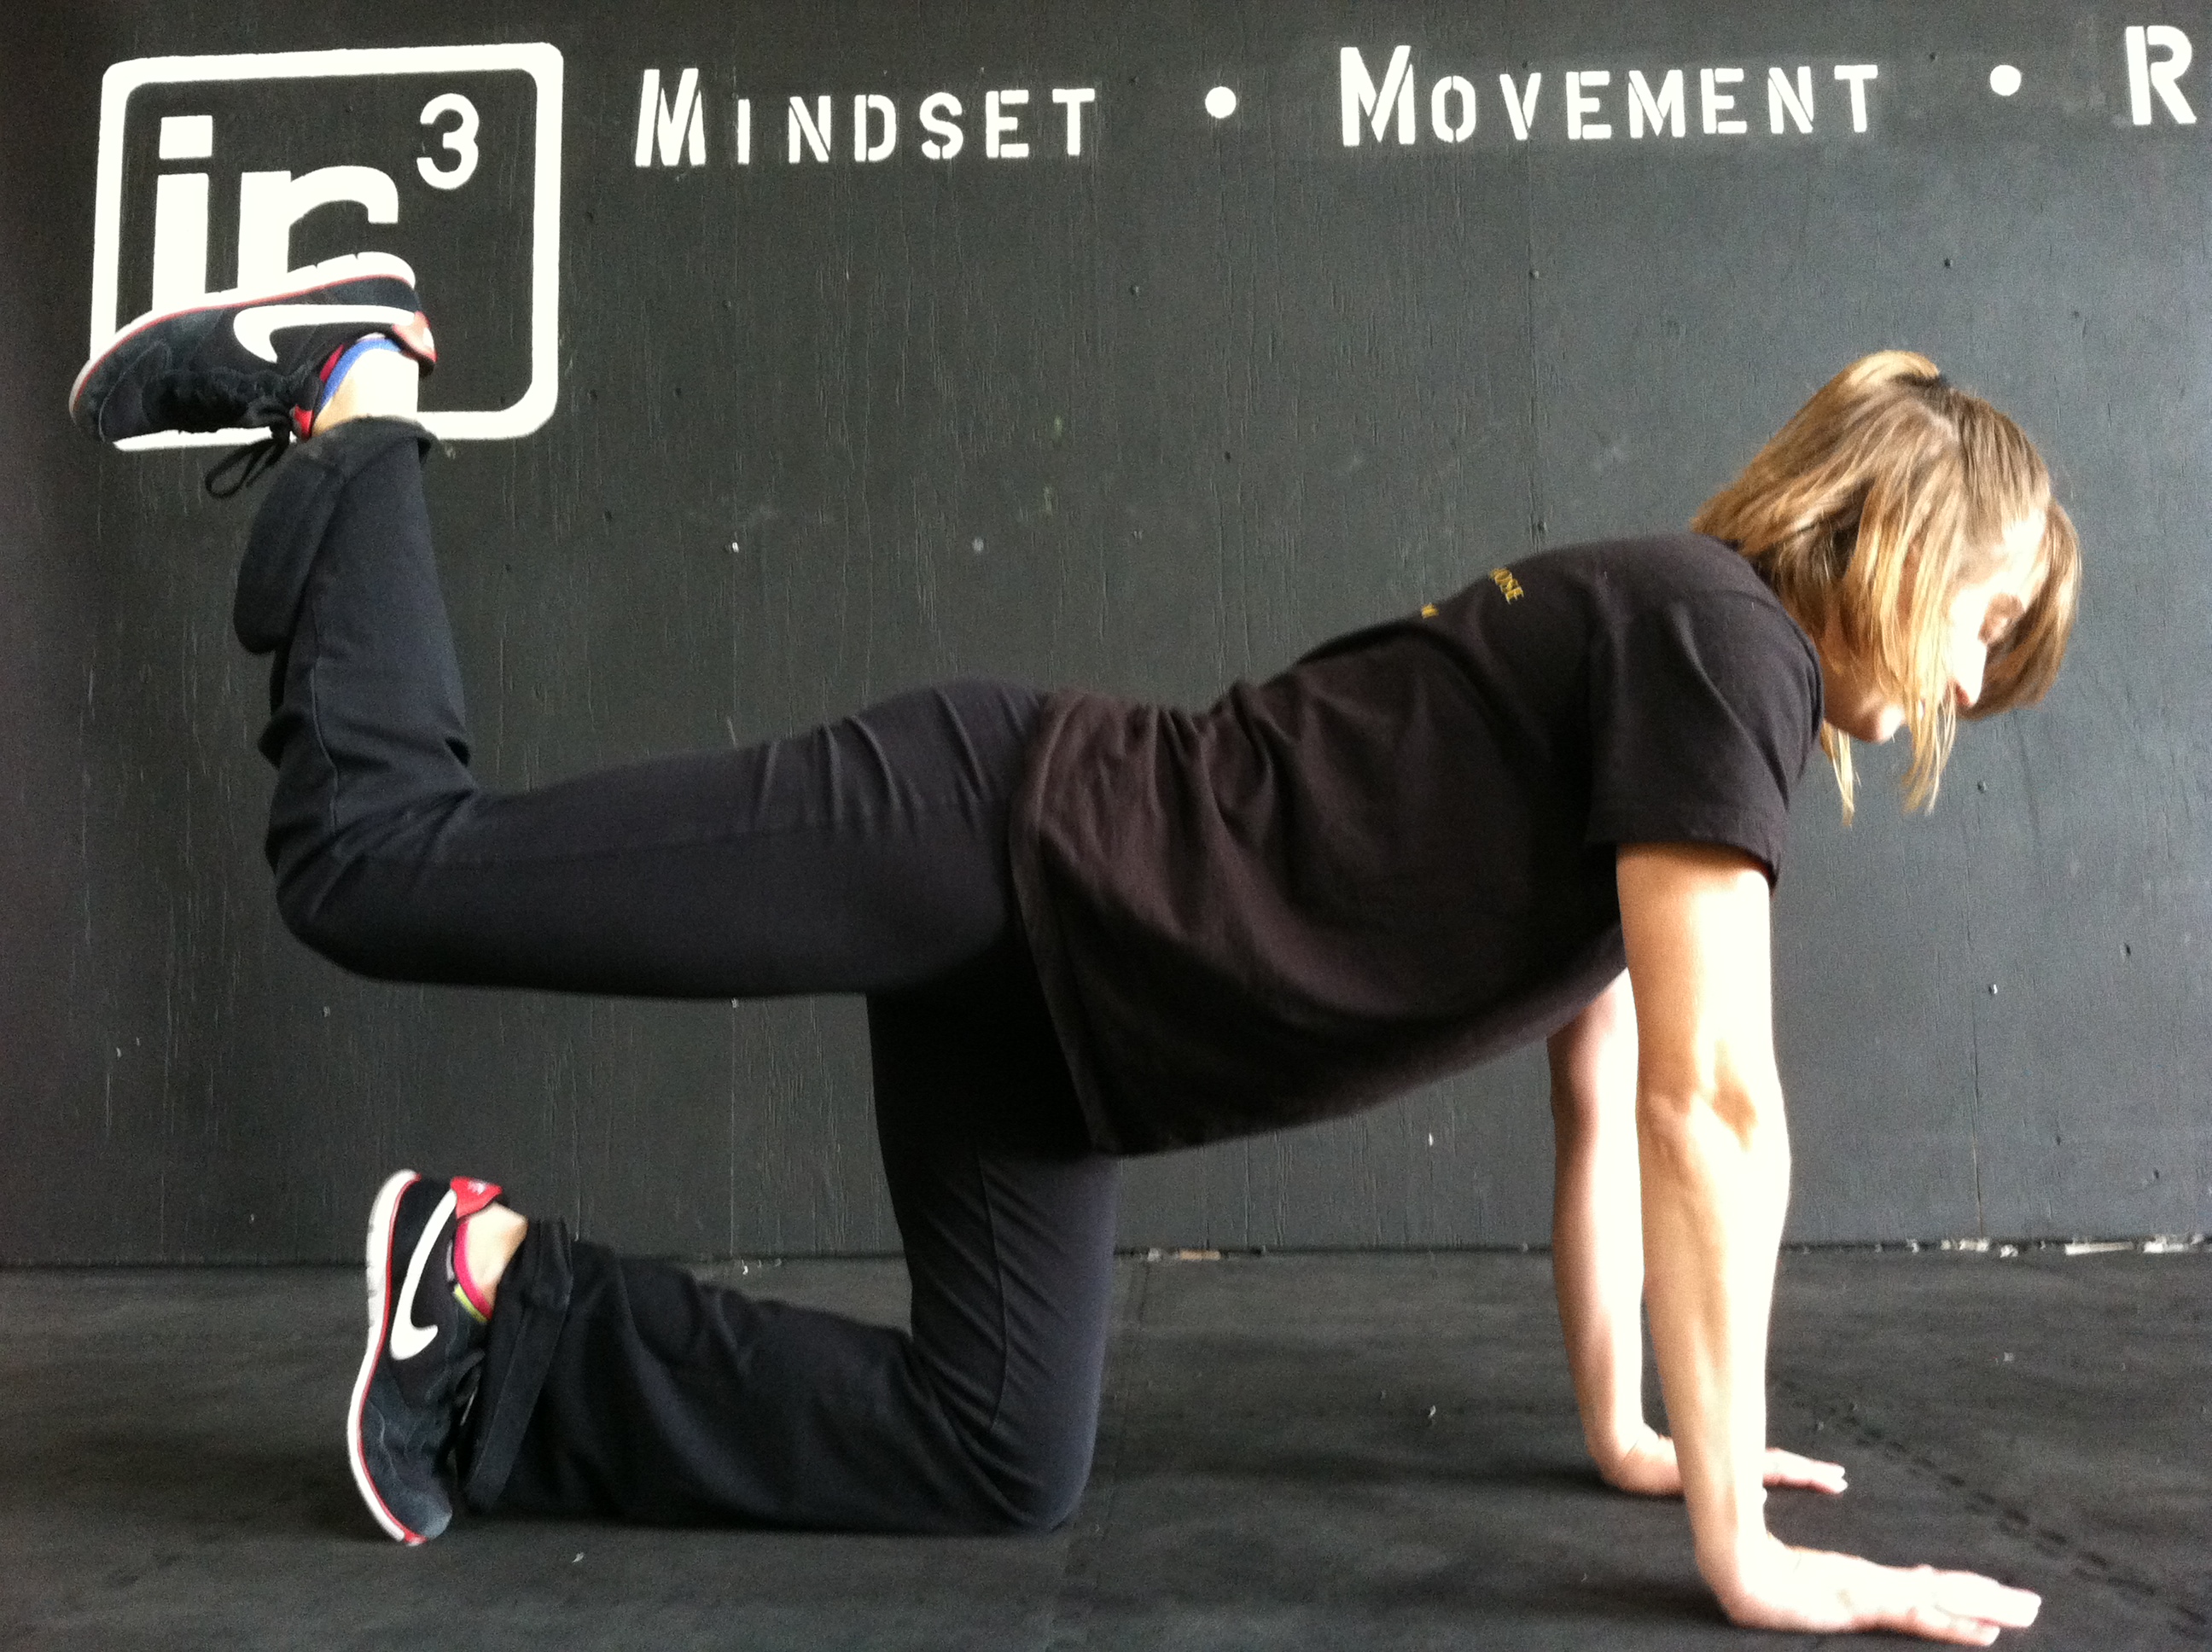
This is the first part of the circle.
4. Glute Bridge – Lie on your back with your knees bent and your feet flat on the ground. Your heels should be about hip-width apart and close enough to your butt that you can reach them with your finger tips when your arms are straight down by your side. Bend your elbows to 90 degrees so that your upper arm is on the ground. Then drive up through your heels, arms and upper back. Squeeze your glutes and lift your hips up as high as you can. Keep your core tight so that you don’t feel this in your low back. Make sure you don’t drive off your heels backward. Also, don’t let your knees fall open. Keep them in line with your hips and ankles. Hold at the top or complete reps by lowering back down and then repeating.
Actually, any glute activation moves you do, would be super beneficial. Here is a list of 10 glute activation moves you can do with a mini band. If your knees cave in when you run, you may want to focus on your external rotators as well (clams, side shuffle, standing external rotation, abductors..)
WORKOUTS
1. Runner’s Recovery Workout – Great bodyweight isometric workout you can do anywhere.
2. Stronger Legs With Knee Pain – A great workout to develop great leg strength for running while being super easy on the knees. The workout will also help you prevent the development of knee pain while upping your mileage to train for your race.
3. The Elite Library – In this library, I’ve also written a great warm up for before your run, a sprint workout to work on speed and core strength and a workout to develop leg strength to help you run further without fatigue.
And if you are preparing for a race this year and want some help organizing your running and strength training, you could win a month of FREE online training here!

CONTEST!!! – Let Me Help You Achieve Your New Years Resolutions
HAPPY NEW YEAR!
Today I would like to announce the official launch of Man Bicep’s Redefining Strength.

I mentioned yesterday that I’ve run Man Bicep for about 3 years now. And over that time, I’ve seen a number of different trends and run into a ton of different questions from clients and readers.
While I’ve tried to answer all the questions, all the desires on Man Bicep, there is only so much I can do from this platform.
Which is why I launched Redefining Strength. Redefining Strength provides everything I’ve been asked for over the years in one place.
On Redefining Strength, you will find a wealth of new content, including more blogs, The Workout Library, a Trigger Point Video Library, E-Books and even online personal training. (I have even more content to come soon too!)
In The Workout Library, there are 50 workouts. There are workouts you can do at home, at the park or at the gym. There are workouts you can do with bodyweight, sandbags, power wheels and suspension trainers. There are workouts for runners, cyclists, beginners and advanced exercisers.
Want even more workouts? Want 24/7 support to help you modify the workouts?
Then join The Elite Workout Library.
Want workout progressions, nutrition tips, goal setting guides and trigger point guides and videos?
Then check out Redefining Strength.
Want a program specifically designed to meet your needs and goals?
Then check out our Online Training.
Online training that you could get for FREE to help you get started on your New Years goals.
Interested? Check out the contest details below.
THE REDEFINING STRENGTH LAUNCH CONTEST
This contest will run from Jan. 1, 2014 till Jan. 8, 2014. Three winners will receive the prizes below:
The first place prize is 4 weeks of online training for FREE. This is a $200 value that can also be applied to Redefining Strength Products.
The second place prize is $100 off Online Training or any Redefining Strength Products.
And the third place prize is $50 off Online Training or any Redefining Strength Products.
To be entered to win, follow these two instructions:
1. Share RedefiningStrength.com on two social media sites and comment below with the sites you posted it to (Facebook, Pinterest, Twitter, Google +, Instagram, LinkedIn…)
2. Comment below with your New Years Resolution.
And as an added bonus, during January, I’m offering all Man Bicep readers 25% off all products in my shop (use coupon code RSLAUNCH) as well as 50% off of The Elite Workout Library.
I hope you all check out Redefining Strength and enjoy the new site.
And don’t worry, Man Bicep isn’t going anywhere! You are stuck with me and my ramblings!!
A New Years Eve Reflection
WARNING: This post is sappy. You’ve been warned.

I think we all need to remember this heading in to this New Year!
I’ve written this blog for almost three years. And rarely a week goes by where I don’t get at least a couple of posts up because I love it so much.
I do it purely for the love.
Because I love health and fitness so much. Because I love all of you so much.
I actually got asked the other day what job I would do if money wasn’t an issue.
I didn’t even need to think about the answer.
Because I’m doing it.
I live, breathe, eat, sweat health and fitness.
I live, breathe, eat, sweat seeing other people realize their own potential.
Every day I want to share my passion with everyone I meet (Seriously, never get into a random conversation with me if you don’t want me to go on some health and fitness tangent because it will happen…Poor lady at the coffee shop who just said “Hello……”)
Every day, I hope to inspire, to educate, to help others grow to be stronger, fitter, healthier, MORE EMPOWERED than they could ever imagine.
And when I say all this, I’m by no means saying I’m selfless.
Far from it.
I’m just saying this is my passion.
And I get a lot in return.
While I help my clients, each of them teaches me something new. Each of them inspires me in return. Each of them touches and changes me. Each of them makes me better and stronger.
You’ve all touched me and taught me so much in 2013.
I only hope I’ve done the same.
We all now face a new year with infinite possibilities. We have the chance to learn, to grow, to inspire.
What are you going to do with your New Year?
P.S. Check back tomorrow for a chance to have me help you get started on your New Years Resolutions for FREE! Oh yea! Working with the Man Biceps! 😛 Ok…Sappiness is now complete.


